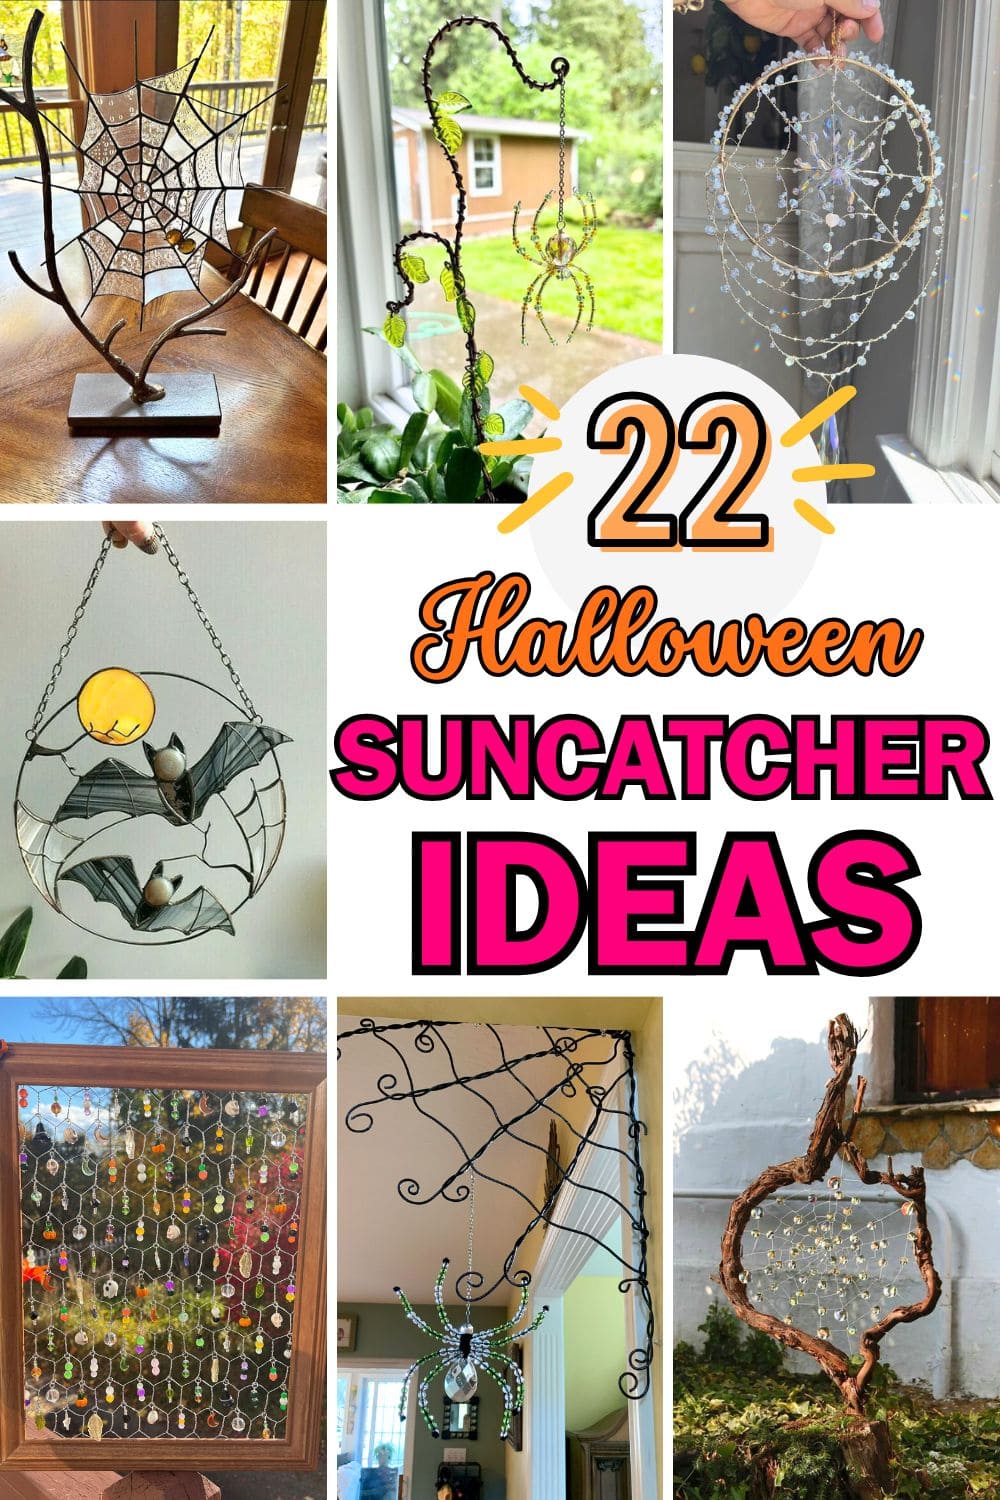
Halloween sunlight has its own kind of magic, it’s warm, golden, and perfect for showing off a suncatcher’s glow.
Imagine stepping into a room where stained glass pumpkins beam orange fire, spider webs glint with silver, and ghostly shapes shimmer across the walls.
These handmade pieces don’t just decorate your windows; they play with light, casting colors and shadows that feel alive.
Making your own Halloween suncatchers lets you blend artistry with a touch of spooky charm, creating pieces that feel personal and one-of-a-kind.
Each flicker of sunlight turns them into living art, transforming your home into a place where Halloween spirit dances in every beam.
#1. Halloween Beaded Suncatcher Frame
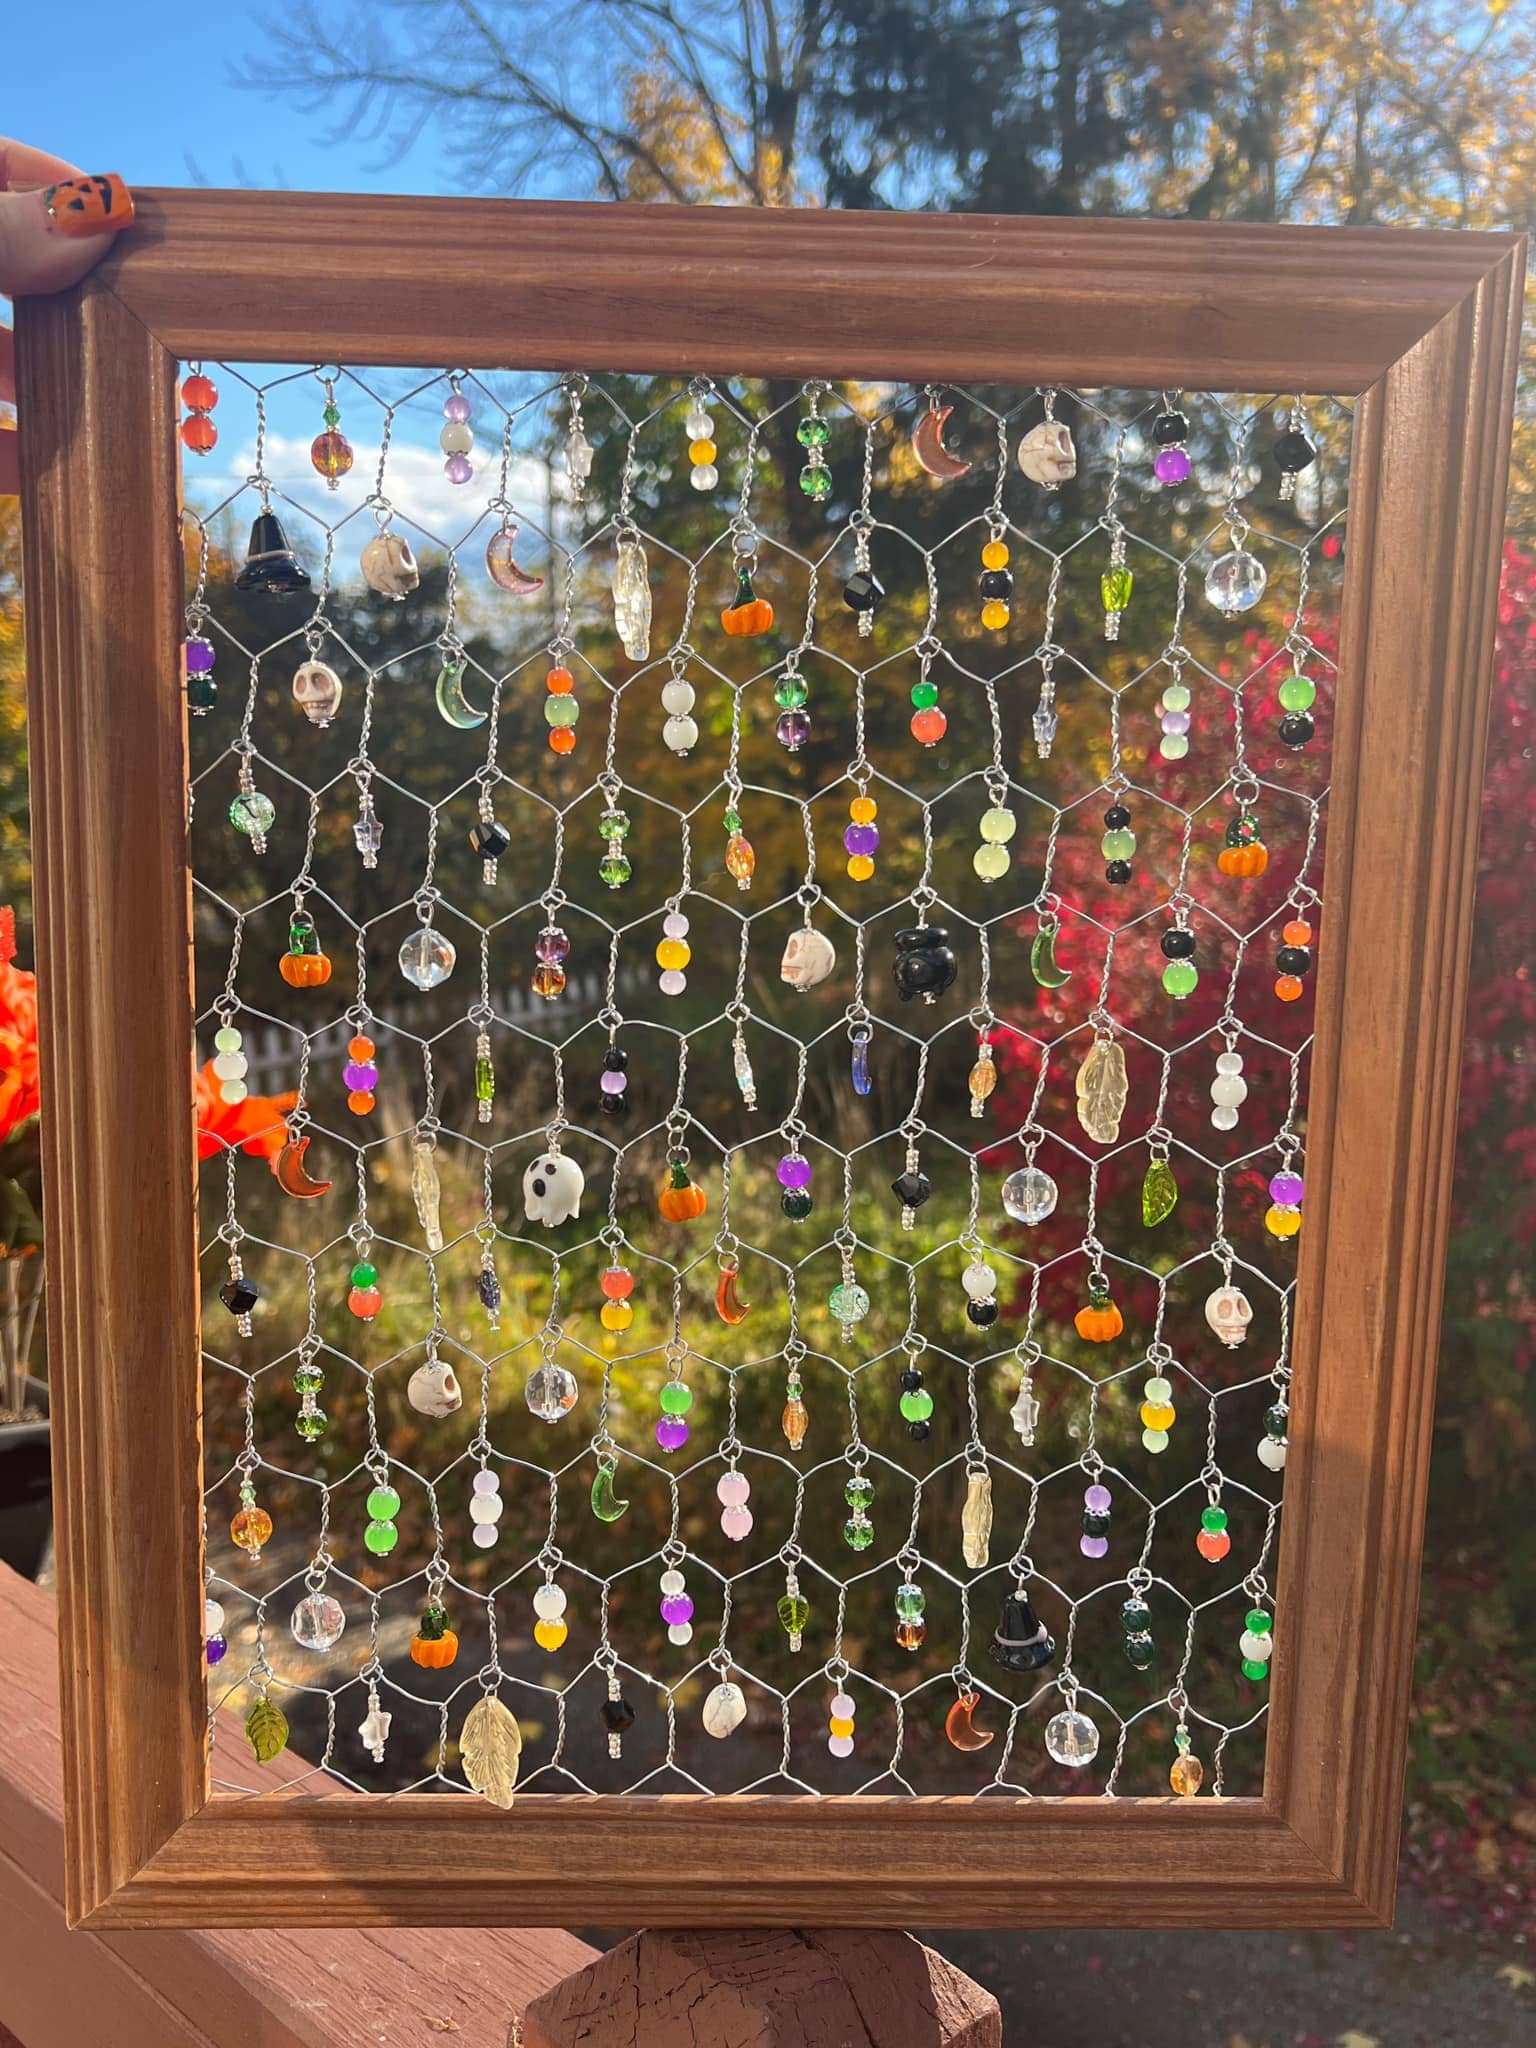
This playful and colorful sun catcher takes the spirit of Halloween and turns it into a sparkling work of art. A rustic wooden frame is fitted with chicken wire, from which dozens of dangling bead strands sway in the light.
Each strand features festive charms like tiny pumpkins, witch hats, ghosts, moons, paired with beads in vibrant shades of orange, green, purple, and black.
Specially, the way the sunlight catches each glass and crystal piece creates a delightful dance of color on the ground or walls.
Materials Needed
- 1 wooden picture frame (approx. 16×20 inches)
- Chicken wire or wire mesh cut to fit frame
- Assorted Halloween charms (pumpkins, ghosts, moons, witch hats)
- Glass and acrylic beads in festive colors
- Jewelry wire and jump rings
- Staple gun or small nails
- Wire cutters and pliers
Step-by-step Guide
Step 1: Secure chicken wire to the back of your frame using a staple gun or nails, pulling it tight so it stays flat.
Step 2: Cut jewelry wire into small lengths, stringing beads and charms in varied patterns to keep the design lively and unpredictable.
Step 3: Use jump rings to attach each strand securely to the chicken wire, spacing them evenly but allowing a little movement for light play.
Step 4: Double-check all connections, then you can ang your frame in a spot that gets plenty of sunlight to let the beads sparkle beautifully.
#2. Driftwood and Crystal Bead Spiderweb Art
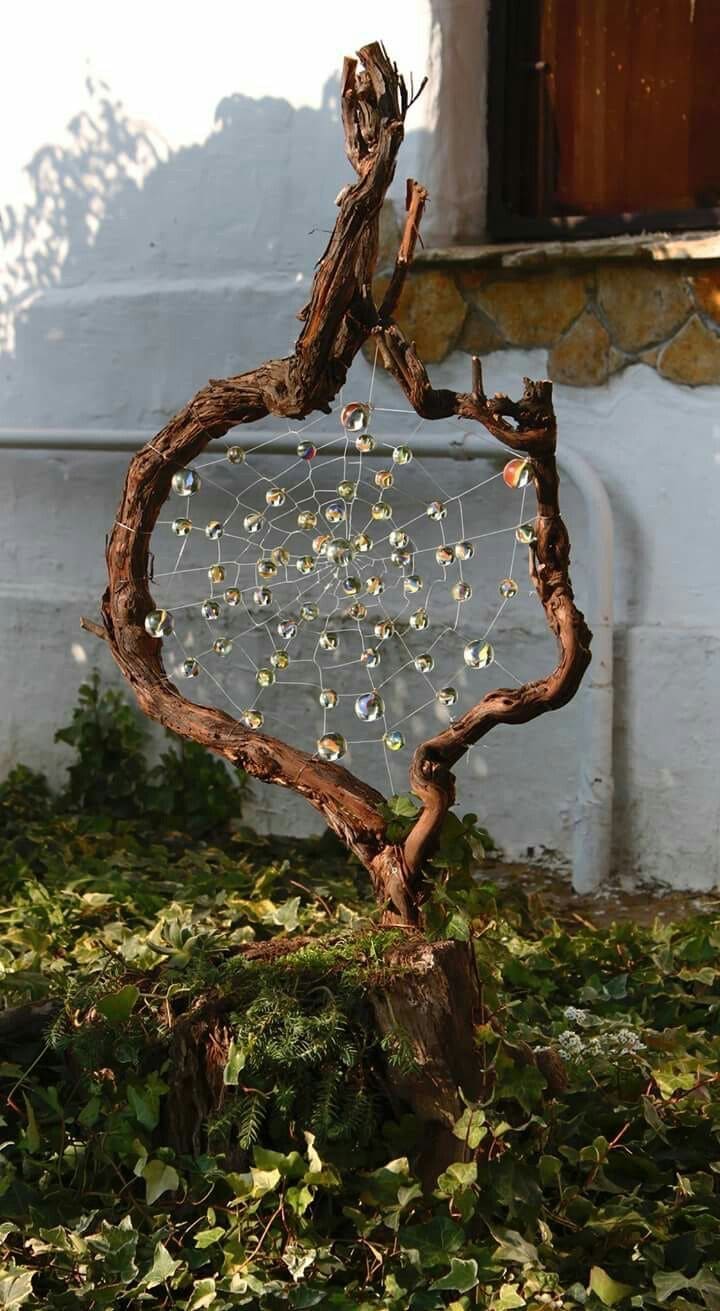
You can see this enchanting creation transforms a twisted piece of driftwood into a frame for a dazzling spiderweb made of fine white cord and shimmering crystal beads.
Each bead catches the sunlight, scattering tiny rainbows over the surrounding greenery. Plus, the organic curves of the wood give the piece a natural, almost mystical feel, perfect for blending Halloween charm.
I bet it works beautifully as a garden focal point, porch decoration, or even an indoor statement piece. In the right light, it’s both eerie and breathtaking.
Materials Needed
- 1 large driftwood or twisted branch frame (approx. 18-24 inches tall)
- Clear nylon or white craft cord
- 30-40 crystal or glass beads (8-12 mm size)
- Hot glue gun or clear-drying craft glue
- Scissors
Step-by-step Guide
Step 1: Position your driftwood securely, either in a plant pot, garden bed, or mounted indoors.
Step 2: Tie the cord to one point of the driftwood and weave an intricate spiderweb, securing each knot tightly.
Step 3: Thread beads onto the web at intervals, spacing them evenly for visual balance. Then use hot glue sparingly to hold beads in place if needed.
Step 4: Place the finished piece where sunlight can hit the beads to create sparkling reflections.
Tip: For a spookier touch at night, you can also aadd a hidden solar spotlight to make the crystals gleam after dark.
#3. Beaded Spider Hanging Garden Ornament
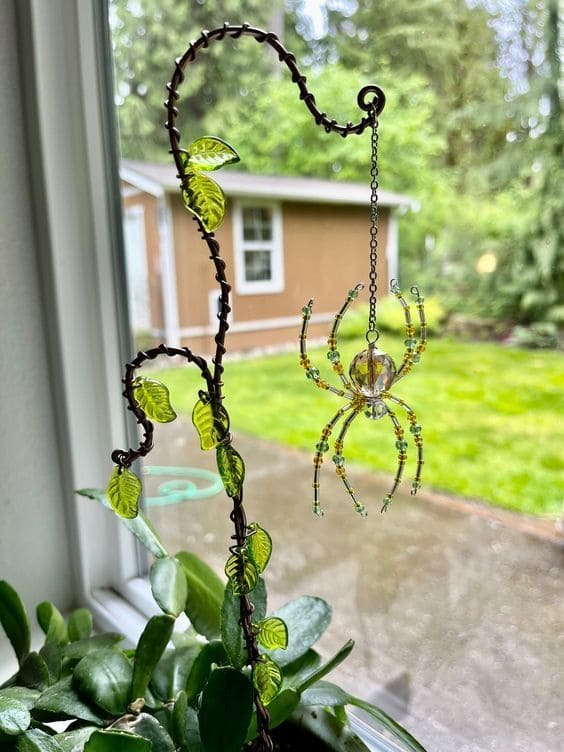
Wow, this delicate beaded spider ornament sways gently from a leafy vine-shaped hook, catching sunlight in every facet.
The spider’s body is crafted from crystal-clear beads, while its legs are detailed with tiny seed beads in green and gold tones.
Moreover, the vine stand, complete with glass leaves, makes the entire display look like a little snapshot from nature, only shinier and more magical.
Materials Needed
- 1 vine-shaped metal plant hook stand (approx. 25-30 cm tall)
- 8 green and gold beaded leg strands (each 8 cm long)
- 1 large faceted glass bead (18–20 mm)
- 1 medium faceted glass bead (10-12 mm)
- 32 small seed beads in green and gold (approx. 3 mm each)
- 1 fine chain (15-20 cm)
- Jewelry wire (0.3-0.4 mm thick)
- Round-nose pliers and wire cutters
- 10-15 glass leaf beads (1.5-2 cm each)
Step-by-step Guide
Step 1: Cut eight equal lengths of jewelry wire (8 cm each) for the spider’s legs. Then string seed beads onto each, alternating green and gold, and secure ends with small loops using round-nose pliers.
Step 2: Thread the large bead for the body and the medium bead for the head onto a central piece of wire. You need to wrap the leg wires around the body wire between the head and body bead.
Step 3: Shape the legs into gentle curves for a natural look. You can adjust angles so the spider sits balanced when hanging.
Step 4: Attach the spider to the chain using a small loop at the top of the head. Then secure the other end of the chain to the vine hook.
Step 5: Decorate the vine hook by attaching glass leaf beads along its length for extra charm.
#4. Hanging Spider Web Halloween Decor
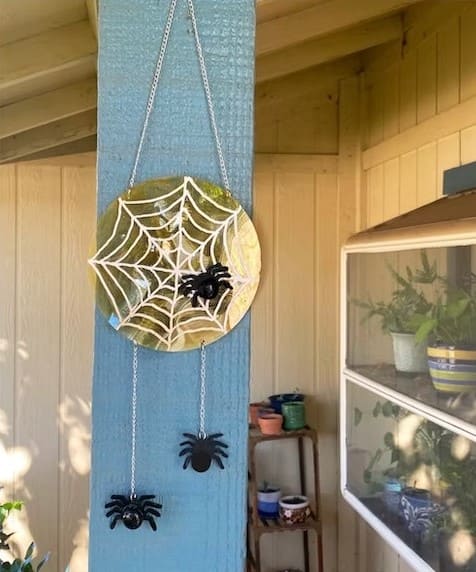
This spooky hanging spider web decor is a simple yet striking way to dress up your porch or entryway for Halloween.
Also, the shimmering circular base adds a subtle reflective touch, while the bold black spiders instantly pop against the white web design.
Dangling from silver chains, each spider sways gently in the breeze, creating an eerie but fun movement that catches the eye of every passerby. It’s lightweight, weather-friendly, and can be reused year after year.
Materials Needed
- Round base (20 cm diameter, lightweight metal, acrylic, or wood)
- White acrylic paint or white paint pen (1-2 mm tip)
- 3 black plastic spiders (4-6 cm each)
- Silver craft chain (approx. 90 cm total length)
- 5-6 jump rings (6 mm)
- Small drill or punch tool
- Hot glue gun and glue sticks
- Scissors or wire cutters
Step-by-step Guide
Step 1: Drill or punch two small holes at the top of the round base for hanging and one to three at the bottom for dangling spiders.
Step 2: Use white acrylic paint or a paint pen to draw a spider web pattern on the base. Let it dry completely.
Step 3: Attach craft chains to the drilled holes using jump rings, leaving about 20-25 cm between the base and each spider.
Step 4: Hot glue a plastic spider onto the web and secure others to the ends of the chains.
Step 5: Finally, add the top hanging chain, then display your spider web decor where it can move with the wind for extra creepiness.
#5. Elegant Beaded Spider Web Ornament
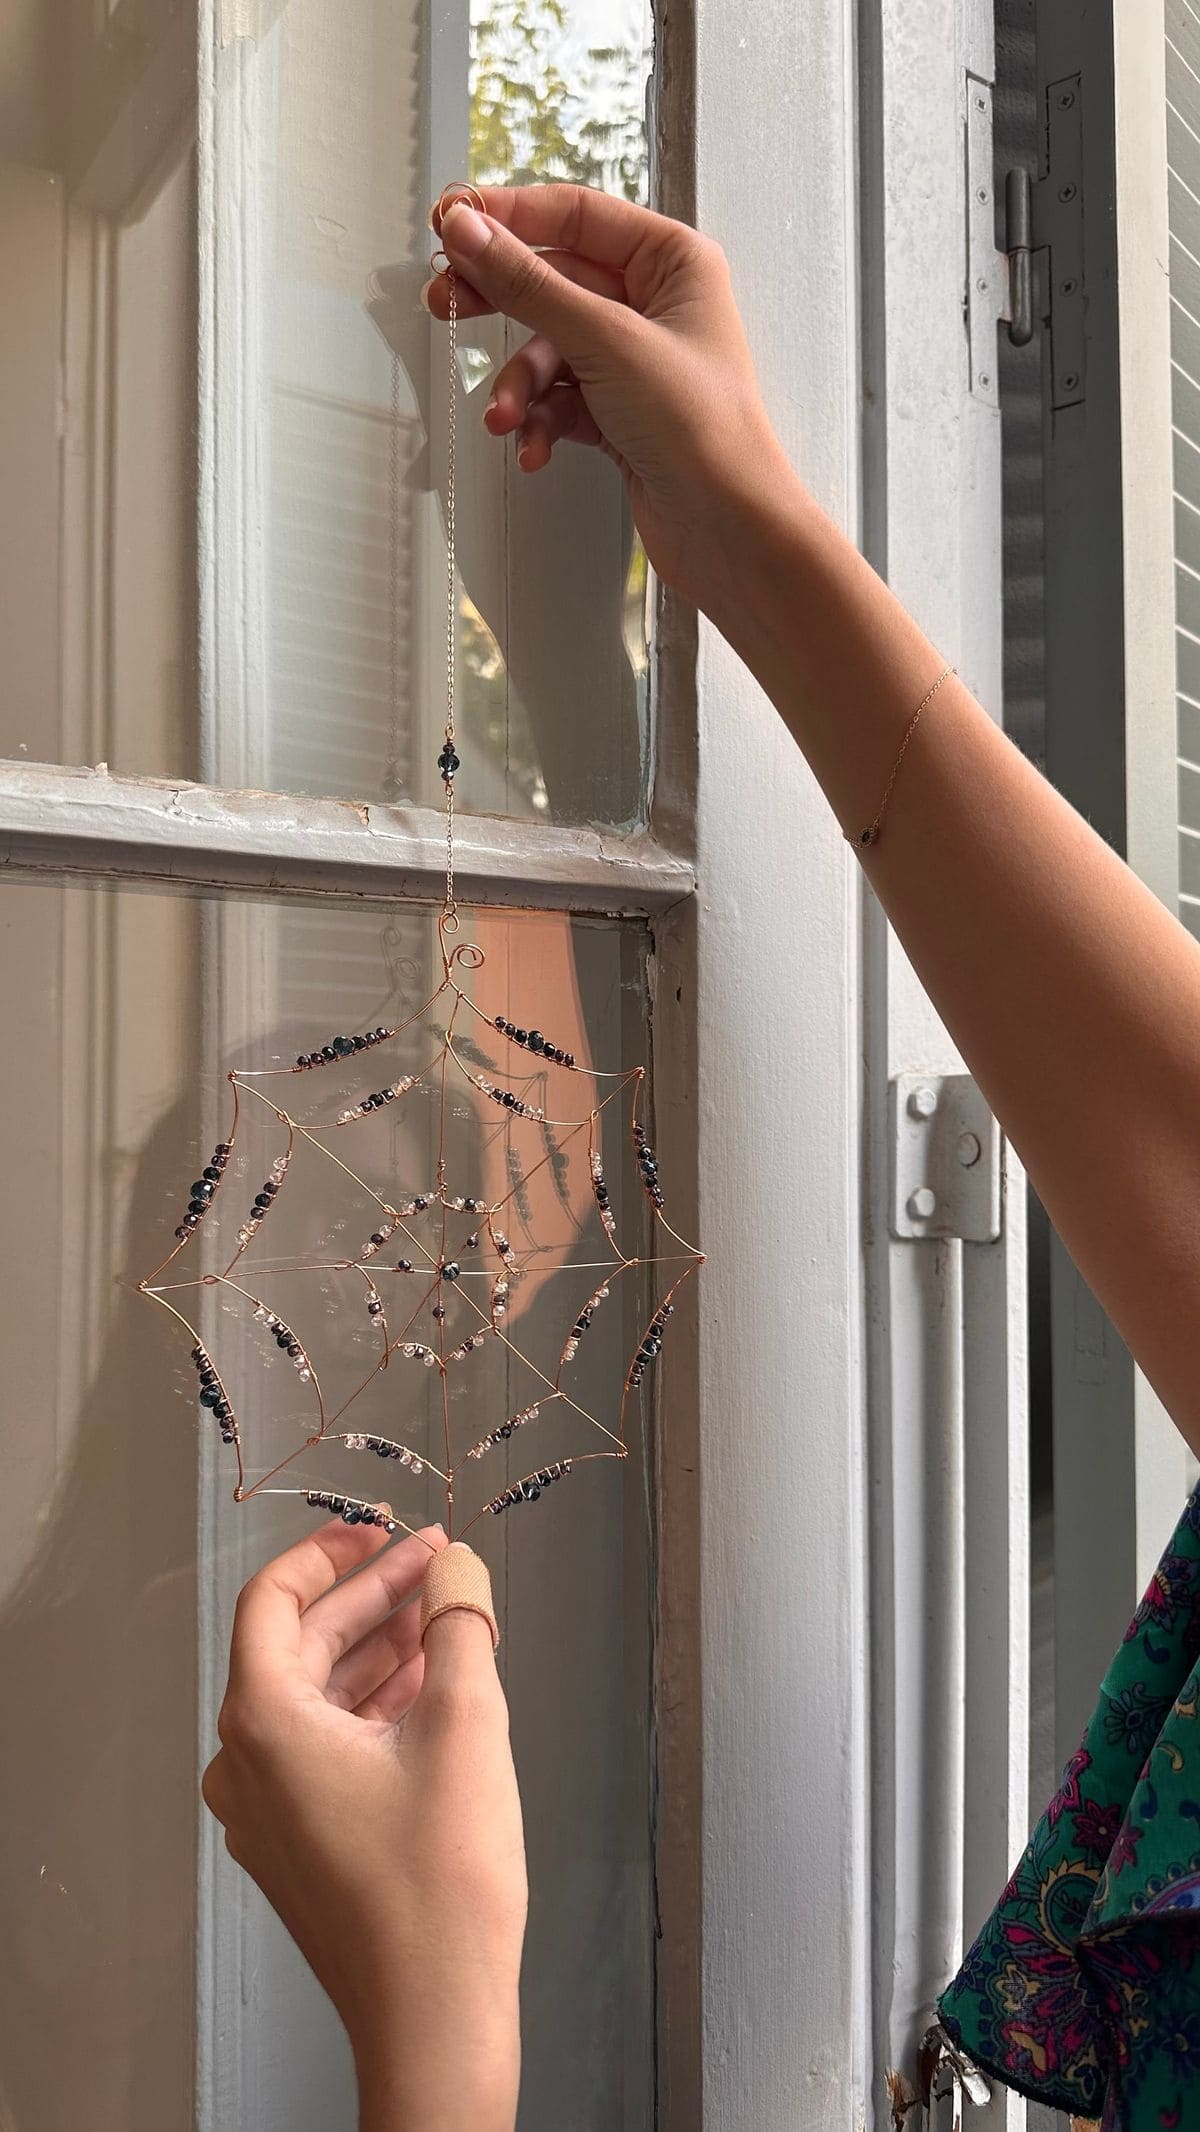
Look at this delicate beaded spider web ornament! It blends spooky Halloween vibes with refined handmade beauty.
The fine wire framework forms a perfectly symmetrical web, adorned with alternating black and crystal-clear seed beads that catch the light beautifully.
Suspended from a slim chain, it dances gently when hung by a window or porch, creating shimmering reflections in the sunlight.
Materials Needed
- Gold or silver craft wire (20-22 gauge, approx. 3 m)
- Black seed beads (approx. 60 pcs, 3 mm)
- Clear crystal seed beads (approx. 60 pcs, 3 mm)
- Small round jump ring (6 mm)
- Hanging chain (20 cm, lightweight)
- Round-nose pliers
- Wire cutters
Step-by-step Guide
Step 1: Cut six equal lengths of wire (about 20 cm each) and twist them together in the center to form a star-shaped base for the web.
Step 2: Starting from the center, weave a continuous wire in a spiral, looping around each spoke to form the web pattern.
Step 3: Thread black and clear beads alternately along sections of the spiral, spacing them evenly for a balanced look.
Step 4: Secure the ends neatly, attach the jump ring to the top, and connect the hanging chain.
Step 5: Hang your beaded web where light can catch the beads for a magical sparkle effect.
#6. Stained Glass Spiderweb Table Display
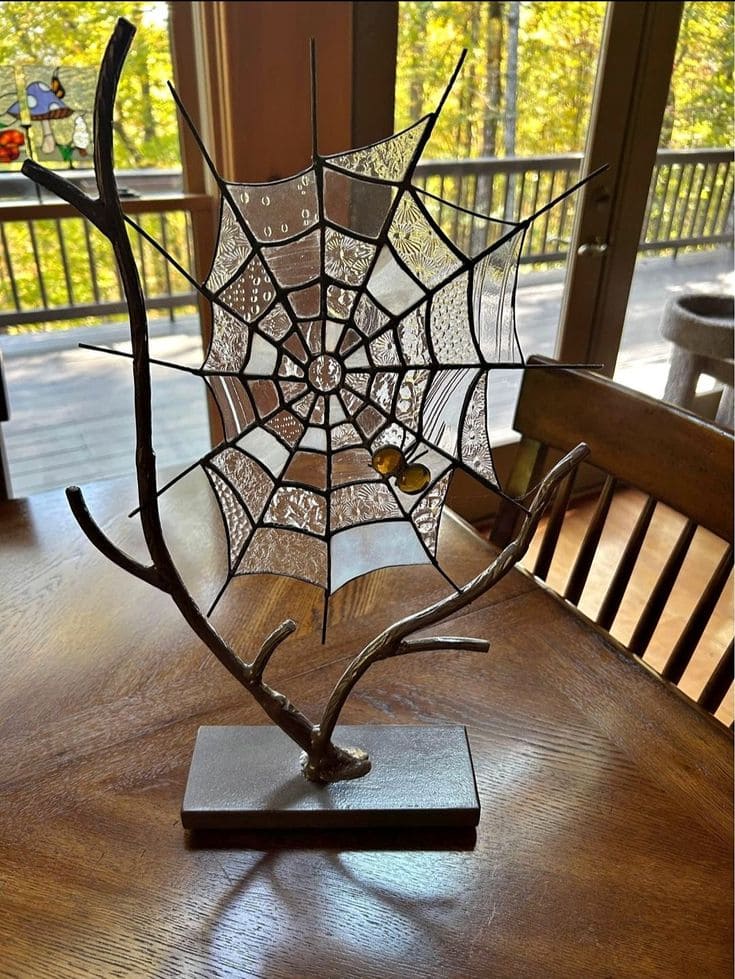
Set in a metal branch-shaped frame, the glass panels are cut and soldered to form an intricate web pattern, each segment showcasing textured glass that catches sunlight like dewdrops at dawn.
You can see a small glass bead spider rests on one side, adding a charmingly creepy detail.
Perfect for Halloween displays or year-round gothic décor, it works wonderfully as a centerpiece on a table, shelf, or windowsill where light can pass through.
Materials Needed
- Pre-made or custom-cut stained glass pieces (varied textures)
- Spiderweb pattern template
- Copper foil tape
- Soldering iron and solder
- Metal branch display stand
- Small glass bead or marble for spider body
- Protective gloves and safety glasses
Step-by-step Guide
Step 1: Cut glass pieces according to your spiderweb pattern, using varied textured glass for visual interest. You should smooth the edges with a glass grinder for a precise fit.
Step 2: Wrap each glass piece with copper foil tape, pressing it firmly to ensure good adhesion. Then burnish the edges for a smooth finish.
Step 3: Arrange the pieces in your pattern within the metal branch frame, ensuring all sections align properly before soldering.
Step 4: Solder the seams carefully, creating neat, even lines to enhance the web’s shape. Then attach a small bead spider for a fun, thematic accent.
Step 5: Polish the solder lines to a bright finish and clean the glass thoroughly.
#7. Beaded Spiderweb Suncatcher Idea
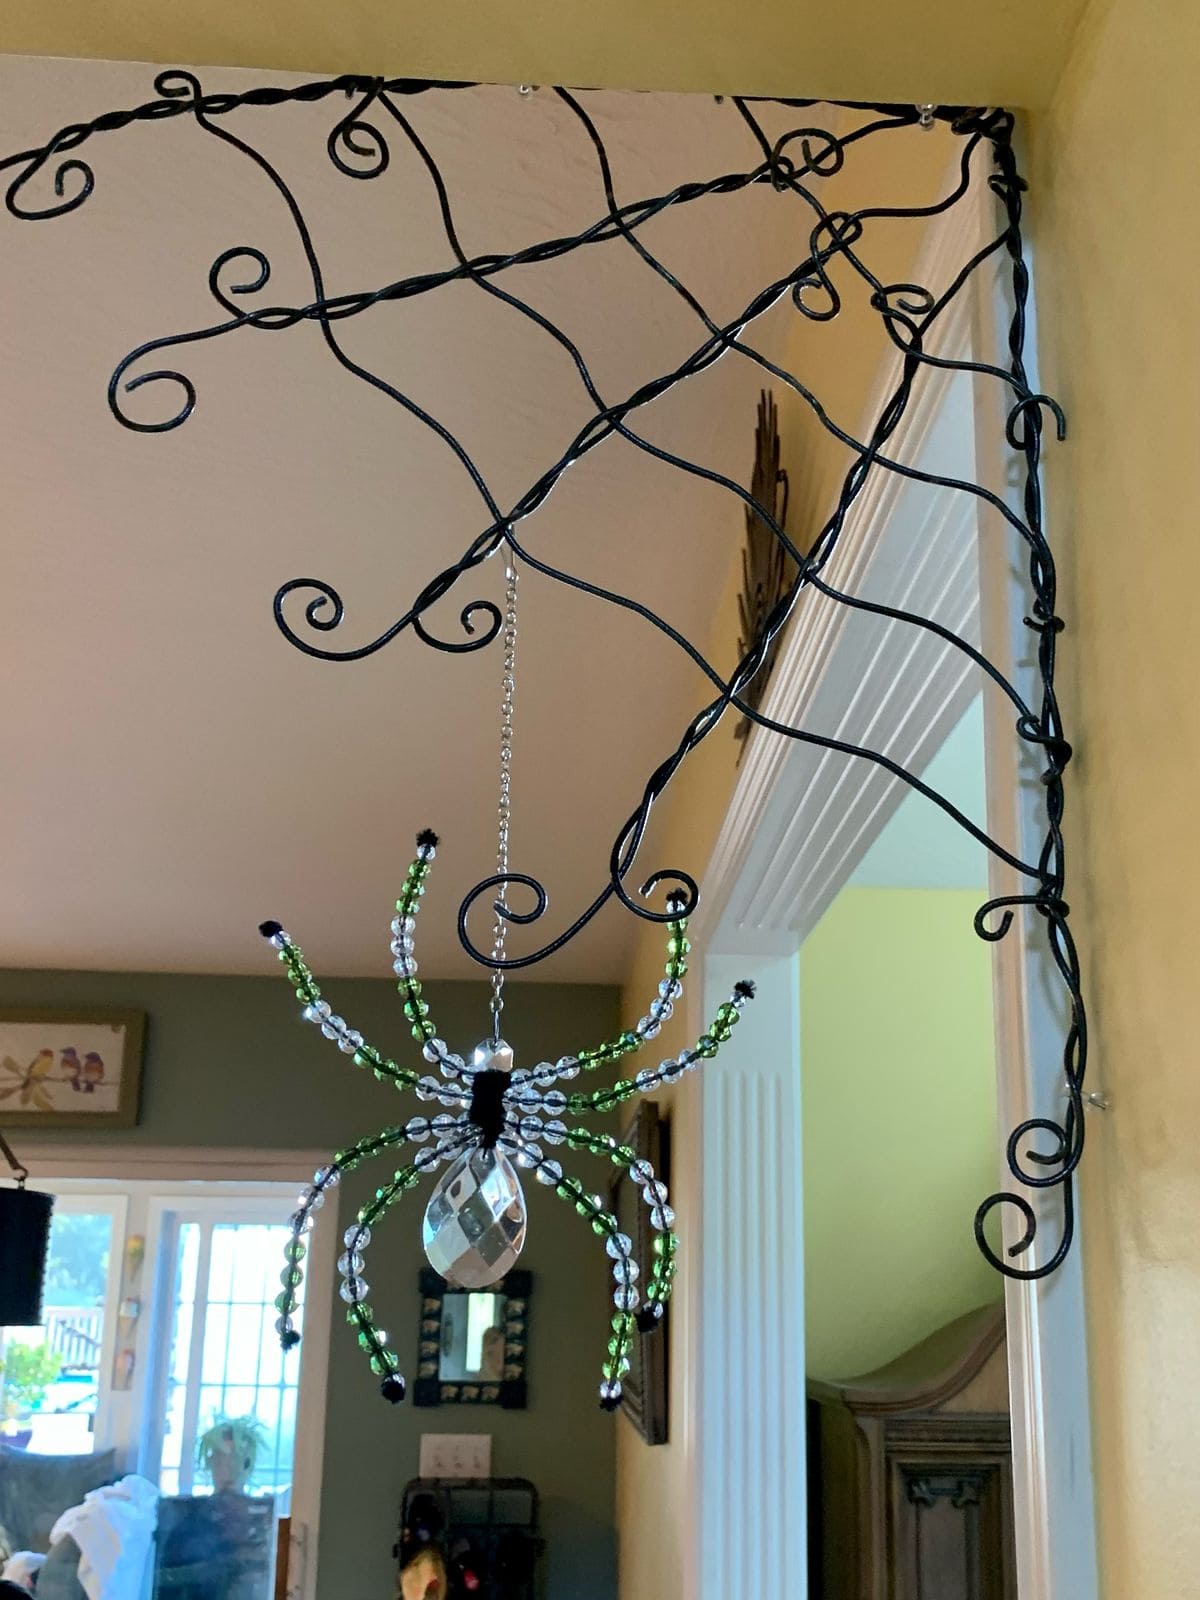
There’s something unexpectedly elegant about this beaded spiderweb suncatcher.
The twisted black wire forms a whimsical, oversized web that fills a doorway or corner, while the spider, crafted from sparkling clear and green beads catches light in a way that’s more enchanting than eerie.
Its faceted crystal body scatters rainbow flecks across the walls when the sun hits, making it a perfect mix of spooky and dazzling.
Materials Needed
- 8-10 ft black craft wire (16-18 gauge)
- 2 ft thinner black wire (22-24 gauge)
- 40-50 clear round beads (6–8 mm)
- 40-50 green round beads (6-8 mm)
- 1 faceted crystal drop (30-40 mm)
- 8 small black pom-poms
- Jewelry chain (10-12 inches)
- Wire cutters and round-nose pliers
- Hooks or nails
Step-by-step Guide
Step 1: Shape the web by twisting the thick wire into curved lines radiating from one corner, adding swirls for a whimsical effect. You can secure it in place at your chosen spot with hooks or nails.
Step 2: Cut thinner wire to weave between the main strands, forming the classic spiderweb pattern. Then twist tightly to keep it secure but leave a bit of looseness for a natural look.
Step 3: For the spider legs, thread alternating green and clear beads onto eight pieces of thin wire, adding a black pom-pom at each end.
Step 4: Attach the legs to the crystal drop, wrapping securely at the top to form the spider’s body.
Step 5: Suspend the spider from the web using a piece of chain, adjusting the length so it hangs freely and catches sunlight perfectly.
#8. Stained Glass Ghost Suncatcher
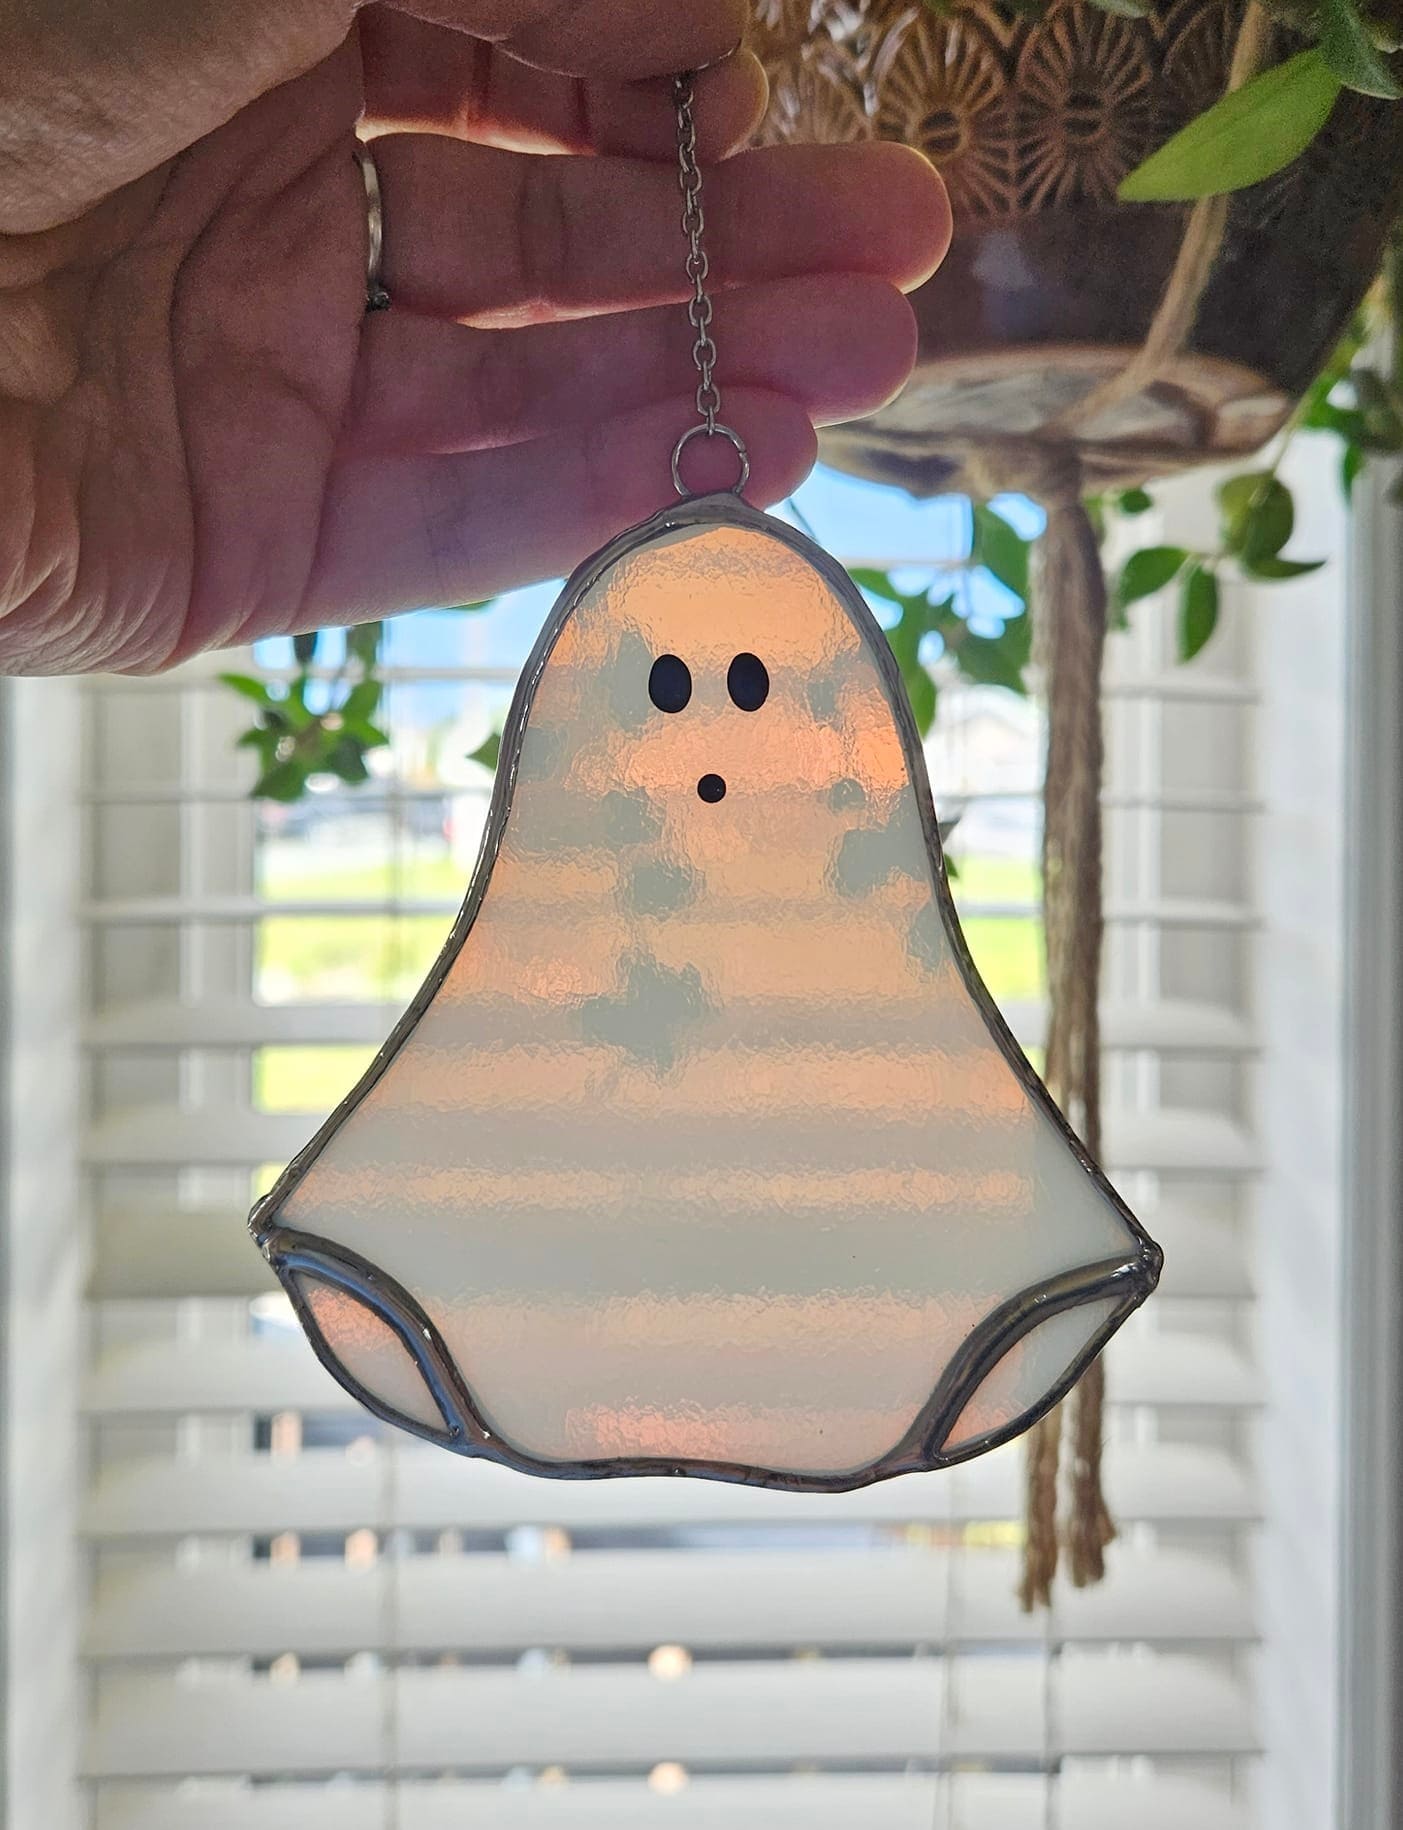
Crafted from iridescent stained glass, this sweet little ghost glows warmly in sunlight, showing soft pinks, creams, and golds as the light shifts through its smooth surface.
With wide black eyes and a tiny “O” mouth, it’s got the perfect mix of spooky and adorable, making it just as fitting for Halloween as it is for adding year-round whimsy to a window.
When the sun hits just right, it’s like your ghost is lit from within, catching everyone’s eye and starting conversations.
Materials Needed
- White or iridescent stained glass sheet (approx. 5×7 inches)
- Black stained glass or glass paint
- Copper foil tape (7/32 inch)
- Flux and solder
- Small metal ring
- Chain or cord
- Glass cutter and running pliers
- Grinder
Step-by-step Guide
Step 1: Draw your ghost pattern on paper and trace it onto the stained glass. Use your glass cutter to carefully follow the outline, then break away the excess with running pliers.
Step 2: Apply copper foil tape along all edges of the glass, pressing firmly so it adheres well. Then smooth it down with a fid or wooden stick for clean lines.
Step 3: Solder along the foiled edges, creating smooth, rounded seams. Don’t forget to solder a small ring at the top for hanging.
Step 4: Add the ghost’s eyes and mouth with either small pieces of black glass soldered in place or with permanent glass paint. If painting, you bake or cure as directed for durability.
Step 5: Attach the hanging chain or cord to the top ring. Hang your ghost in a sunny window and watch it glow.
#9. Crystal Spiderweb Sun Catcher
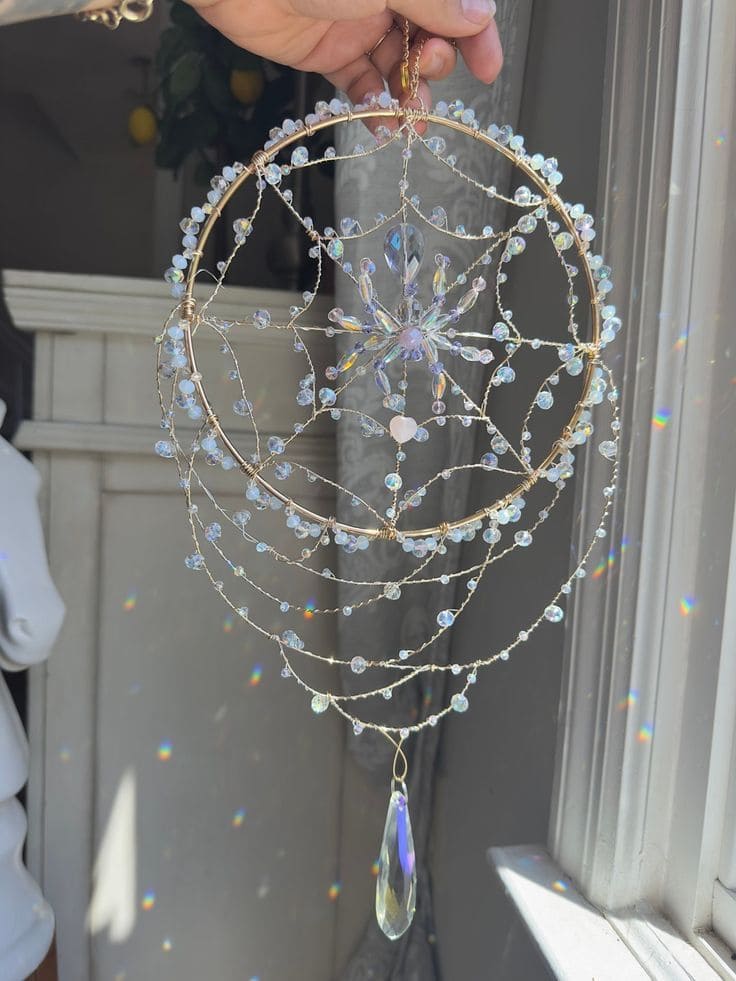
This dazzling crystal spiderweb sun catcher turns sunlight into a cascade of rainbows, making it an enchanting display for any window.
The intricate web is woven from fine gold wire, adorned with iridescent beads that sparkle in every direction.
At the center sits a crystal spider with a faceted body, while a large teardrop crystal hangs gracefully at the bottom, adding movement and light play.
Materials Needed
- 1 gold metal hoop (20-25 cm diameter)
- 8 gold jewelry wires (0.4-0.5 mm thick, 40-45 cm each)
- 80-90 small iridescent beads (4-5 mm)
- 30 medium crystal beads (6-8 mm)
- 1 large faceted bead (12-14 mm)
- 1 medium faceted bead (8-10 mm)
- 2 elongated crystal beads (12-15 mm)
- 1 teardrop crystal pendant (6-7 cm length)
- Gold jump rings and small chain (10-15 cm)
- Round-nose pliers and wire cutters
Step-by-step Guide
Step 1: Wrap gold wire tightly around the hoop to form anchor points for your web. You create eight equally spaced spokes by stretching wires across the hoop and twisting them at the center.
Step 2: Begin weaving the web by looping wire around each spoke, adding small beads at regular intervals. Continue until the web pattern fills most of the hoop.
Step 3: Craft the spider by threading the large bead for the body and the medium bead for the head onto a short wire. You now add crystal bead legs using smaller wire sections.
Step 4: Secure the spider at the center of the web with extra wire.
Step 5: Attach the teardrop crystal to the bottom of the hoop using a jump ring. Then add the hanging chain at the top.
Tip: For a magical moonlit effect, I recommend using AB (Aurora Borealis) coated crystals so the sun catcher glows even in low light.
Refer to: 22 Beaded Halloween Crafts That Are Almost Too Cute to Be Creepy
#10. Stained Glass Pumpkin Suncatchers
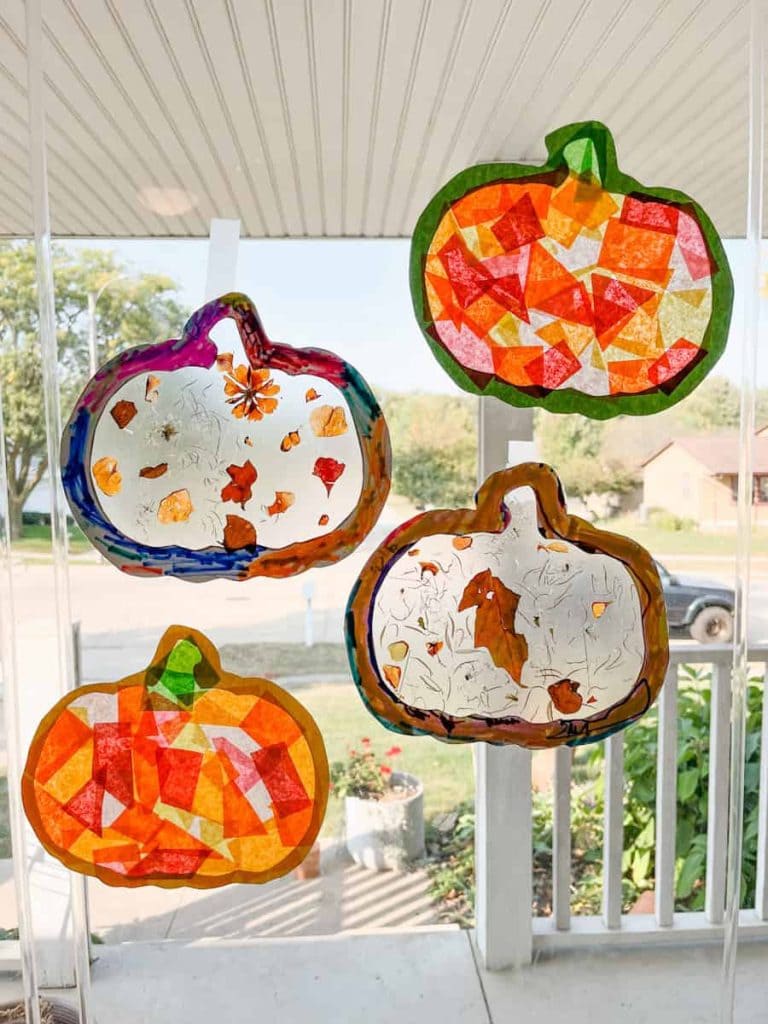
These bright and cheerful pumpkin suncatchers bring the warm glow of fall right into your windows. Made from colorful tissue paper and clear contact paper, they’re lightweight, fun to make, and perfect for kids’ crafting sessions.
The vibrant mosaic effect captures sunlight beautifully, turning an ordinary glass pane into a glowing autumn display.
You can mix colors for a playful look or stick to rich orange and gold tones for a classic harvest vibe.
Materials Needed
- Orange, red, yellow, and green tissue paper (cut into 2-3 cm pieces)
- Black construction paper (1 sheet, 21 × 29 cm)
- Clear contact paper (2 sheets, 25 × 30 cm each)
- Scissors
- Glue stick
- Printable pumpkin template (optional, approx. 20 × 25 cm)
- String or suction cups
Step-by-step Guide
Step 1: Cut a pumpkin shape from black construction paper, then cut out the center, leaving a 1-1.5 cm border to create the frame.
Step 2: Place the pumpkin frame on the sticky side of a clear contact paper sheet.
Step 3: Fill the inside with overlapping pieces of tissue paper, covering the entire area.
Step 4: Once filled, place another sheet of contact paper (sticky side down) over the design to seal it.
Step 5: You can trim away any excess contact paper and hang in a sunny window with string or suction cups.
#11. Creepy Spiderweb Beaded Suncatcher
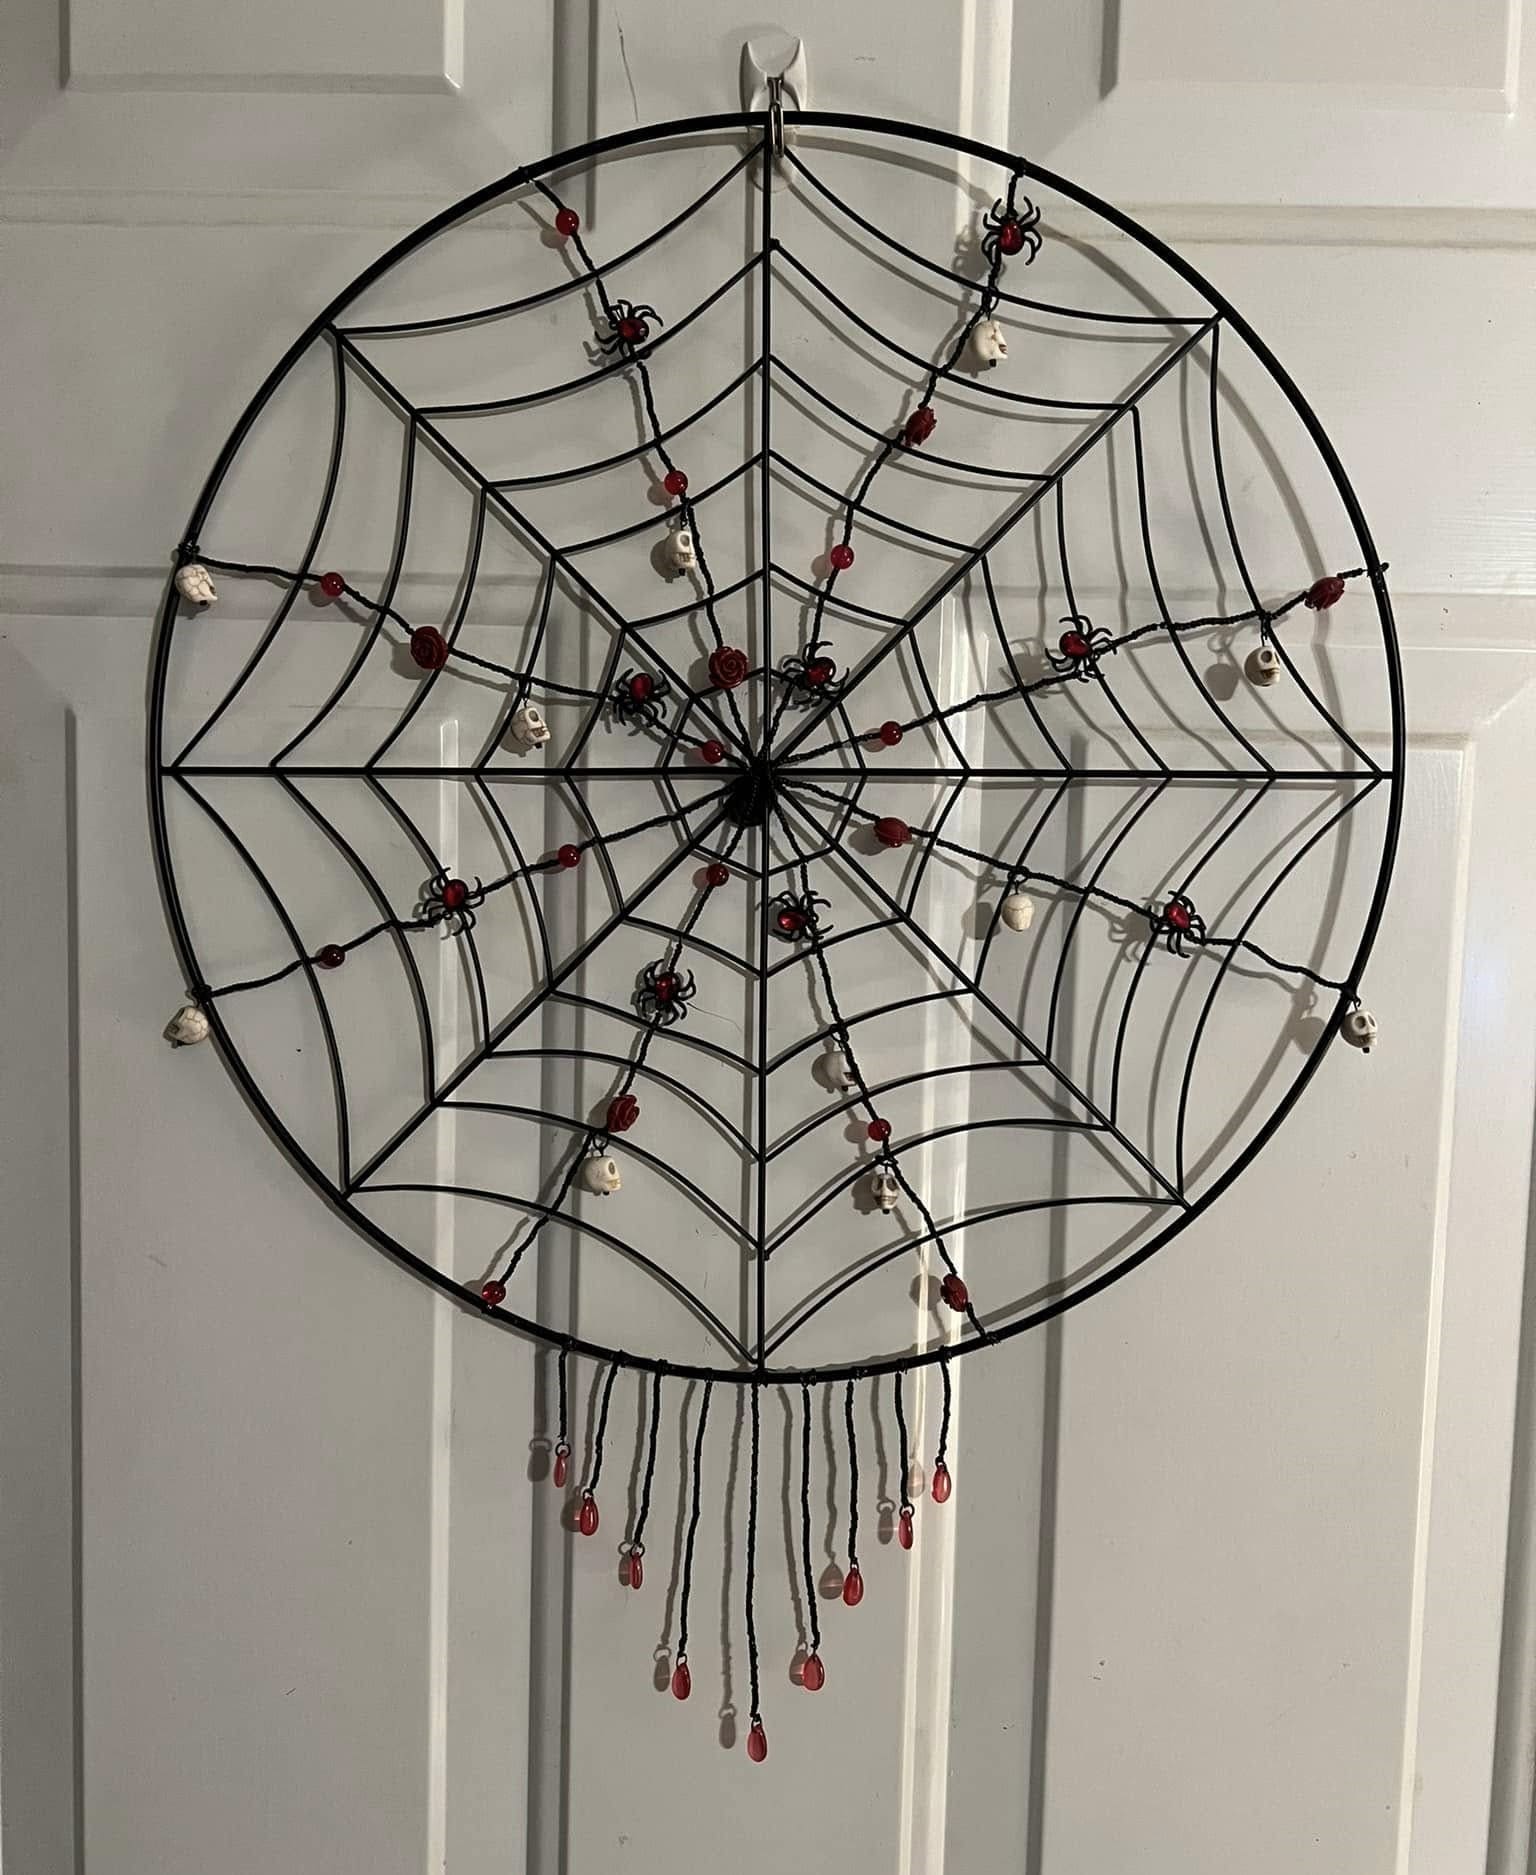
If you want your Halloween décor to lean into eerie elegance, this spiderweb suncatcher delivers the perfect mix of spooky and striking.
The black metal web frame forms a bold silhouette, while the red beads add a blood-like pop of color. Tiny skulls and plastic spiders crawl along the web strands, giving it an unsettlingly realistic vibe.
Plus, the dangling red bead drops at the bottom add extra movement when it sways in the breeze, catching the light in an ominous glimmer.
Materials Needed
- 1 large metal spiderweb frame (18-20 inches in diameter)
- 20-25 red glass or acrylic beads (8-10 mm)
- 10-12 small skull beads (0.5-0.75 inch)
- 8-10 plastic spider charms (1 inch)
- Black jewelry wire (22-24 gauge)
- Wire cutters
- Needle-nose pliers
- Small hook or ribbon
Step-by-step Guide
Step 1: Lay your spiderweb frame on a flat surface. Plan where you’ll place your skulls, spiders, and beads so the design feels balanced and not overly crowded in one spot.
Step 2: Cut short lengths of black jewelry wire and thread a bead or skull onto each. Then twist the wire tightly around the web strands to secure, tucking in any sharp ends with pliers.
Step 3: Attach the spider charms in various spots, some near the center and others toward the outer rings, so they look like they’re exploring the web.
Step 4: For the dangling strands, cut six to eight 6-inch lengths of wire. String 2-3 beads on each, ending with a red teardrop bead at the bottom. You twist them onto the bottom section of the frame.
Step 5: Hang your finished piece in a bright window or outdoors, letting the light illuminate the beads.
#12. Stained Glass Bat and Moon Suncatcher
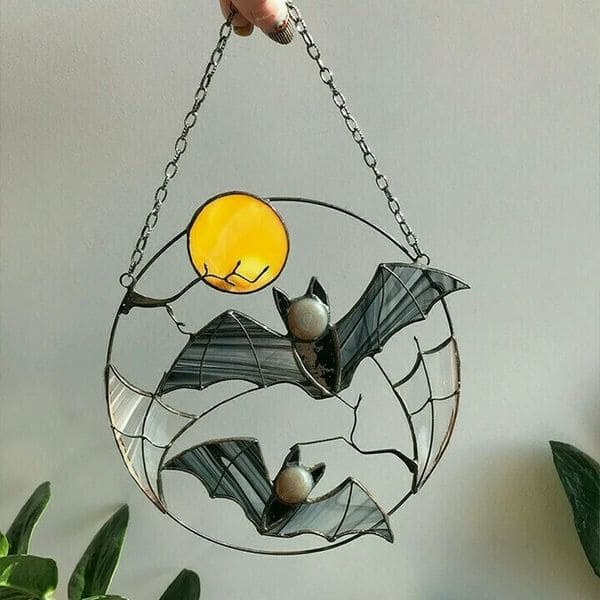
This hauntingly beautiful suncatcher captures the perfect October night with two sleek black bats soaring under a glowing golden moon.
The stained glass wings shimmer with smoky gray streaks that change with the light, while the circular frame and delicate chain make it easy to hang in any sunny spot.
When sunlight pours through, the piece casts an eerie yet enchanting glow, instantly adding a touch of gothic elegance to your space.
Materials Needed
- Pre-cut stained glass in black, gray, white, and yellow
- Copper foil tape
- Soldering iron and solder
- Flux and brush
- Metal ring (approx. 8-10 inches in diameter)
- Hanging chain and hooks
- Glass cutter (if cutting your own pieces)
- Safety gear (goggles, gloves, mask)
Step-by-step Guide
Step 1: Begin by arranging your stained glass pieces including two bats, a bright moon, and any web-like background details.
Step 2: Wrap each glass piece’s edges with copper foil tape, pressing firmly so it adheres smoothly.
Step 3: Brush on a light layer of flux over the foiled edges, then carefully solder the pieces together, working slowly to keep lines neat.
Step 4: Solder the assembled bats and moon into the circular metal frame. Check that all joints are strong so the suncatcher will last for many Halloweens to come.
Step 5: Attach the chain to the top of the frame, hang it in a sunny window, and watch the colors shift and glow throughout the day.
#13. Halloween Crystal and Bead Spiral Suncatcher
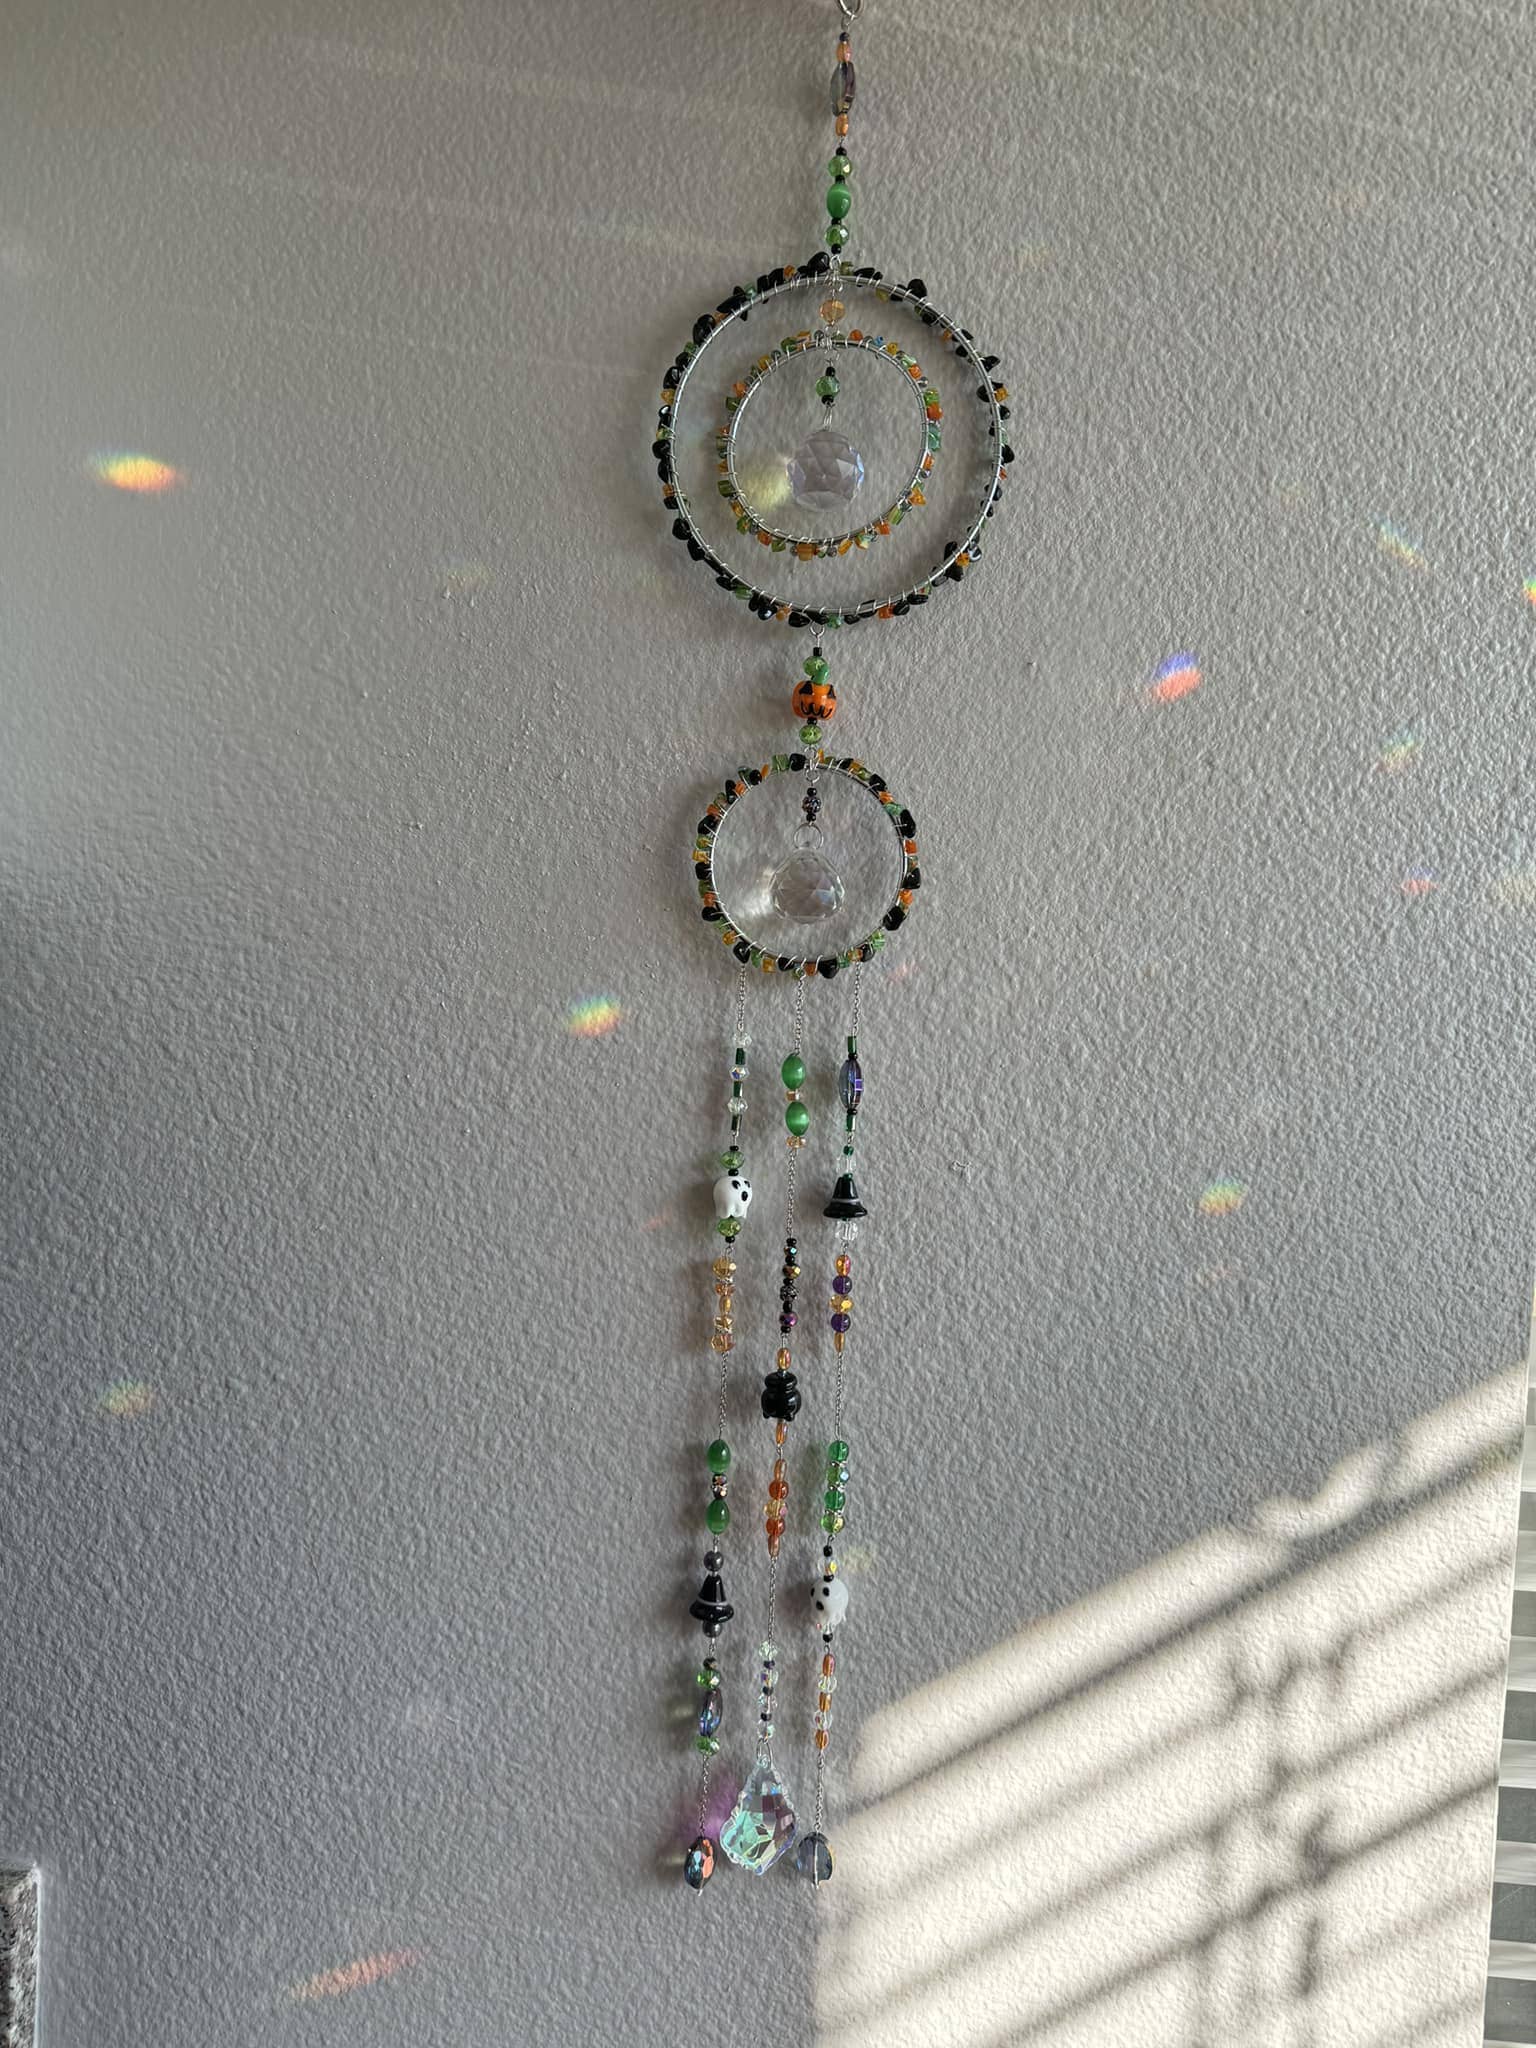
This piece is like a little Halloween galaxy dancing in the sunlight. Two sparkling crystal orbs hang in wire-wrapped rings, surrounded by tiny beads in pumpkin orange, witchy green, and midnight black.
Dangling strands below are dotted with whimsical charms like tiny ghosts, witches’ hats, and shimmering gems that scatter rainbows across the wall when the light hits just right.
Materials Needed
- 2–3 metal or wire rings (various sizes)
- Halloween-colored seed beads (orange, green, black, purple)
- 2 faceted crystal balls
- Halloween-themed charms (ghosts, witch hats, pumpkins)
- Jewelry wire (24–26 gauge)
- Round-nose pliers
- Wire cutters
- Hanging hook or loop
Step-by-step Guide
Step 1: Start by securing one end of your wire to the first ring. Then string seed beads around the frame, mixing colors for a festive look. You wrap the wire tightly so the beads stay in place without gaps.
Step 2: Attach the crystal ball to the center of the ring using a length of wire. Then wrap it securely so it hangs freely and catches the light. Repeat the same process for the smaller ring.
Step 3: Connect the rings together using beads and wire links, making sure they hang evenly and spin gently when moved.
Step 4: Create the dangling bead strands by threading beads, charms, and crystals onto wire. You next attach these strands to the bottom ring for extra sparkle and movement.
Step 5: Finish with a secure loop or hook at the top. And now hang your suncatcher in a sunny window, and watch as it throws tiny rainbow spells across your walls.
#14. Sparkling Spiderweb Beaded Hanger
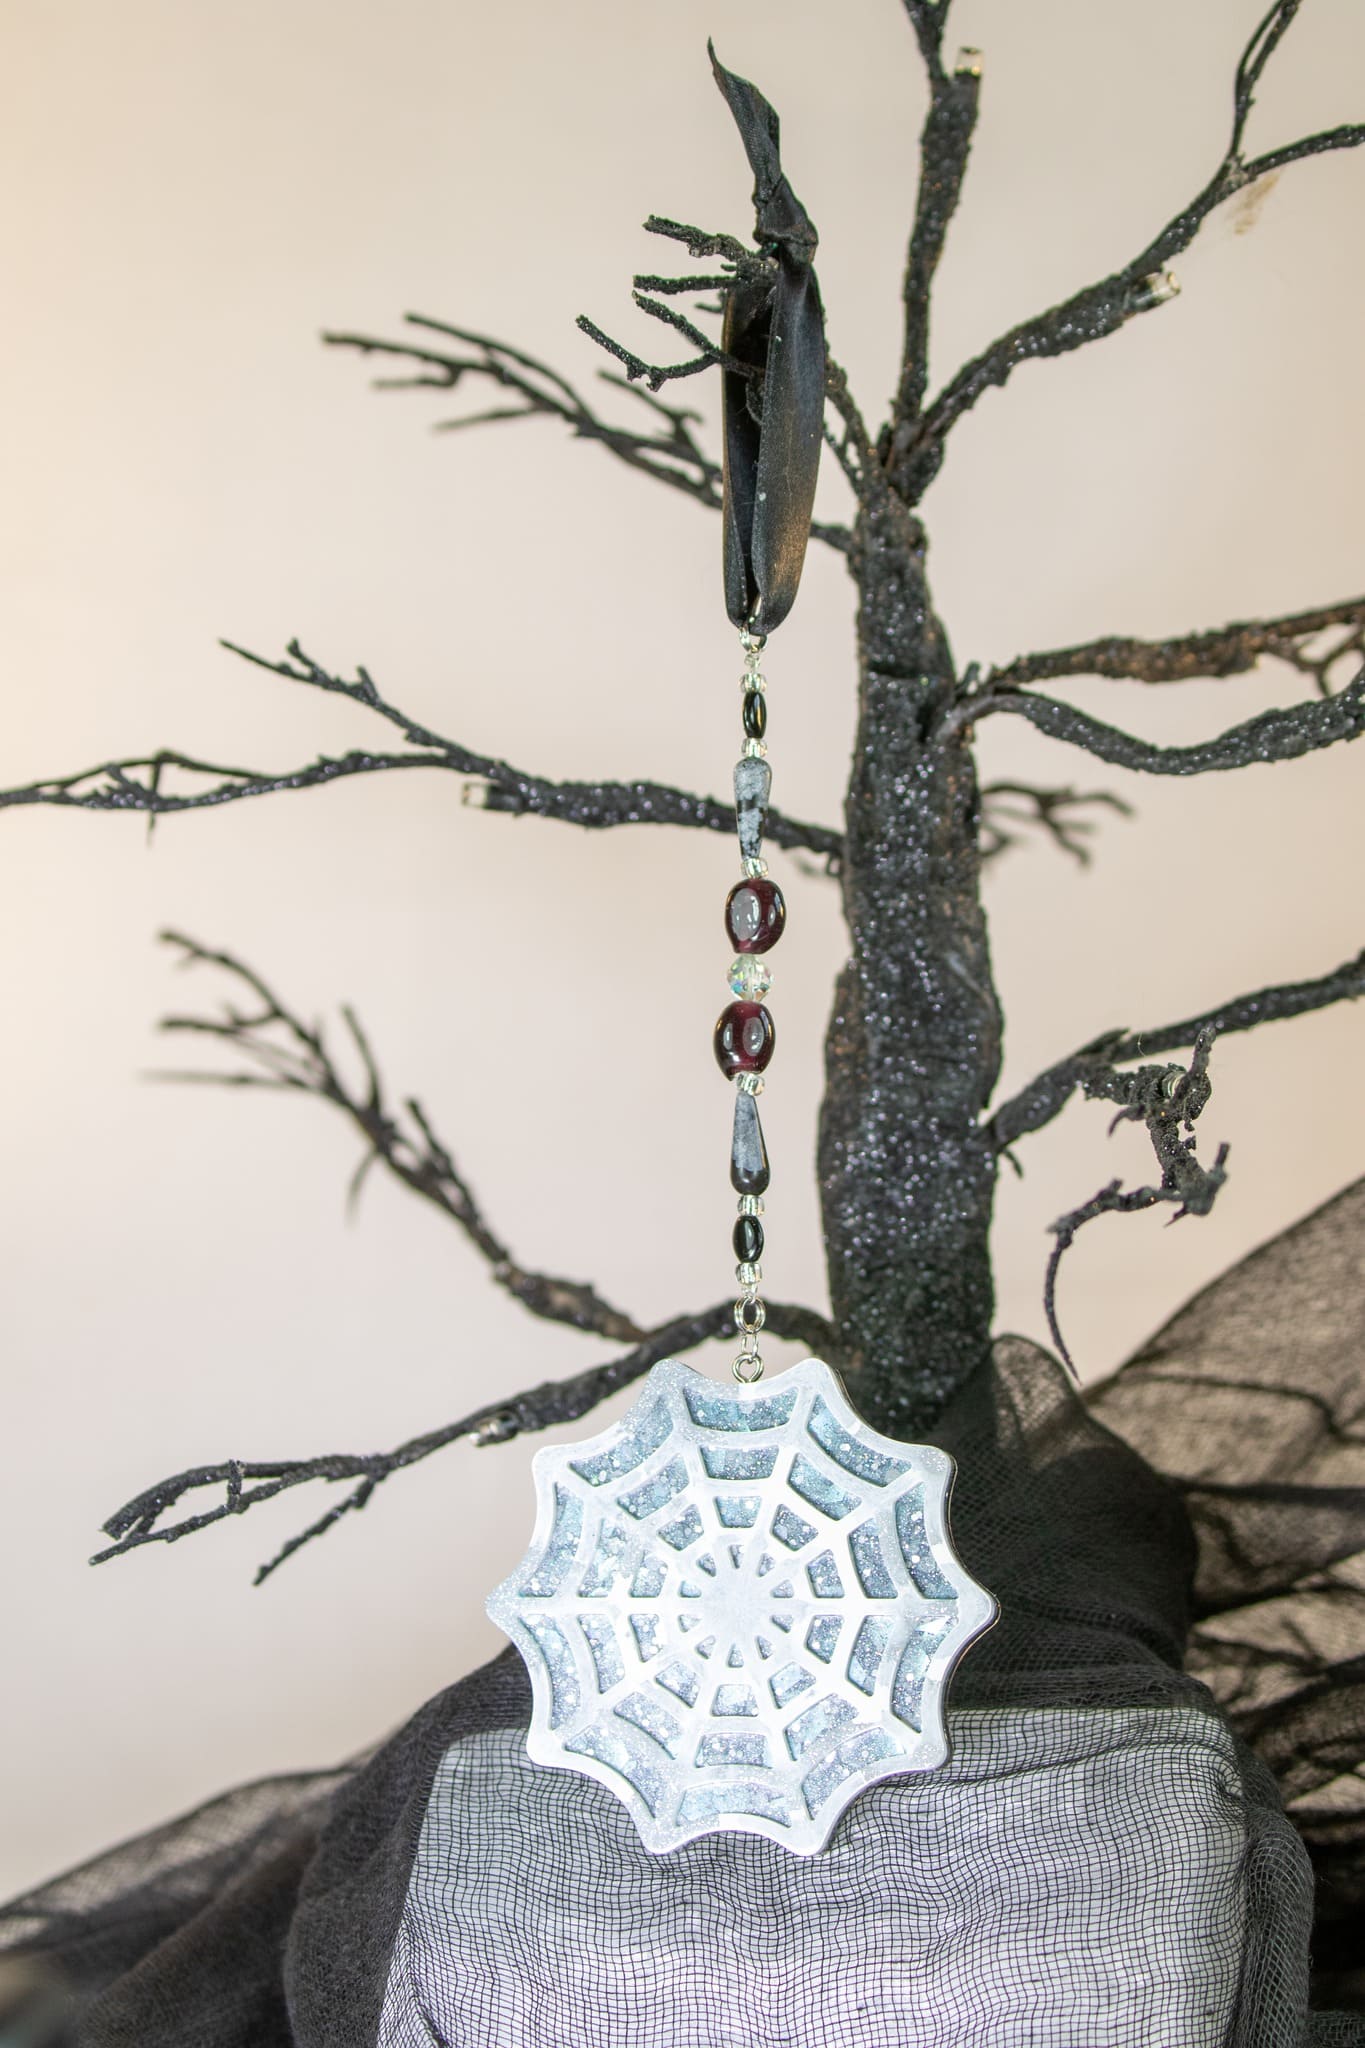
This spiderweb suncatcher has the perfect mix of eerie elegance and glittery charm. The web is cast in a crisp white frame filled with shimmering silver glitter, catching light like frost on a cold October morning.
Above it, a string of beads, rich reds, deep blacks, and smoky grays, adds a touch of gothic glamour.
Hung by a sleek black ribbon, it sways gently, casting tiny sparkles as it moves. Whether in a sunny window or on a Halloween tree, it’s a piece that turns a spooky symbol into a dazzling autumn accent.
Materials Needed
- Spiderweb resin pendant (approx. 3 inches)
- Fine silver glitter
- Black, red, and gray beads (varied sizes and shapes)
- Jewelry wire or head pins
- Small jump rings
- Black ribbon (12-14 inches)
- Jewelry pliers and wire cutters
Step-by-step Guide
Step 1: If making the pendant from scratch, pour resin into a spiderweb mold, mixing in fine glitter before curing. Once hardened, remove from mold and sand edges if needed.
Step 2: Using jewelry wire or head pins, thread your chosen beads in a sequence that balances color and size. You secure each section by making loops with jewelry pliers.
Step 3: Attach the beaded strand to the top of the spiderweb pendant using a small jump ring, ensuring it hangs straight without twisting.
Step 4: Tie a black ribbon securely to the top loop or bead link for hanging.
Step 5: Hang in a bright spot and watch as sunlight brings out the glittery web details, creating a subtle, magical shimmer.
#15. Ghosts and Pumpkins Stained Glass Suncatcher
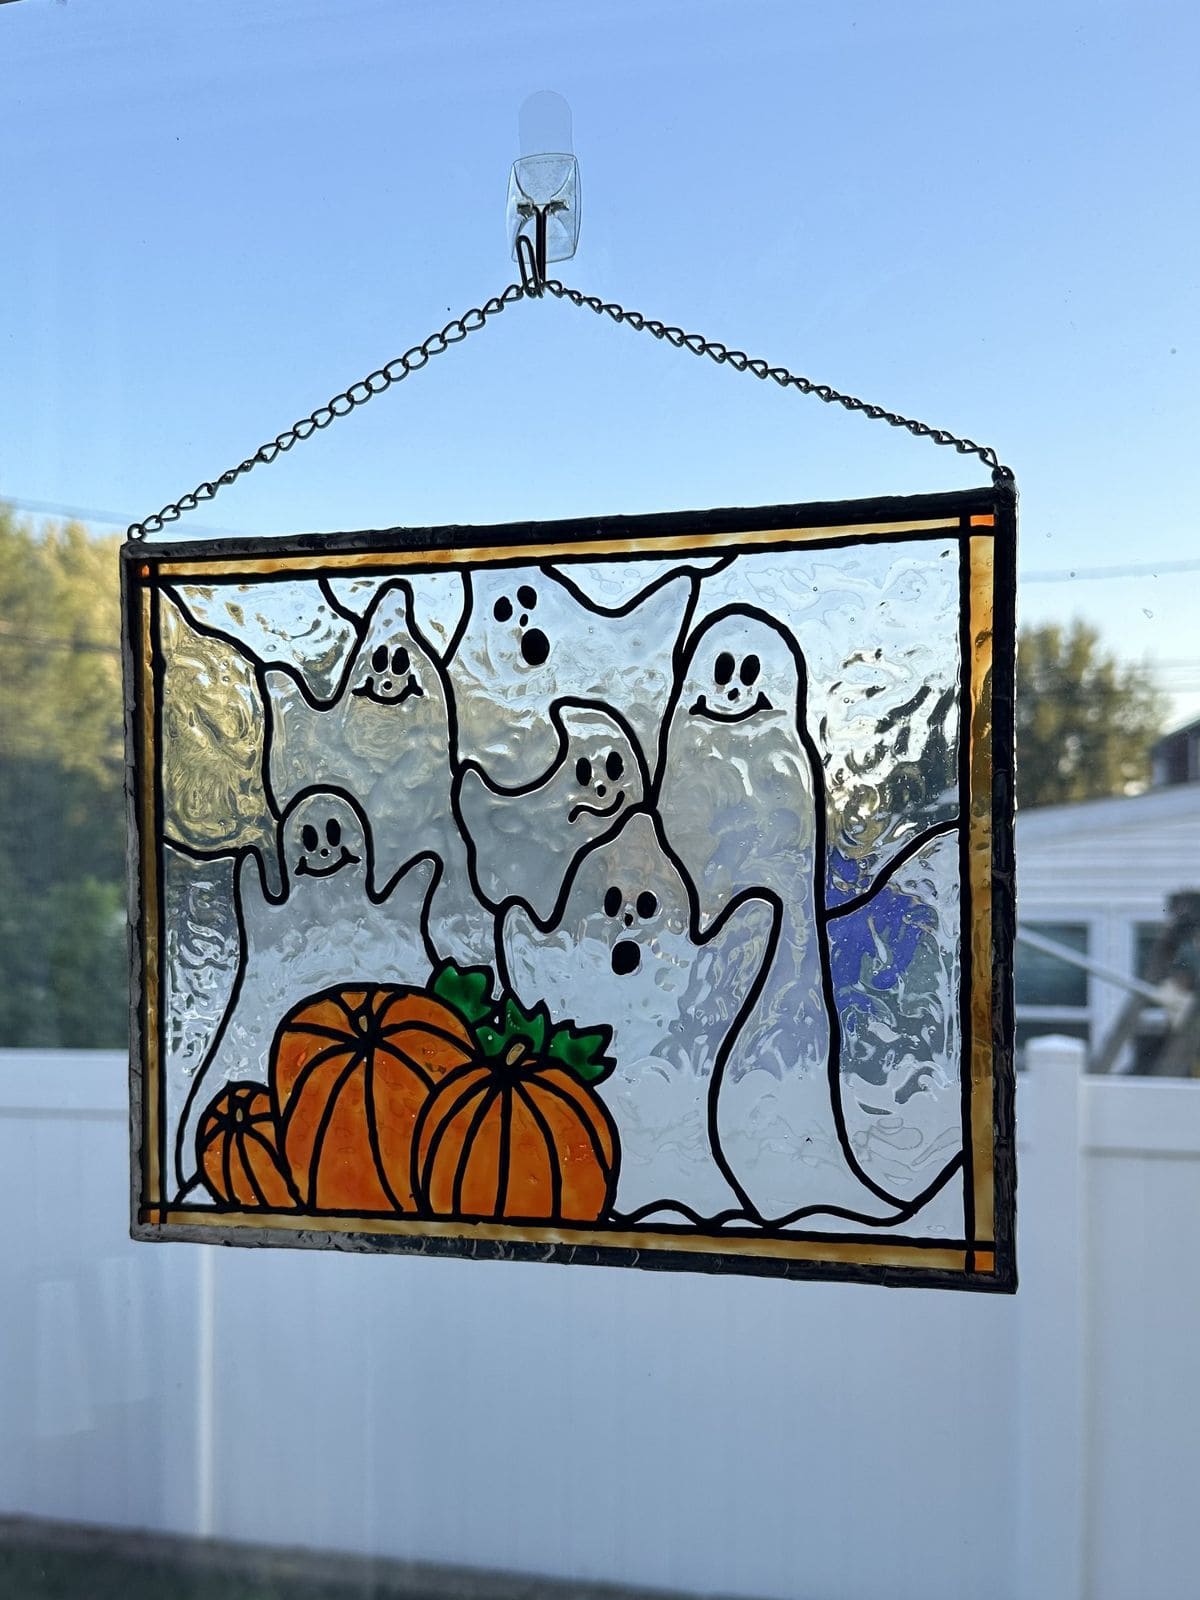
This charming stained glass suncatcher captures the whimsical spirit of Halloween with a friendly gathering of ghosts floating above a patch of bright orange pumpkins.
The textured clear glass background allows sunlight to dance through, casting a warm, inviting glow. Bold black outlines give definition to each ghost and pumpkin, making the design pop against any window.
Moreover, the piece hangs neatly from a small chain, making it easy to display in your living room, kitchen, or entryway for a playful seasonal touch that’s both spooky and cheerful.
Materials Needed
- Stained glass sheets: clear textured (20×15 cm), orange, green
- Black glass paint or lead came
- Soldering iron & solder (if using traditional stained glass method)
- Glass cutter and grozing pliers
- Fine chain (20 cm)
- Strong window suction hook
- Protective gloves and safety glasses
Step-by-step Guide
Step 1: Sketch your ghost and pumpkin design to fit the size of your chosen glass panel.
Step 2: Cut your stained glass pieces carefully, following the template. You use clear textured glass for the background, orange for pumpkins, and green for leaves.
Step 3: Outline each shape with lead came or apply black glass paint for a faux stained glass effect.
Step 4: If soldering, join the pieces together with solder along the lead came lines, then clean and polish.
Step 5: Attach the hanging chain and secure it to a window using a strong suction hook.
#16. Mini Witchy Halloween Hanging
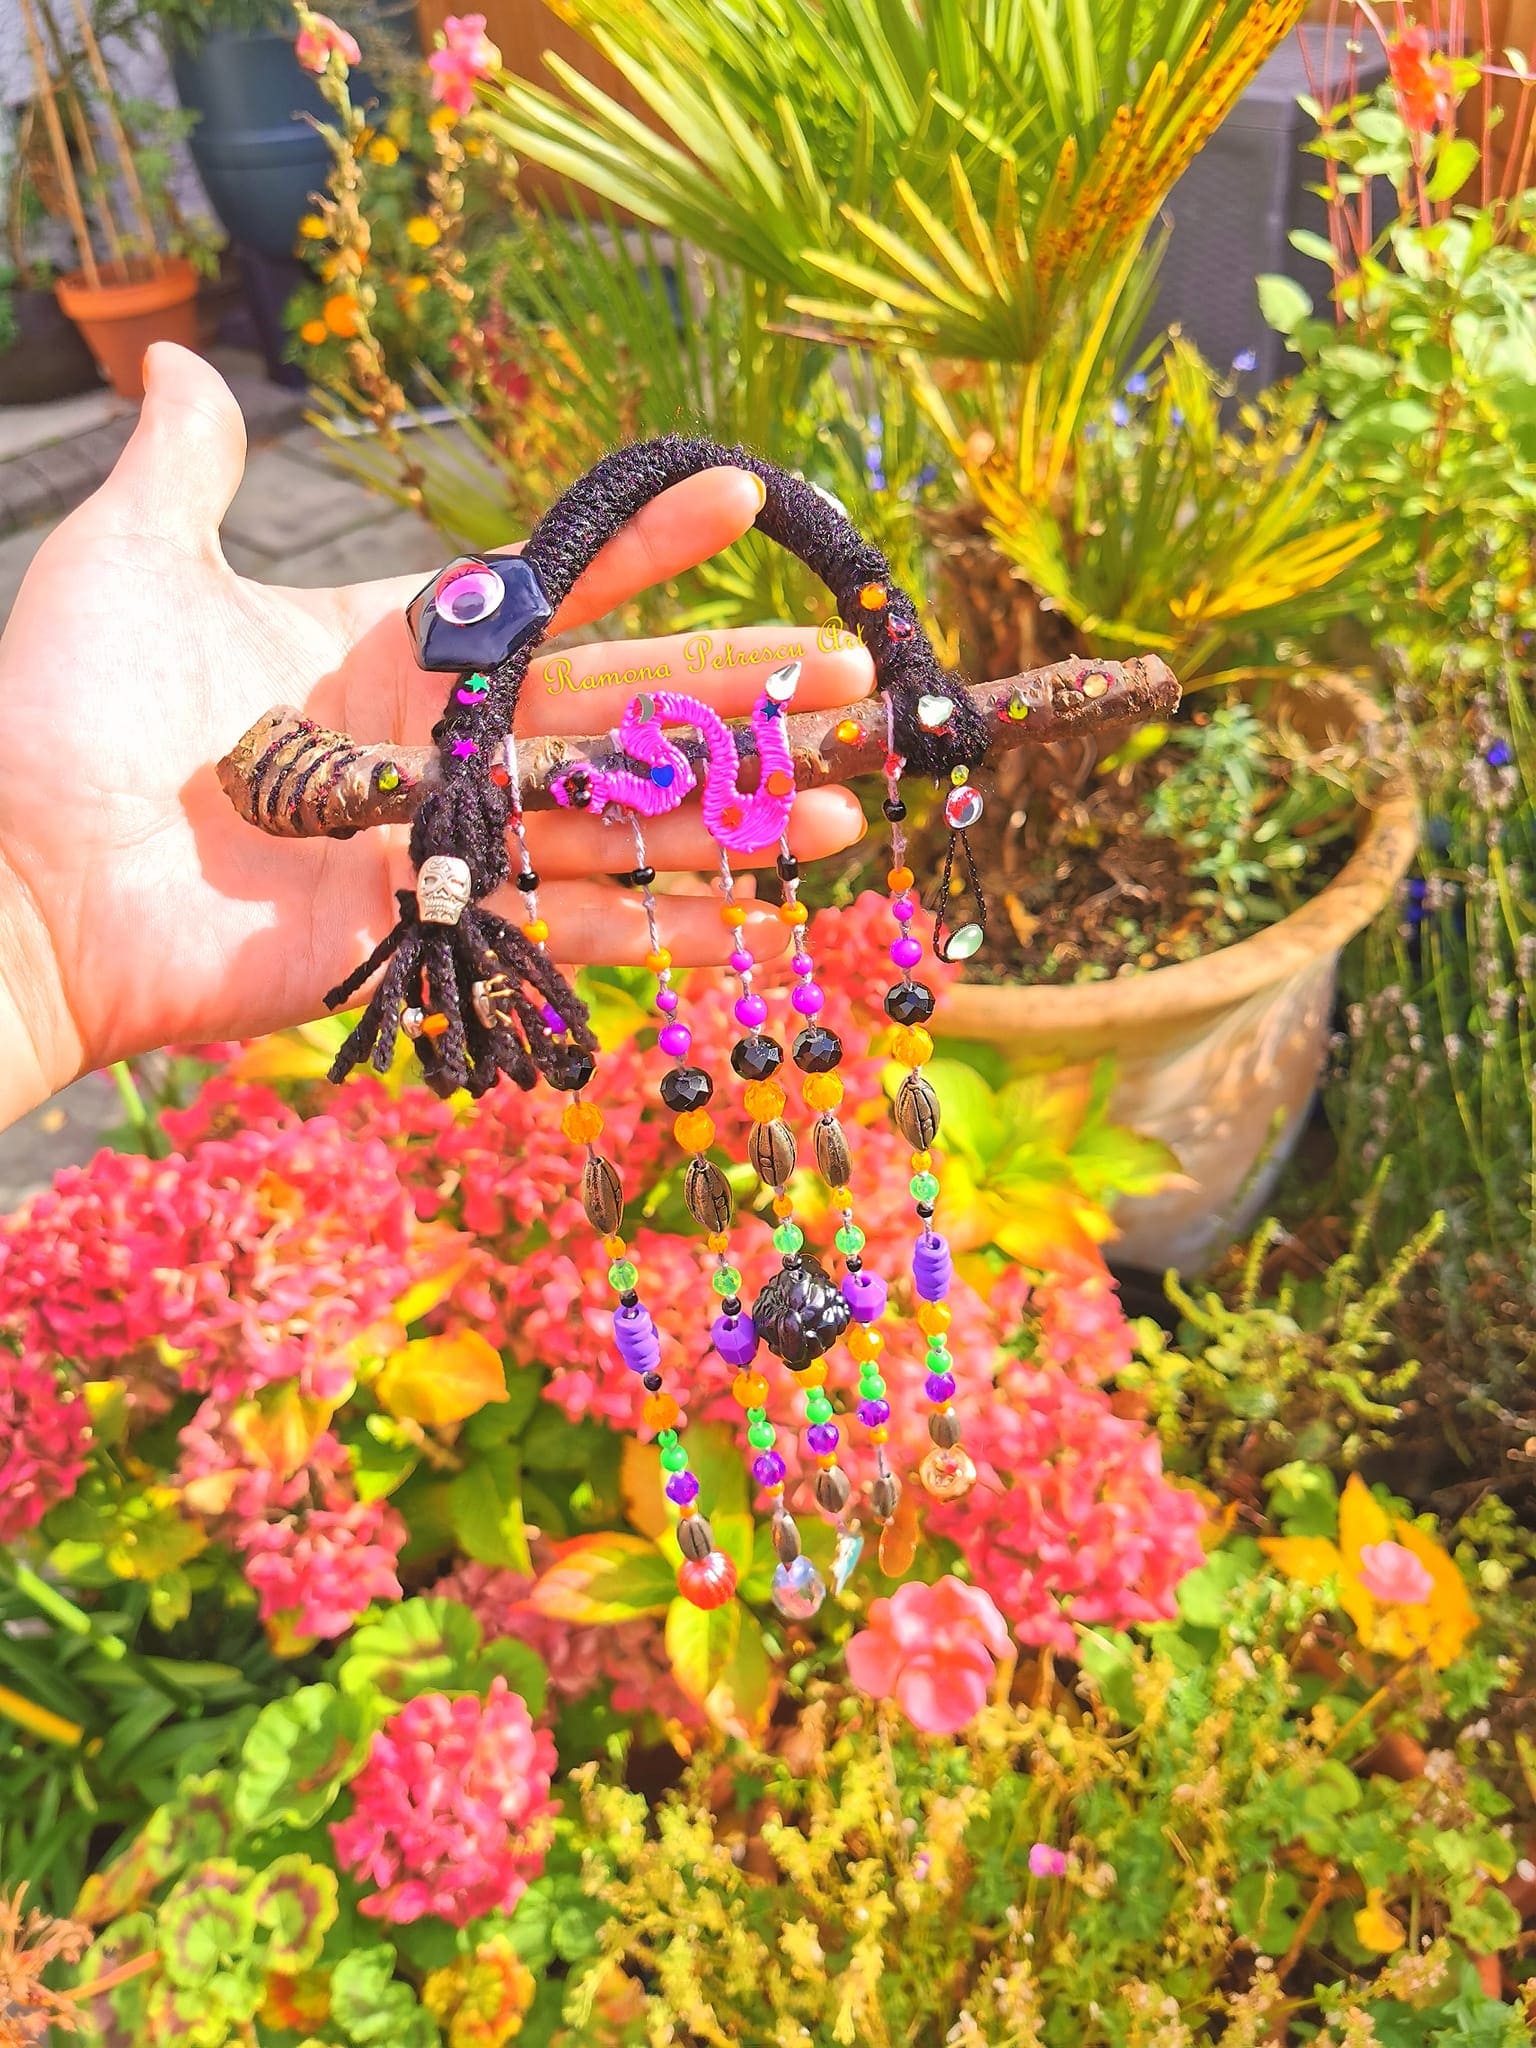
Made from a small twig wrapped in black yarn, this playful little decoration is adorned with an assortment of quirky details, a purple seahorse charm, a bold googly eye, and tiny star embellishments.
Colorful bead strands dangle from the base, mixing orange, purple, green, and black with an eclectic mix of textures like seed pods and faceted glass.
Plus, each swing of the beads catches the light, adding a spark of magic to any sunny spot.
Materials Needed
- 1 small twig (approx. 6-7 inches)
- Black yarn or cord
- Assorted beads in Halloween colors
- Small charms (seahorses, skulls, stars, eyes, etc.)
- Jewelry wire
- Scissors and glue (optional)
Step-by-step Guide
Step 1: Wrap your twig in black yarn, tucking or gluing ends to secure.
Step 2: String beads and charms onto short lengths of jewelry wire or thread, creating strands of varying lengths for a playful look.
Step 3: Tie or wrap each strand securely around the twig. Then add extra decorative touches like a googly eye, small charms, or painted accents.
Step 4: Hang your mini charm piece somewhere it can sway gently and catch the light.
#17. Stained Glass Spiderweb with Beaded Spider
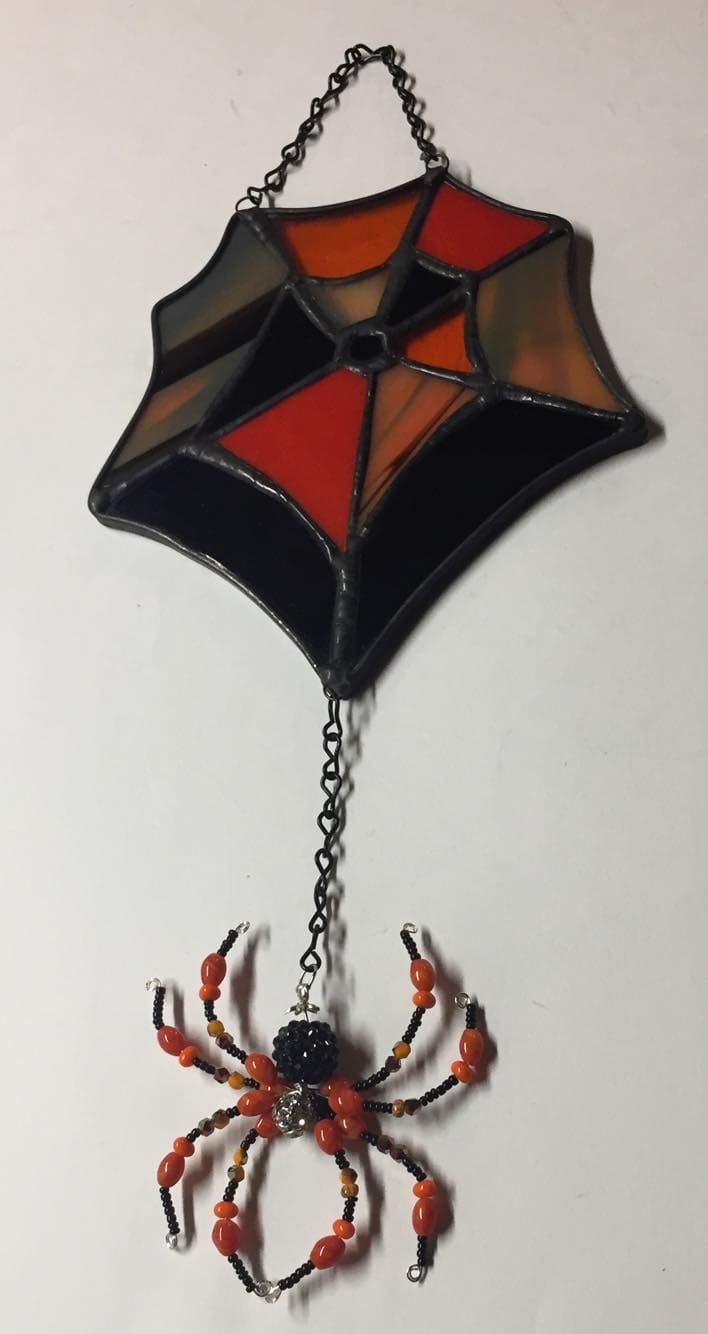
This piece blends elegance with a touch of Halloween creepiness. The stained glass spiderweb shimmers with bold shades of red, orange, and black, catching the light in a way that makes the whole design glow.
Dangling from a black chain is a meticulously crafted beaded spider, its segmented legs made from tiny black and orange beads, and its body glistening with larger beadwork for extra texture.
Every time sunlight passes through, it casts fiery reflections that bring the web and spider to life.
Materials Needed
- 1 stained glass spiderweb piece (approx. 6-8 inches across)
- 1 beaded spider ornament (black and orange beads, assorted sizes)
- Black metal chain (12-14 inches)
- Jump rings and connectors
- Jewelry pliers
Step-by-step Guide
Step 1: Attach the black chain to the top of the stained glass spiderweb using a jump ring, securing it for hanging.
Step 2: Connect another length of chain from the bottom of the web to the top of the beaded spider, making sure the spider hangs at a visible, balanced length.
Step 3: Use jewelry pliers to firmly close all jump rings so the pieces stay secure and don’t come loose over time.
Step 4: Hang your spiderweb in a window or sunny spot to enjoy the stained glass glow and the dangling spider’s playful sway.
#18. Stained Glass Paper Spiderwebs
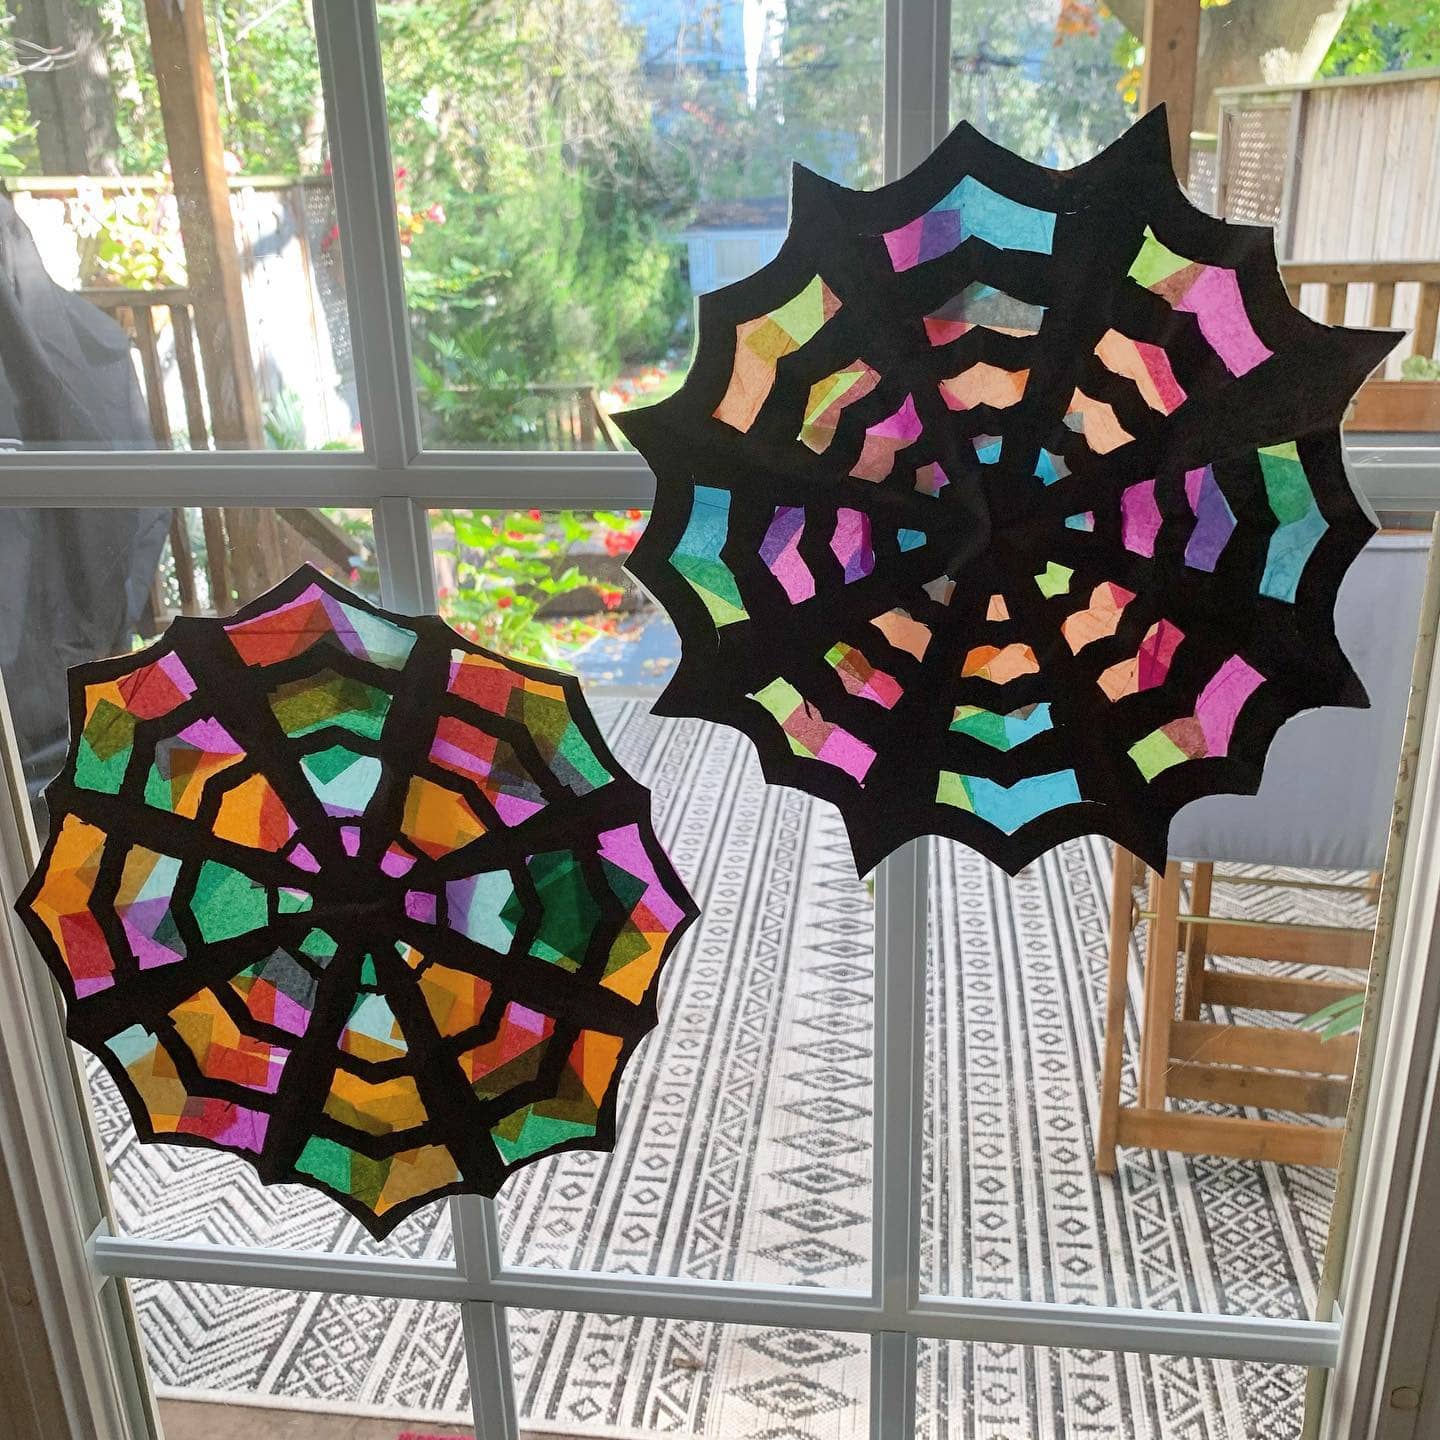
These stained glass spiderwebs glow like Halloween jewels when sunlight streams through them.
Made with bold black frames and filled with colorful tissue pieces, they bring a festive yet artsy flair to your windows. Each web catches the light in a different way, shifting shades as the day passes.
This is an easy, mess-free project that’s fun for both kids and adults, perfect for adding a playful pop of spooky color to your home without going full-on creepy.
Materials Needed
- 2 sheets of black construction paper (9×12 inches)
- Assorted tissue paper scraps (at least 6-8 colors)
- 1 sheet of clear contact paper (12×12 inches)
- Scissors
- Pencil
- Ruler
- Glue stick
Step-by-step Guide
Step 1: Fold each black construction paper in half, then lightly sketch half of a spiderweb shape with bold lines for cutting. Think of it as making a paper snowflake but with web-like patterns.
Step 2: Use scissors to carefully cut along the lines, unfolding to reveal your full web shape. The open spaces will become the stained glass sections.
Step 3: Lay a piece of clear contact paper sticky-side up, then place your web frame onto it, pressing gently to stick.
Step 4: Tear or cut small pieces of tissue paper in various colors and press them into the open sections of the web, slightly overlapping for a rich color mix.
Step 5: Once all spaces are filled, place another piece of contact paper over the top to seal it, then trim any excess.
Read more: 20+ Fun Suncatcher Crafts Kids Will Love Creating and Playing With
#19. Beaded Spiderweb Suncatcher
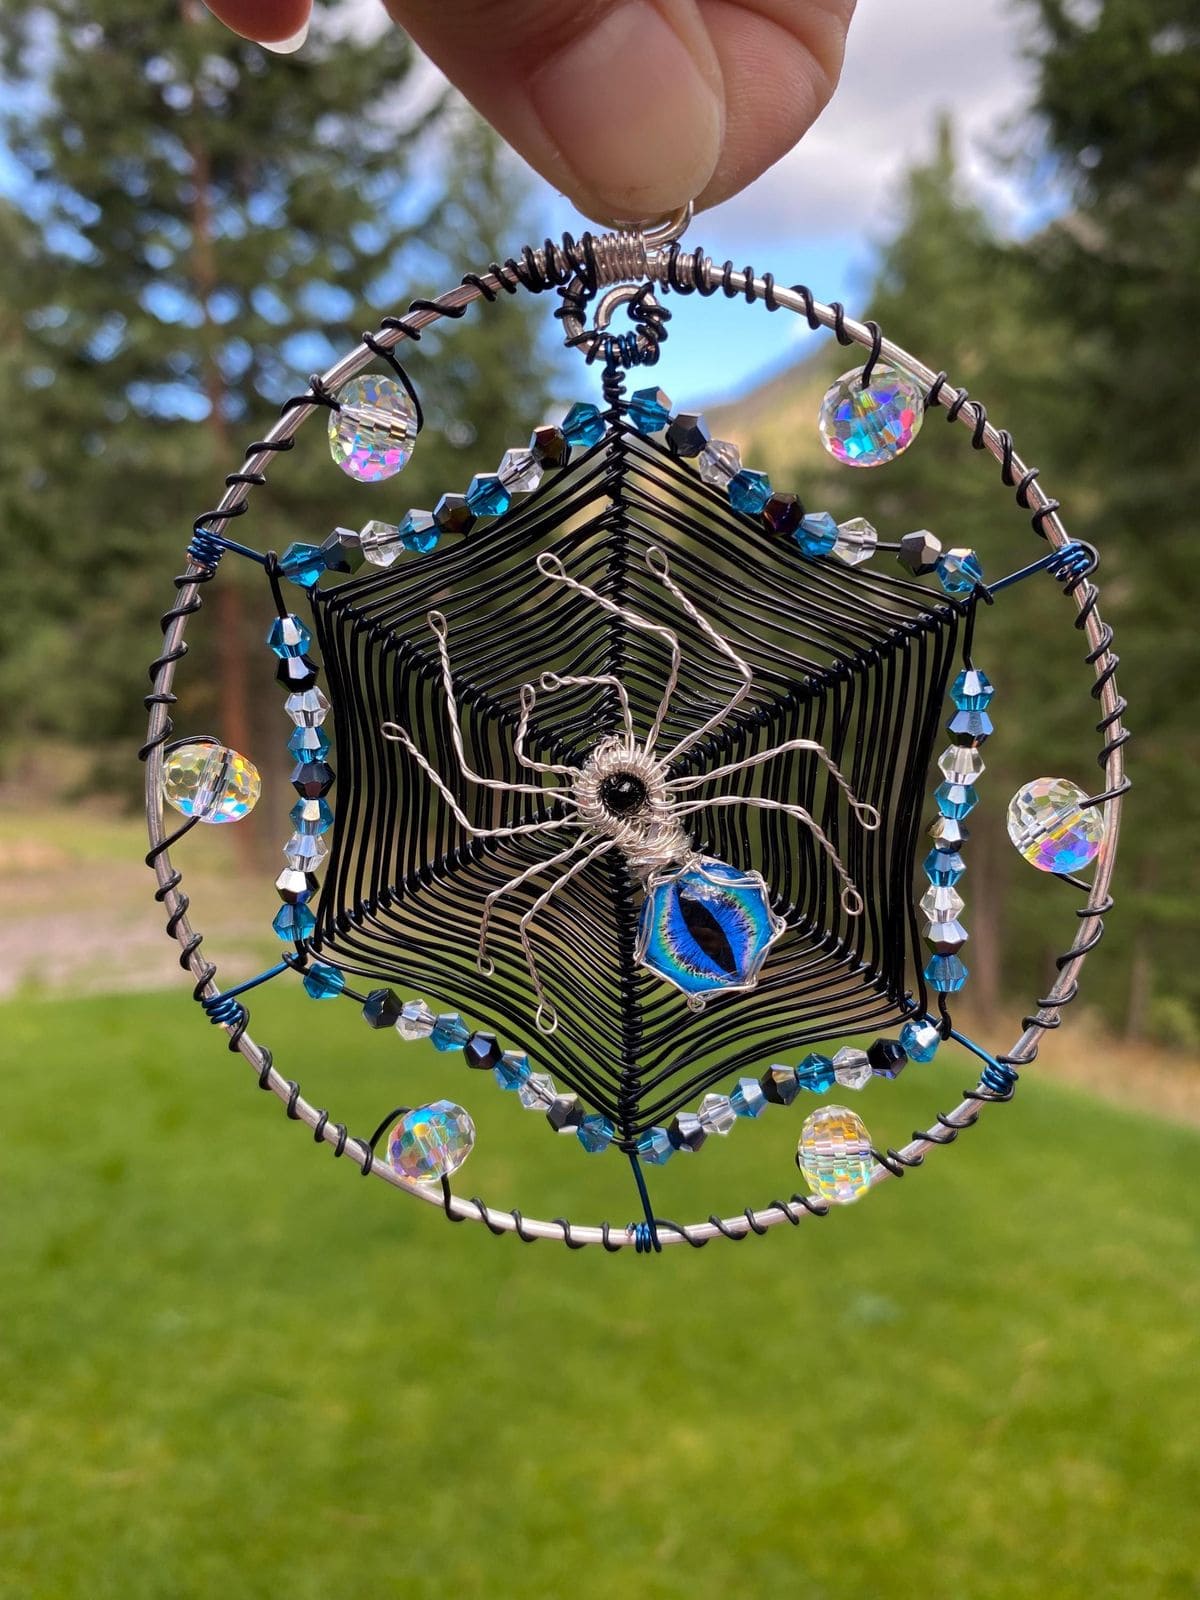
This shimmering spiderweb suncatcher looks like it’s been spun by a magical creature under a full moon.
The intricate black wire web creates the perfect stage for a delicate silver-wire spider, complete with a mesmerizing blue gemstone body.
Surrounding the frame, sparkling beads catch the sunlight and throw tiny rainbows across your space.
Materials Needed
- 1 metal hoop (4-6 inches diameter)
- 15 ft black craft wire (24-26 gauge)
- 8 ft silver craft wire (24-26 gauge)
- 6-8 iridescent crystal beads (10-12 mm)
- 20-25 small faceted beads in blue, black, and clear (4-6 mm)
- 1 oval or teardrop gemstone bead (1-1.5 inches)
- 1 small round bead (8-10 mm)
- Wire cutters and round-nose pliers
Step-by-step Guide
Step 1: Secure one end of the black wire to the metal hoop and begin wrapping it in a spiral pattern toward the center to form the spiderweb.
Step 2: Add small beads along the web’s lines as you go, threading them in a balanced way so the sparkle is evenly distributed.
Step 3: To make the spider, thread the gemstone onto the silver wire for the body, add the smaller round bead for the head, and twist the wire tightly to hold them in place.
Step 4: Create eight wire legs, bending them at slight angles to mimic a natural stance. Then attach the spider to the web by weaving or wrapping its legs around the wire strands.
Step 5: Decorate the outer hoop with crystal beads, spacing them so each catches the light. Finish by making a small loop at the top for hanging.
#20. Crimson Serpent Suncatcher
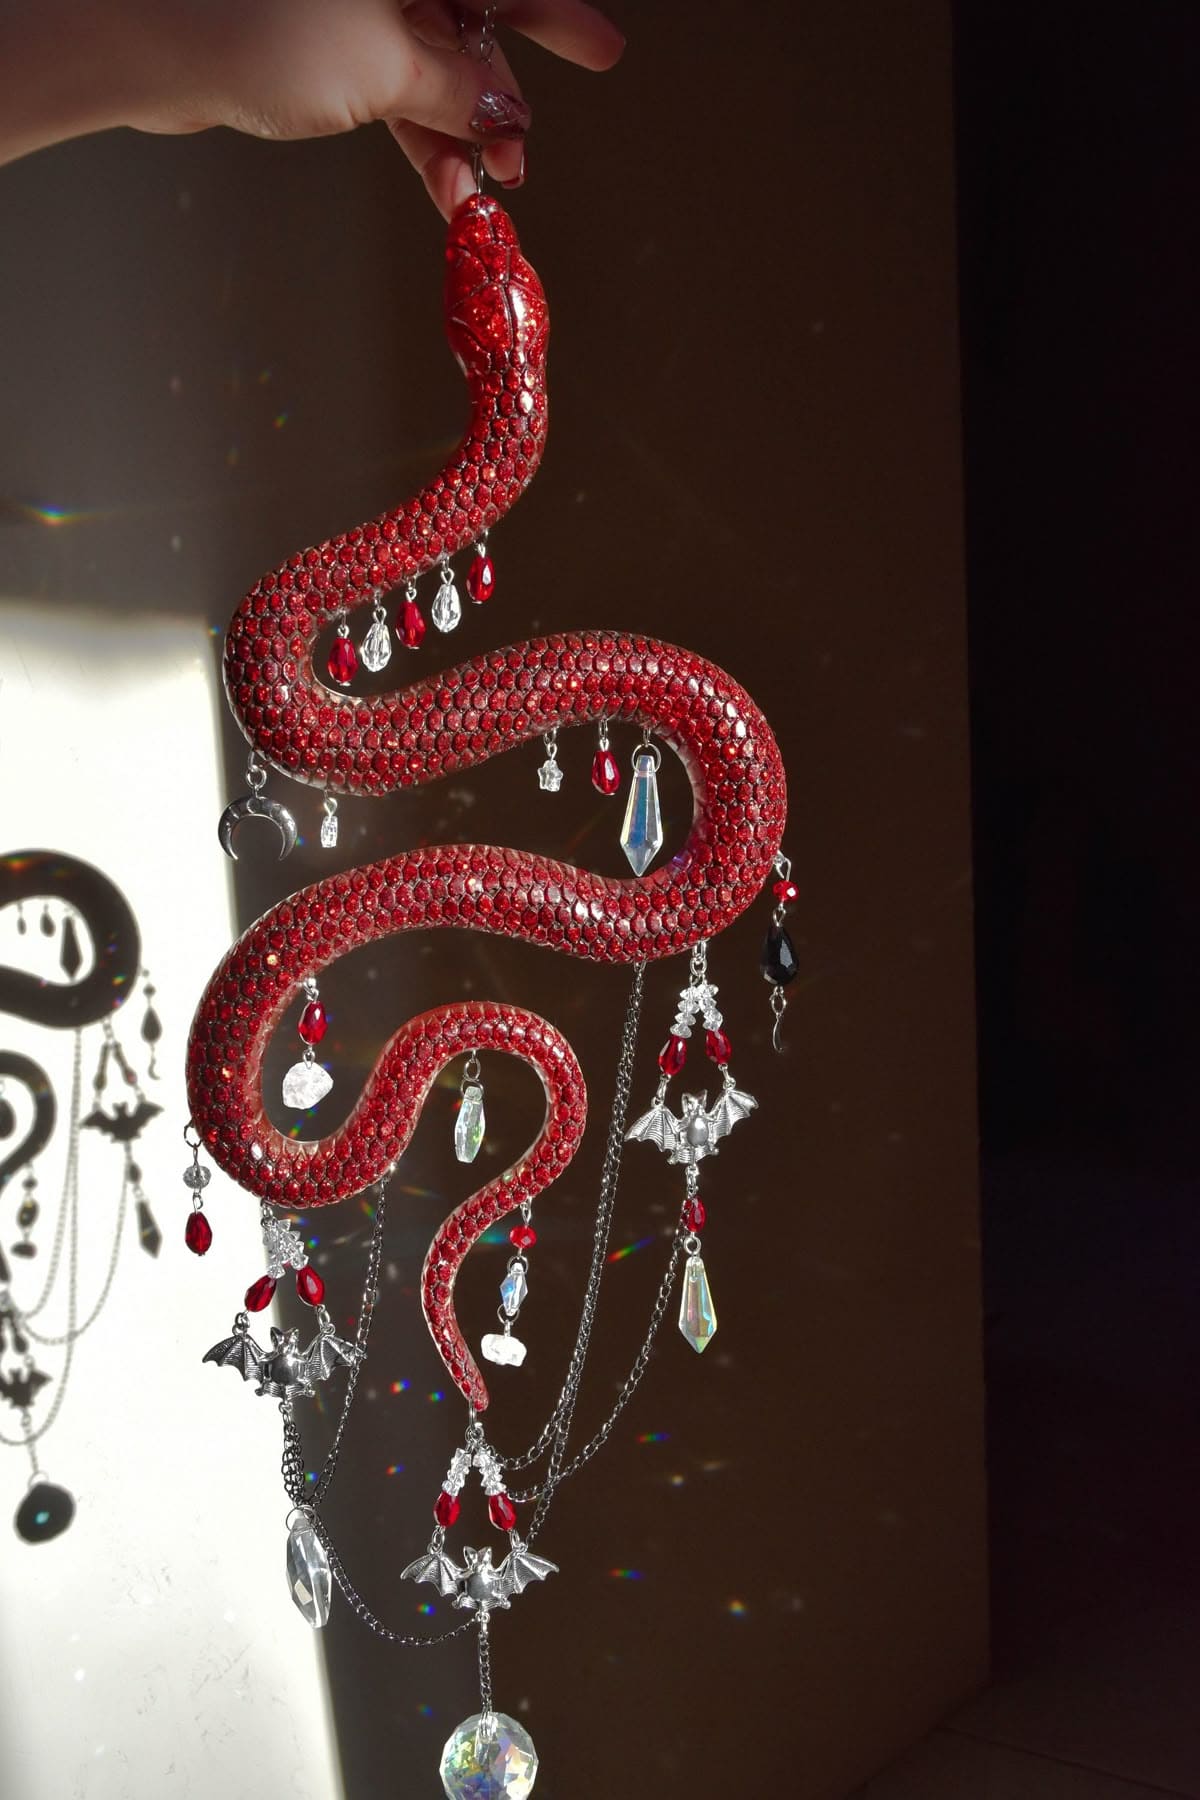
This hypnotic crimson serpent suncatcher is pure Halloween drama.
You can see the shimmering red scales capture light like tiny embers, while dangling chains hold a collection of gothic charms like bats, moons, crystals, and teardrop beads in deep red and icy clear.
When sunlight hits it, the room dances with glints of crimson and silver, creating an atmosphere both elegant and dangerous.
Materials Needed
- 1 resin or metal snake form (10-12 inches long)
- 50-60 small red rhinestones (3-5 mm)
- 8-10 gothic charms (bats, moons, stars, etc.)
- 12-15 teardrop glass beads in red and clear (8-10 mm)
- 4-6 crystal prism drops (20-40 mm)
- 3-4 ft fine chain in silver or black
- Jewelry jump rings and clasps
- Strong adhesive
- Jewelry pliers
Step-by-step Guide
Step 1: Begin by embellishing the snake form with rhinestones, placing each one carefully to follow the scale pattern. Then allow the adhesive to fully set before adding any hanging elements.
Step 2: Cut various lengths of fine chain to create a cascading effect. You attach charms, beads, and crystal prisms to the ends using jump rings so they sway freely.
Step 3: Secure the chains along the snake’s curves, making sure the spacing feels balanced. Let some hang lower than others to create depth and movement.
Step 4: Add a sturdy loop or hook at the top of the snake’s head for hanging.
Step 5: Hang it in a sunny spot and watch as the red light fragments and shadows cast a spellbinding display.
#21. Beaded Halloween Suncatcher Hoop
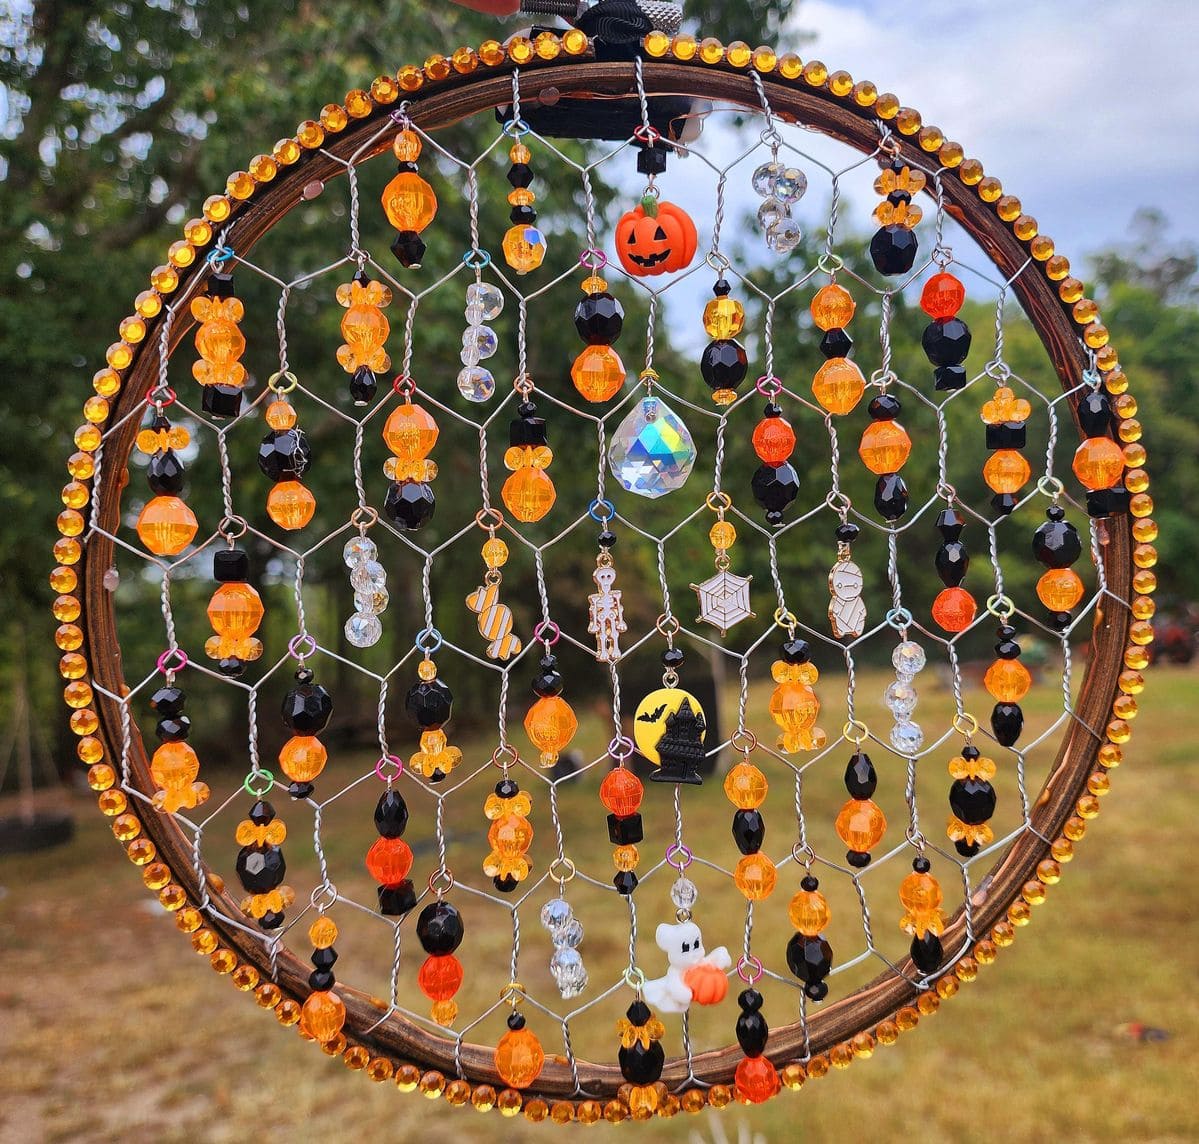
Wow, this beaded Halloween suncatcher dances with light and festive charm. The orange, black, and clear beads shimmer beautifully in the sun, while tiny themed charms add that unmistakable spooky spirit.
Hung in a window or on a porch, it catches sunlight during the day and reflects a magical pattern across your space.
Materials Needed
- 1 wooden embroidery hoop (10-inch diameter)
- 2-3 ft of chicken wire or metal mesh
- Assorted beads (orange, black, clear; 8-12 mm)
- 6-8 Halloween-themed charms
- Jewelry wire (22-24 gauge)
- Wire cutters
- Small pliers
- Hot glue gun with glue sticks
- Self-adhesive rhinestone trim (about 30 inches)
Step-by-step Guide
Step 1: Cut a piece of chicken wire slightly larger than your embroidery hoop. You place it between the hoop’s rings and tighten to secure, trimming excess around the edges.
Step 2: Cut 8-10 strips of jewelry wire, each about 8 inches long. Then thread a mix of beads onto each strip, adding a Halloween charm or two in the center for extra detail.
Step 3: Twist the ends of each wire strip around the chicken wire so they hang vertically. Then space them evenly for a neat, symmetrical look.
Step 4: Hot glue the rhinestone trim around the outer edge of the hoop to give it a finished, sparkly border.
Step 5: Hang your suncatcher in a sunny spot and watch as it casts a playful glow and spooky charm across the room.
#22. Embossed Glass Ghost Suncatcher
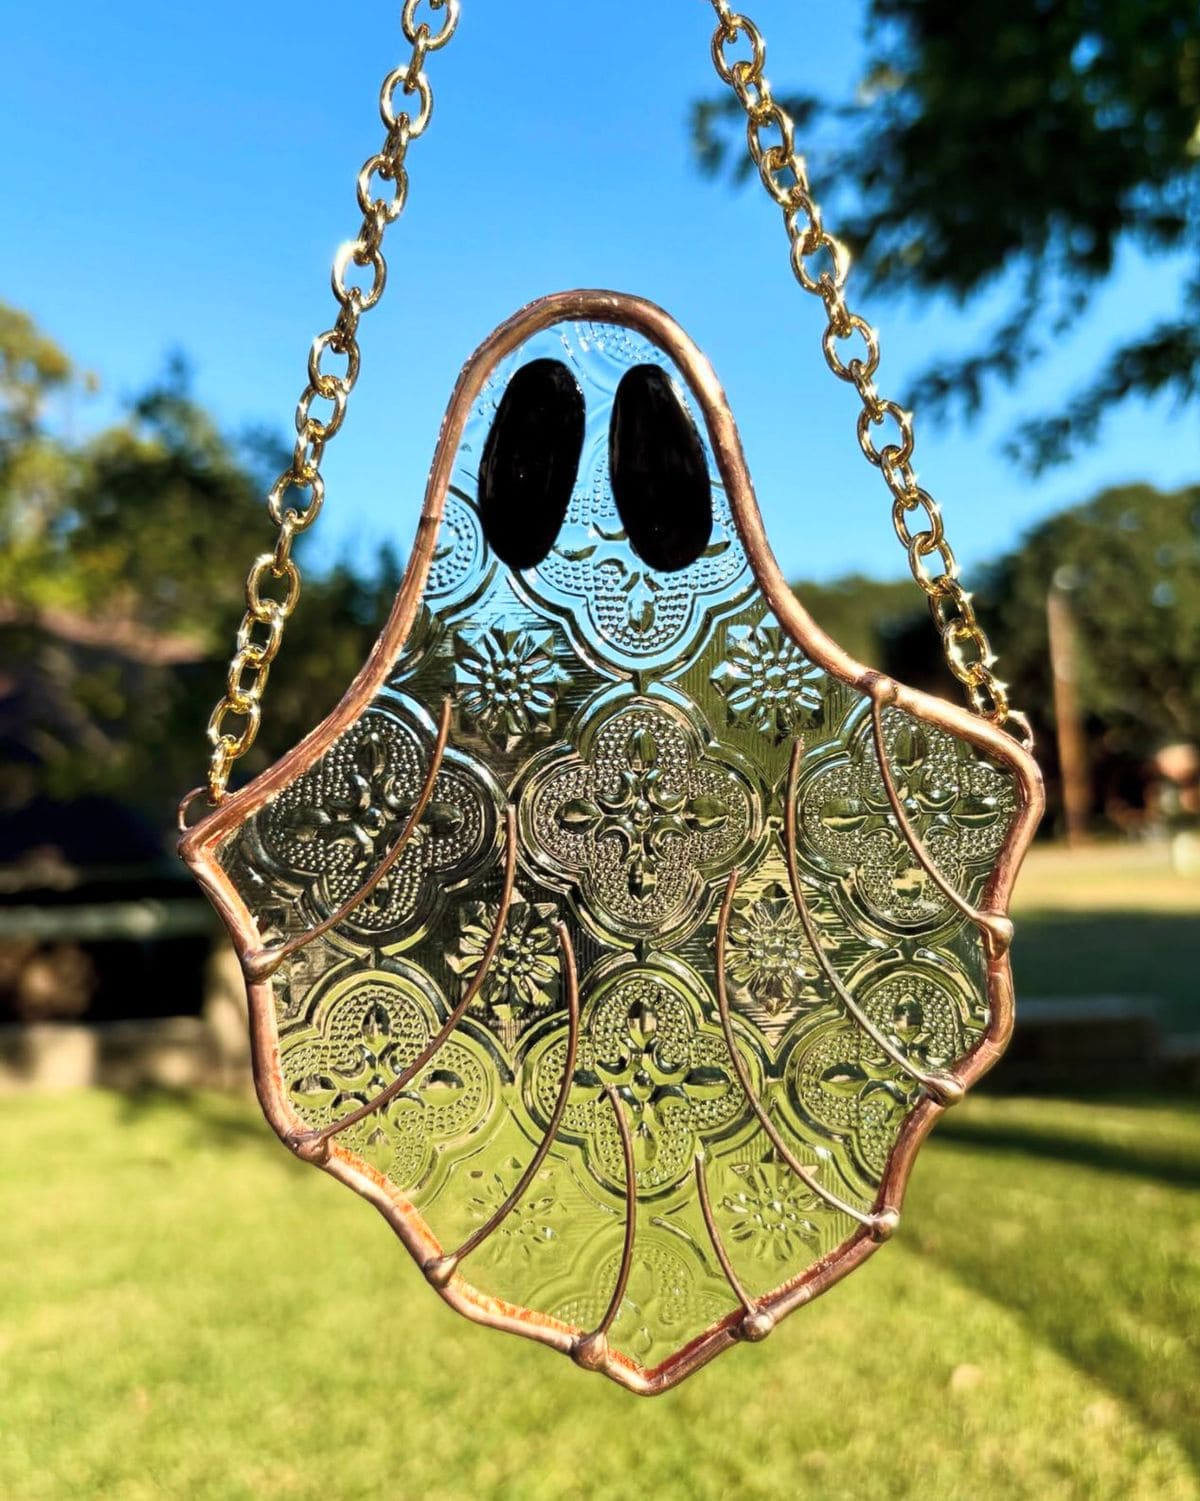
This ghost brings elegance to the spooky season. Crafted from embossed clear glass with intricate floral and geometric patterns, it catches sunlight like a jewel, scattering delicate textures across the room.
Also, the copper foil edges give it a warm, handcrafted feel, while the oval black eyes keep it playful and unmistakably ghostly.
Hanging from a gold chain, it sways gently, glimmering with every shift in light. It’s a perfect mix of vintage charm and Halloween spirit.
Materials Needed
- Embossed clear glass sheet (approx. 5×7 inches)
- Black stained glass or glass paint for eyes
- Copper foil tape (7/32 inch)
- Flux and solder
- Gold chain and small jump rings
- Glass cutter and running pliers
- Grinder
- Pattern template
Step-by-step Guide
Step 1: Trace your ghost pattern onto the embossed glass and cut it carefully with a glass cutter, following the curves slowly to avoid chipping. You should break away excess glass with running pliers and smooth sharp edges with a grinder.
Step 2: Apply copper foil tape around all edges of the cut glass, pressing it evenly and smoothing it for a tight fit.
Step 3: Solder along the foiled edges, building a neat, rounded bead of solder for a polished frame. Then attach a small jump ring at the top for hanging before the solder cools.
Step 4: Create the eyes with small black glass pieces soldered in place or with durable glass paint.
Step 5: Connect the gold chain to the top jump ring. Now you can hang in a sunny spot to enjoy its sparkling textures and ghostly charm.
