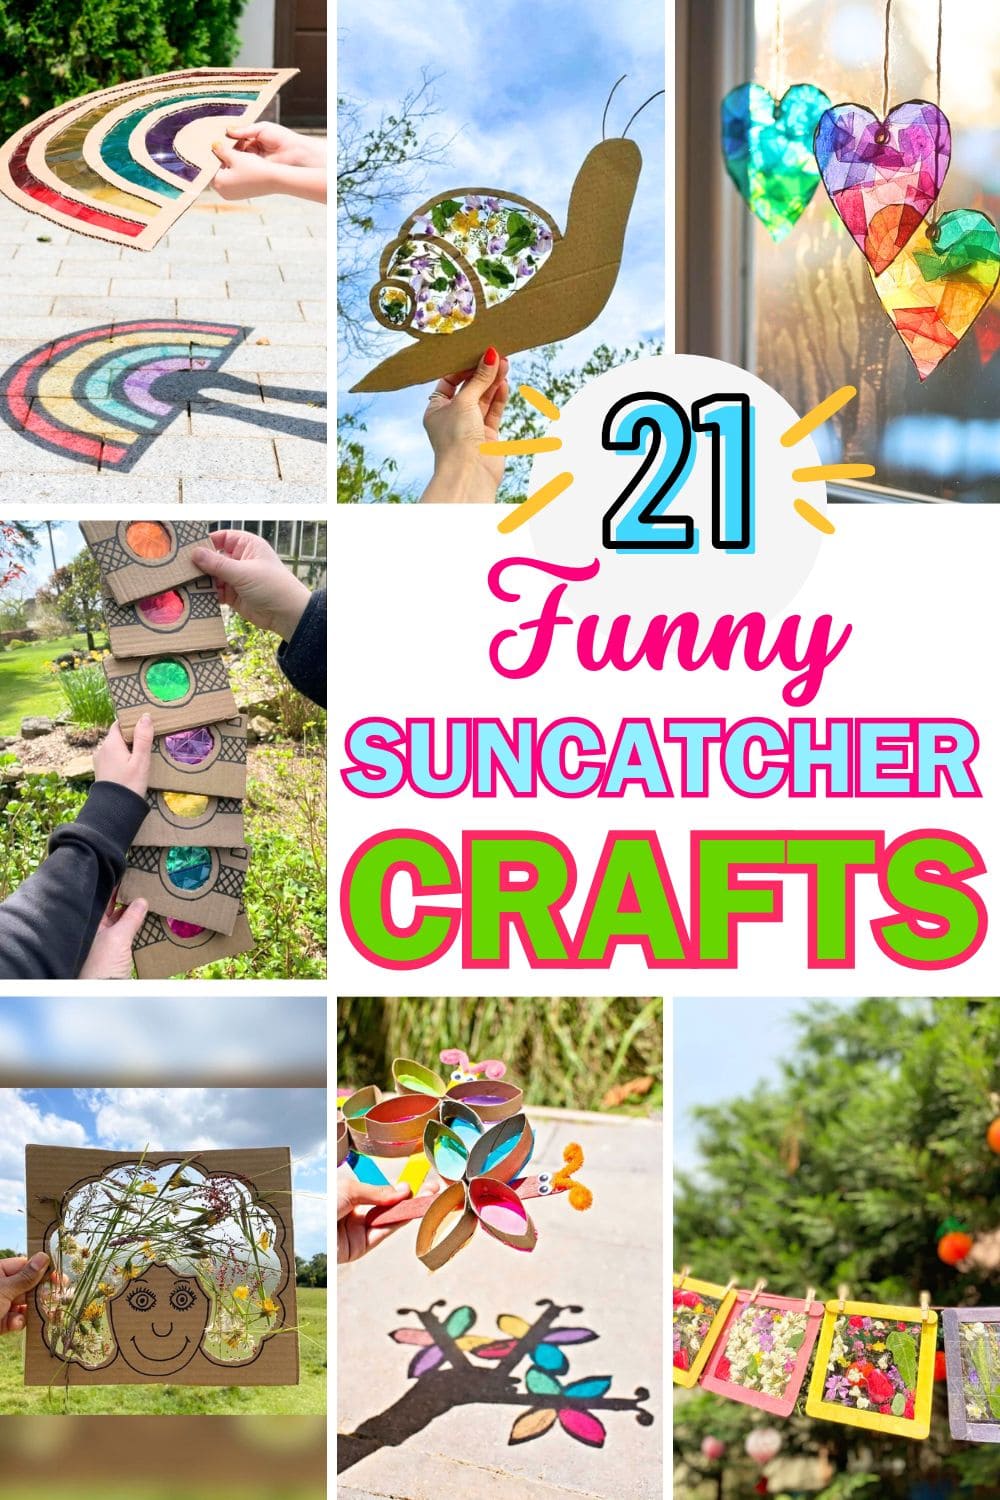
Have you ever seen the pure joy on a child’s face when they watch colorful light dance across the walls? Suncatchers bring that magical experience to life, turning sunlight into a dazzling display of colors.
Whether it’s a simple craft using tissue paper or a creative masterpiece with beads and recycled materials, these DIY projects keep little hands busy while sparking their imagination.
The best part? Once they’re done crafting, they get to play, watch, and admire how their suncatchers transform sunlight into shimmering rainbows of color!
#1. Ethereal Bunny Suncatcher
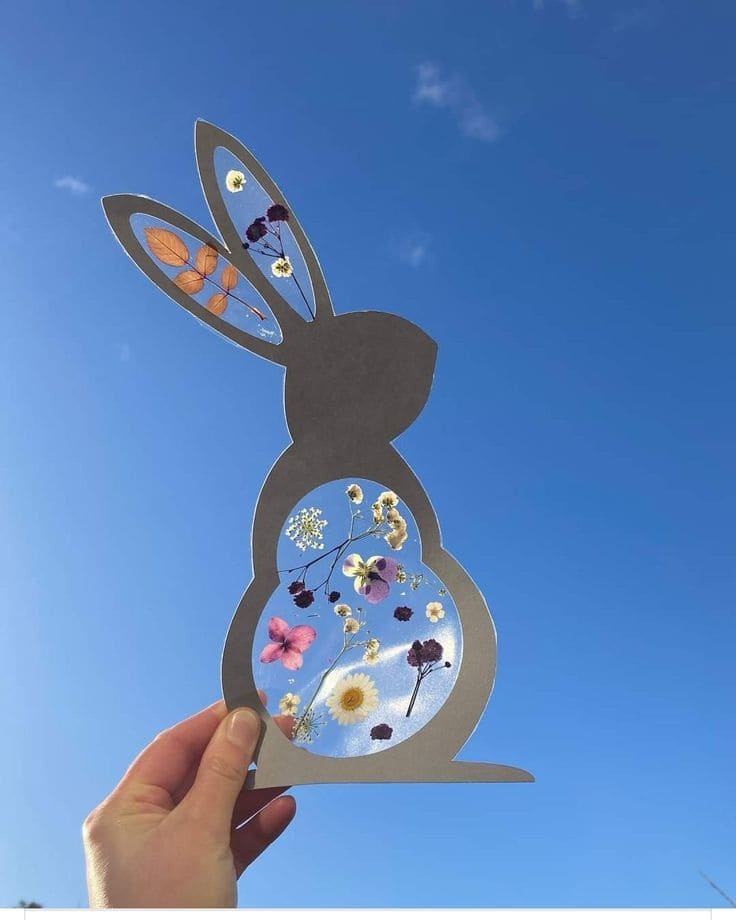
For a delightful spring-inspired craft that brings sunlight to life, this DIY bunny suncatcher is a must-try!
With delicate pressed flowers and transparent sections that let the sky shine through, this enchanting creation turns any window into a masterpiece.
Materials Needed:
- Cardstock (1 sheet, gray or any preferred color)
- Contact paper (2 sheets)
- Pressed flowers and leaves (assorted)
- Scissors
- Pencil
- Bunny template (printed or hand-drawn)
Instructions:
- Use a pencil to trace a bunny silhouette onto cardstock. Carefully cut out the outline and create inner cutouts for transparent sections.
- Stick one sheet of contact paper behind the bunny cutout, ensuring the sticky side faces up.
- Arrange flowers and leaves creatively inside the transparent sections.
- Place the second sheet of contact paper over the design to sandwich the flowers. Press firmly to secure.
- Finally, cut any extra contact paper around the edges for a neat finish.
#2. Whimsical Natures Hairdo Flower Suncatcher
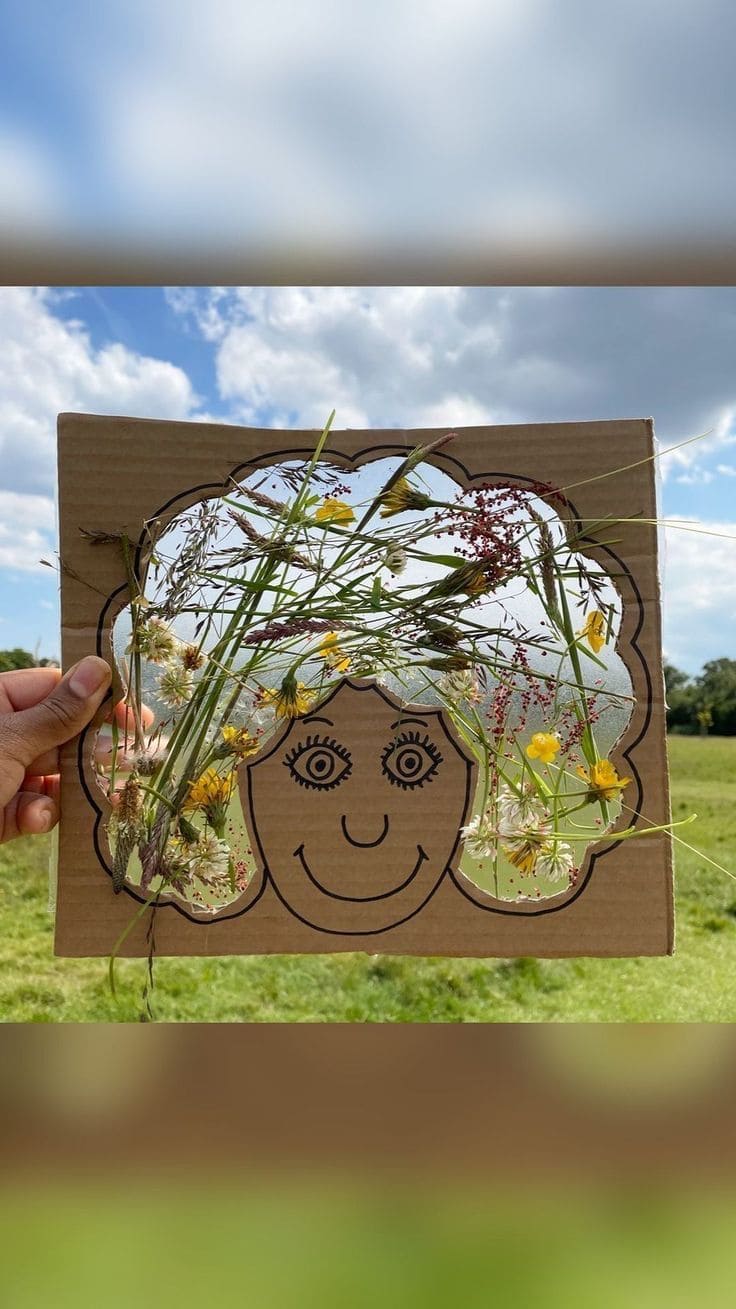
If you want a fun and creative way to combine nature and art, this adorable flower suncatcher craft is perfect! Featuring a happy face with wildflower-filled hair, it brings a delightful outdoor touch to any window.
Materials Needed:
- Cardboard (one sturdy piece)
- Clear contact paper (two sheets)
- Black marker
- Scissors or craft knife
- Fresh or dried flowers and grass
Instructions:
- Use a black marker to sketch a cheerful face on the cardboard. Keep it simple and fun!
- Carefully cut out the top section where the hair will be, creating an open space.
- Stick one sheet behind the cut-out section, sticky side up, to hold the flowers in place.
- Press wildflowers, grass, and small leaves onto the sticky surface to form a creative hairstyle.
- Cover the flowers with another sheet of contact paper to keep them secure.
- Finally, hold your suncatcher up to the light or tape it to a window to see the colors glow beautifully!
#3. Radiant Rainbow Cardboard Suncatcher Delight

Inspired by the magic of rainbows, this DIY suncatcher lets kids create a mesmerizing light display! With a simple mix of cardboard and colorful cellophane, you can turn an ordinary afternoon into a glowing, creative adventure.
Materials Needed:
- 1 large piece of sturdy cardboard
- 3-4 sheets of colored cellophane (red, orange, yellow, green, blue, purple)
- 1 pencil and ruler
- 1 craft knife or scissors
- 1 glue stick or tape
Instructions:
- On the cardboard, sketch a large rainbow with multiple arch sections. Leave space between each arch to add the colorful cellophane.
- Use a craft knife or scissors to carefully remove the inner sections of each rainbow stripe, leaving just the outer frame.
- Cut strips of colored cellophane to fit each arch, then glue or tape them to the back of the frame in the correct order.
- If using glue, allow it to dry completely before handling.
#4. Glowing Handprint and Snowflake Glitter Suncatchers
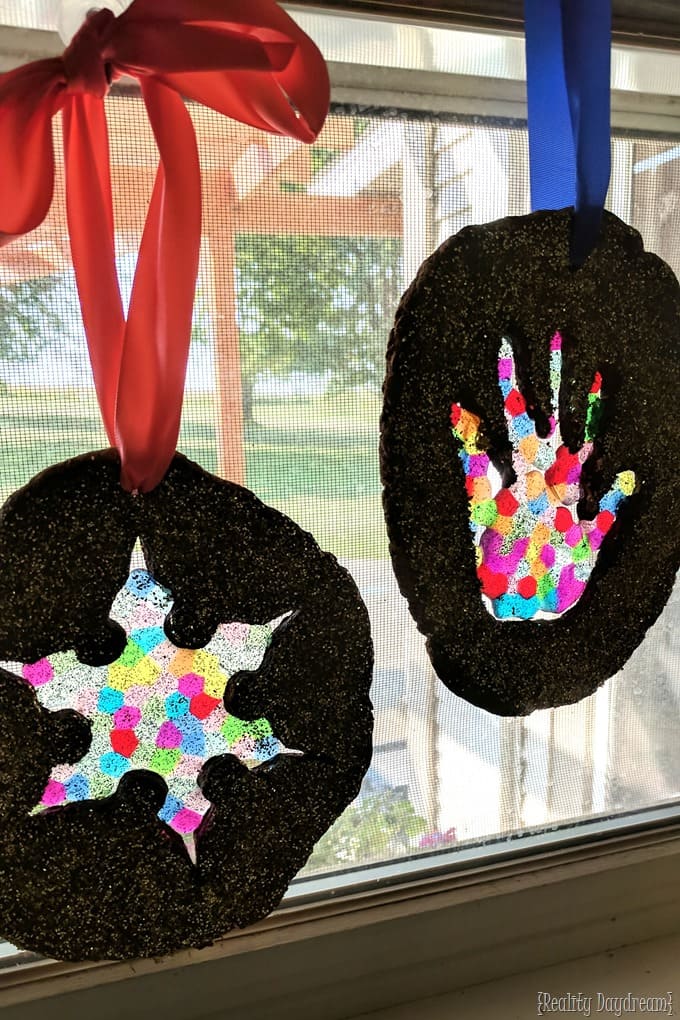
From a simple piece of cardboard to a dazzling window display, this DIY suncatcher craft combines vibrant colors, shimmering glitter, and a touch of personal creativity.
Kids will love seeing their handprints and snowflakes light up with beautiful rainbow hues!
Materials Needed:
- 1 large piece of cardboard
- 1 pencil
- 1 craft knife or scissors
- 1 bottle of black paint
- 1 tube of glitter
- 1 sheet of clear contact paper
- Multiple colors of tissue paper
- 1 hole punch and ribbon
Instructions:
- On the cardboard, draw a handprint and a snowflake shape (or any shape your child loves).
- Carefully use scissors or a craft knife to remove the inner portion, leaving a hollow frame.
- Cover the entire cardboard with black paint and sprinkle glitter while it’s still wet. Let it dry completely.
- Cut a piece of clear contact paper slightly larger than the cut-out shapes and stick it to the back of the cardboard.
- Tear or cut tissue paper into small pieces and press them onto the sticky side of the contact paper, filling the cut-out areas with colorful designs.
- Ultimately, place another sheet of contact paper over the tissue to secure it. Punch a hole at the top, thread a ribbon through, and hang it in a sunny window to watch the magic happen!
#5. Double Heart Flower Suncatcher
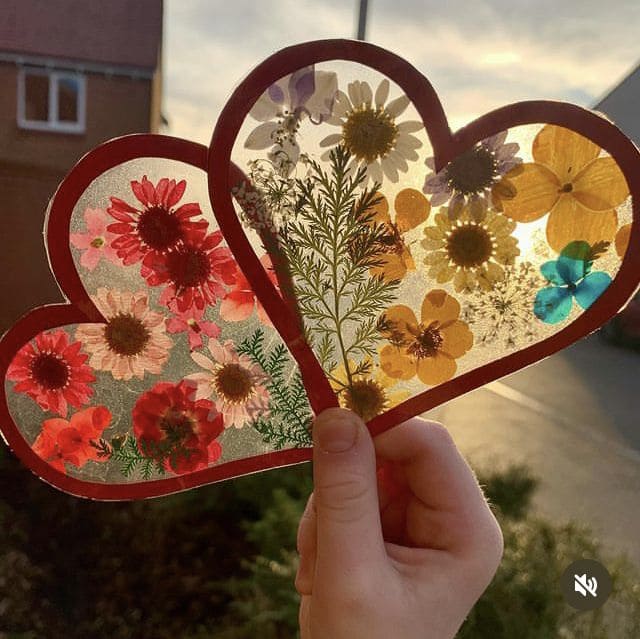
Covered in glowing sunlight, this heart-shaped flower suncatcher brings a touch of magic to any window. With vibrant pressed flowers and a striking double-heart design, it beautifully captures nature’s charm.
Materials Needed:
- Cardstock (1 sheet, red or any preferred color)
- Clear contact paper (2 sheets)
- Pressed flowers and leaves (assorted colors)
- Scissors
- Pencil
- Heart template (printed or hand-drawn)
Instructions:
- Draw two overlapping hearts on cardstock and carefully cut out both the outline and inner sections to create a frame.
- Stick one sheet of contact paper behind the frame, ensuring the sticky side faces up.
- Next, arrange flowers and leaves within the heart shapes, mixing colors for a stunning effect.
- Place the second sheet of contact paper over the flowers to secure them in place. Press gently to avoid wrinkles.
- Cut off any excess contact paper around the hearts for a clean look.
#6. Colorful Dino Suncatchers
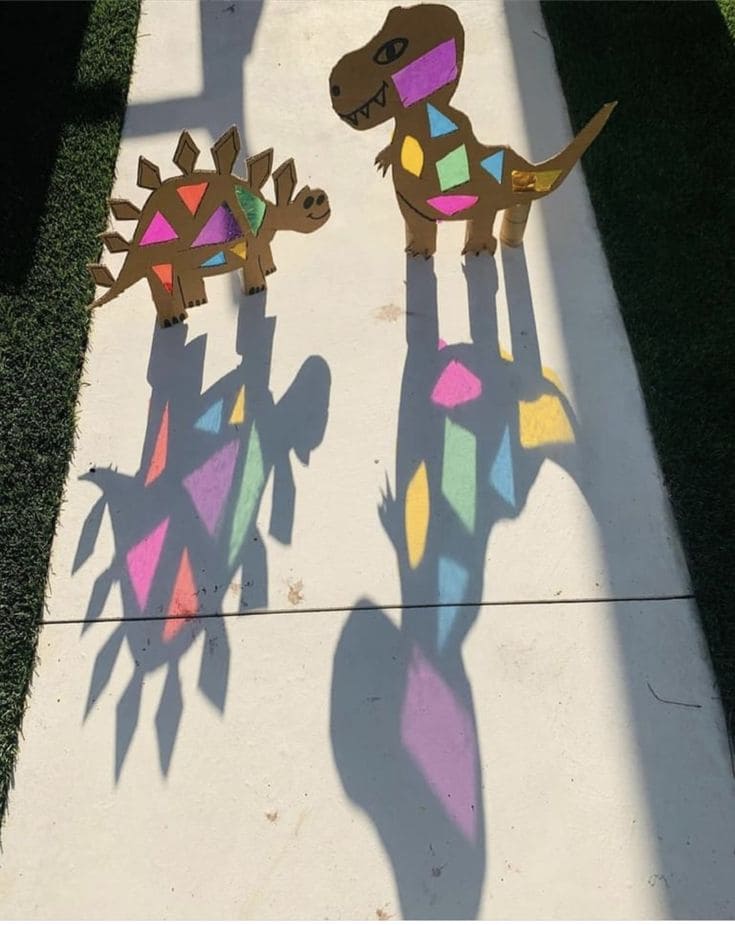
Every child loves dinosaurs, and this DIY craft makes them even more magical! These dazzling cardboard dinosaurs, filled with vibrant cellophane, transform sunlight into a rainbow of colors.
Materials Needed:
- 2 large pieces of cardboard
- Colorful cellophane sheets (various colors)
- Black marker
- Scissors or craft knife
- Glue or tape
- Wooden sticks or small tubes
Instructions:
- Firstly, sketch dinosaur shapes on the cardboard and carefully cut them out.
- Cut small geometric holes in the body to act as light-catching windows.
- Glue or tape different colored cellophane sheets behind the cut-out spaces.
- Use a black marker to add dino features and attach wooden sticks or tubes to the back to stand them up.
- Place them in direct sunlight and watch as their shadows burst into colorful patterns!
#7. Enchanting Rainbow Light Suncatcher Station
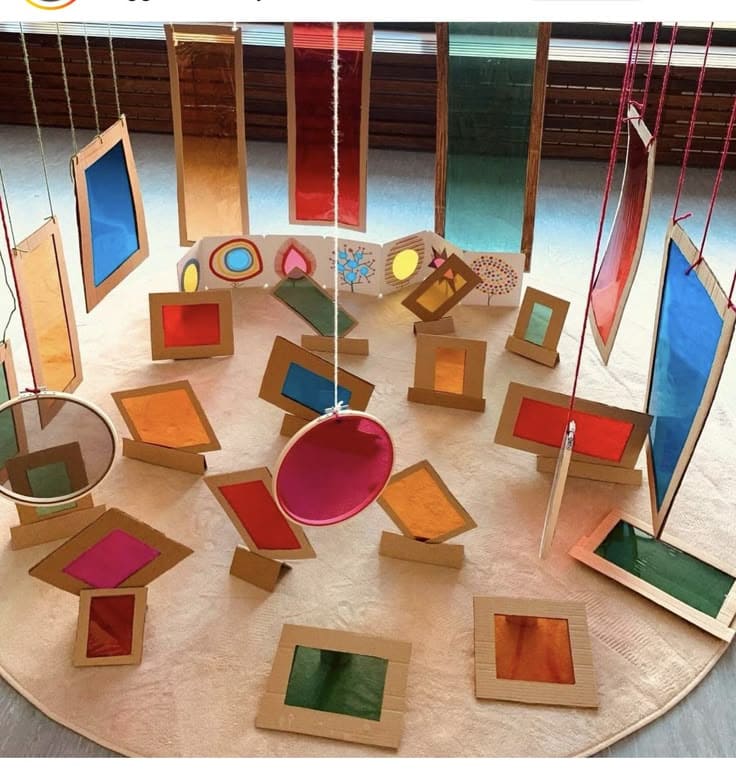
The magic of light and color comes alive with this stunning DIY suncatcher station!
A collection of vibrant, framed suncatchers transforms any space into a glowing wonderland, making it an interactive and mesmerizing way for kids to explore color and light.
Materials Needed:
- Cardboard sheets
- Colored cellophane or tissue paper
- Scissors or craft knife
- Glue or double-sided tape
- String or yarn
- Paper clips or clothespins
- Hole puncher
Instructions:
- Cut out rectangular or circular shapes from cardboard, then cut a smaller shape inside each to create a frame.
- Cut out pieces of colored cellophane or tissue paper slightly larger than the inner frame openings.
- Use glue or double-sided tape to secure the colored paper to the frames.
- If hanging the suncatchers, punch a hole at the top of each frame and thread string or yarn through it.
- Arrange some frames on stands for easy play and hang others near a light source to cast dazzling reflections.
#8. Enchanting Butterfly Bloom Suncatcher
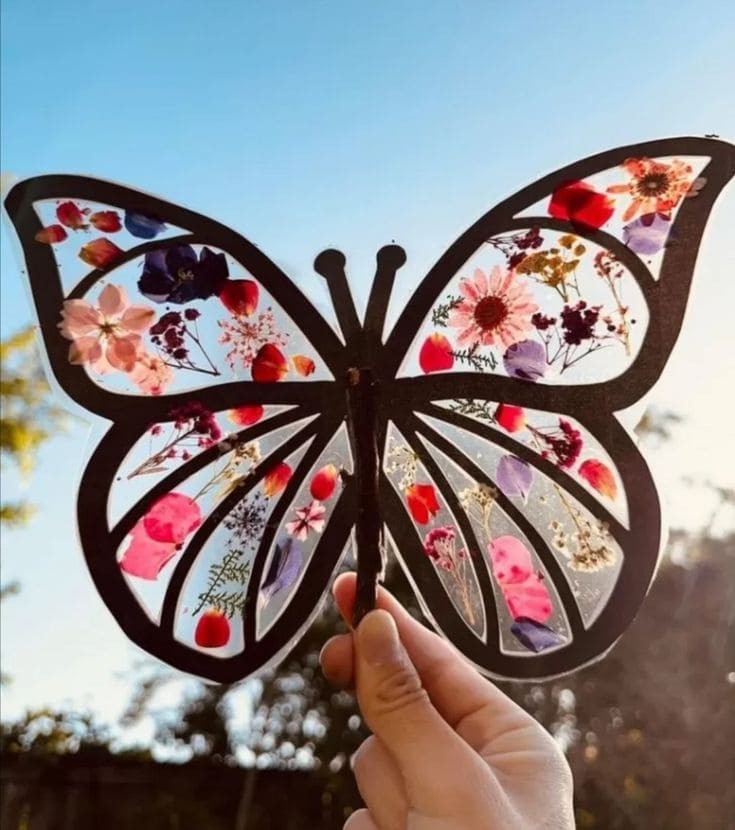
Your little artist will love crafting this magical butterfly suncatcher! With delicate floral wings and a nature-inspired frame, this craft captures sunlight beautifully, bringing a whimsical glow to any space.
Materials Needed:
- Black cardstock or sturdy paper
- Clear contact paper
- Pressed flowers and leaves (various colors for a vibrant look)
- Scissors or craft knife
- Stick or wooden dowel
- Glue or tape
Instructions:
- Draw or print a butterfly outline on black cardstock, then cut out the shape and inner wing sections to create an open frame.
- Stick a sheet of clear contact paper to the back of the butterfly frame, leaving the sticky side exposed.
- Gently press dried flowers and leaves onto the sticky surface, filling the wings with colorful petals and greenery.
- Place another sheet of contact paper over the flowers, pressing firmly to secure them in place.
- Attach a small stick or wooden dowel in the center as the butterfly’s body for a rustic touch.
#9. Colorful Cardboard Camera Suncatchers
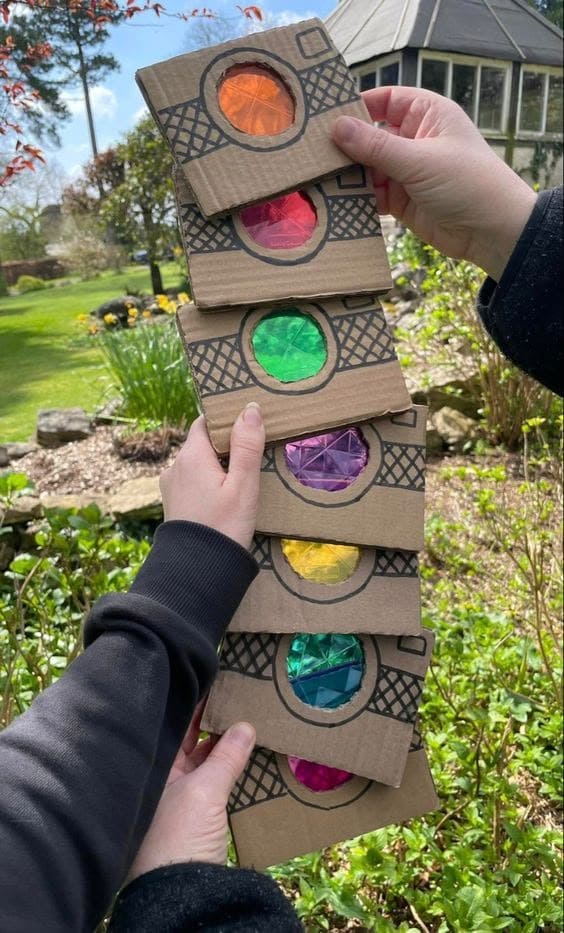
Just imagine holding a mini camera that turns the world into a rainbow! This DIY cardboard camera suncatcher is a creative and interactive craft that lets kids explore light and colors in the most playful way.
Materials Needed:
- Cardboard
- Colored cellophane or plastic wrap
- Scissors and craft knife
- Black marker
- Glue or tape
Instructions:
- Draw and cut out a simple camera shape from cardboard. Make sure to leave space for a circular lens.
- Cut a hole in the center where the camera lens would be.
- Tape or glue a piece of colored cellophane over the hole. Choose different colors for variety!
- Use a black marker to add fun details like buttons, textures, or even a pretend flash.
#10. Pressed Flower Window Suncatchers
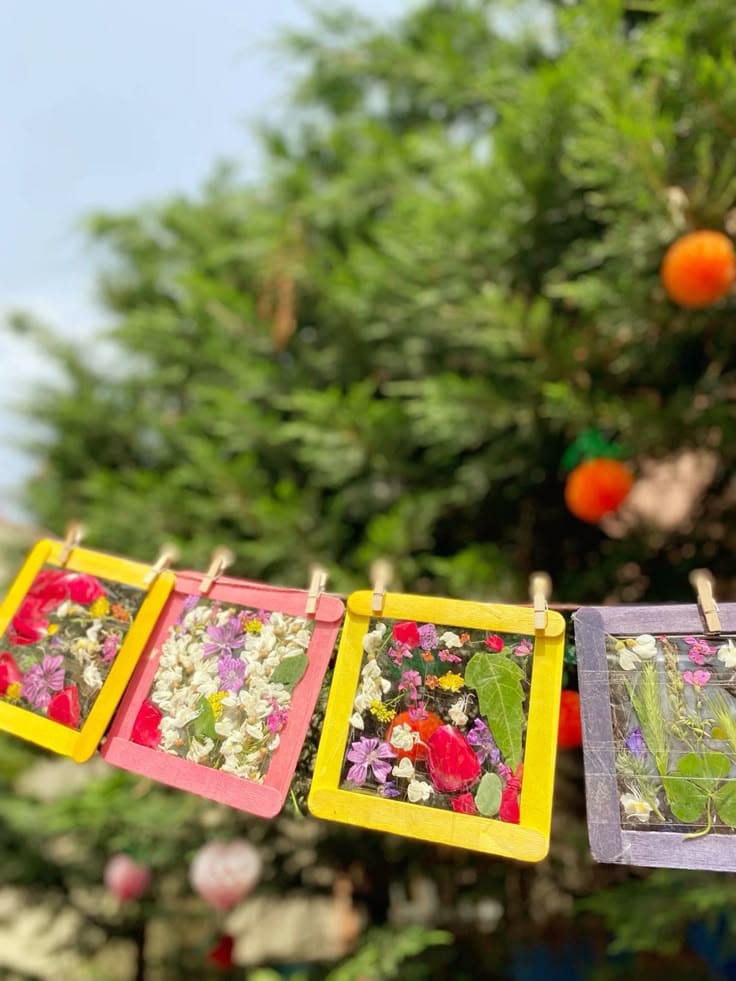
In just a few simple steps, you can turn nature’s beauty into a stunning, sunlit masterpiece! This DIY pressed flower suncatcher craft lets kids preserve colorful petals and leaves inside a framed display.
Materials Needed:
- 4 colored craft sticks
- Clear contact paper or laminating sheets
- Pressed flowers and leaves
- Glue or hot glue gun
- Scissors
- Mini clothespins and string
Instructions:
- Glue four craft sticks together in a square shape to form the frame. Let it dry completely.
- Cut a piece of clear contact paper slightly larger than the frame and stick it to the back, sticky side up.
- Let kids place pressed flowers and leaves onto the sticky surface, creating their own floral designs.
- Cover the flowers with another layer of contact paper, pressing gently to seal. Trim any excess edges.
- Finally, use mini clothespins to hang the suncatchers on a string near a sunny window.
#11. Whimsical Lovebird Suncatchers
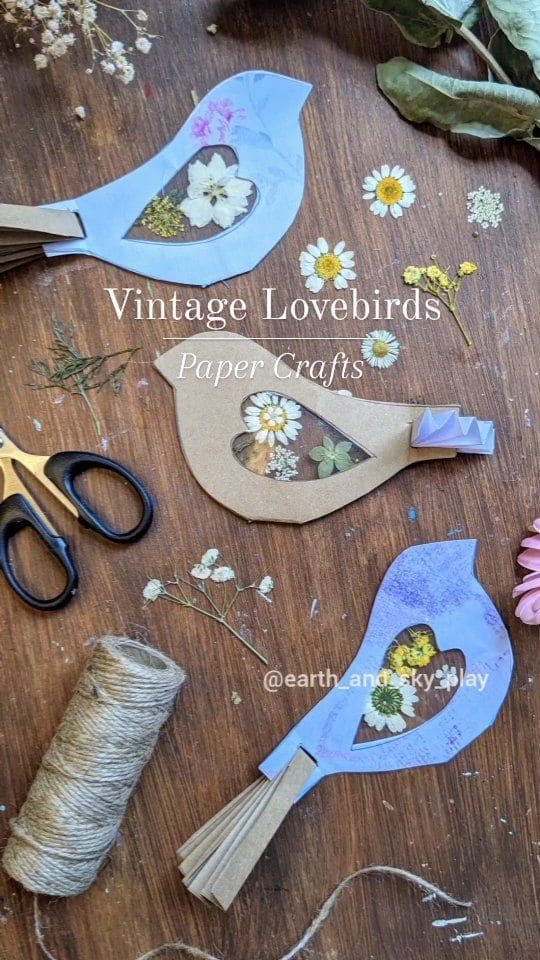
What about making a charming lovebird suncatcher that dances with sunlight? This DIY project blends vintage elegance with nature’s beauty, turning delicate pressed flowers into a stunning window decoration.
Materials Needed:
- Cardstock or kraft paper
- Clear contact paper
- Pressed flowers and leaves (various shapes and colors)
- Scissors or craft knife
- Glue or tape
- Brown paper strips
- String or twine
Instructions:
- Draw or print a lovebird outline on cardstock, then cut out the shape, including a small heart or teardrop-shaped window in the center of the body.
- Stick a piece of clear contact paper to the back of the bird’s cutout, ensuring the sticky side faces up.
- Carefully press dried flowers and leaves onto the exposed sticky area, creating a colorful and natural display.
- Place a second sheet of contact paper over the flowers, pressing firmly to secure them inside.
- Fold brown paper strips accordion-style and attach them to the bird’s bottom for a rustic, feathery tail.
- Use glue to secure any loose edges, punch a hole at the top, and tie a string for hanging.
#12. Magical Butterfly Suncatcher
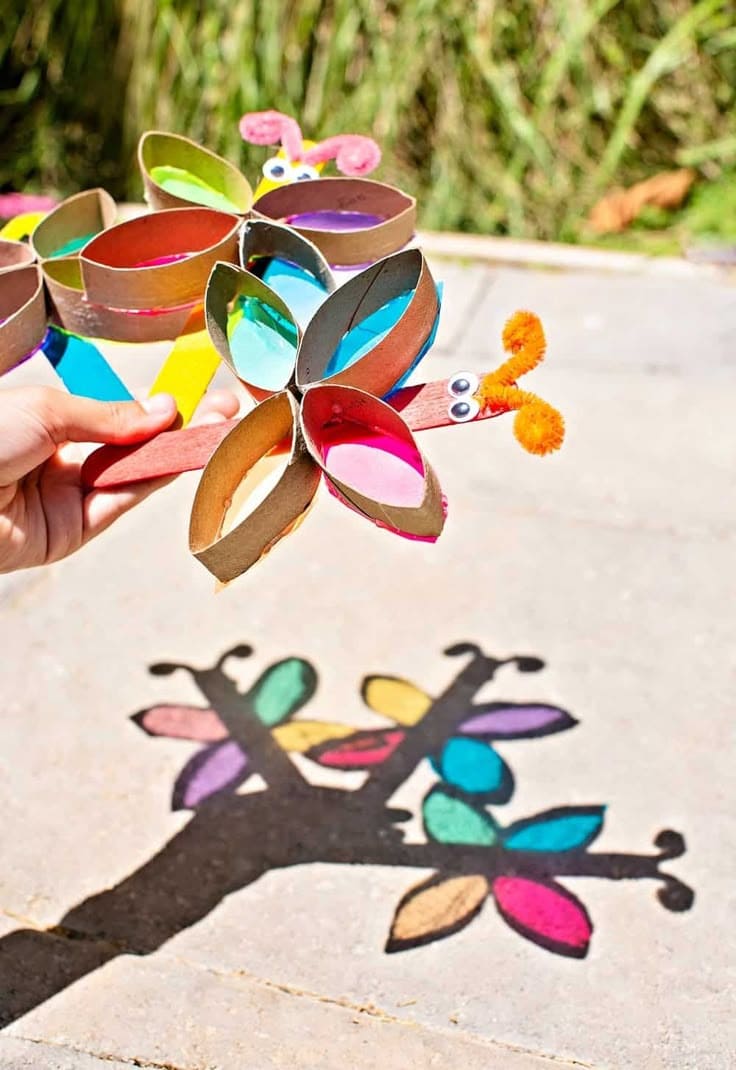
This vibrant DIY butterfly suncatcher creates a dazzling shadow effect when the sunlight hits it just right! With colorful wings and a playful antenna, this craft is perfect for kids who love to mix creativity with a little science.
Materials Needed:
- 3-4 empty toilet paper rolls
- Colorful cellophane or tissue paper
- Craft sticks
- Pipe cleaners
- Googly eyes
- Glue or Mod Podge
- Scissors and a hole punch
Instructions:
- Flatten toilet paper rolls slightly and cut them into 1-inch oval shapes. Arrange them in a butterfly wing pattern with four sections.
- Cut pieces of cellophane or tissue paper slightly larger than the ovals. Glue them inside the wing openings, trimming any excess.
- Attach a craft stick in the center of the wings with glue.
- Twist pipe cleaners into curly antennae and glue them on top. Stick on googly eyes for extra personality!
- Once everything is secure, let your butterfly rest for a few minutes.
#13. Vibrant Sea Turtle Suncatchers
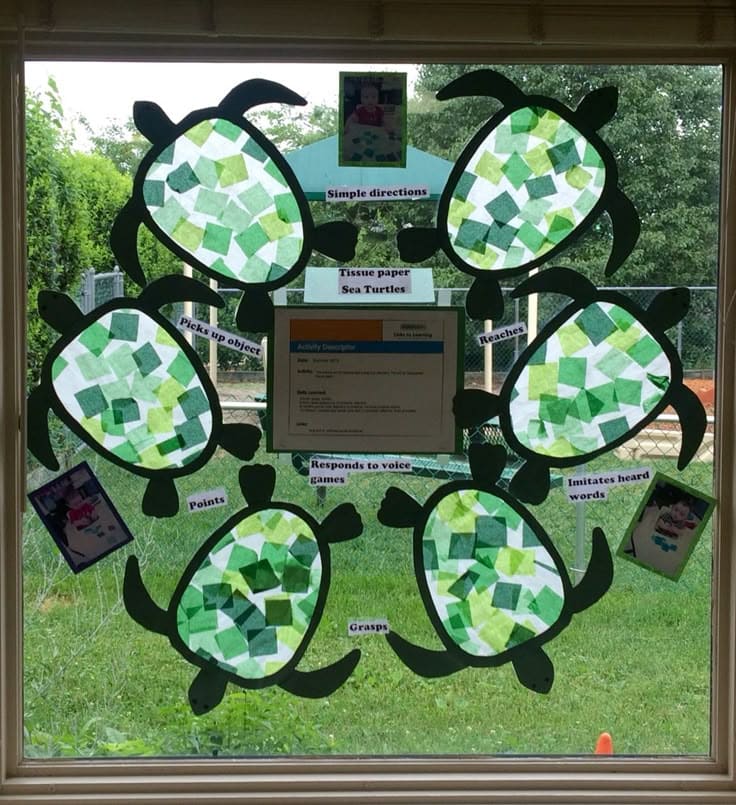
I believe this adorable tissue paper sea turtle suncatcher is the perfect craft for kids to explore their creativity while learning about ocean life.
With its vibrant shades of green, this project turns a simple window into a glowing underwater scene, bringing warmth and color into any space.
Materials Needed:
- Black cardstock
- Green and light green tissue paper
- Scissors
- Glue stick or clear tape
- Clear contact paper or laminating sheet
- Marker
Instructions:
- Draw and cut out a large sea turtle shape from black cardstock. Remove the center of the shell to create a hollow frame.
- Cut or tear different shades of green tissue paper into small squares.
- Lay a sheet of contact paper sticky side up, place the turtle frame on top, and fill the shell space with tissue paper pieces.
- Cover with another sheet of contact paper, ensuring all tissue pieces are secured. Trim the edges if necessary.
- Ultimately, use a marker to draw eyes or other details.
#14. Glowing Mason Lid Flower Suncatchers
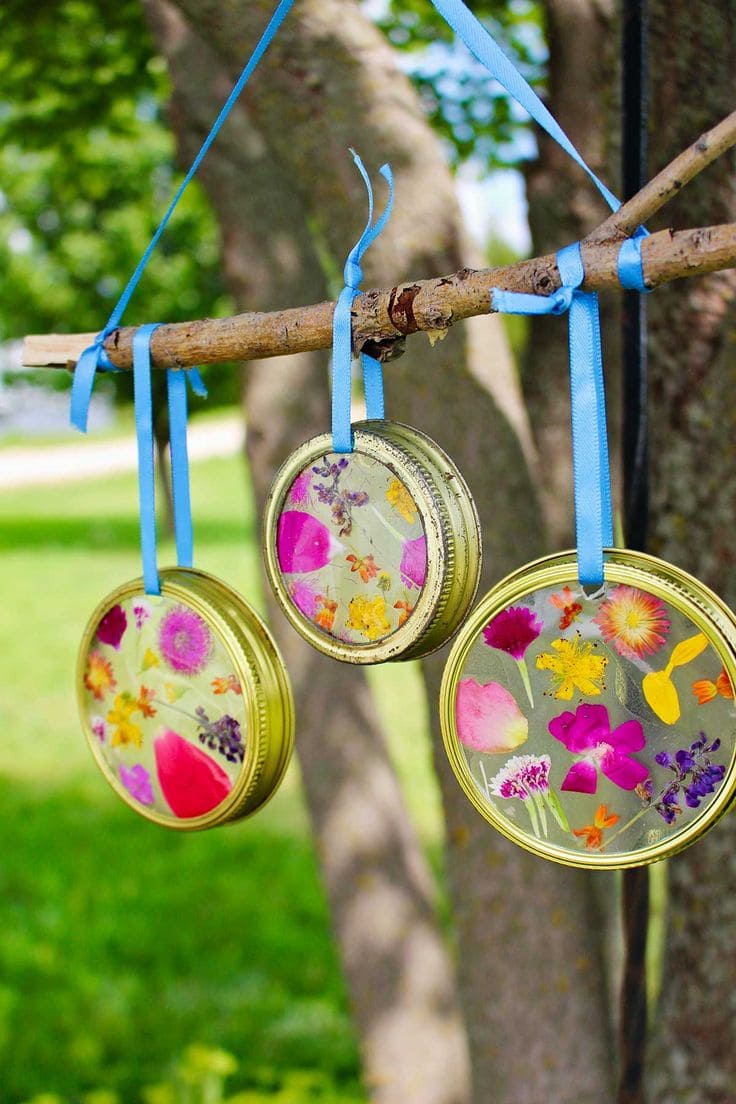
By transforming simple mason jar lids into dazzling floral suncatchers, you can create a stunning nature-inspired craft with kids.
These pressed flower decorations capture sunlight beautifully, making them a vibrant addition to any garden or window!
Materials Needed:
- 3 mason jar lids (outer rings only)
- 1 sheet of clear contact paper
- 1 handful of pressed flowers and leaves
- 1 pair of scissors
- 1 hole puncher
- 3 strands of ribbon
Instructions:
- Cut a piece of clear contact paper slightly larger than the mason jar lid opening.
- Arrange pressed flowers and leaves onto the sticky side of the contact paper.
- Cover with another piece of contact paper and smooth it out to remove air bubbles.
- Press the floral design into the mason jar lid ring, trimming any excess paper.
- Use a hole punch to create a small hole at the top, then thread a ribbon through and tie it securely.
#15. Magical Butterfly Wing Suncatchers for Kids
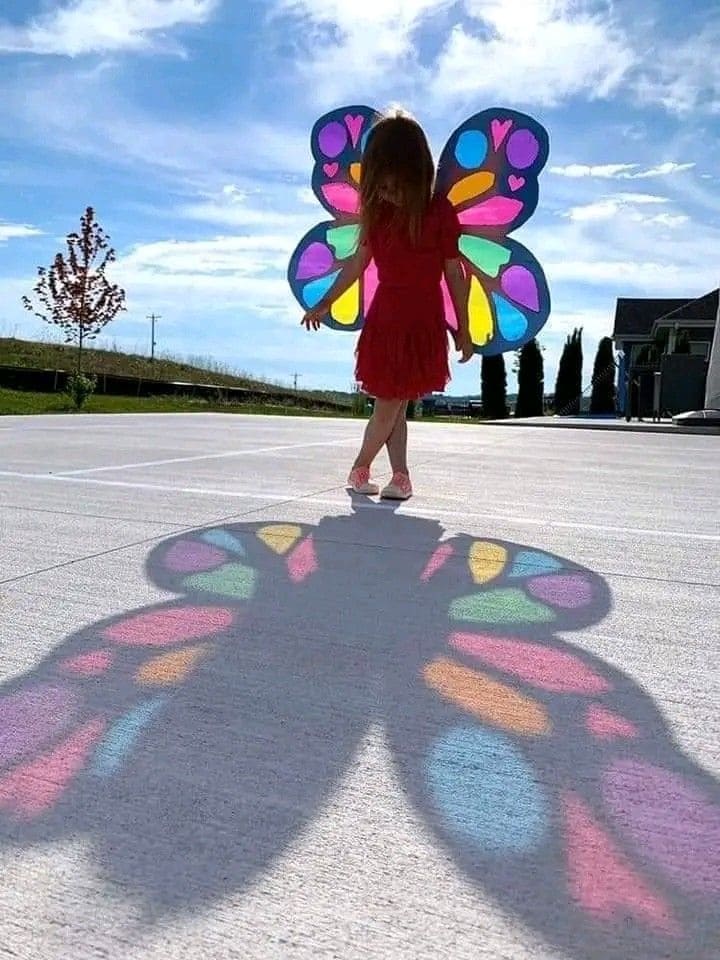
Like a burst of color dancing in the sunlight, these DIY butterfly wing suncatchers transform ordinary playtime into an enchanting experience.
The way the light filters through the vibrant, translucent wings creates a breathtaking shadow effect, making kids feel like real-life fairies or butterflies.
Materials Needed:
- Black poster board or sturdy cardstock
- Colored tissue paper or cellophane
- Scissors
- Clear contact paper or glue
- Elastic straps or ribbon
- Hole puncher
Instructions:
- Sketch large butterfly wings on black poster board and carefully cut them out. Cut out sections within the wings to create openings for the colored paper.
- Cut or tear different shades of tissue paper or cellophane into various shapes.
- Cover one side of the wing cutouts with contact paper or apply glue, then press the tissue or cellophane pieces onto the sticky surface.
- Once covered, add another layer of contact paper or a light coating of glue to secure everything. Trim any excess material.
- After that, use a hole puncher to make small holes near the top and bottom of each wing, then thread elastic or ribbon through to create wearable straps.
#16. Radiant Nature-Inspired Paper Plate Suncatcher
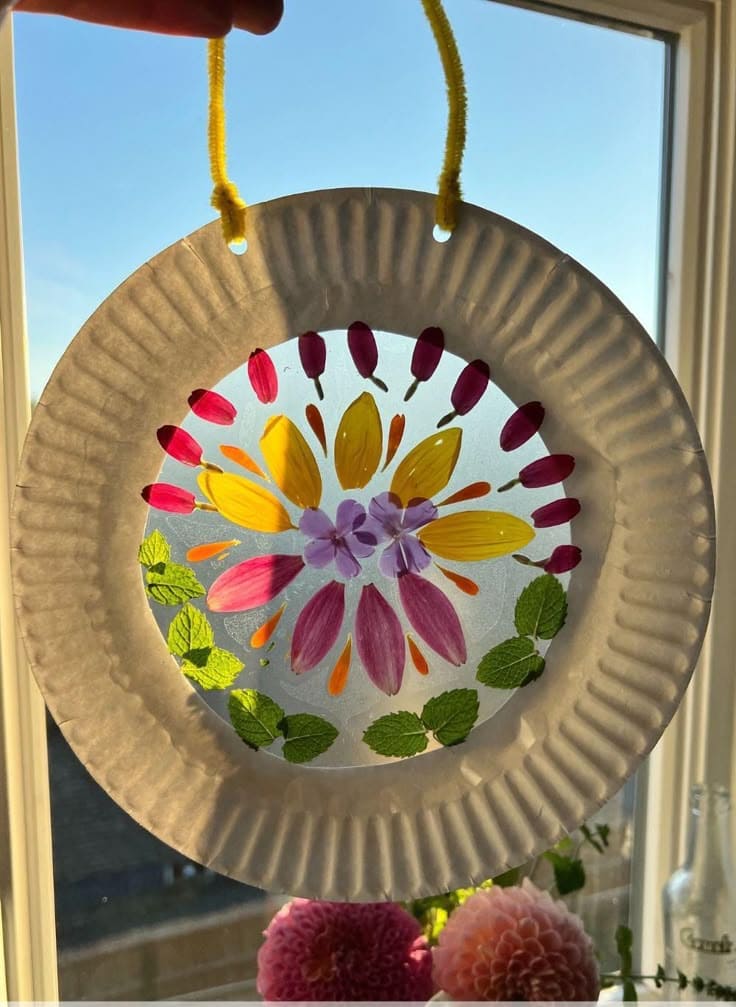
Instead of using regular paper crafts, why not create a dazzling suncatcher that blends art and nature?
This simple yet stunning DIY project lets kids explore colors, textures, and light while making a beautiful window display.
Materials Needed:
- 1 large paper plate
- 1 sheet of clear contact paper
- A variety of pressed flowers and leaves (bright and colorful)
- 1 hole puncher
- 1 pipe cleaner or ribbon
- 1 pair of scissors
Instructions:
- Cut out the center of the paper plate, leaving a sturdy outer rim.
- Cut a piece of contact paper slightly larger than the opening, then stick it to the back of the plate with the sticky side facing up.
- Let kids place pressed flowers and leaves on the sticky surface, creating a vibrant, nature-inspired design.
- Cover the flowers with another sheet of contact paper, pressing firmly to secure.
- Then, use a hole puncher to make two holes at the top, then thread a pipe cleaner or ribbon through to hang.
#17. Blooming Window Frames Suncatchers
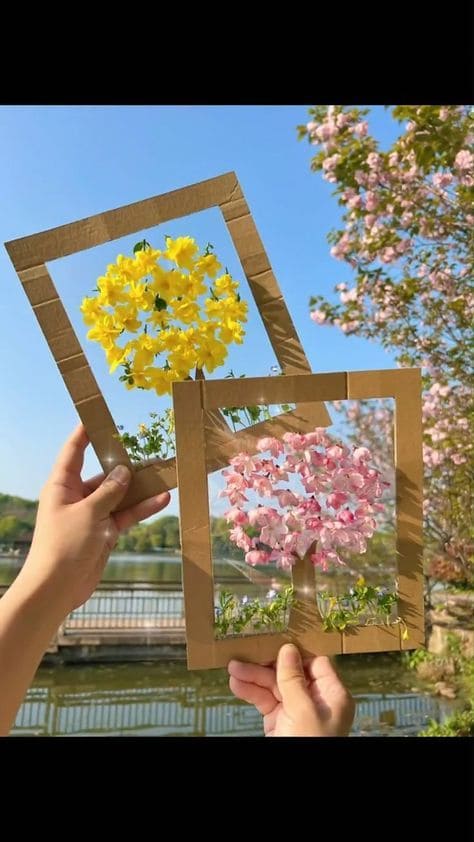
When sunlight shines through these DIY suncatchers, the vibrant flowers appear to float like delicate works of art.
This craft allows kids to frame real blossoms and create a nature-inspired masterpiece that looks breathtaking against the sky.
Materials Needed:
- Cardboard (cut into a square frame)
- Clear contact paper or laminating sheets
- Fresh flowers or petals
- Scissors
- Glue or tape
Instructions:
- Using sturdy cardboard, cut out a square or rectangle and remove the center, leaving a frame shape.
- Cut two pieces slightly larger than the frame and attach one to the back, sticky side up.
- Press flowers onto the sticky surface, creating a symmetrical or freeform design.
- Cover with the second piece of contact paper and press down to secure the flowers inside. Trim the edges if needed.
#18. Whimsical Nature Snail Suncatcher
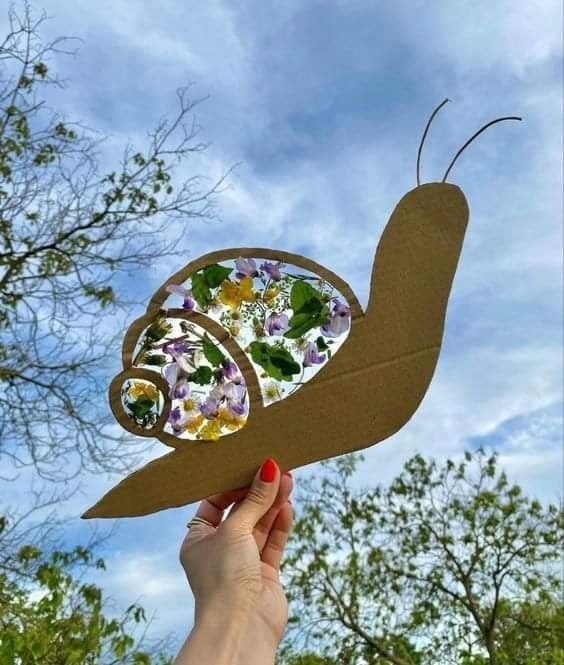
To bring nature’s charm indoors, this adorable DIY snail suncatcher captures sunlight through its floral-filled shell, creating a stunning stained-glass effect.
Materials Needed:
- 1 piece of cardboard
- Clear contact paper or laminating sheets
- Fresh or dried flowers and leaves
- Scissors and a craft knife
- Hole punch (optional)
- Thin wire or pipe cleaners
Instructions:
- Sketch a simple snail shape on cardboard, leaving an open shell space. Carefully cut it out using scissors or a craft knife.
- Attach a sheet of contact paper or laminating film over the shell’s empty space, sticky side up.
- Arrange flowers and leaves on the sticky surface to create a colorful, nature-inspired design.
- Cover with another sheet of contact paper, pressing gently to secure everything in place.
- Curl pipe cleaners or wire and glue them onto the snail’s head.
#19. Heart Suncatcher Magic
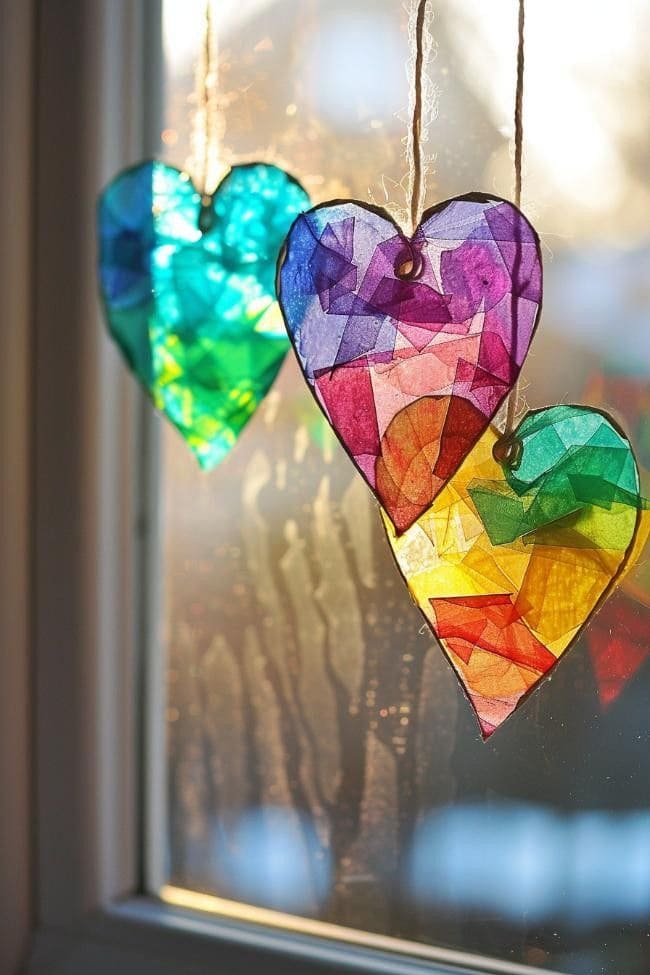
With sunlight streaming through, these vibrant heart suncatchers bring a warm, colorful glow to any window.
A simple yet stunning craft, this project lets kids explore colors and textures while making heartfelt decorations that shine beautifully in the light.
Materials Needed:
- Wax paper
- Tissue paper in various colors
- Glue stick or Mod Podge
- Scissors
- Hole puncher
- String or twine
Instructions:
- Cut out a heart shape from wax paper. You can fold the paper in half before cutting to create a symmetrical heart.
- Tear or cut tissue paper into small pieces and arrange them on the heart. Overlapping pieces create a beautiful stained-glass effect.
- Apply a thin layer of glue over the tissue paper to hold it in place. You can also sandwich the design between two pieces of wax paper and gently press them together.
- Allow the suncatcher to dry completely before handling.
- Finally, use a hole punch to make a hole at the top, then thread a piece of string through it.
#20. Springtime Radiant Daffodil Suncatcher
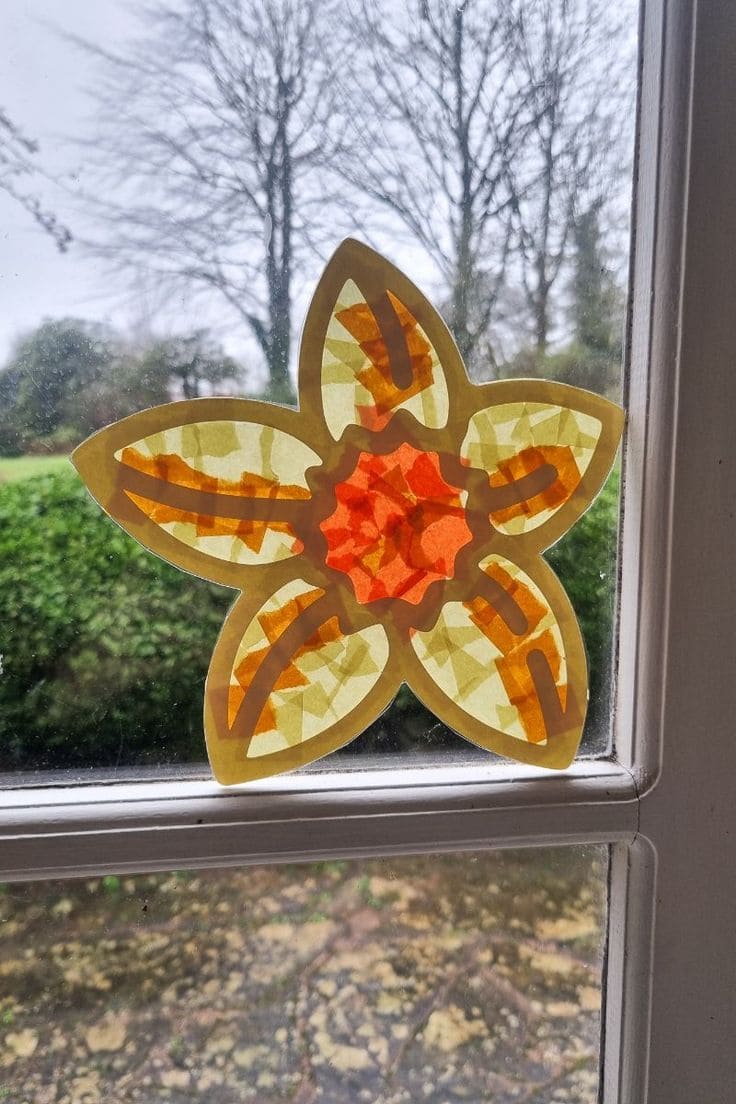
How about bringing a burst of sunshine to your windows with this stunning daffodil suncatcher?
This vibrant craft uses bright yellow and orange tissue paper to create a glowing effect when the sunlight streams through, making it a perfect spring-themed activity for kids.
Materials Needed:
- 1 sheet of yellow cardstock
- Orange and yellow tissue paper
- Black marker
- Scissors
- Glue stick or double-sided tape
- Clear contact paper or laminating sheet
Instructions:
- Draw a large daffodil outline on the yellow cardstock and cut out the center petals to create the frame.
- Tear or cut the orange and yellow tissue paper into small pieces.
- Lay a sheet of contact paper sticky side up, place the daffodil frame on top, and fill the open spaces with tissue paper pieces.
- Cover the flower with another sheet of contact paper to secure everything in place, then trim any excess.
- Use a black marker to outline or add petal details for a more defined look.
#21. Shimmering Star Suncatcher Craft
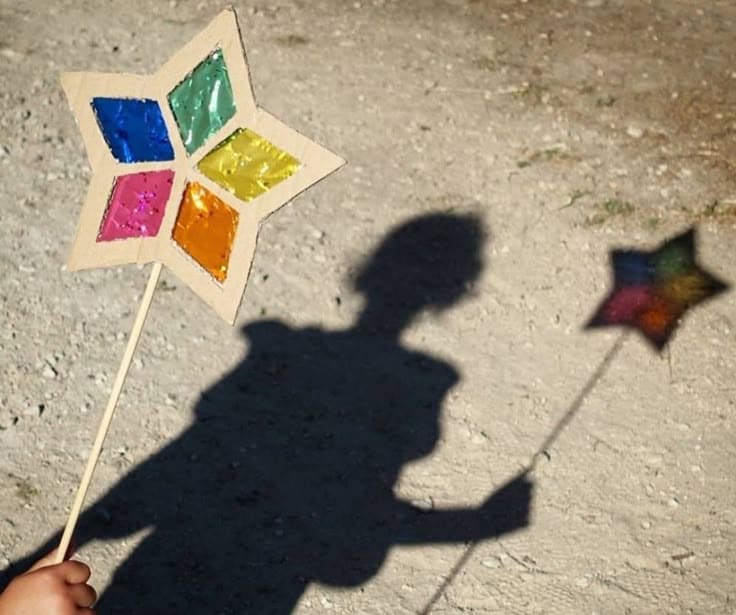
Kids will love crafting this dazzling star wand that catches the sunlight and casts colorful shadows. It’s a fun way to blend creativity with a little bit of magic, making playtime shine even brighter!
Materials Needed:
- Cardboard
- Colored cellophane or candy wrappers (various colors)
- Wooden dowel or sturdy stick
- Scissors
- Glue or tape
- Craft knife (optional)
Instructions:
- Draw and cut out a large star from sturdy cardboard. Then, cut out smaller sections inside each point to form “windows” for the cellophane.
- Cut pieces of colored cellophane or candy wrappers slightly larger than the openings and glue them behind the cutouts. This will create the stained-glass effect.
- Secure a wooden dowel or stick to the bottom of the star using strong glue or tape. Let it dry completely.
- Trim any excess cellophane, reinforce weak spots with extra tape or glue, and your shimmering star wand is ready!
