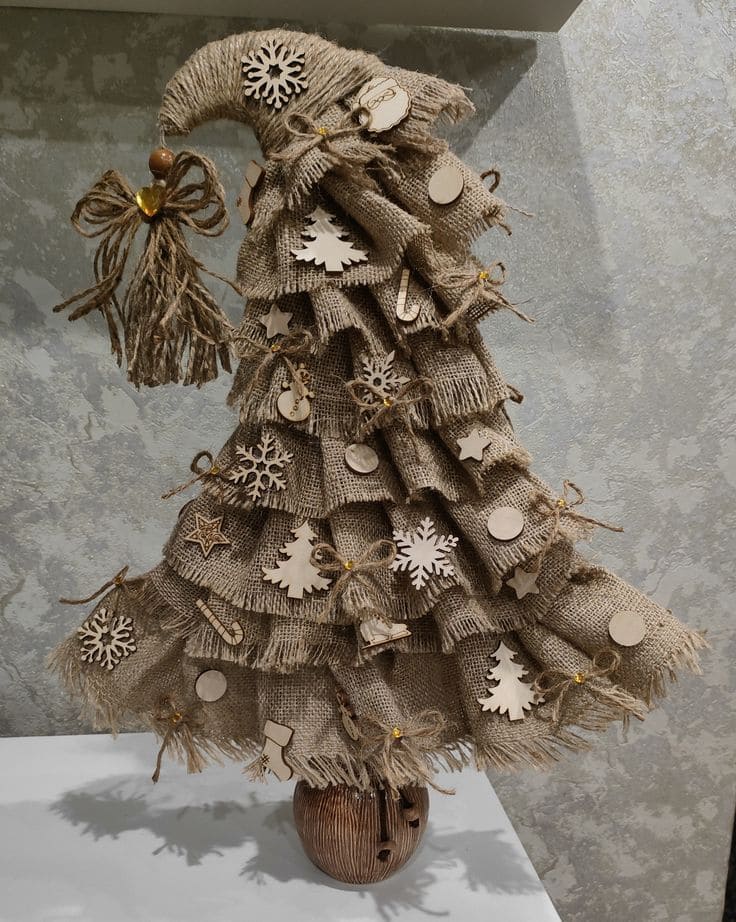
Materials
- Burlap fabric (1 yard, cut into 3-4 inch wide strips)
- Foam or cardboard cone base (about 18 inches tall)
- Hot glue gun and glue sticks
- 15 Small wooden ornaments or cutouts (stars, trees, snowflakes)
- Jute twine (2 yards)
- Decorative bead or charm for tree topper
- Wooden or round base (3-4 inches wide)
Instructions
- Start by cutting the burlap into long strips. Then pull a few threads from each edge to create a soft, frayed look.
- Beginning at the bottom of your cone, glue the first burlap strip in a loose, ruffled fold around the base. You continue layering upward, slightly overlapping each row to form a tiered, textured effect.
- Once the cone is fully covered, gather the top of the burlap and twist it slightly to form a whimsical, floppy tip. Secure it with twine and a dab of glue.
- Decorate your tree with small wooden shapes, gluing them evenly across the layers. You can also tie tiny twine bows and add them between ornaments for extra charm.
- Attach your tree to a wooden base using hot glue. Top it off with a small bead, ribbon bow, or rustic bell.
Notes
For a cozier winter feel, you can also lightly brush the edges with white paint or sprinkle a bit of faux snow on the burlap.