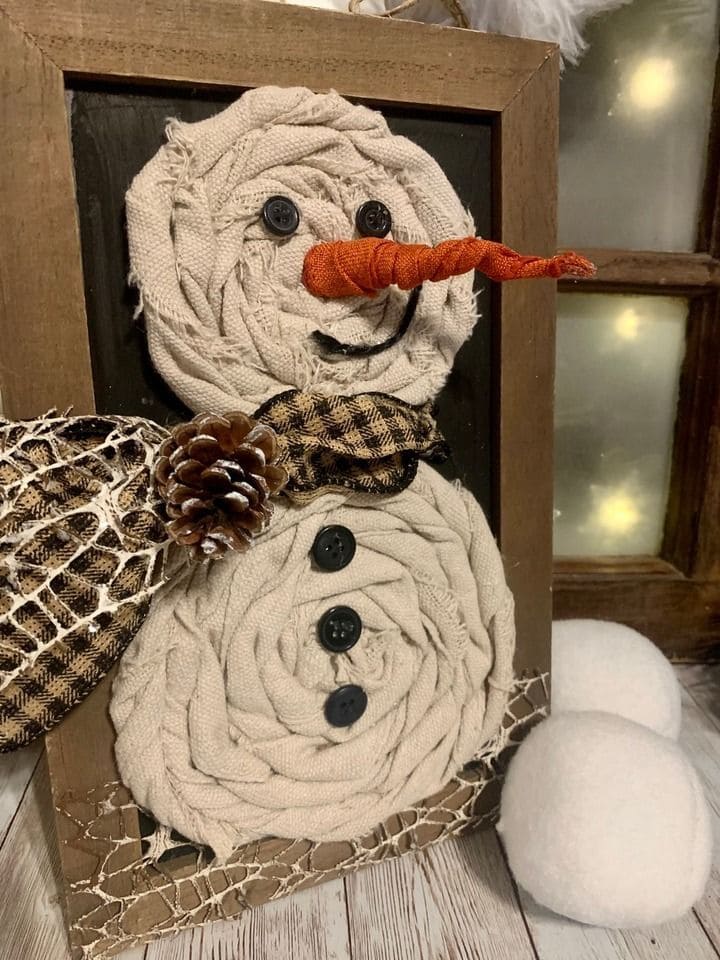
Cut your fabric into long strips. Twist and roll each strip into a spiral, gluing as you go to form two round rosettes including one for the snowman’s head and one for his body. The head should be about 5 inches wide, and the body about 7 inches.
Glue the two fabric rosettes vertically onto the wooden frame to create the snowman’s shape.
Attach two black buttons for the eyes and three more for the body. Then use black paint or a marker to draw a small curved smile beneath the eyes.
Twist the orange fabric into a cone shape to form the carrot nose. Glue it securely to the snowman’s face.
Tie a short piece of plaid ribbon around the neck area for a scarf. You can add the pinecone and decorative mesh at one side for a cozy touch.
Finish by brushing a little white paint or fake snow on the pinecone for a frosty look, then place your framed snowman on display.