Materials
- Linen or Aida fabric (14 count, 8”×10”)
- Embroidery floss in 10-12 autumn shades (orange, white, brown, green, gold, gray, black, and red)
- Embroidery needle (size 24 or 26)
- Small scissors
- Fabric backing or interfacing
- Frame or display board (7”×9”)
- Decorative cord or tassel trim (about 18” length)
- Hot glue or craft adhesive
- Optional: light batting for a padded finish
Instructions
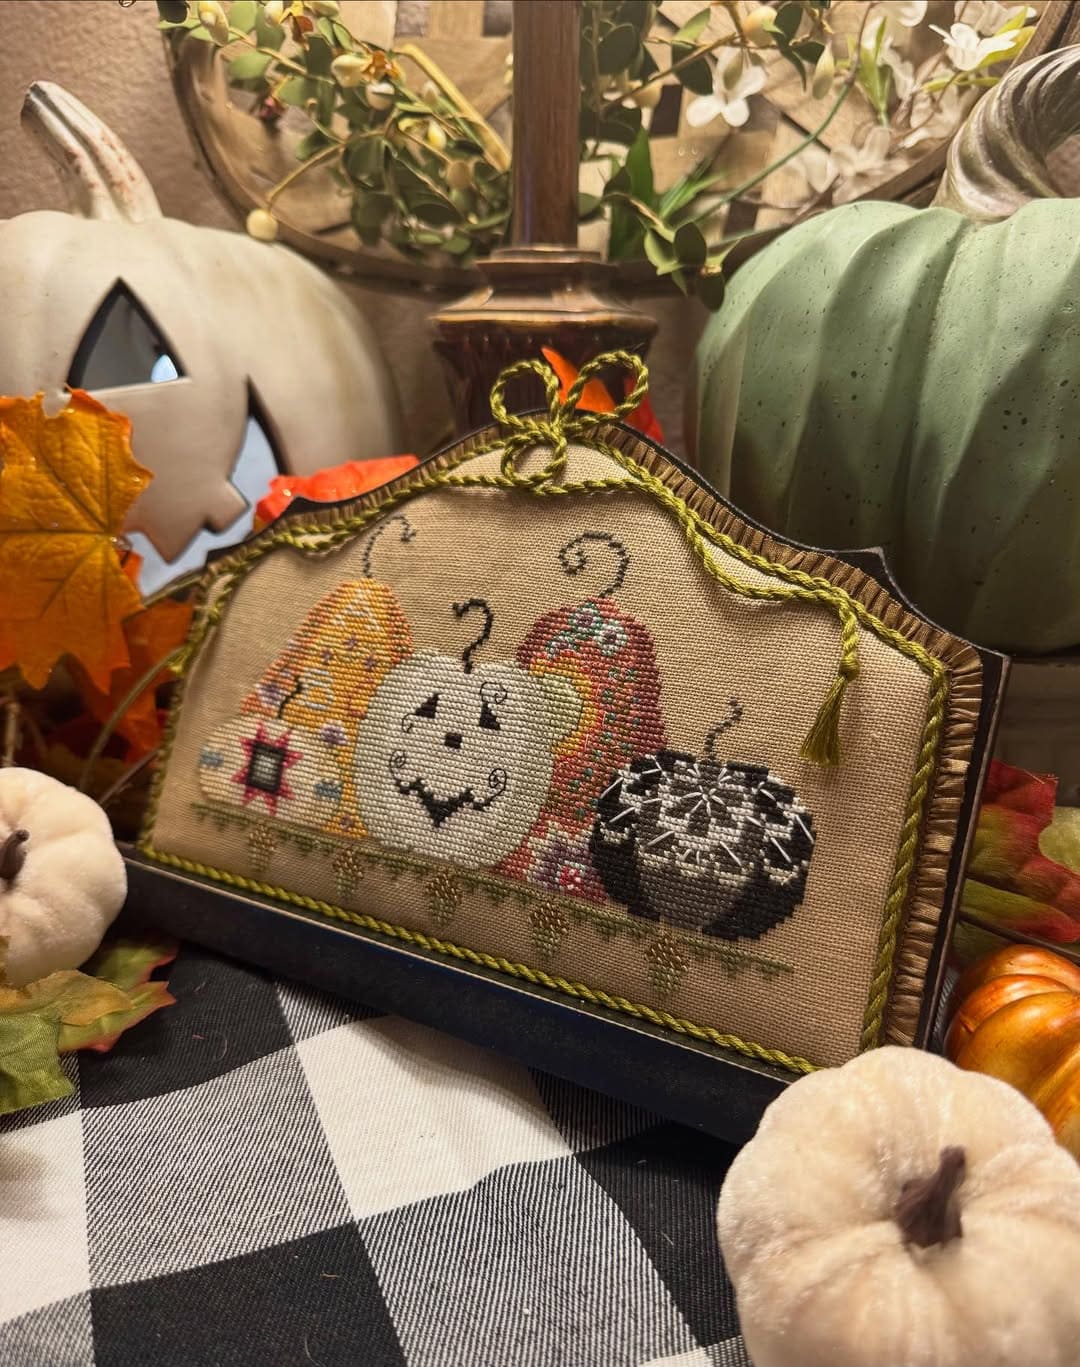
- Secure your fabric in a hoop and find the center of your pattern. Start stitching from the middle pumpkin, using warm oranges and yellows for a natural gradient effect.
- Add character with small details such as smiling faces, patchwork squares, or stripes. Then use contrasting shades like black and white for extra charm.
- Once the pumpkins are complete, outline stems and vines in soft green to connect the design and create a balanced flow.
- Gently iron the finished piece on the back side with a pressing cloth, then attach it to a backing fabric using light glue or double-sided fusible interfacing.
- Mount your stitched fabric on a shaped display board or frame. Add the decorative cord along the edge with hot glue, and tie a bow or tassel at the top for a refined finish.
Notes
This design looks especially beautiful under warm lighting, try placing it near candles or fairy lights to highlight the subtle shading and bring out the cozy glow of your autumn stitches.