Materials
- Linen or Aida fabric (14 count, 5”×7” per ornament)
- Embroidery floss in 8-10 shades (red, white, green, gray, gold, black, and brown)
- Embroidery needle (size 24 or 26)
- Small scissors
- Cross stitch pattern (Santa or woodland holiday scenes)
- Natural twigs (about ¼ inch thick, cut into 6” and 5” pieces)
- Hot glue or strong craft adhesive
- Small faux greenery, pinecones, or berries for decoration
- Twine or jute rope for hanging
Instructions
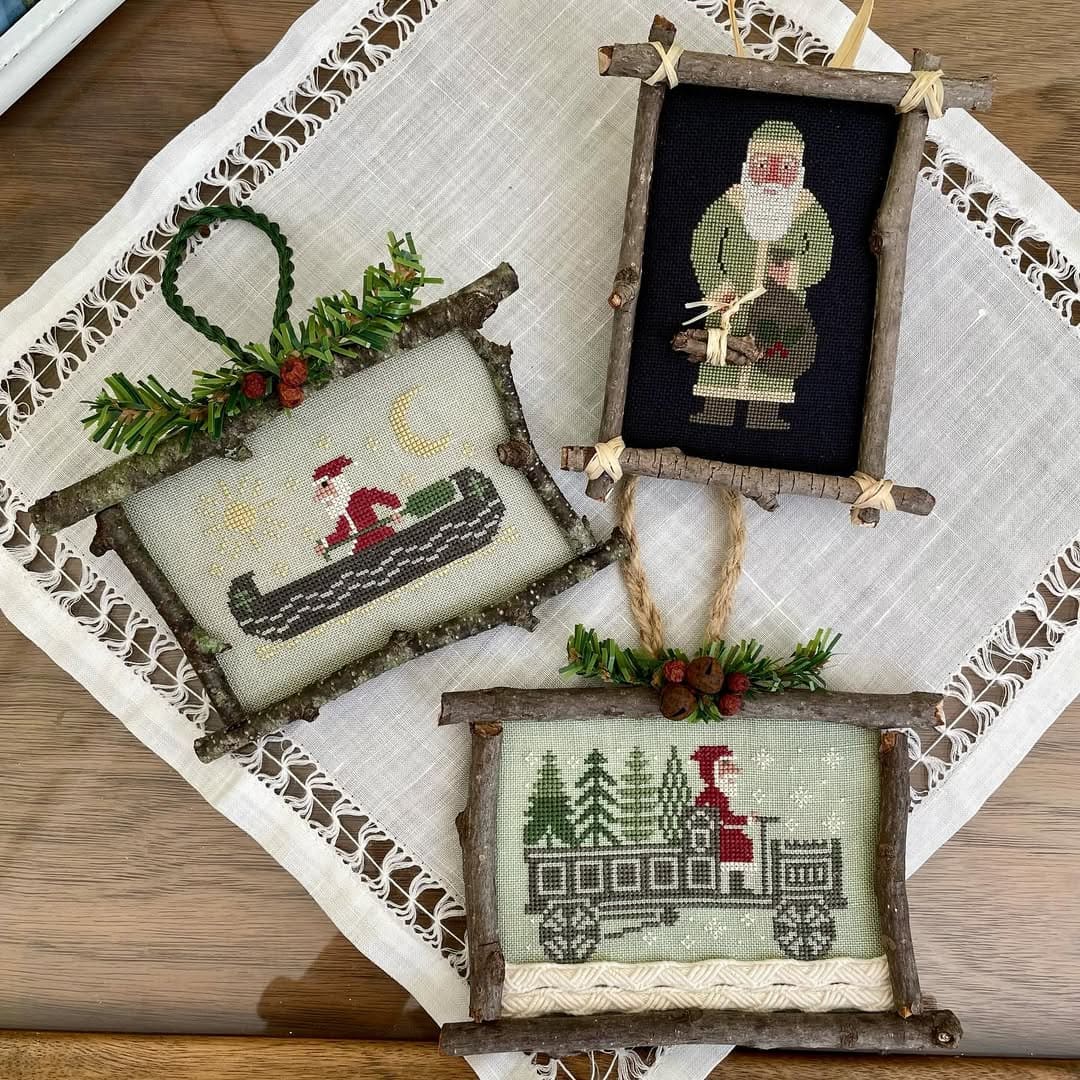
- Stitch your chosen Santa design in the center of the fabric. Use deep reds and earthy greens to keep that classic, vintage holiday feel. Work neatly and evenly for a smooth finish.
- When your stitching is complete, gently iron the fabric on the reverse side to remove creases. You now trim it into a rectangle, leaving about half an inch of fabric around the border.
- Cut four twigs, two slightly longer for the top and bottom, and two shorter for the sides. Arrange them into a frame shape and secure the corners with hot glue or twine.
- Attach your stitched fabric to the back of the frame with glue, making sure it’s centered and stretched evenly.
- Add a few small sprigs of faux pine, berries, or twine bows at the corners for decoration. Then attach a loop of jute rope or twine to the top for hanging.
Notes
For a more authentic touch, you can lightly sand the twigs or brush them with a bit of white paint for a frosted winter look. These rustic ornaments pair beautifully with natural greenery and candlelight.