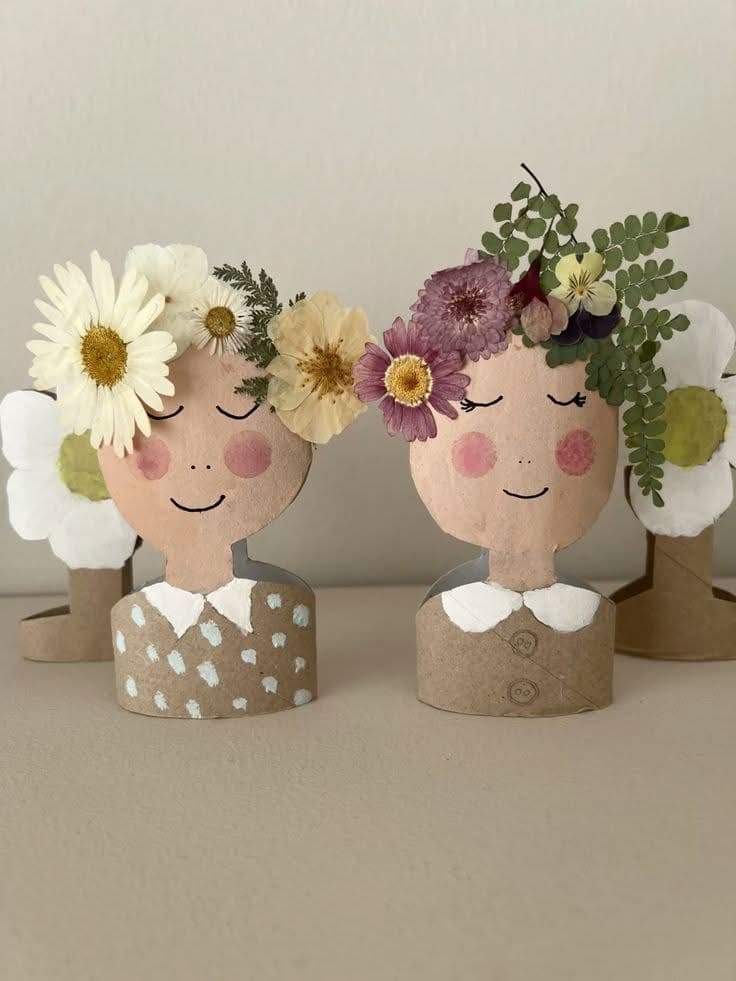
Cut out head and shoulder shapes from kraft paper. Then paint the face area using light pink or beige tones and let it dry.
Using a black pen, draw closed eyes, a small smile, and blush dots on the cheeks. You can add a paper collar or patterned clothing with a touch of paint or cutouts.
Arrange your pressed flowers and leaves on top of the head, forming a crown or floral hairstyle. Mix different shapes and sizes for a natural, organic look.
Once you’re happy with the placement, glue them carefully, starting from the back layer forward.
Allow the glue to dry completely before displaying your fairy faces upright or framing them.