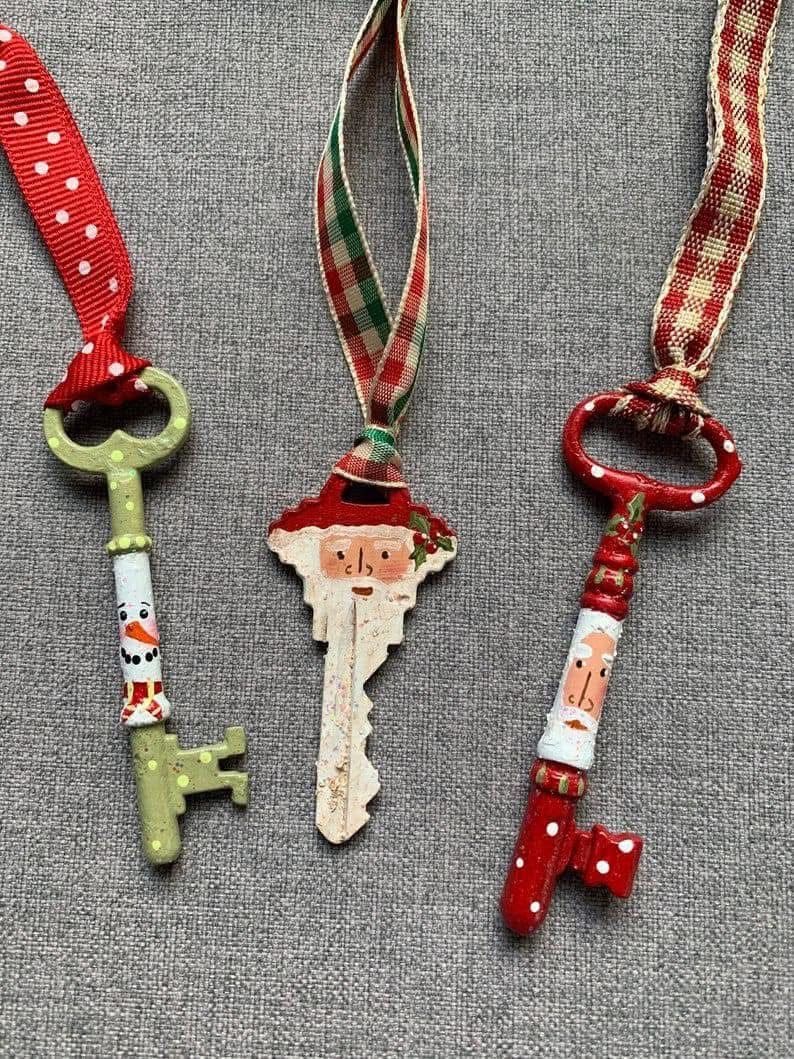
Clean and dry your keys thoroughly to remove any dust or rust. If the metal is dark, apply a thin base coat of white paint to help the colors pop. Let it dry completely.
Decide which Christmas characters you want to paint including Santa, a snowman, or an elf. Start with the base color of each key (red for Santa, green for the snowman, cream for the elf). Apply two coats if needed for solid coverage.
Once the base layer is dry, use a fine brush to paint small details like faces, hats, scarves, and buttons. Add tiny white dots or holly designs for extra holiday flair. You can even use the teeth of the key to mimic a beard or scarf edge.
After all paint has dried, brush a thin coat of clear varnish to protect your artwork and give it a polished finish.
Thread a ribbon through the key’s loop or handle and tie it securely in a bow or loop. Choose ribbons that complement each character such as red and white for Santa, green plaid for the elf, and dotted red for the snowman.
Hang them on your Christmas tree, attach them to gift tags, or display them on a holiday wreath.