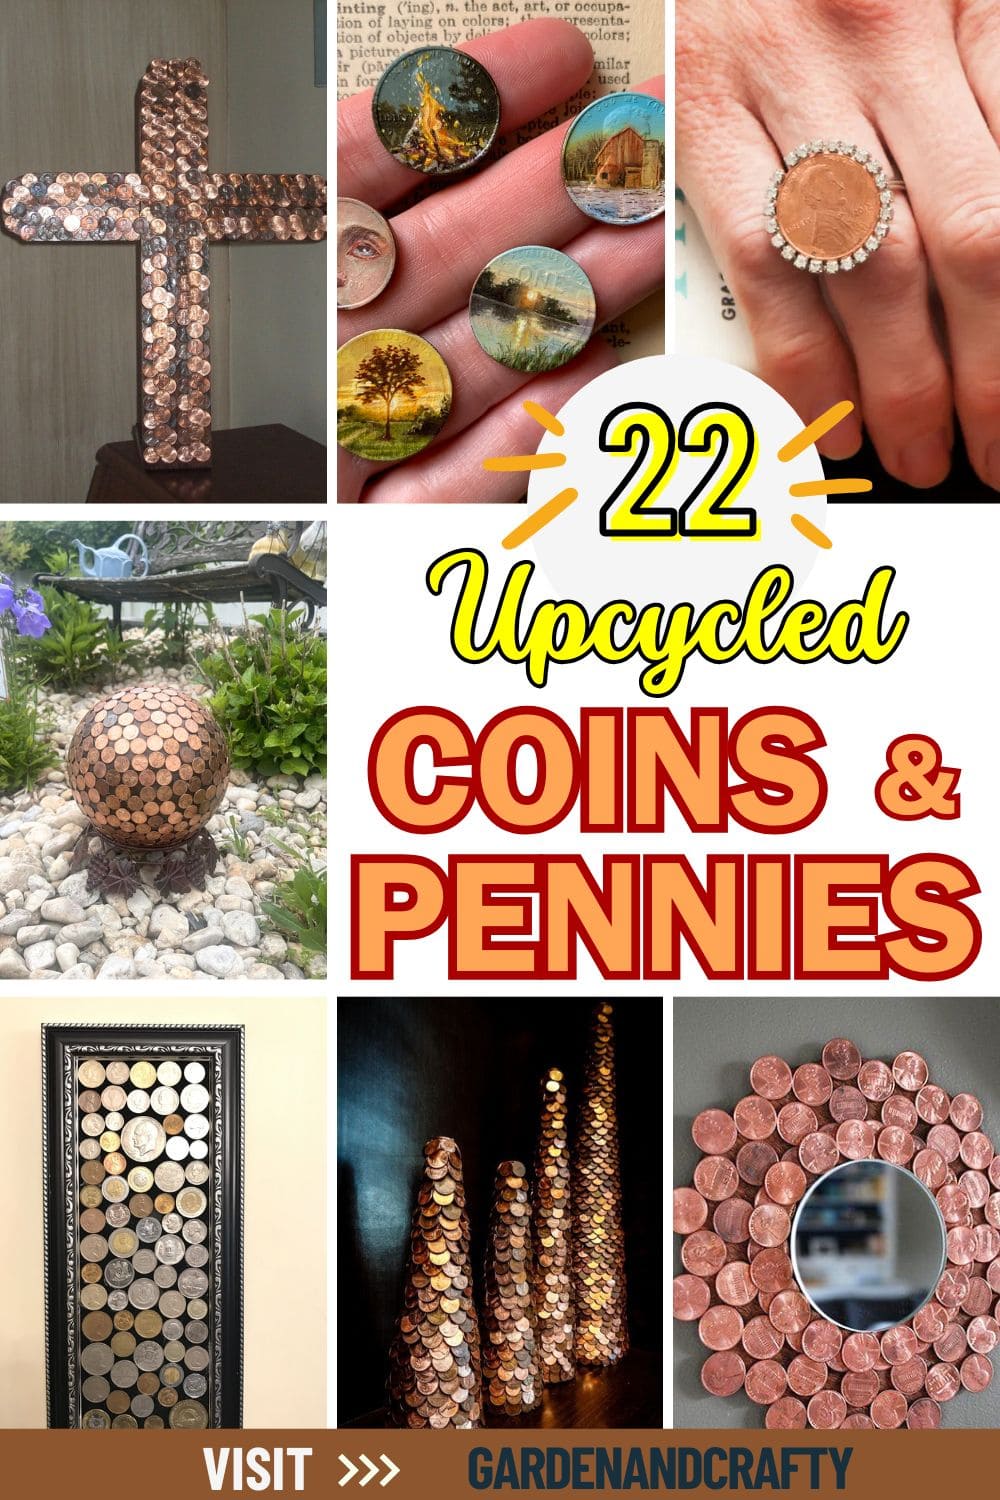
Ever wondered what to do with that jar of old coins collecting dust? Turns out, those pennies and forgotten foreign coins can become beautiful, bold, and surprisingly sentimental works of art.
Whether you’re honoring a loved one, showcasing a bit of history, or simply looking for a unique DIY project, these creative ideas give small change a whole new purpose.
You don’t need fancy tools or a big budget, just some glue, imagination, and a handful of coins. Let’s turn that spare change into something truly unforgettable with these 22 inspiring, hands-on ideas.
#1. Garden Penny Sphere
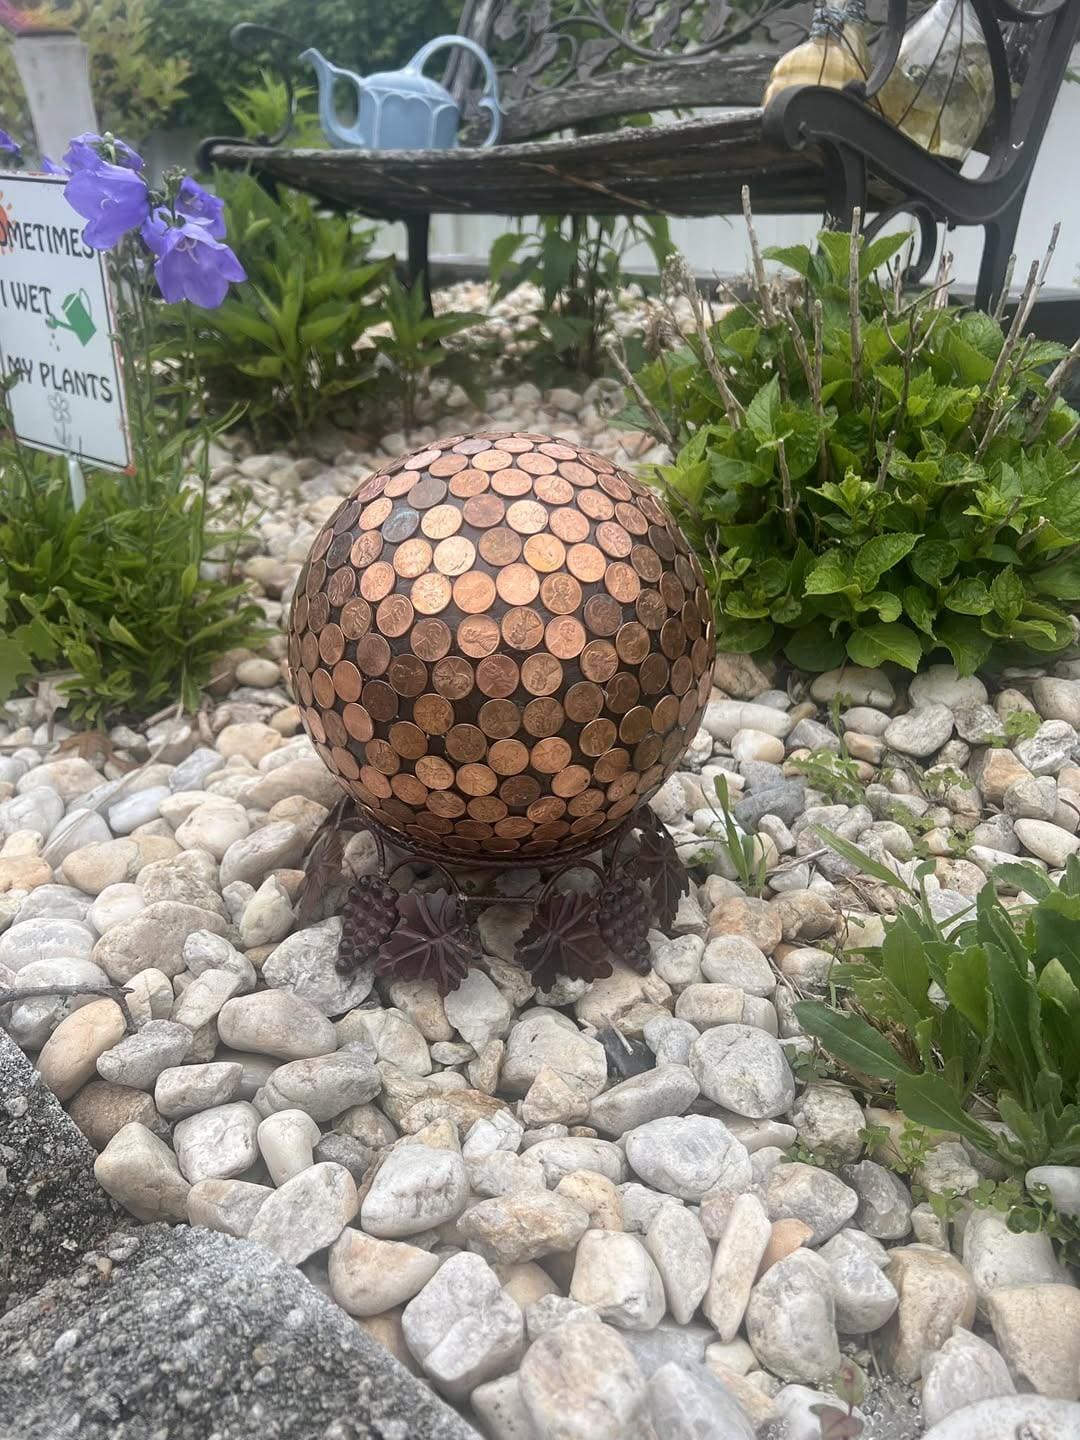
I made this piece on a quiet weekend, and now it’s the star of my rock garden. The light hits it just right in the afternoon, those old pennies shine like tiny sunbursts.
Materials Needed
- 1 old bowling ball (8–10″)
- 400–500 pennies
- 1 tube strong outdoor glue
- 1 can clear acrylic spray sealant
- 1 pair gloves (optional)
- 1 garden stand (optional)
Step-by-step Guide
Step 1: Clean the ball’s surface with rubbing alcohol. Lightly sand if it’s glossy.
Step 2: Glue pennies starting from the base center and spiral outward. Work in sections and press each coin firmly.
Step 3: Let the glue dry completely, at least 24 hours.
Step 4: Spray with clear acrylic sealant to weatherproof. Once dry, display it proudly in your garden.
#2. Full-Body Penny Sculpture
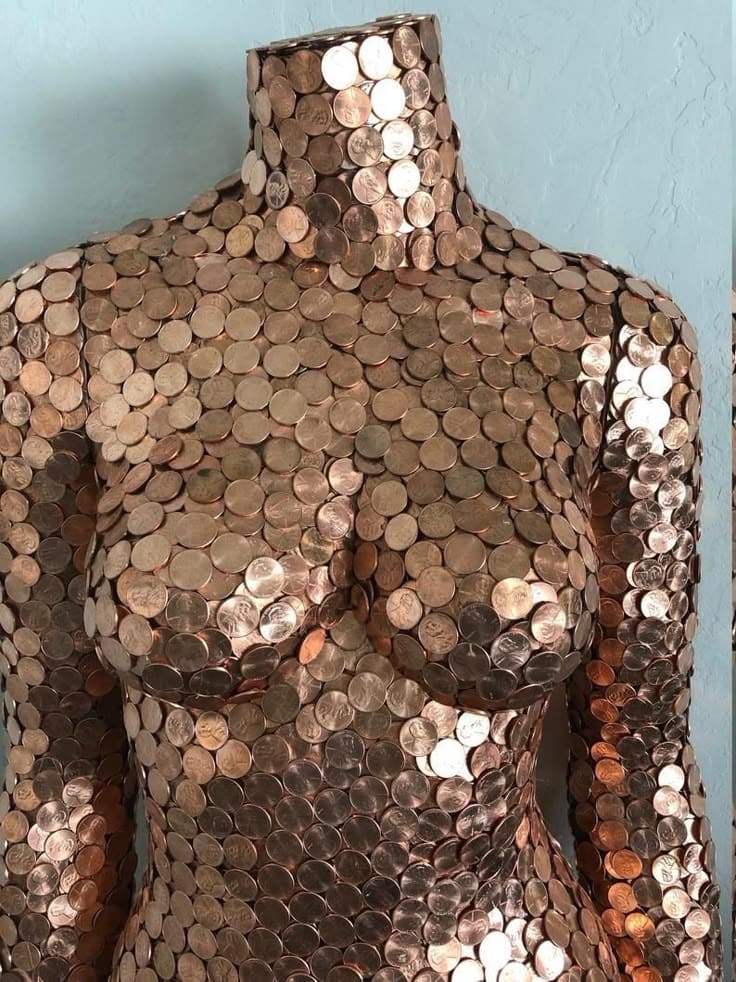
This piece isn’t subtle and that’s exactly why I love it. Every curve is wrapped in decades of copper coins, each catching the light in a different way.
Materials Needed
- 1 female mannequin torso
- 800–1000 pennies
- 1 tube strong adhesive (like E6000)
- 1 soft cloth
- 1 can clear sealant spray (optional)
Step-by-step Guide
Step 1: Clean the surface of the mannequin and the coins for a smoother bond. Wipe each penny to restore shine.
Step 2: Start gluing coins from the bottom or neckline. Follow the body’s natural curves, overlapping slightly for full coverage.
Step 3: Work slowly in sections, allowing glue to dry before moving on. Pay extra attention around high-detail areas like shoulders and chest.
Step 4: Once the entire surface is covered, spray with a clear sealant to protect the finish and enhance the copper glow.
#3. Rope and Coin Tree Art
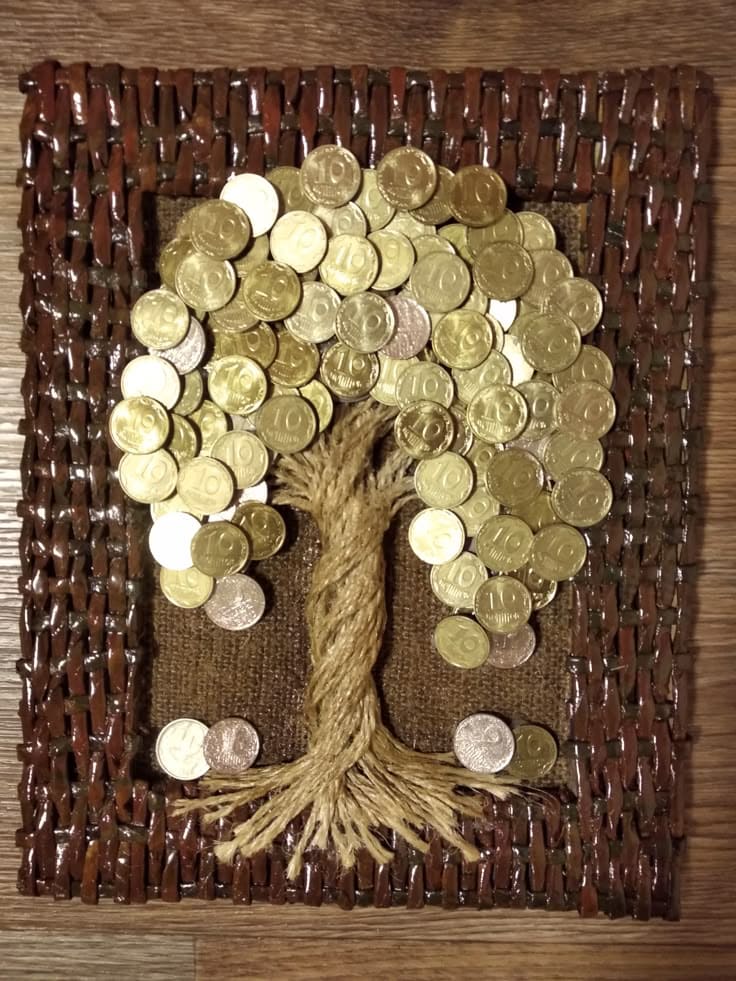
I call this my “Tree of Luck.” It’s warm, textural, and feels rooted in something symbolic, growth, abundance, resilience.
Materials Needed
- 1 wooden frame base
- 40–50 coins
- 1 piece burlap
- 1 roll thick jute rope
- 1 tube hot glue
Step-by-step Guide
Step 1: Cut and glue the burlap onto the frame’s center to create a neutral background.
Step 2: Twist several lengths of jute rope together and glue vertically in the center to form the trunk. Separate and fan out the ends at the bottom for roots.
Step 3: Shape the rope at the top into loose branches or leave it flat, then begin adding coins. Arrange them in a rounded shape like foliage, layering slightly.
Step 4: Once the coins are glued in place and dry, hang or display it somewhere you could use a little visual luck and charm.
#4. Penny Cone Trees
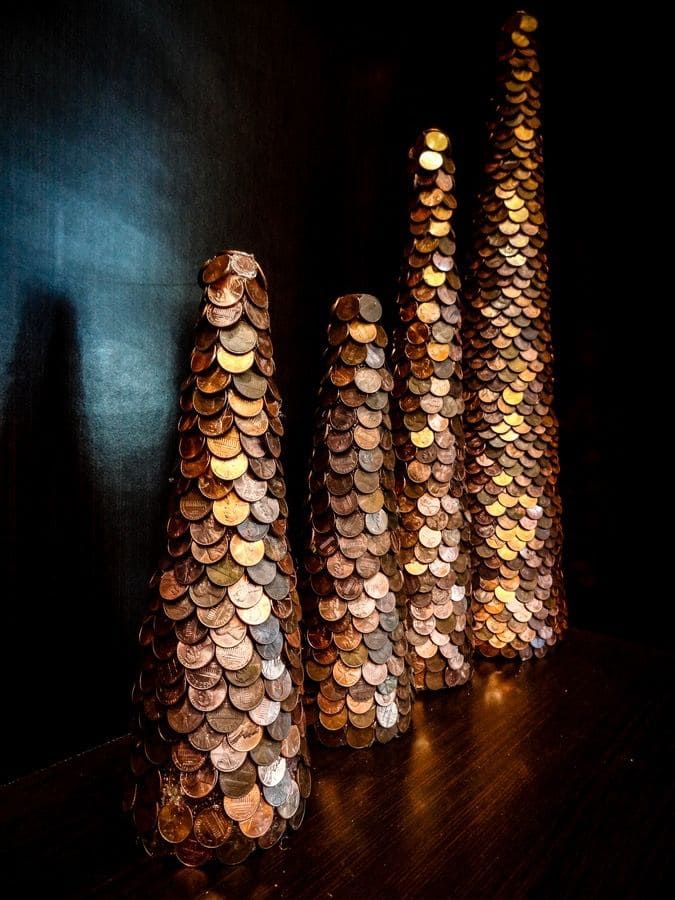
I made these as a holiday project, but honestly, they stay up year-round. They feel earthy, elegant, and timeless.
Materials Needed
- 4 foam or cardboard cones (varying heights)
- 500–700 pennies
- 1 tube strong craft glue
- 1 can clear gloss spray (optional)
Step-by-step Guide
Step 1: Start with clean, dry cones. If using cardboard, you can spray paint them dark brown to hide gaps.
Step 2: Glue pennies starting from the bottom. Overlap slightly in rows, moving upward like fish scales for depth and texture.
Step 3: Work slowly, letting each row dry slightly to avoid slipping.
Step 4: Once finished, apply clear gloss spray to enhance shine and protect the surface.
#5. Golden Coin Apple
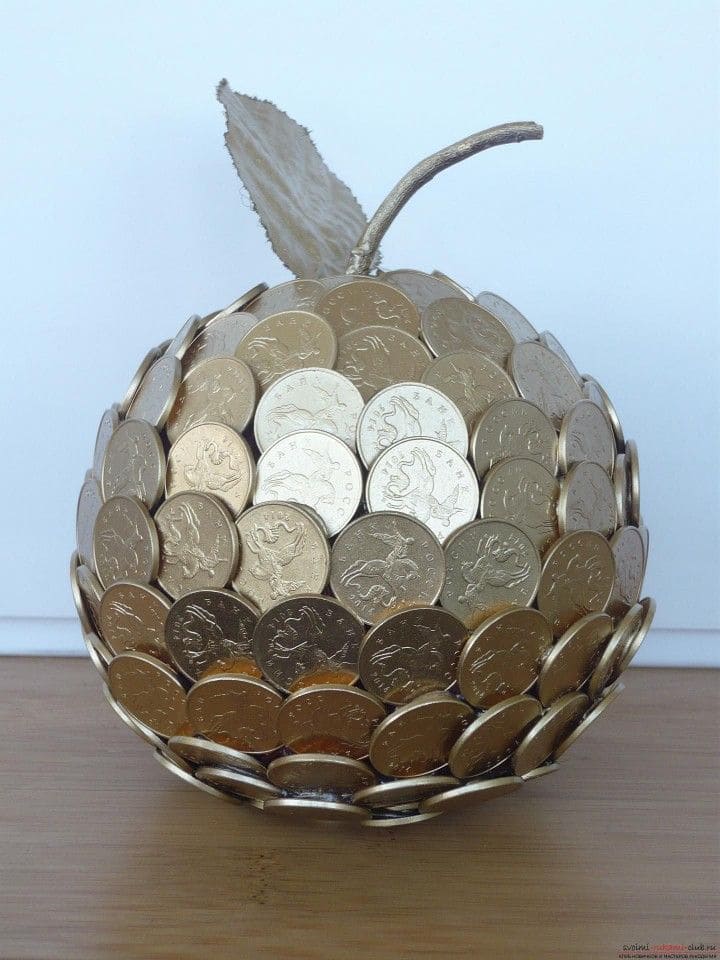
With overlapping coins like dragon scales and a metallic stem and leaf, this apple has a polished, almost regal look.
Materials Needed
- 1 foam or plastic apple shape
- 60–80 gold-tone coins
- 1 gold-painted stem + leaf (real or crafted)
- 1 tube strong glue
- 1 can gold spray paint (optional)
Step-by-step Guide
Step 1: If your apple base isn’t already gold, spray paint it first and let it dry fully.
Step 2: Starting at the bottom, glue coins in overlapping rows like scales. Press each firmly before adding the next.
Step 3: Continue up the shape until fully covered. Leave space at the top for the stem.
Step 4: Attach the leaf and stem at the top. Let dry completely before displaying this golden fruit of your craft.
#6. Penny Mirror Frame
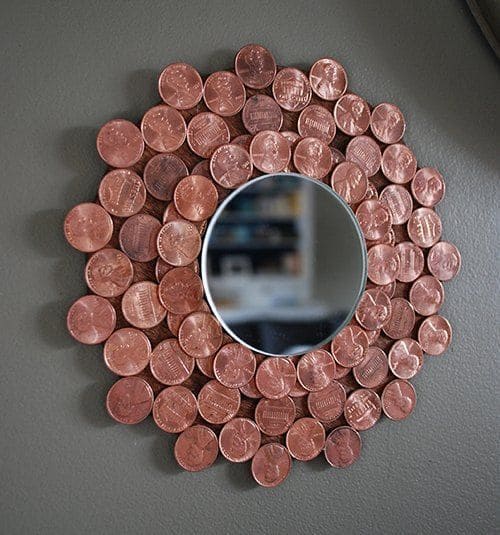
There’s something magnetic about that coppery glow, each penny whispering stories from pockets long emptied.
Materials Needed
- 1 small round mirror (6″–10″)
- 60–80 pennies
- 1 round wood
- 1 tube strong glue
- 1 hanging hook
Step-by-step Guide
Step 1: Center and glue the mirror onto your backing surface. Let it dry completely.
Step 2: Begin gluing pennies around the mirror in tight rings. Start close to the edge and work outward, overlapping slightly if needed.
Step 3: Fill any gaps and double-check spacing for a balanced, radiant finish.
Step 4: Attach a hook or adhesive backing, then hang it where the light can bounce off those shiny copper edges.
#7. Coin Charm Bracelet
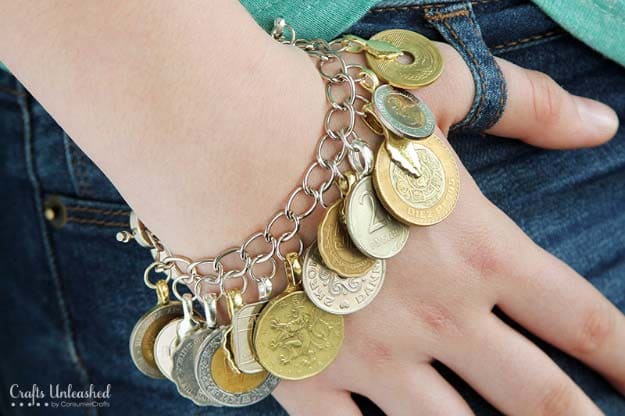
Every time I wear this bracelet, it’s like carrying tiny souvenirs from around the world. The clink of the coins, the glint of mixed metals, it feels bold and a little bohemian.
Materials Needed
- 1 chunky chain bracelet
- 20–30 mixed coins (small and medium size)
- 20–30 jump rings
- 1 pair jewelry pliers
Step-by-step Guide
Step 1: Clean your coins and decide the layout, mix sizes, colors, and textures for a balanced look.
Step 2: Attach a jump ring to each coin using pliers. Make sure they’re securely closed.
Step 3: Hook each coin onto a link in the bracelet chain, spacing them evenly or clustering for a fuller style.
#8. Coin Drop Earrings
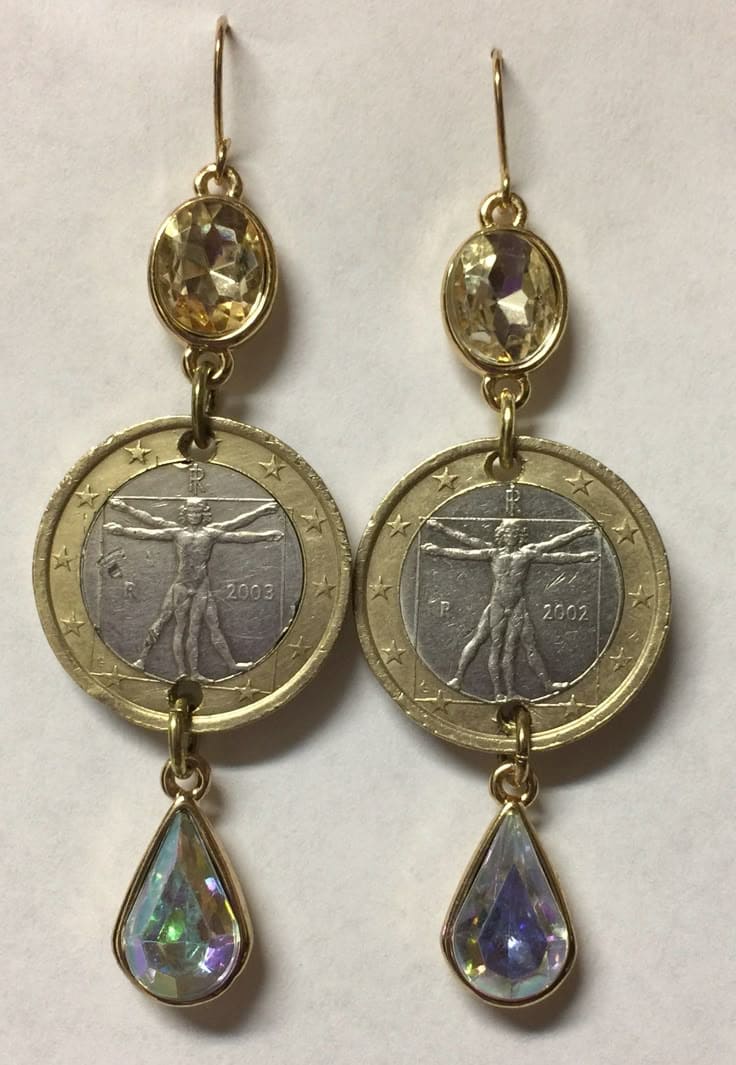
These earrings make a statement before you even say a word. I crafted them from beautiful old euro coins, pairing their timeless design with sparkly crystal drops.
Materials Needed
- 2 coins with open centers (like Euro coins)
- 2 teardrop crystals
- 2 oval crystal charms
- 2 earring hooks
- 4 jump rings
- 1 pair jewelry pliers
Step-by-step Guide
Step 1: Use jewelry pliers to carefully attach a jump ring to each coin’s top and bottom center.
Step 2: Connect an oval crystal charm to the top jump ring, then add the earring hook to it.
Step 3: Attach a teardrop crystal to the bottom jump ring for extra sparkle and movement.
Step 4: Check that all connections are tight. Polish the coins if needed, then wear them proudly.
#9. Framed Coin Wall Art
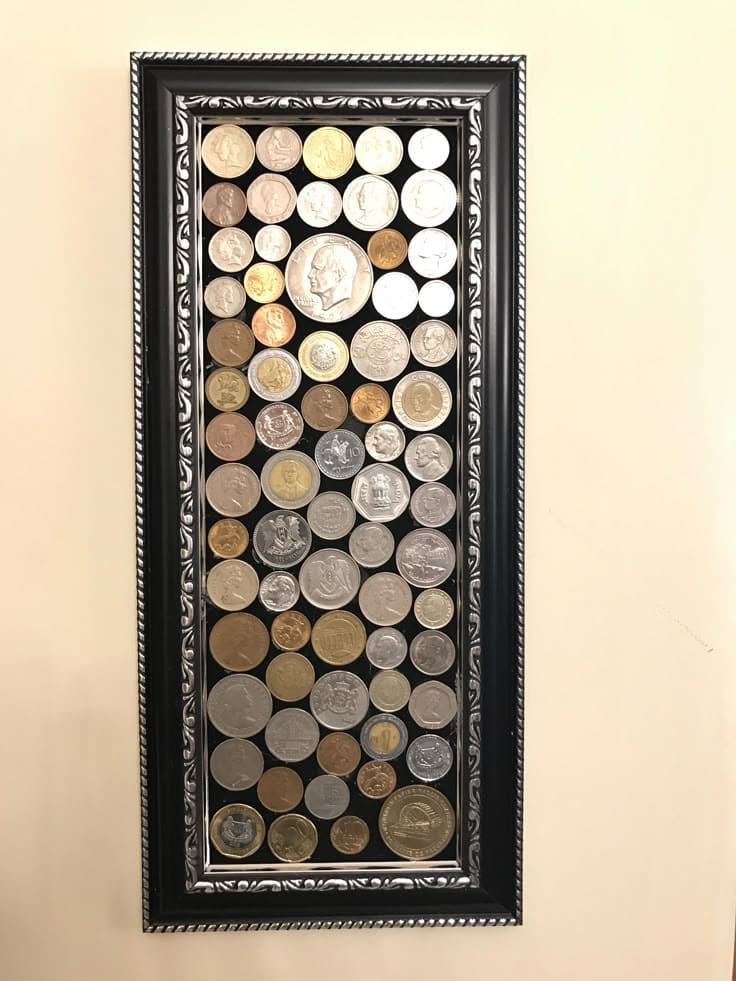
This piece feels like a time machine hanging on the wall. Each coin has its own quiet story, some from travels, others passed down through family.
Materials Needed
- 1 shadow box frame (10″×20″ or similar)
- 50–70 mixed coins
- 1 sheet black felt
- 1 tube strong craft glue
- 1 piece cardboard backing
Step-by-step Guide
Step 1: Remove the backing from the frame and cover it with black felt using glue or double-sided tape.
Step 2: Arrange coins in neat rows or columns before gluing, play around with layout to get the best visual balance.
Step 3: Glue each coin onto the felt backing, starting from the center and working outward for symmetry.
Step 4: Let it dry completely, then place it back into the frame. Hang on a wall where light can hit it.
#10. Floating Money Cup
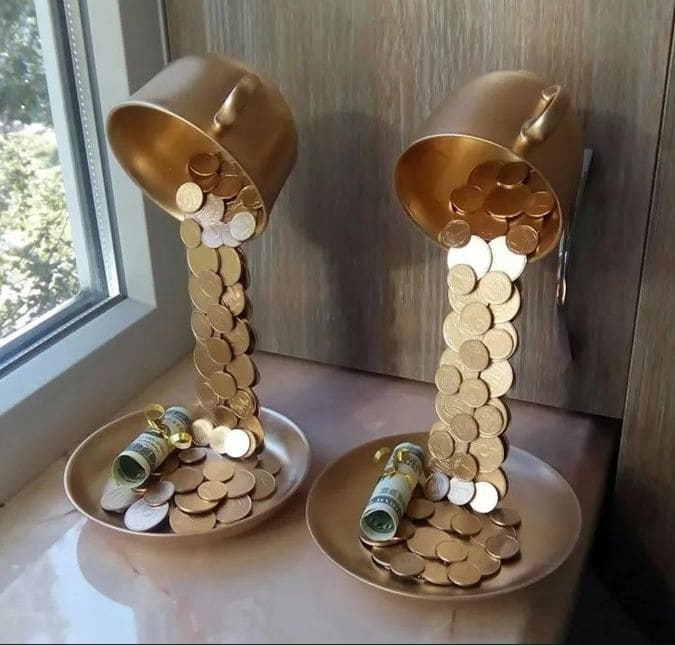
This project is one of those “wait, how did you make that?” pieces. The illusion of coins pouring mid-air from a cup into a puddle of riches never fails to impress.
Materials Needed
- 1 sturdy fork
- 1 cup + 1 saucer
- 60–80 coins
- 1 tube strong glue
- 1 can gold spray paint (optional)
- Decorative cash roll (optional)
Step-by-step Guide
Step 1: Bend the fork into an “L” shape. Glue the handle to the saucer and the prongs to the inside of the cup at an angle.
Step 2: Once secure, start gluing coins along the fork to hide it. Layer them so they look like a flowing stream.
Step 3: Add more coins at the base and inside the cup to create the “overflowing” effect.
Step 4: Spray everything gold for a unified look (if needed).
#11. Penny Bowl
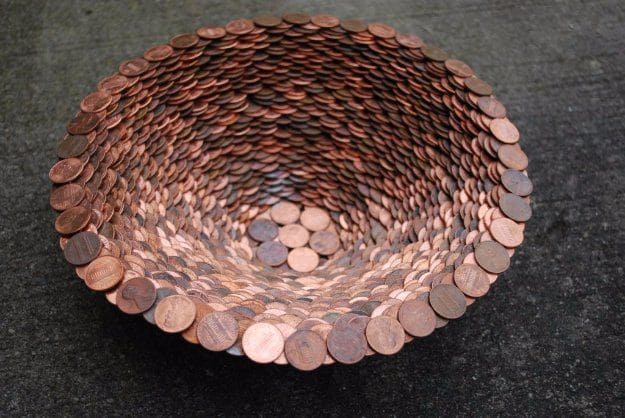
There’s something so satisfying about this bowl, layer after layer of copper coins spiraling toward the center like a vortex of shimmer.
Materials Needed
- 1 large mixing bowl (used as a mold)
- 300–400 pennies
- 1 tube strong craft glue
- 1 can clear acrylic sealer
- 1 sheet plastic wrap
Step-by-step Guide
Step 1: Line the outside of a large bowl with plastic wrap tightly. This will be your mold.
Step 2: Begin gluing pennies in overlapping layers starting from the center bottom, working your way outward and upward. Let each layer dry partially before adding more to avoid sliding.
Step 3: Once fully covered and dried (24+ hours), gently remove the penny shell from the mold.
Step 4: Spray with clear acrylic sealer to lock in shine and protect the surface.
#12. Penny Wind Chime
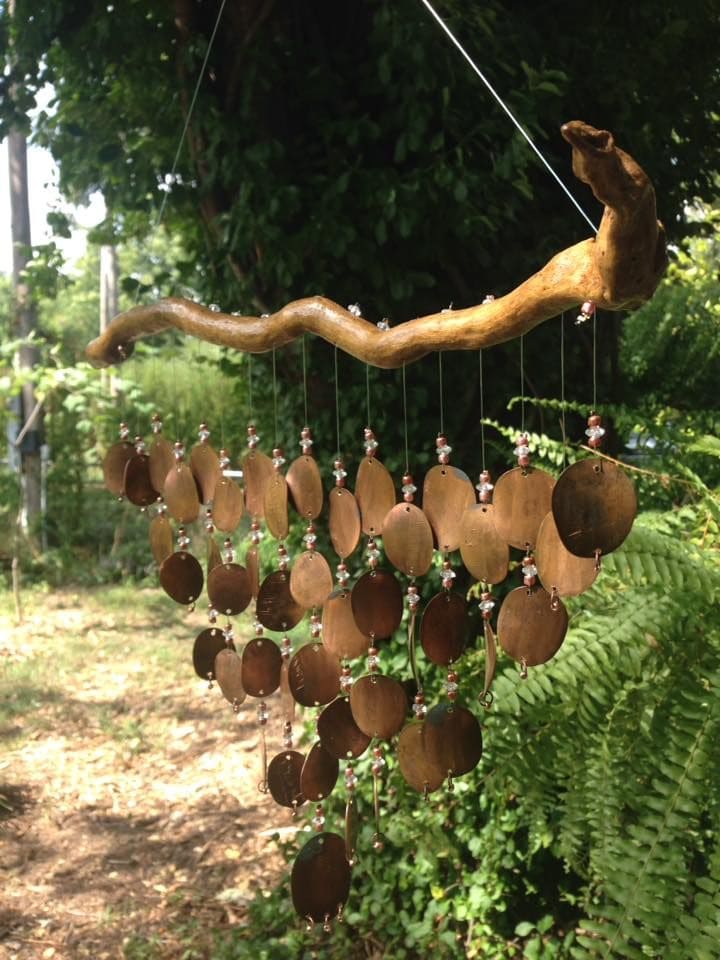
This wind chime feels like nature and nostalgia woven together. I hung it under a tree where the breeze plays soft notes against the coins, and the sunlight dances across their surfaces.
Materials Needed
- 1 piece of driftwood
- 30–40 pennies (drilled with holes)
- Fishing line
- 20–30 small beads
- 1 drill with metal bit
- 1 hook
Step-by-step Guide
Step 1: Drill small holes in the top of each penny. Be patient and wear eye protection.
Step 2: Cut lengths of fishing line and string the pennies with small beads in between. Vary the lengths for a cascading look.
Step 3: Tie each strand securely to the branch or driftwood, spacing them evenly.
Step 4: Add a hook or tie twine to the top ends for hanging.
#13. Penny Mosaic Tabletop
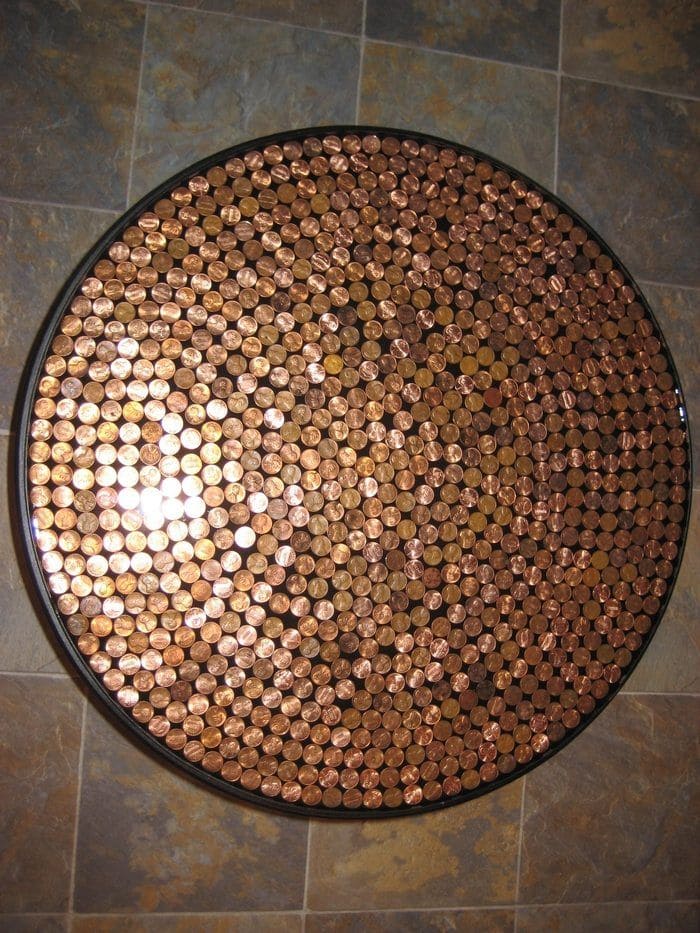
The variation in patina, the gleam of copper under light, it turns something simple into something stunning.
Materials Needed
- 1 round table (preferably wood or MDF)
- 1000–1200 pennies
- 1 tube strong glue
- 1 can clear resin
- 1 painter’s torch (optional)
Step-by-step Guide
Step 1: Clean and dry your pennies. Sort them by tone for a more controlled color gradient or mosaic effect.
Step 2: Glue the coins directly onto the tabletop, starting from the center and spiraling outward. Keep them tight and level.
Step 3: Once fully covered, let dry at least 24 hours.
Step 4: Pour resin or epoxy coating over the entire surface, using a torch to pop any air bubbles. Let it cure completely before using.
#14. Penny Cross
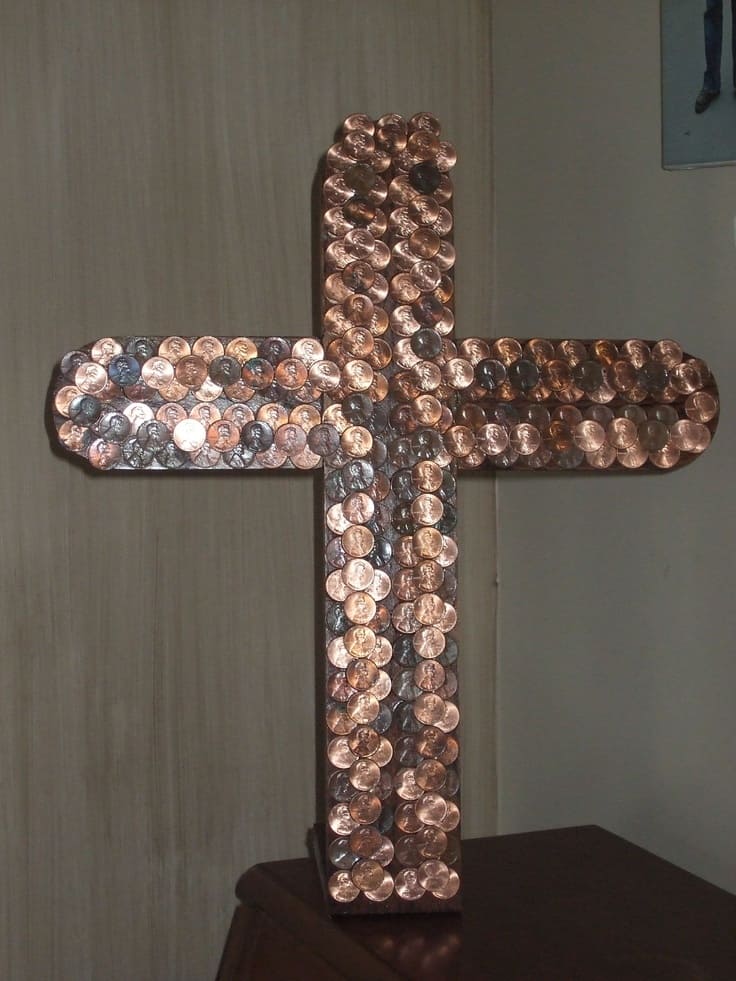
Whether displayed on a mantle or given as a gift, it’s a powerful blend of humble materials and heartfelt intention.
Materials Needed
- 1 wooden cross base (approx. 12″–18″)
- 150–200 pennies
- 1 tube strong adhesive
- 1 soft cloth
- 1 can clear acrylic spray (optional)
Step-by-step Guide
Step 1: Clean and polish the pennies to bring out their shine and natural variation in tone.
Step 2: Start at the center of the cross and work outward, gluing pennies edge-to-edge in neat rows. Be sure to align heads or alternate sides for symmetry.
Step 3: Let dry completely, then check for any loose coins and reinforce as needed.
Step 4: Spray with a clear acrylic sealer for long-term protection and enhanced shine.
#15. Penny Monogram Letter
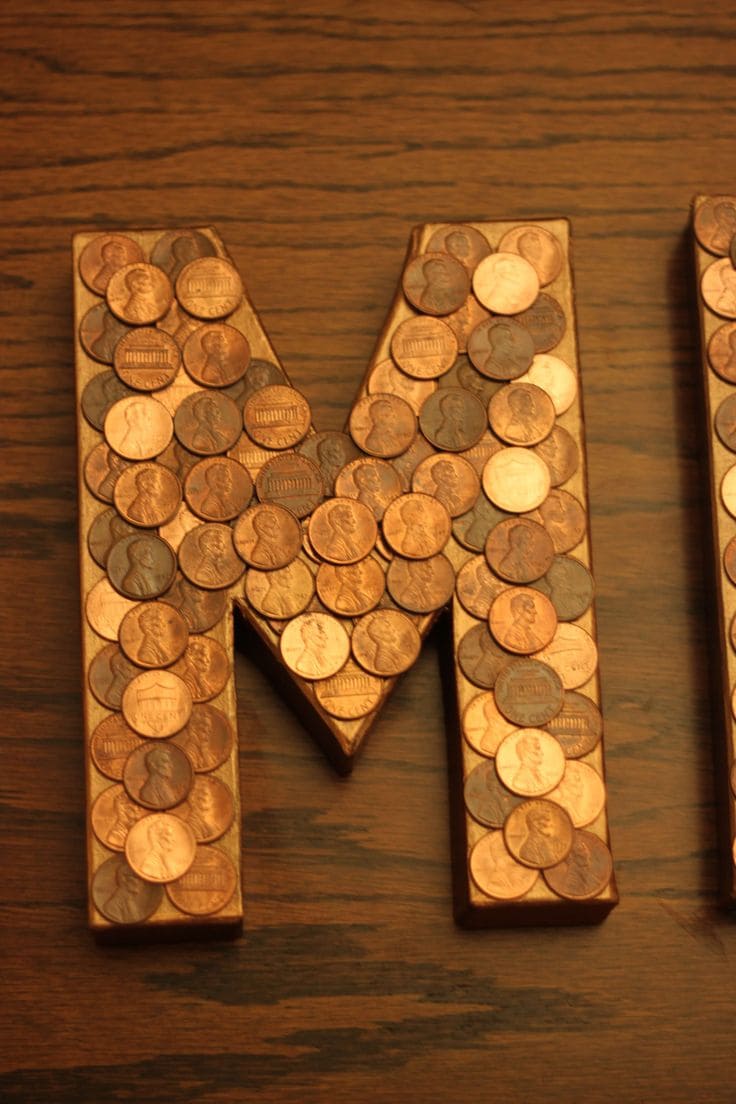
This letter “M” is bold, handmade, and lined with real pennies that give it warmth and a hint of nostalgia.
Materials Needed
- 1 wood or cardboard monogram letter (8″–12″)
- 60–80 pennies
- 1 tube strong glue
- 1 can gold spray paint (optional for base)
- 1 clear acrylic sealer (optional)
Step-by-step Guide
Step 1: If your base isn’t already colored, spray paint it and let it dry.
Step 2: Arrange pennies on the surface to test fit and spacing. Try alternating heads and tails for visual interest.
Step 3: Glue each coin down securely. Press and hold for a few seconds to ensure a good bond.
Step 4: (Optional) Spray with clear sealant for extra shine and protection.
#16. Penny Puzzle Ball
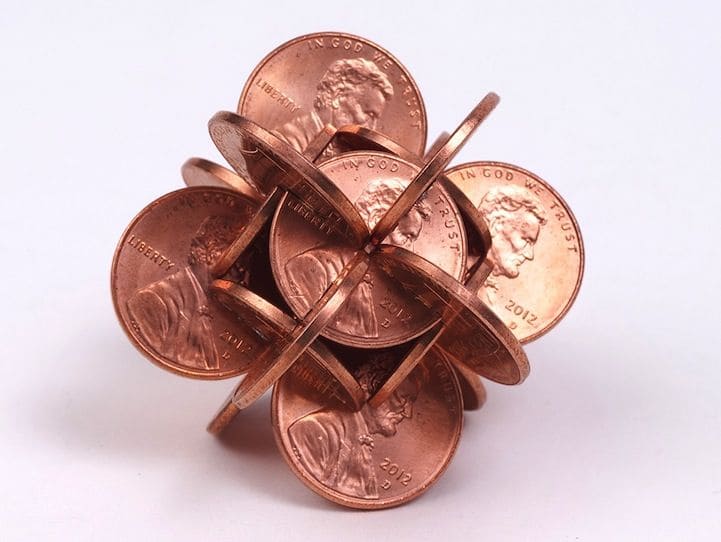
This is one of those crafts that makes people stop and ask, “Wait… how did you make that?” It’s a mini sculpture, a fidget piece, and a conversation starter all in one.
Materials Needed
- 12–16 pennies (identical size)
- 1 small saw
- 1 file or sandpaper
- Strong glue (optional)
- Protective gloves and eyewear
Step-by-step Guide
Step 1: Carefully saw small, shallow slits halfway across several pennies, enough to interlock them. File the edges smooth for safety.
Step 2: Begin assembling the puzzle by sliding slotted pennies together at 90° angles to form a spherical shape. It may take a few tries!
Step 3: Once assembled, keep it as a loose 3D puzzle, or glue in place if you prefer a permanent sculpture.
Step 4: Polish with a soft cloth to bring out that rich copper shine.
#17. Coin Keyring
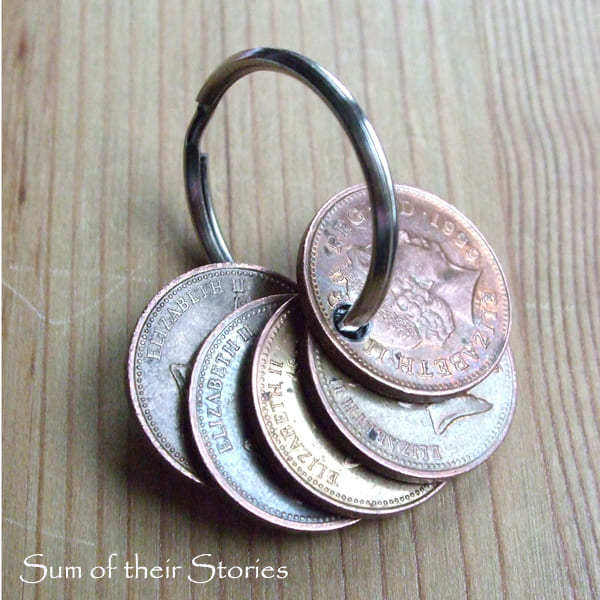
This tiny project holds surprising emotional weight. Each coin on this keyring reminds me of a place, a moment, or a person.
Materials Needed
- 4–6 coins (personal or foreign)
- 1 metal keyring
- 1 small drill with a metal bit
- Fine sandpaper
Step-by-step Guide
Step 1: Drill a small hole near the edge of each coin. Sand the back of the hole gently to smooth sharp edges.
Step 2: Arrange the coins in your preferred order by date, by size, or by story.
Step 3: Thread them onto the keyring and close securely.
#18. Pennies from Heaven Ornament
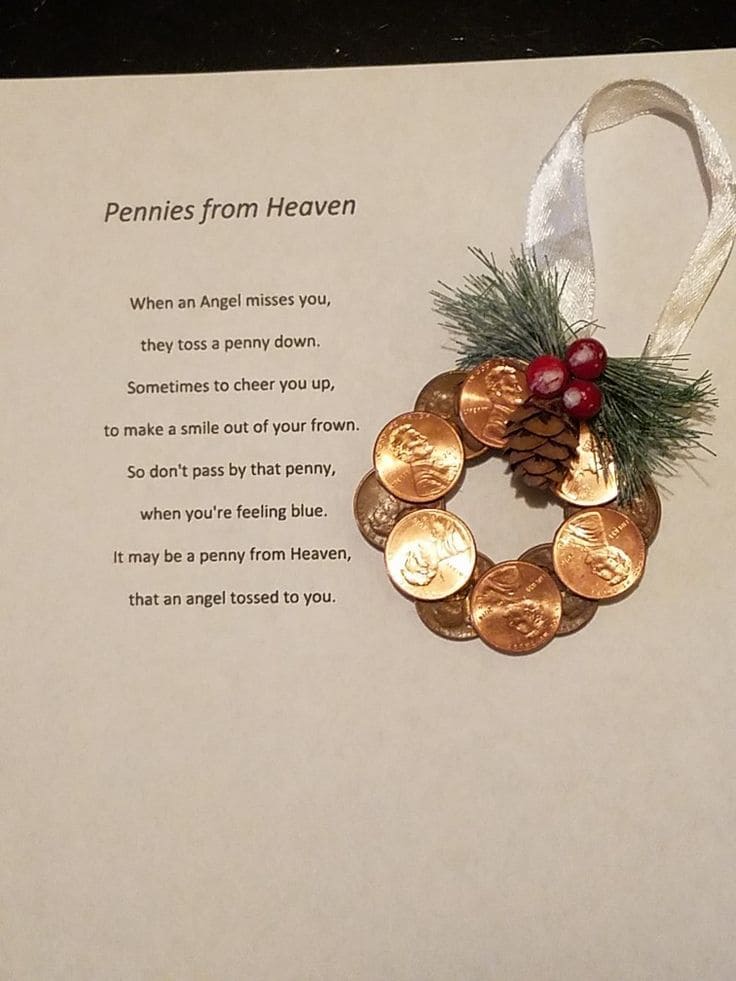
This project holds more than just coins as it carries love, memory, and quiet reassurance. The poem adds a beautiful message of hope, while the penny circle becomes a tiny halo of remembrance.
Materials Needed
- 10–12 shiny pennies
- 1 strip of ribbon (6″–8″)
- 1 mini pinecone, faux greenery, and red berries
- 1 glue gun
- 1 printed poem (optional)
Step-by-step Guide
Step 1: Arrange the pennies in a circular wreath shape. Glue them together side-by-side on a flat surface.
Step 2: Attach a loop of ribbon to the back for hanging. Make sure it’s centered and secure.
Step 3: Glue a small pinecone, berries, and greenery at the top or side as decoration.
#19. Penny Cocktail Ring
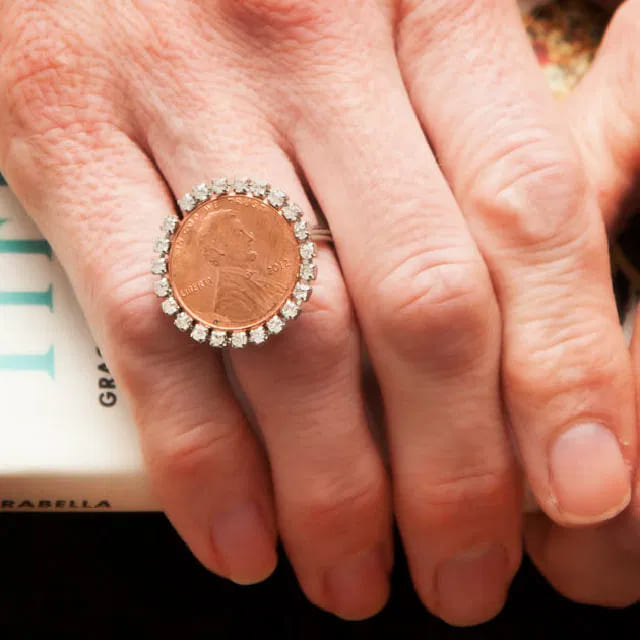
Who knew a single cent could steal the show? I made this for fun, but now I wear it to parties and always end up telling the story behind it. It’s bold, playful, and surprisingly chic.
Materials Needed
- 1 penny (clean and polished)
- 1 large ring base (flat top)
- 1 rhinestone setting
- Strong jewelry glue
- Clear top coat (optional)
Step-by-step Guide
Step 1: Clean your penny and the ring base. Make sure both are completely dry.
Step 2: Glue the penny onto the center of the ring base. Press firmly and let dry.
Step 3: Carefully glue rhinestones or gem trim around the penny’s edge to create a halo effect.
Step 4: Once fully dry, apply a clear top coat to add extra shine and protect from tarnish.
#20. Penny Picture Frame

This frame feels like a memory in itself. Each penny adds a little shimmer and story to the photo it surrounds.
Materials Needed
- 1 basic photo frame (any size)
- 40–60 pennies (cleaned)
- 1 tube craft glue
- 1 soft cloth (for polishing)
Step-by-step Guide
Step 1: Clean the frame’s surface and polish each penny to bring out the shine.
Step 2: Lay out your pennies first to check spacing, try staggering slightly for a layered look.
Step 3: Glue coins around the frame, pressing firmly and letting each side dry before rotating.
Step 4: Once dry, add your favorite photo and display it on a shelf or desk.
#21. Miniature Painted Coins
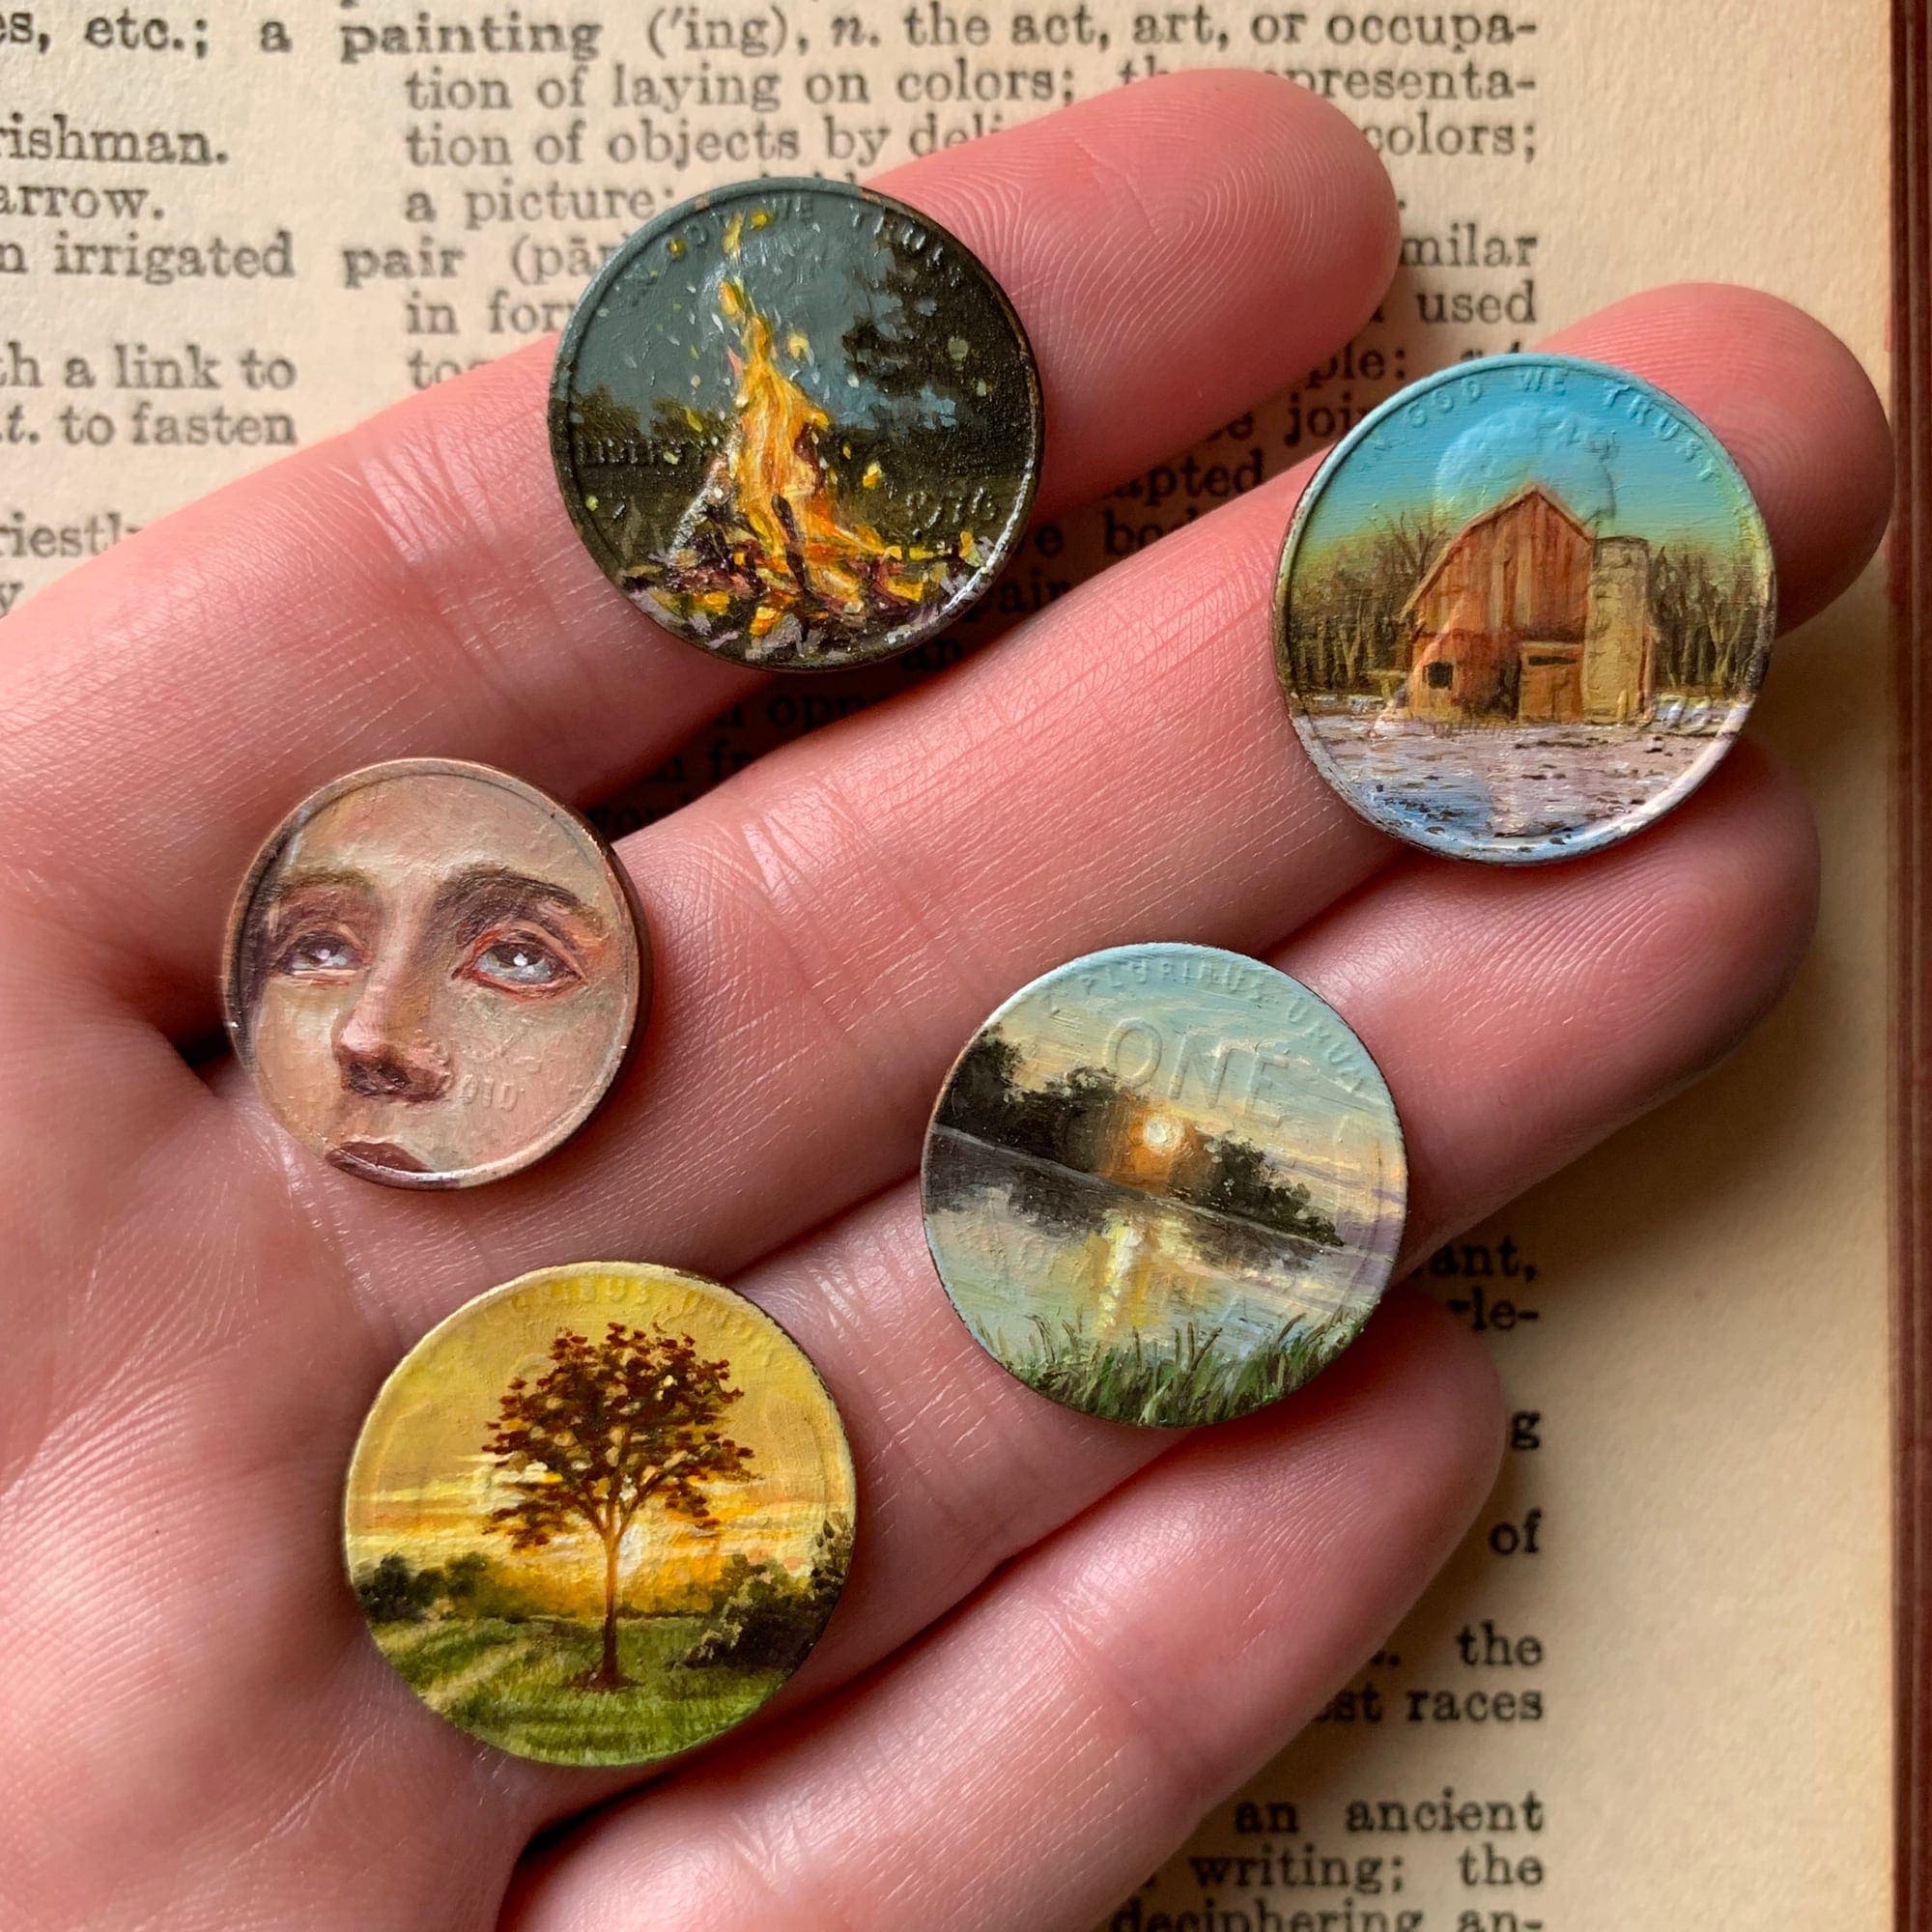
These aren’t just coins, they’re emotional landscapes, frozen moments, and soft glimmers of memory captured in copper.
Materials Needed
- 5–10 clean coins (preferably copper or smooth-surfaced)
- Acrylic paint
- Ultra-fine detail paintbrush
- Magnifier (optional)
- Clear gloss varnish or resin
Step-by-step Guide
Step 1: Clean each coin with rubbing alcohol and let it dry completely.
Step 2: Sketch your design lightly with pencil or dive right in with paint. Use a magnifier and detail brush for precision.
Step 3: Work in layers, letting each dry before adding detail. Use minimal water to keep lines crisp.
Step 4: Once fully dry, seal with a thin coat of gloss varnish or clear resin to preserve the artwork and protect against wear.
#22. Coin Concho Necklace
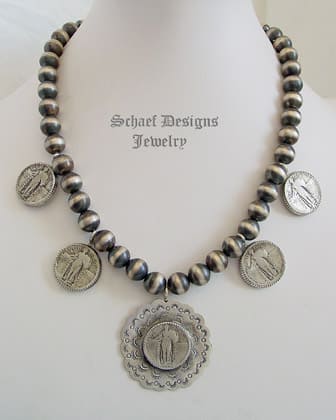
This necklace feels like a story worn close to the heart. Inspired by traditional Southwestern jewelry, it blends rustic charm with polished sophistication.
Materials Needed
- 1 strand of large silver or faux pearl beads
- 5 coin-style conchos (flat-backed or drilled)
- 1 large concho pendant
- 1 jewelry wire
- Jump rings and jewelry pliers
- 1 clasp set
Step-by-step Guide
Step 1: Plan your layout, center the large concho and evenly space the four smaller ones on either side.
Step 2: String your beads onto the jewelry wire, pausing to attach each concho with jump rings. Use pliers to secure.
Step 3: Once beading is complete, attach the clasp to both ends of the wire.
