Over the last few years, a quiet gardening revolution has been rolling through seed-starting circles and it looks a bit like a cinnamon-roll-inspired spiral.
Called the Seed Snail method, this creative approach has captured the attention of gardeners everywhere. From urban balconies to homeschooling parents and veteran green thumbs, people are discovering how charming and clever this spiral method can be.
It’s small-space friendly, eco-conscious, and a joy to watch as seeds transform into thriving seedlings right before your eyes.
Let me walk you through how it works, why gardeners are loving it, and how you can get started even if you’ve got limited space or budget.
What Is the Seed Snail Method?
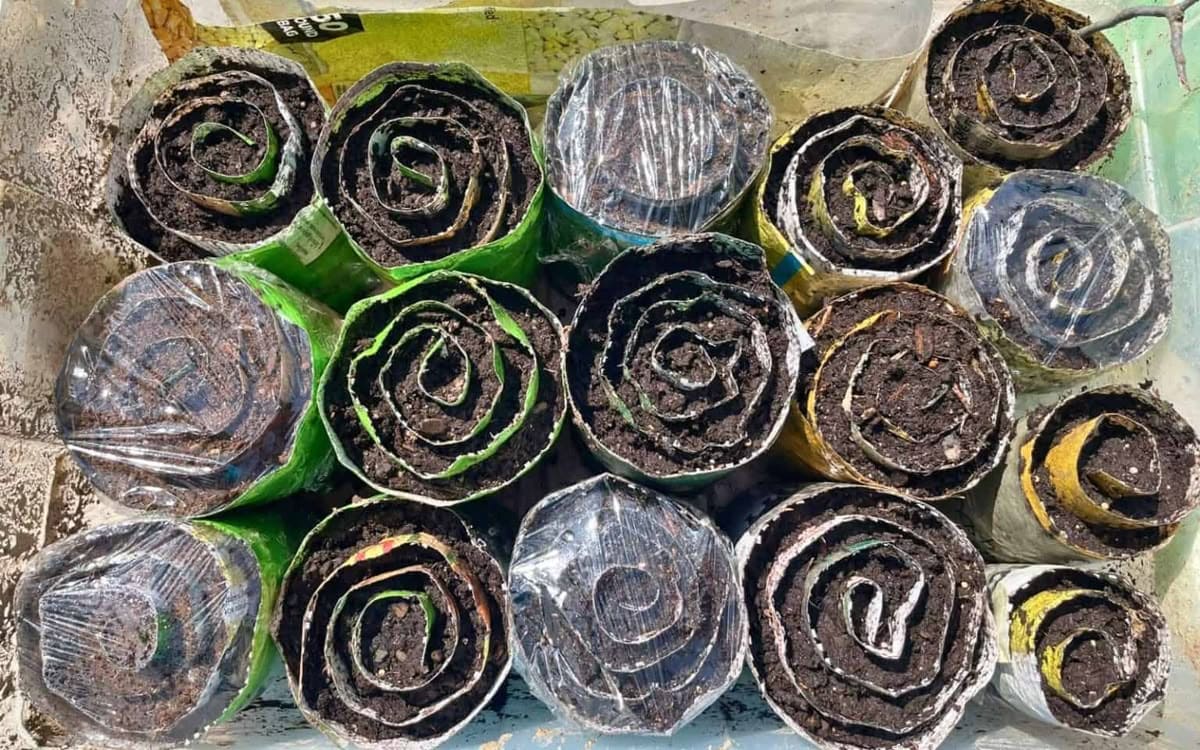
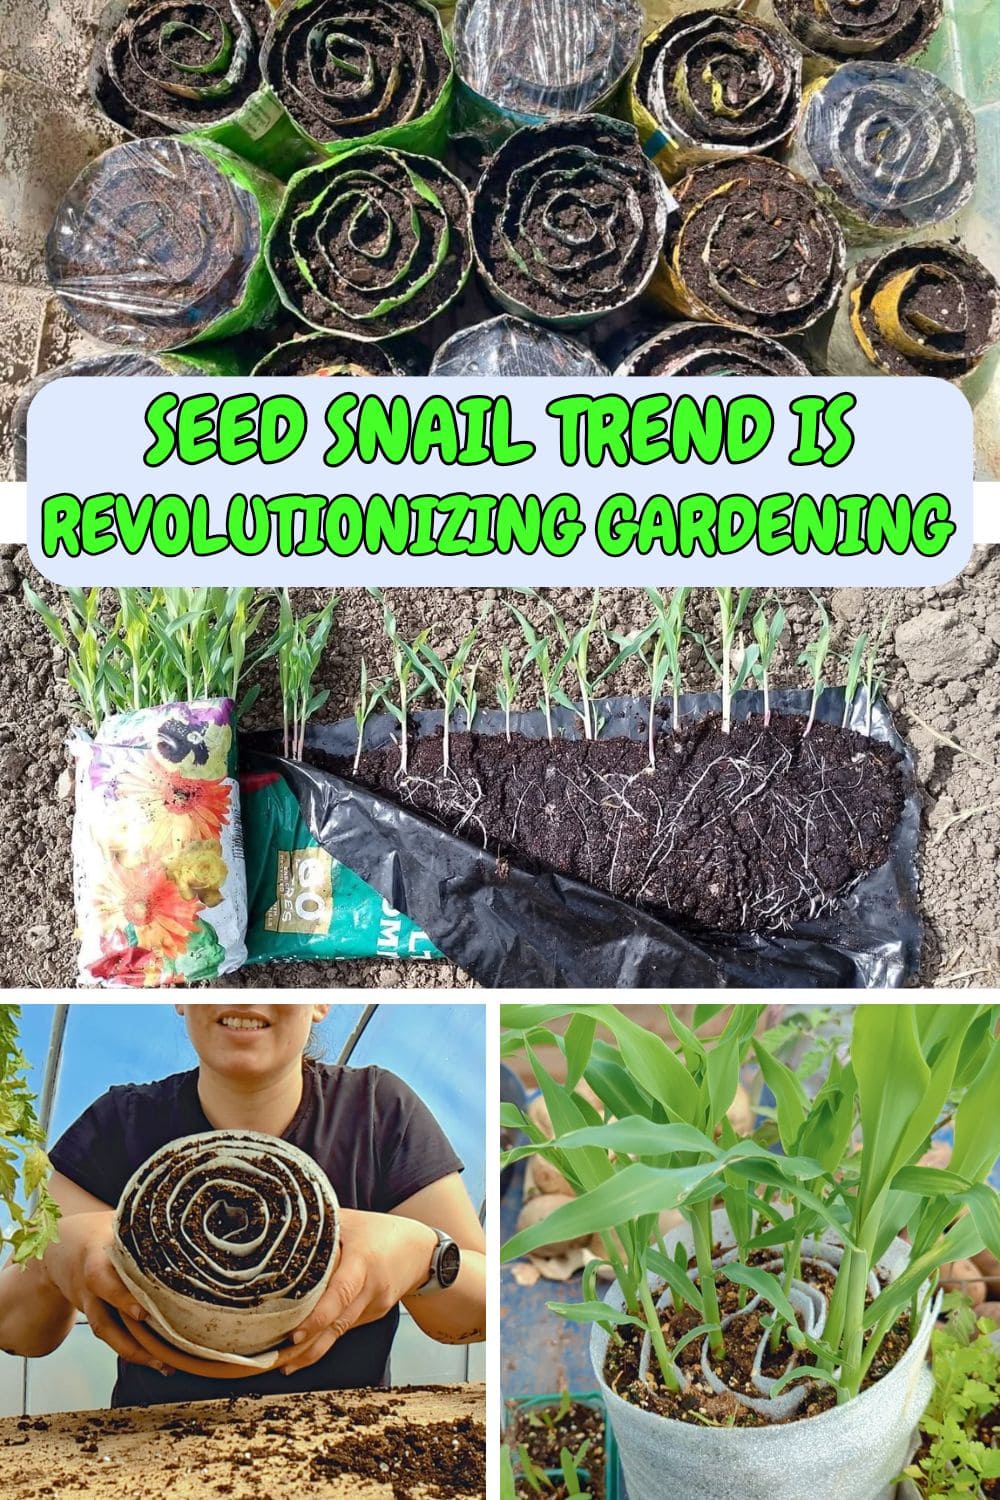
You can imagine a long strip of flexible material could be poly-foam packaging, burlap, even a clean produce bag is spread with damp seed-starting mix and rolled tightly, snail-shell style.
Then you nestle your seeds in between the layers, place the coil upright, and let the magic happen. The spiral shape creates lots of room for roots to grow straight down while conserving horizontal space.
That upright shape means more seeds fit in a smaller spot than traditional flats. And when tiny roots wrap through the spiral, they’re easy to access for top-ups without disturbing the whole assembly.
Why This Trend Took Off
What makes the Seed Snail method stand out isn’t just its cute name as it’s the advantages it delivers.
First, it saves serious space. One spiral on a windowsill may hold more seedlings than a dozen small pots. That’s perfect for apartment gardeners or anyone drowning in seed flats come spring.
It also makes watering a breeze. While overhead watering can disturb seedlings in flats, snails are best moistened from the bottom, standing them in a shallow tray so water wicks up like magic keeps things fed and moist without overdoing it.
Plus, you’re not tied down once everything sprouts. If a section gets crowded or starts leaning, you unroll just enough, restructure it, and mold it back. No need to repot, no root damage, and no waste.
Materials You’ll Need
Making a seed snail is surprisingly easy with common materials:
- A strip of flexible growing medium like poly-foam, burlap, or produce bag, about 4-6″ wide and 30-36″ long
- Seed-starting mix
- Your choice of seeds (fast-sprouting ones like tomatoes, peppers, basil, or greens work best)
- Tray
- Something to mist with
- Optional: clear dome or plastic bag
Step‑by‑Step: Rolling Your First Seed Snail
Step 1: Prepare your strip
Cut a long strip of flexible material about 4 to 6 inches wide and 30 to 36 inches long. This will be your snail base.
Besides, good options include soft poly foam (like packaging wrap), burlap, old grain sacks, or even a folded piece of strong paper towel. You then lay it out flat on your workspace.
Step 2: Moisten your seed-starting mix
You can use a light hand here, your mix should feel damp like a wrung-out sponge, not soggy.
Next, spread a thin layer across the strip, covering most of it evenly. Leave about an inch of clean space at the top to keep soil from spilling when you roll it.
Step 3: Add your seeds
Place your seeds along the length of the strip, spacing them a little apart so they have room to grow.
You should be gentle, then press them just slightly into the mix so they stay put when rolled. This is a good time to label your strip if you’re growing multiple types.
Step 4: Roll it up
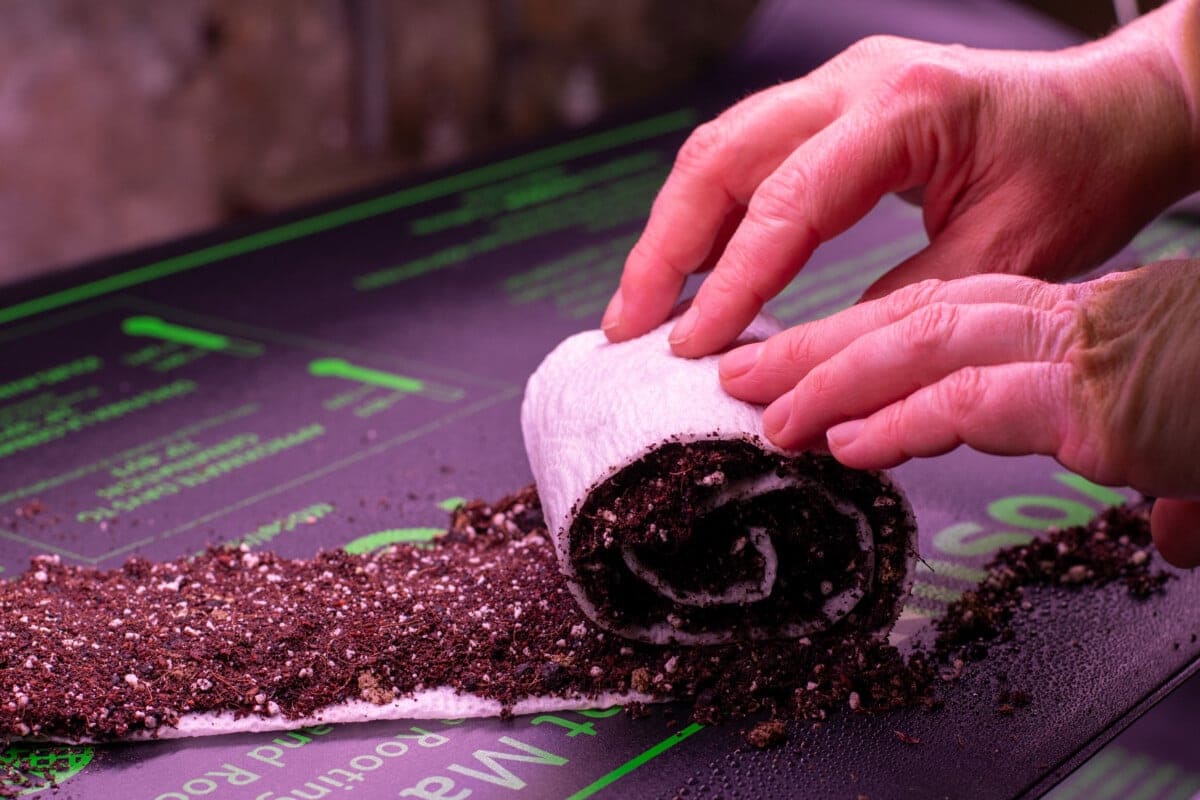
Starting from one end, carefully roll the strip into a loose spiral, like you’re making a cinnamon roll.
Try not to press too tight as you want airflow and space for roots to stretch. Once rolled, secure it with a small piece of twine, a plant clip, or even a rubber band.
Step 5: Set it upright in a tray
Place your rolled snail standing upright in a shallow container or pot. You can also dd about half an inch of water to the bottom so the soil can stay moist from underneath.
If your environment is dry, lightly cover the whole setup with a clear plastic bag or dome to hold in humidity.
Step 6: Give it light
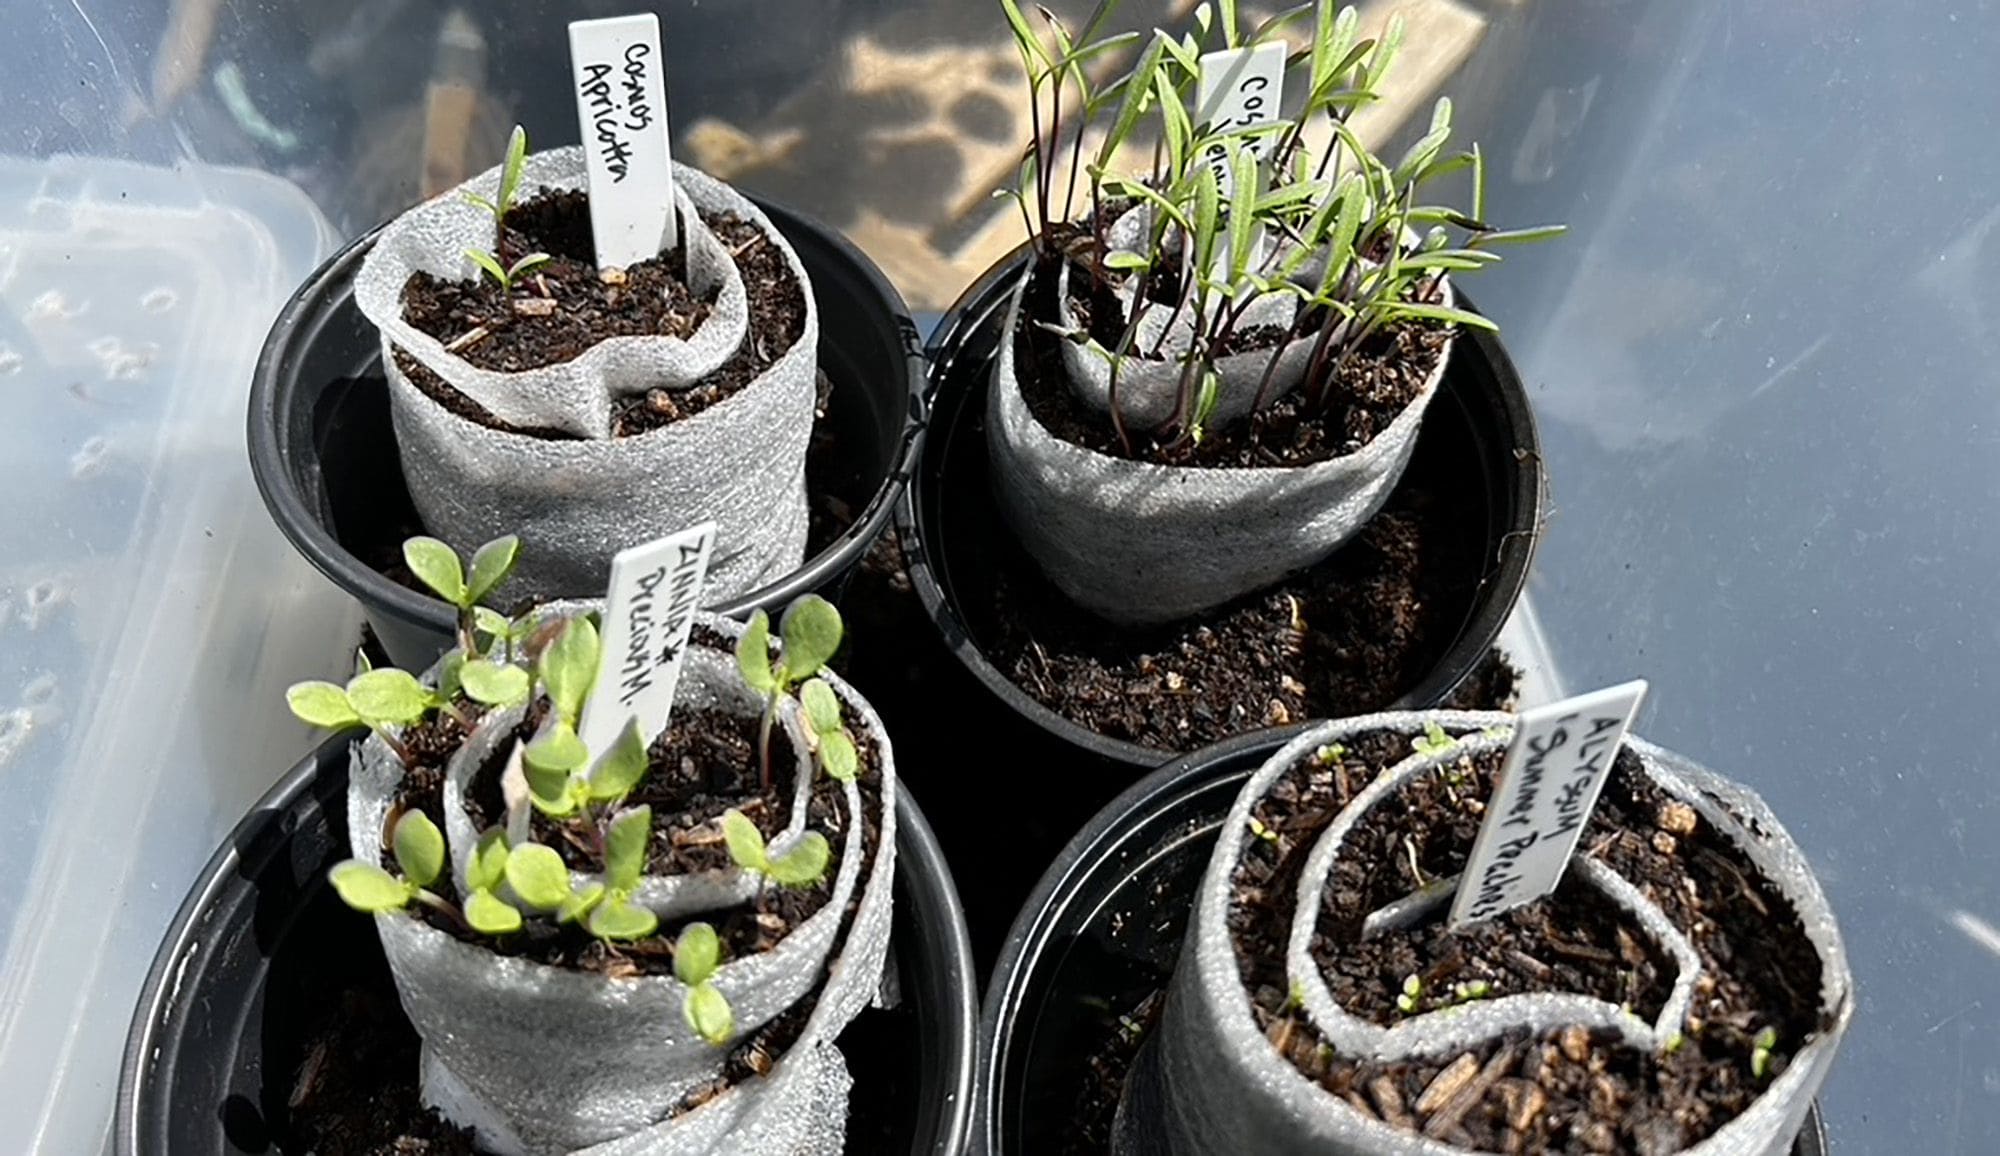
Place your snail somewhere bright like a sunny windowsill with indirect light. You also want to mist the top daily to keep the surface moist while waiting for germination.
Once sprouts appear, remove the cover and let your seedlings enjoy fresh air and light.
A Few Helpful Tips
Stick to sowing one seed variety per snail to keep things tidy and prevent overcrowding. Heavier seeds can be tucked deeper in the spiral, while tiny ones belong near the top for easy sprouting.
You also need to use a clean tray and mist lightly every couple of days. Warmth helps, but once seedlings emerge, remove any cover to avoid excess humidity or mold.
An added bonus is that around the edges, roots can peek out and access water directly. If anything looks dry, a quick bottom soak refreshes it all without disturbing fragile leaves.
When It’s Time to Unroll and Plant
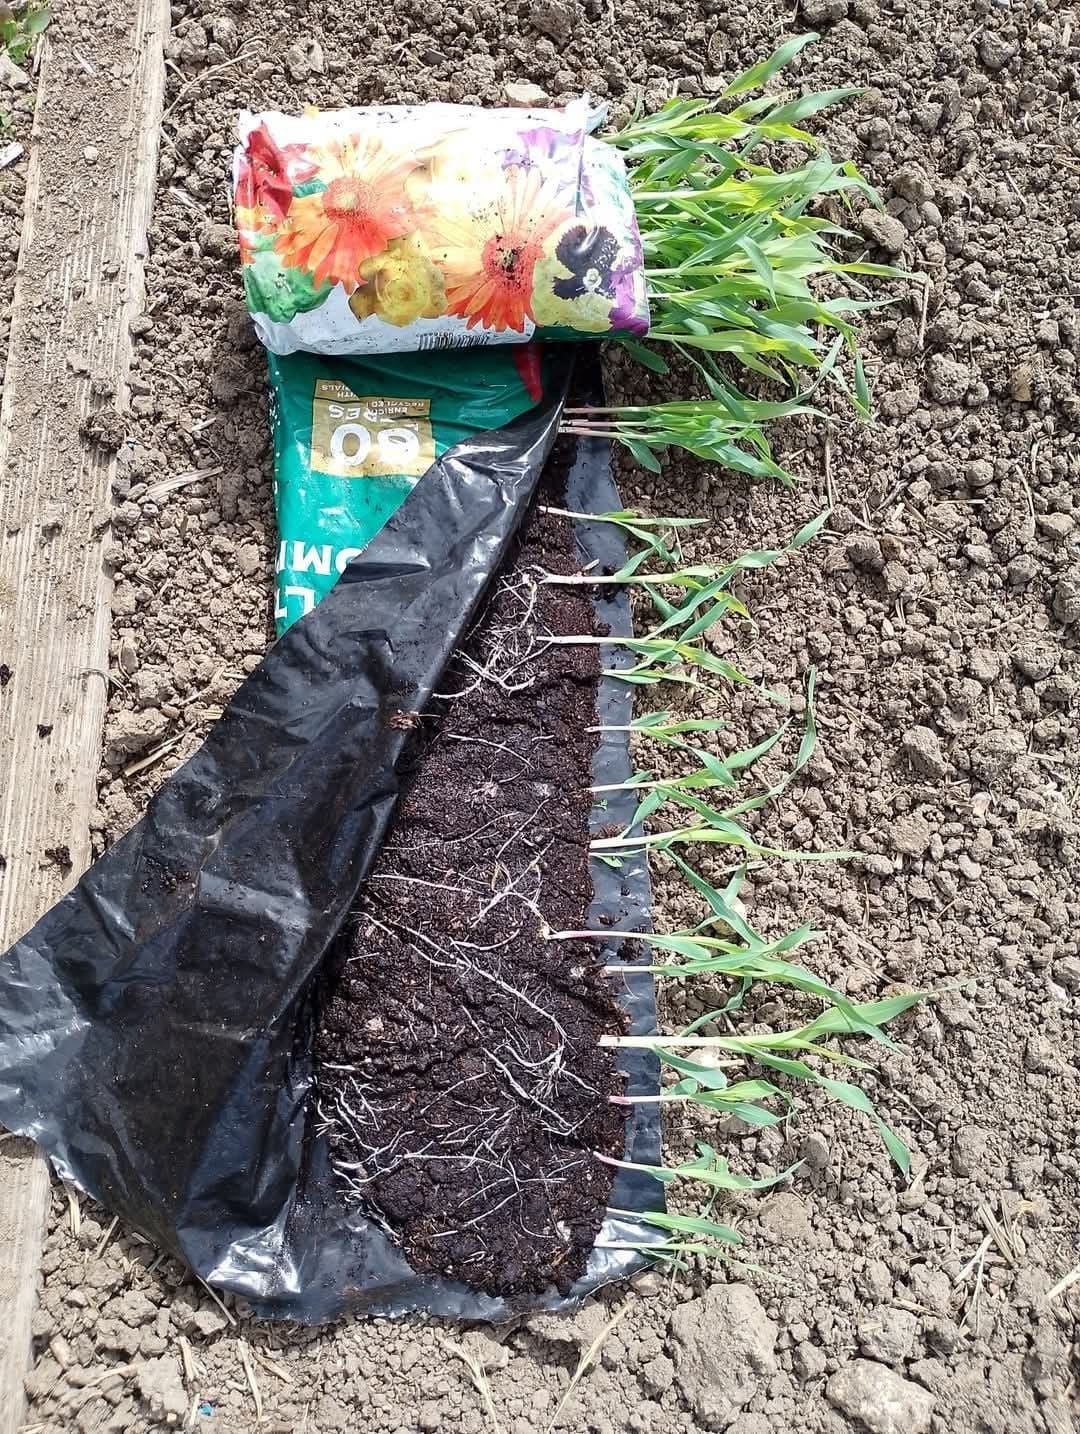
Once seedlings are an inch or two tall and roots show through the bottom layers, it’s go-time.
Gently unroll the snail, plant entire coils into soil or cells, or separate and tuck each seedling lightly into its pot. Roots grow strong and straight, minimizing transplant shock and improving early growth.
Is the Seed Snail Method Right for You?
If you’re tight on space, budget-conscious, or just love experimenting, the Seed Snail could be a game-changer. Its charm lies in blending efficiency with nurturing care, a spiral full of life that’s both tidy and customizable.
For eco-enthusiasts, it also avoids single-use plastic pots, fitting well with a low-waste gardening lifestyle.
That said, if you already use biodegradable pots, automatic waterings, or rotate flats every season, the snail adds a playful but practical, twist rather than a necessity.
