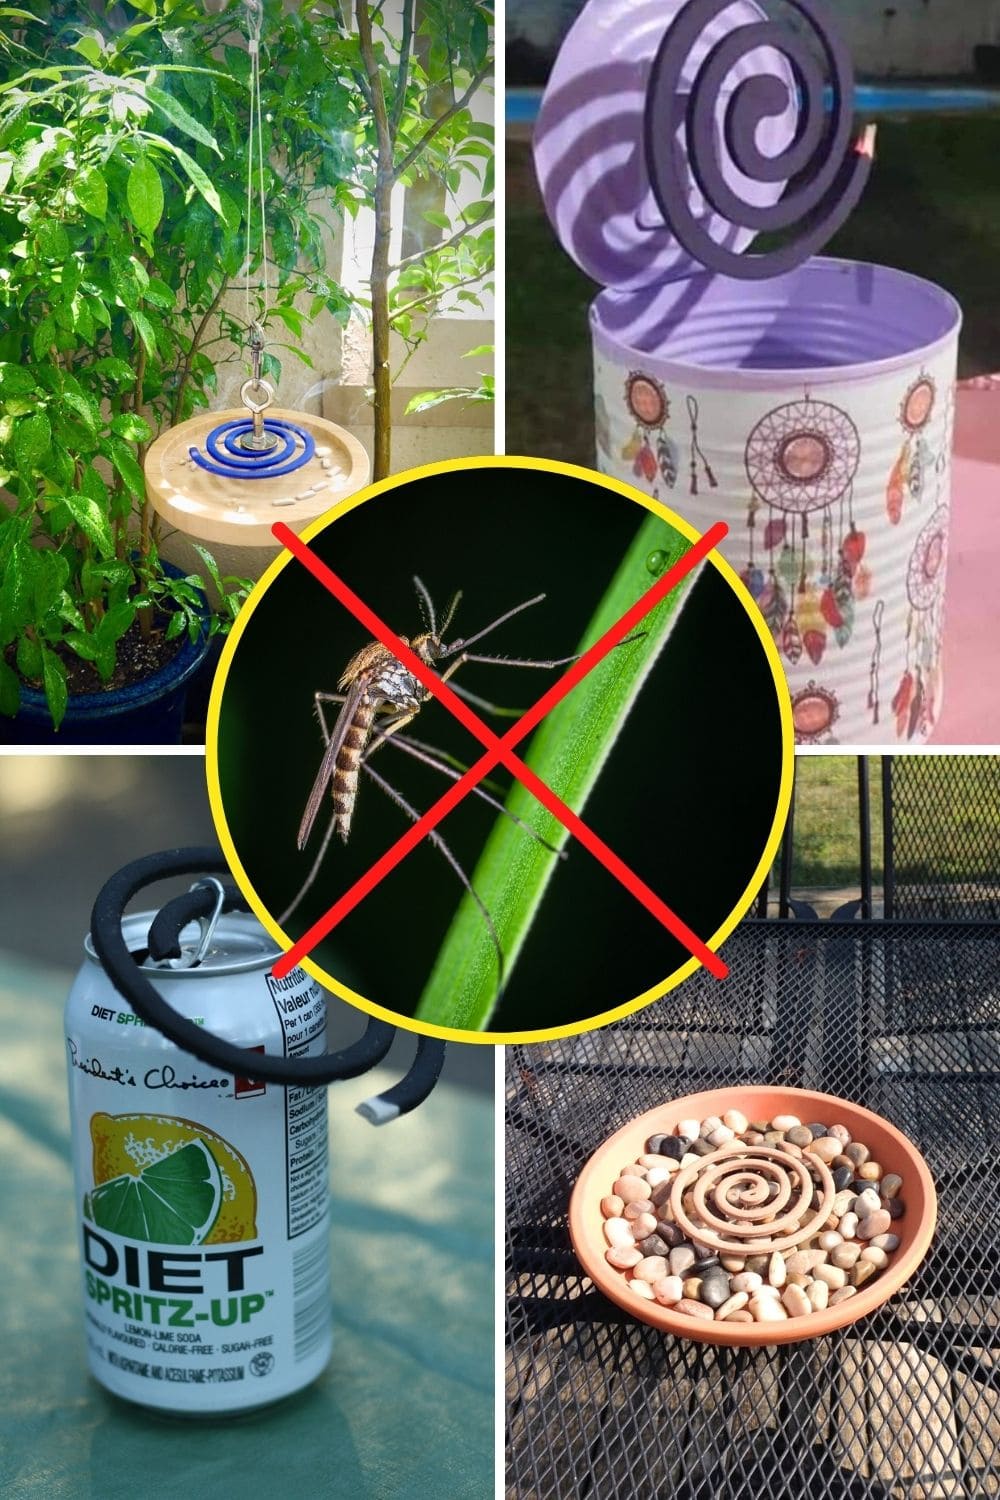
When the rainy season arrives, it often brings more than just the soothing sound of raindrops. Puddles form in gardens, streets, and even small corners around the home, creating perfect breeding grounds for mosquitoes.
These tiny pests can carry dangerous diseases like dengue, malaria, and Zika virus. During times of frequent rainfall, their numbers can multiply quickly, making outdoor relaxation or even a quiet evening indoors uncomfortable.
Protecting your home becomes essential, and one of the simplest, most effective solutions is using mosquito coils. With the right coil holder, you can keep the smoke flowing safely.
#1. Upcycled Tin Can Mosquito Coil Holder
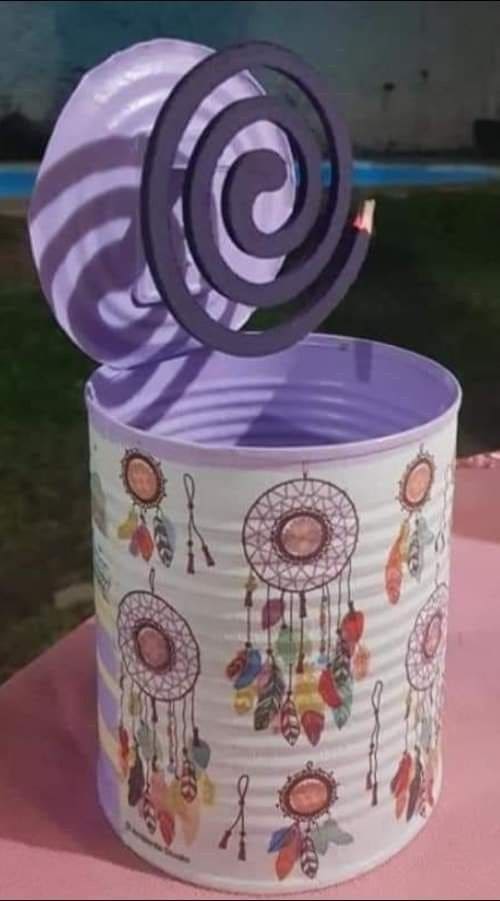
Turning an old tin can into a mosquito coil holder is a perfect example of how a little creativity can give everyday items a new life.
This version, painted in a soft pastel shade and decorated with dreamcatcher motifs, adds a whimsical touch to your outdoor space. The coil is mounted above the open can, allowing ashes to fall neatly inside for easy cleanup
Not only does this project help keep mosquitoes away, but it also lets you recycle and personalize something that might have otherwise been thrown away.
Materials Needed
- 1 empty tin can (4-6 in height)
- 1 coil-holding wire or metal hook (8-10 in length)
- Spray paint (pastel or color of choice)
- Decorative stickers or decoupage paper
- Clear sealant spray
- 1 mosquito coil
Step-by-step Guide
Step 1: Clean and dry the tin can thoroughly, removing any sharp edges around the rim.
Step 2: Spray paint the entire can, allowing it to dry fully before adding designs.
Step 3: Apply decorative stickers or decoupage patterns, then seal with a clear spray for durability.
Step 4: Attach the coil-holding wire across the top so that the coil hangs above the open can.
Step 5: Light the coil, letting the ashes drop inside for mess-free use.
#2. Terracotta Dish and Pebble Mosquito Coil Holder
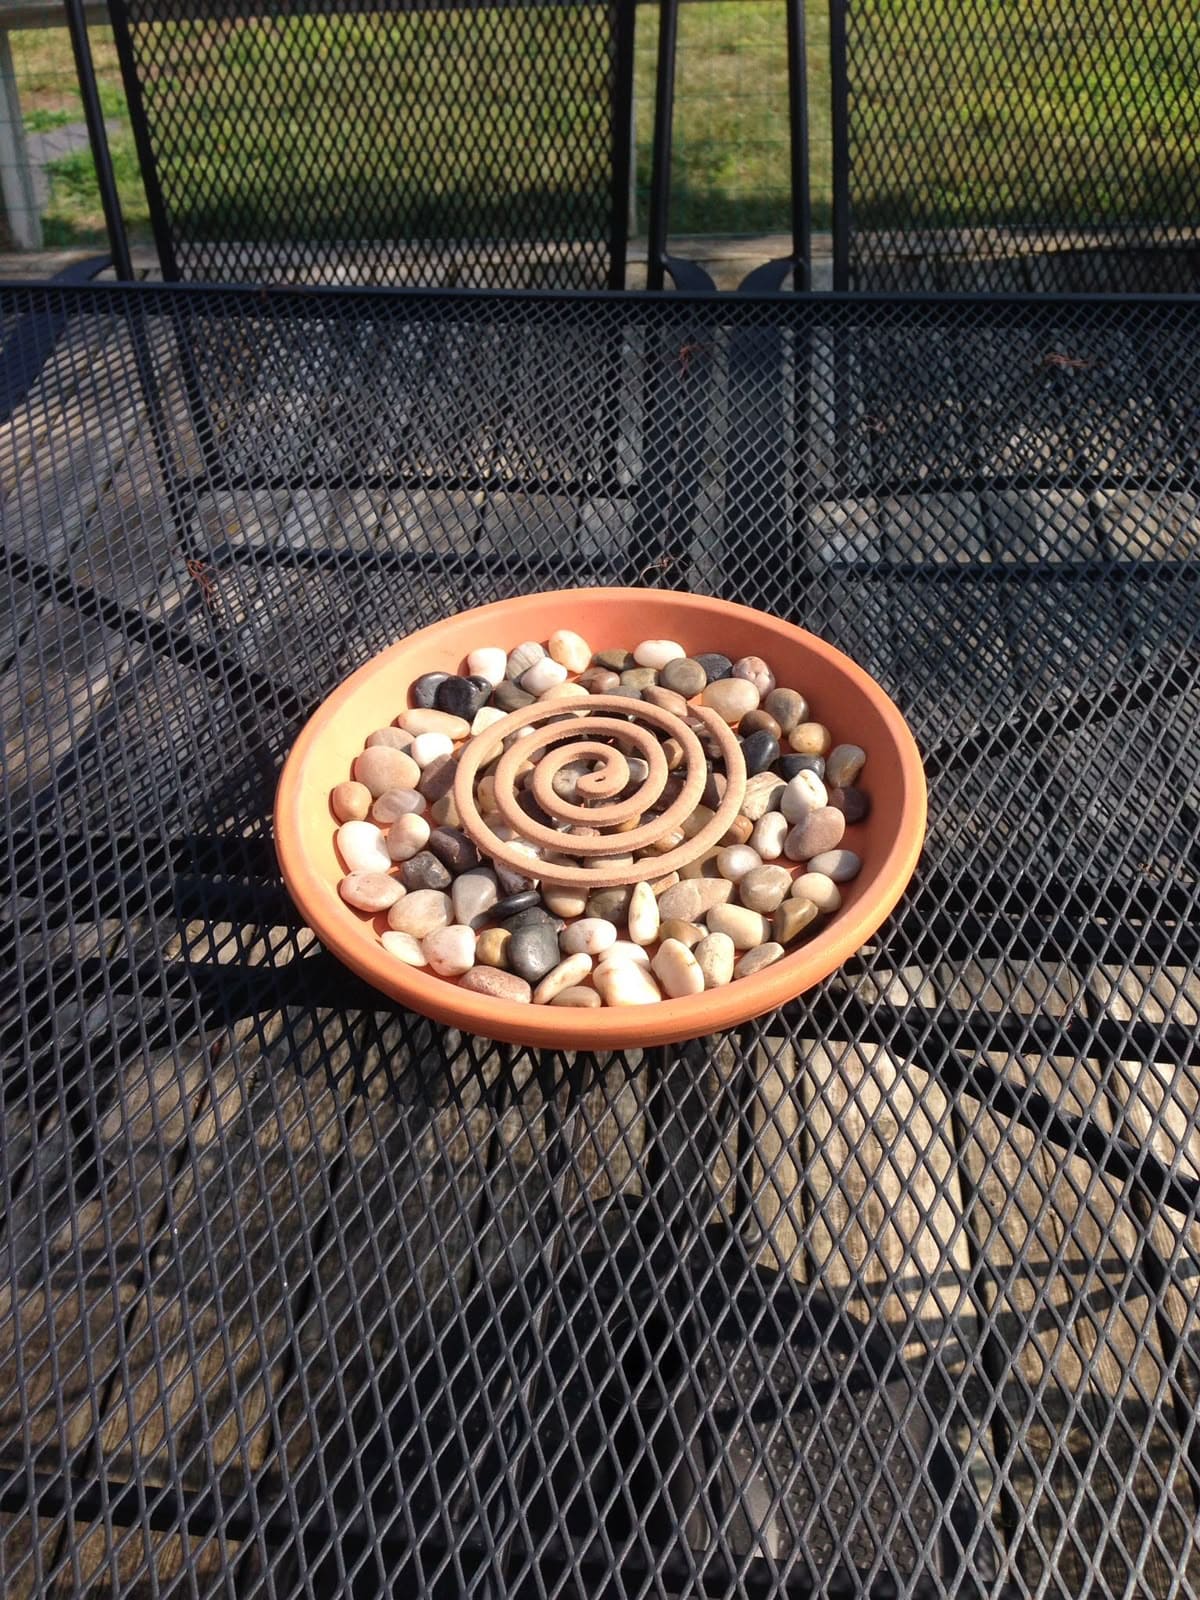
For a simple yet stylish mosquito coil holder, you can’t go wrong with a terracotta dish filled with smooth pebbles.
This setup keeps the coil steady, adds a natural decorative touch, and is easy to move around as needed. The terracotta absorbs some of the heat, while the pebbles prevent the coil from tipping over or scorching the surface beneath.
It’s perfect for tabletops, patios, or garden seating areas, blending functionality with earthy charm. Plus, it’s quick to make and you’re ready to enjoy a mosquito-free evening.
Materials Needed
- 1 terracotta dish or saucer (8-10 in diameter)
- 1-2 lbs of smooth river pebbles (1-2 in size)
- 1 mosquito coil
- Optional: heat-resistant mat
Step-by-step Guide
Step 1: Place the terracotta dish on a stable, flat surface, preferably on a heat-resistant mat if indoors.
Step 2: Arrange the river pebbles evenly inside the dish, leaving a flat spot in the center for the coil.
Step 3: Position the mosquito coil on top of the pebbles, making sure it’s level and stable.
Step 4: Light the outer tip and let the smoke drift naturally around your seating area. After use, allow the dish to cool before moving or refilling.
#3. Mosaic Tile Base Mosquito Coil Holder
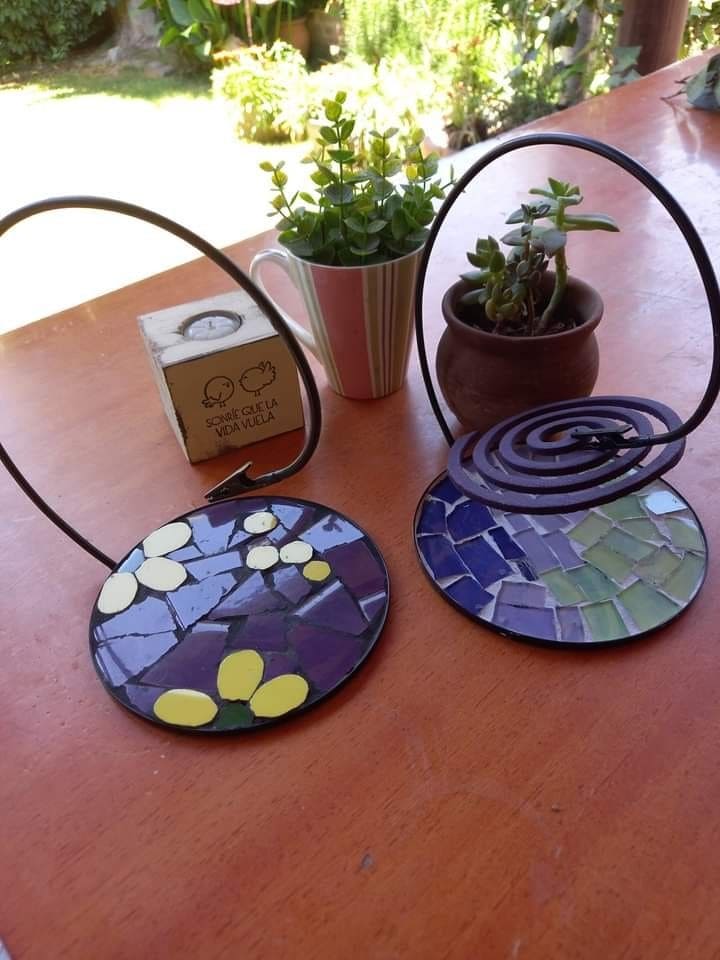
If you love blending practicality with artistry, a mosaic tile base mosquito coil holder is a beautiful choice. The vibrant patterns turn something as ordinary as a coil holder into a decorative accent for your table or patio.
Plus, the sturdy metal frame keeps the coil elevated, allowing smoke to disperse evenly while preventing burns on the surface below.
Each base is a small piece of art as the colorful tiles catch the sunlight during the day and add charm to your outdoor gatherings at night.
Materials Needed
- 1 metal coil stand with loop arm (6-8 in tall)
- 1 round base (5-6 in diameter) with mosaic tile surface
- 1 mosquito coil
- Clear tile sealant (optional)
Step-by-step Guide
Step 1: Place the mosaic tile base on a stable, heat-safe surface like a patio table.
Step 2: Attach or position the metal loop arm securely to hold the coil in midair.
Step 3: Hook the mosquito coil onto the arm, ensuring it’s balanced and not touching the tiles.
Step 4: Light the outer end of the coil and let it smolder, releasing smoke gently over your seating area. After use, tap away ash carefully to keep the mosaic surface clean.
#4. Decorative Ceramic Bowl Mosquito Coil Holder
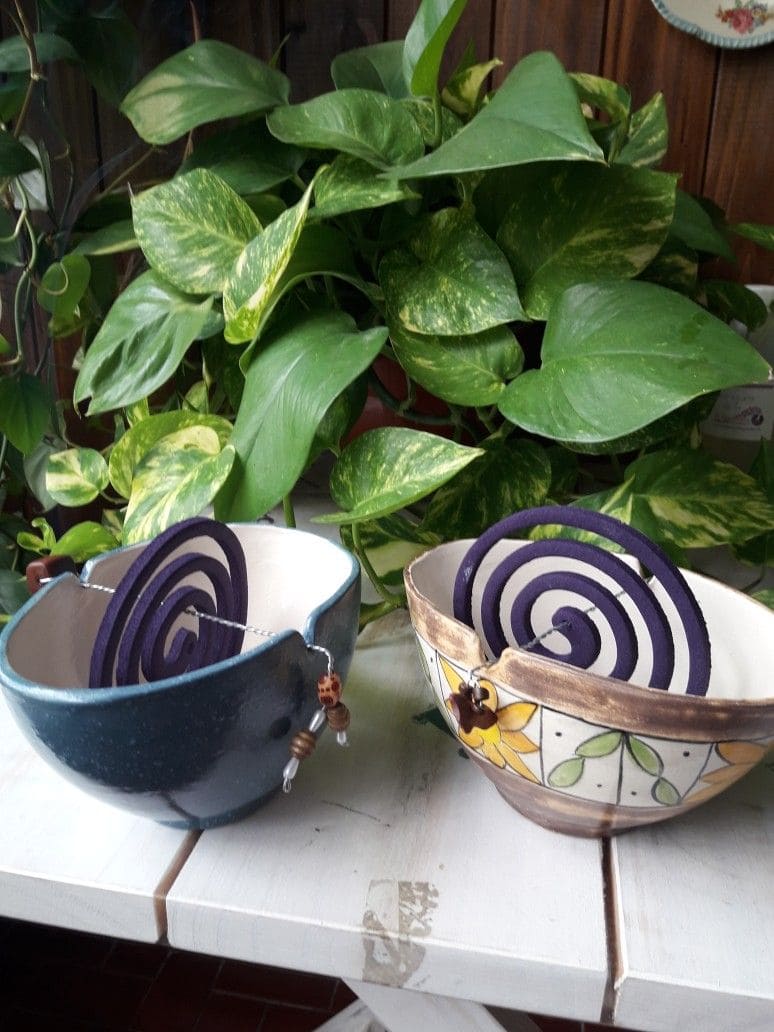
Imagine sipping tea in your garden while a gentle curl of smoke drifts from a beautiful ceramic bowl nearby.
These charming bowls, each with their own hand-painted designs, turn a simple mosquito coil into part of your table setting.
Moreover, the ceramic body keeps heat contained and ash neatly collected, so there’s no mess to worry about. They fit perfectly into patios, balconies, or cozy indoor corners with good ventilation.
Materials Needed
- 1 ceramic bowl (6-8 in diameter, heat-resistant glaze)
- 1 mosquito coil
- 1 metal rod or wire holder (6-8 in long)
- Small beads or charms (optional)
- Heat-resistant adhesive (optional)
Step-by-step Guide
Step 1: Choose a ceramic bowl that complements your existing décor and is deep enough to contain falling ash.
Step 2: Install or place the metal rod across the bowl, securing with adhesive if you want a permanent setup.
Step 3: Add beads or charms to the rod ends for a personal touch.
Step 4: Place the mosquito coil on the holder so it’s suspended above the bowl’s base.
Step 5: Light the coil, let the smoke rise gently, and enjoy a bug-free, stylish atmosphere.
#5. Painted Concrete Base Mosquito Coil Holder
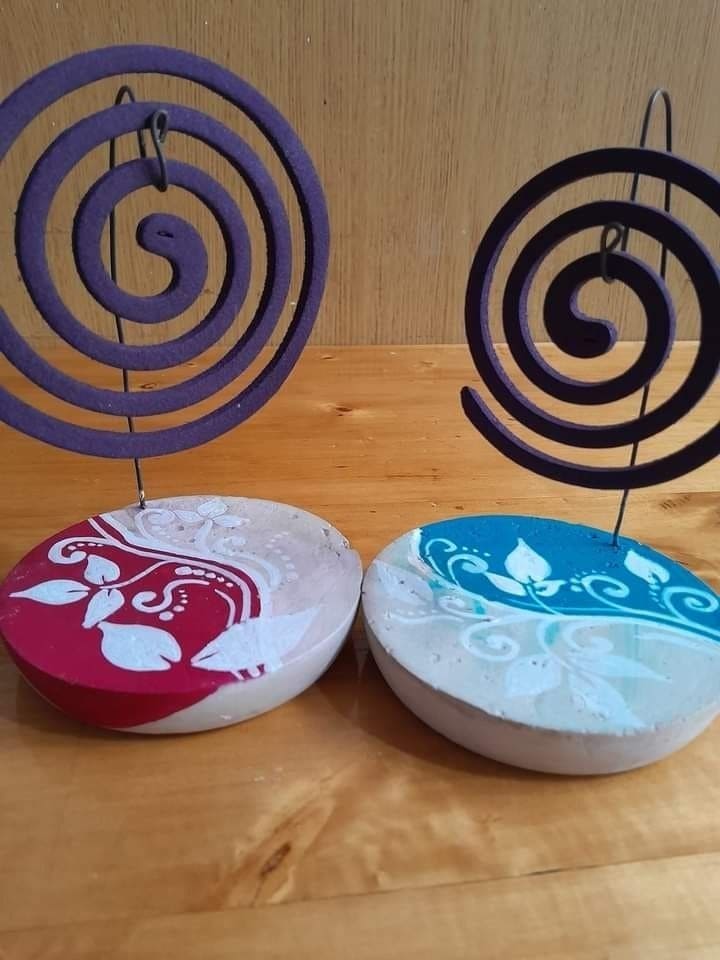
Who says mosquito coil holders have to be boring? These painted concrete base holders bring a splash of color and artistry to your outdoor setup.
The sturdy, weighted base keeps the coil steady even on breezy days, while the delicate floral patterns add a handmade charm.
Bonus, each one can be customized with different colors and designs to suit your style, bright and bold for a lively garden party or soft pastels for a calm evening retreat.
Materials Needed
- 1 round concrete base (4-5 in diameter, 1-1.5 in thick)
- 1 metal rod with coil hook (6-8 in tall)
- Acrylic paint in chosen colors
- Paintbrushes (fine and medium tip)
- Clear sealant spray
- 1 mosquito coil
Step-by-step Guide
Step 1: Paint the surface of the concrete base with your chosen colors, adding patterns or stencils for decoration.
Step 2: Allow the paint to dry completely, then spray a clear sealant to protect from weather and ash stains.
Step 3: Insert the metal rod securely into the center of the base.
Step 4: Now you can hang the mosquito coil on the hook, ensuring it’s balanced and not touching the base.
Tips: You can use waterproof paint if the holder will be kept outdoors permanently, and match the colors to your garden furniture for a coordinated look.
#6. Rustic Wooden Stand Mosquito Coil Holder
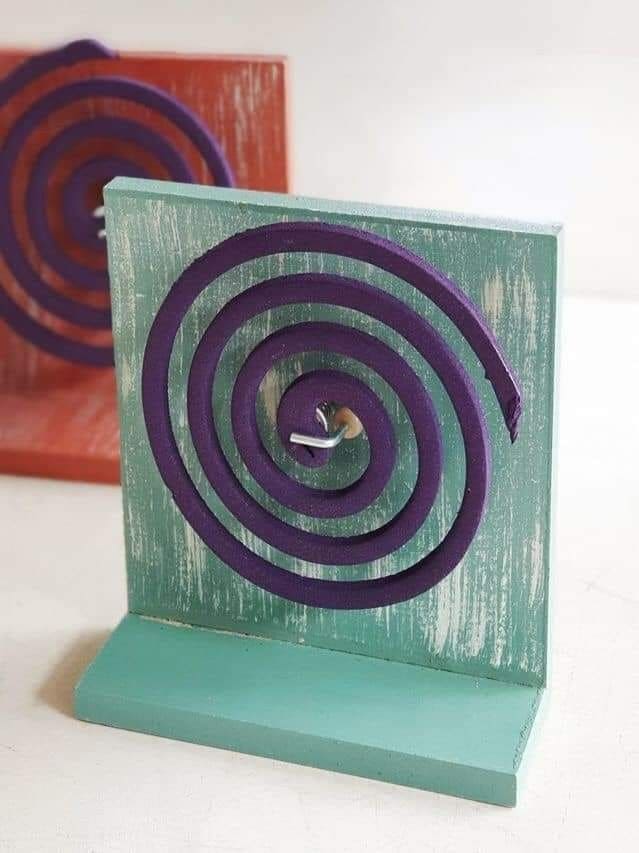
Sometimes all you need is a sturdy, no-nonsense holder with a touch of rustic charm. This wooden stand design keeps the coil upright, secure, and easy to light, while its distressed paint finish adds a cozy, handmade feel to your space.
It works perfectly on patios, balconies, or even inside screened porches where you want a blend of practicality and style.
Specially, the flat base ensures stability, and the upright board catches the ash, keeping your table or floor clean. You can even make a few in different colors to match your décor or seasonal themes.
Materials Needed
- 1 wooden board (6 × 8 in)
- 1 wooden base (6 × 3 in)
- 1 small metal hook (1 in)
- Sandpaper
- Acrylic paint in desired color
- Wood glue or screws
- 1 mosquito coil
Step-by-step Guide
Step 1: Sand the wooden board and base to smooth rough edges.
Step 2: Paint both pieces in your chosen color, letting them dry fully. Then lightly sand again for a distressed look if desired.
Step 3: Attach the board vertically to the base using wood glue or screws, ensuring it stands firm.
Step 4: Screw the metal hook into the center of the board at coil height.
Step 5: Hang the coil on the hook, light the outer tip, and let the smoke work its magic.
Read more: How to Kill Mosquitoes and Their Larvae with the Mosquito Bucket of Doom
#7. Simple Ground Stake Mosquito Coil Holder
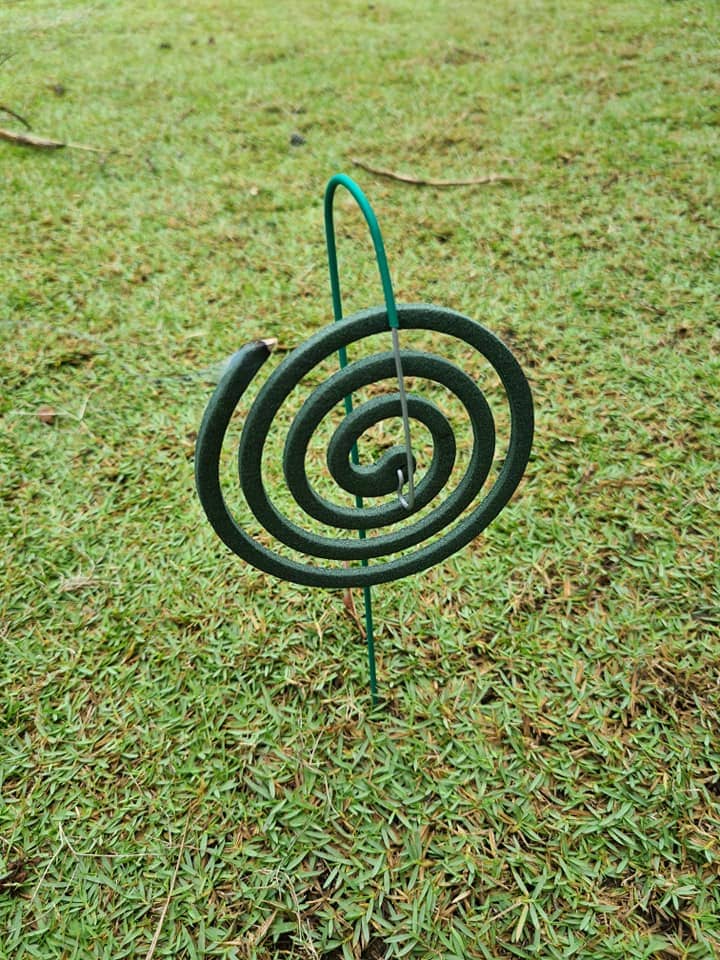
This ground stake mosquito coil holder keeps your coil upright and off the damp ground, allowing it to burn evenly while the smoke disperses freely.
Perfect for camping trips, backyard barbecues, or an evening tea on the lawn, it’s light enough to move around yet sturdy enough to stay in place.
Because it’s just a slim, coated metal rod, it blends effortlessly with the garden without taking up space or drawing too much attention.
Materials Needed
- 1 metal stake or rod (8-10 in length, 0.2 in thickness)
- 1 mosquito coil
- Rust-resistant coating or spray paint
Step-by-step Guide
Step 1: Choose a spot with firm soil where you’ll be seated.
Step 2: Push the metal stake 3-4 inches into the ground until stable.
Step 3: Slide the mosquito coil onto the stake, securing it at the center loop.
Step 4: Finally, light the outer tip of the coil and let the smoke do its job.
#8. Metal Mosquito Sculpture Coil Holder
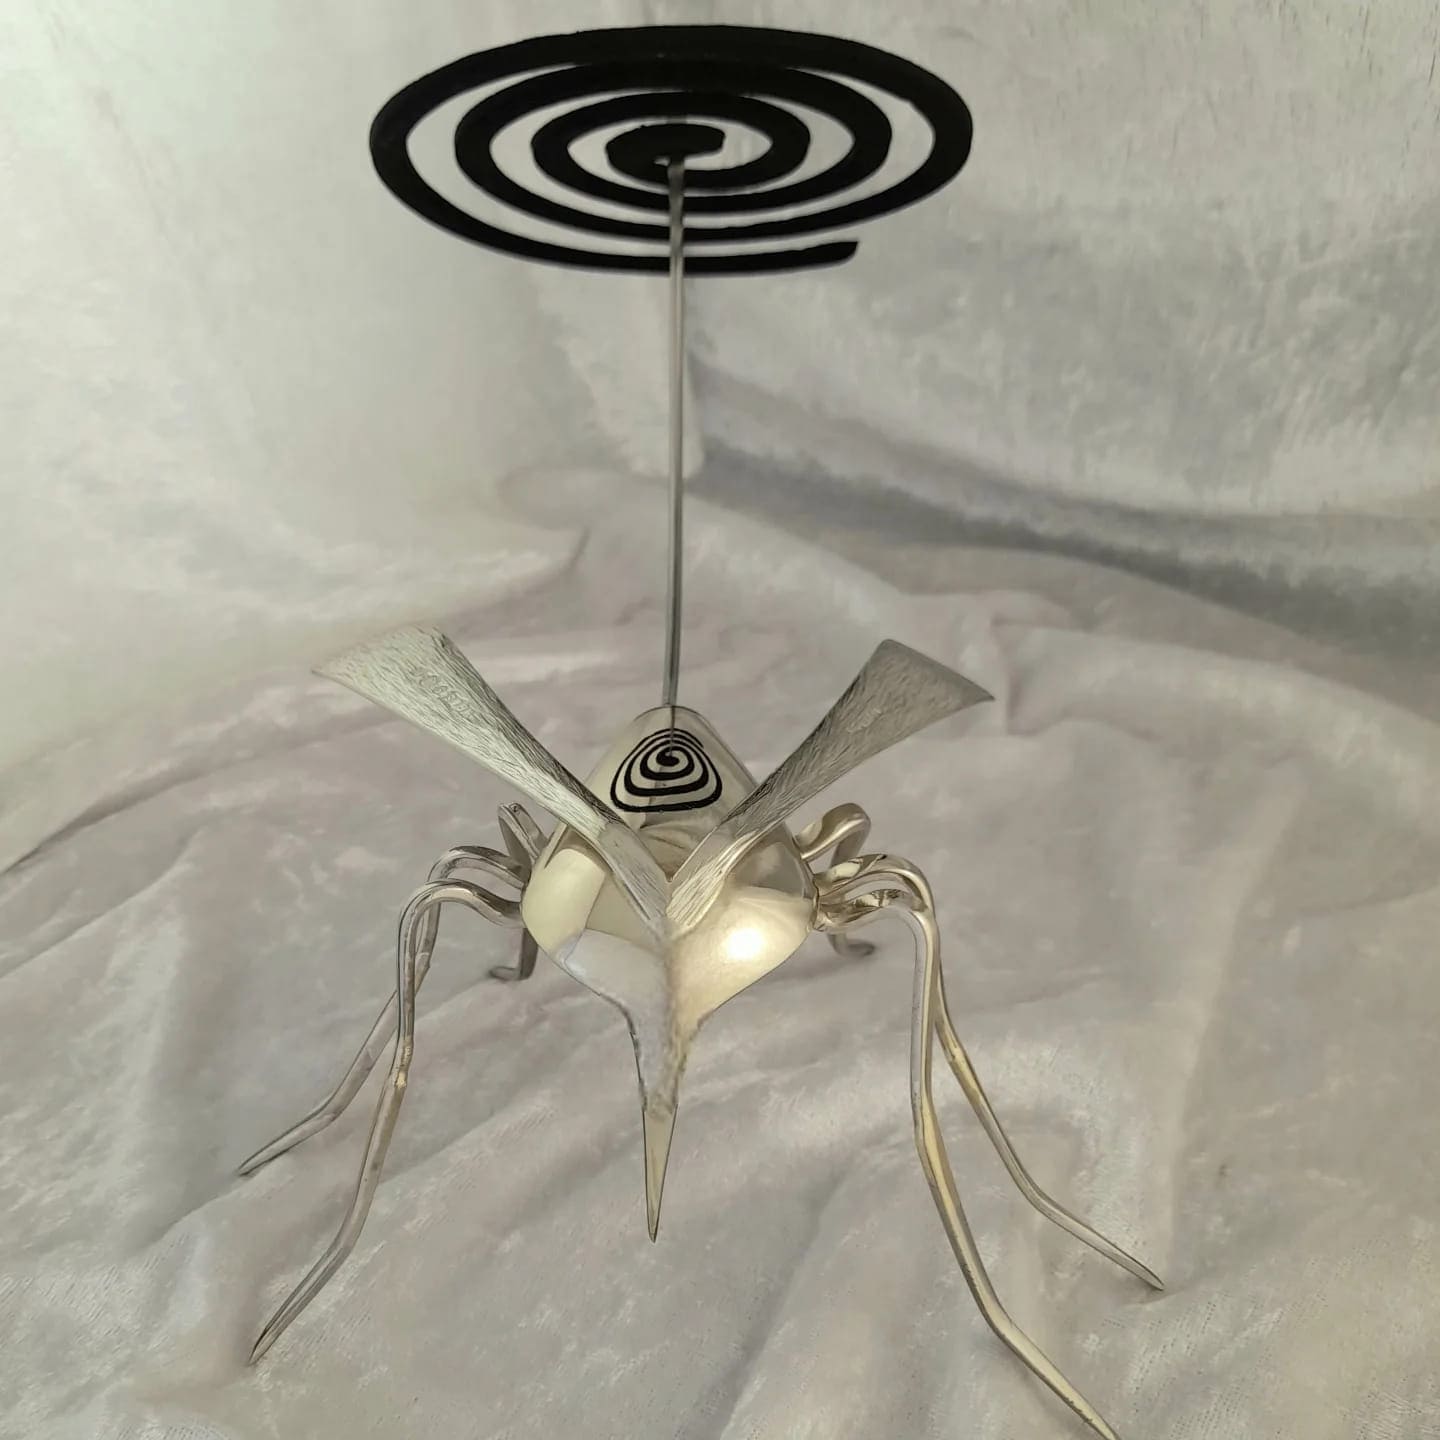
Let’s talk about poetic justice, a mosquito-shaped sculpture holding the very coil designed to keep its kind away!
This clever design is equal parts functional and decorative, making it a standout conversation piece. Crafted from bent and shaped metal, it stands gracefully on spindly legs while the coil rests securely above.
The artistic detail in the wings and body makes it look like a piece of modern art, yet it’s built with practicality in mind.
Materials Needed
- 1 metal mosquito sculpture (approx. 8-10 in length, 6-8 in height)
- 1 coil-holding rod or wire (8-10 in length)
- Heat-resistant adhesive or welding tools
- 1 mosquito coil
Step-by-step Guide
Step 1: Place the sculpture on a stable, flat surface where it won’t be easily knocked over.
Step 2: Attach the coil-holding rod to the sculpture’s back, ensuring it’s firmly fixed.
Step 3: Position the mosquito coil on the rod so it’s elevated above the sculpture’s body.
Step 4: Light the coil at the outer edge, allowing smoke to rise and drift around the area.
Step 5: After use, remove ash carefully to keep the sculpture looking pristine.
Tips: If placing outdoors, apply a clear rust-resistant coating to keep the sculpture in top shape season after season.
#9. Elevated Plate Stand Mosquito Coil Holder
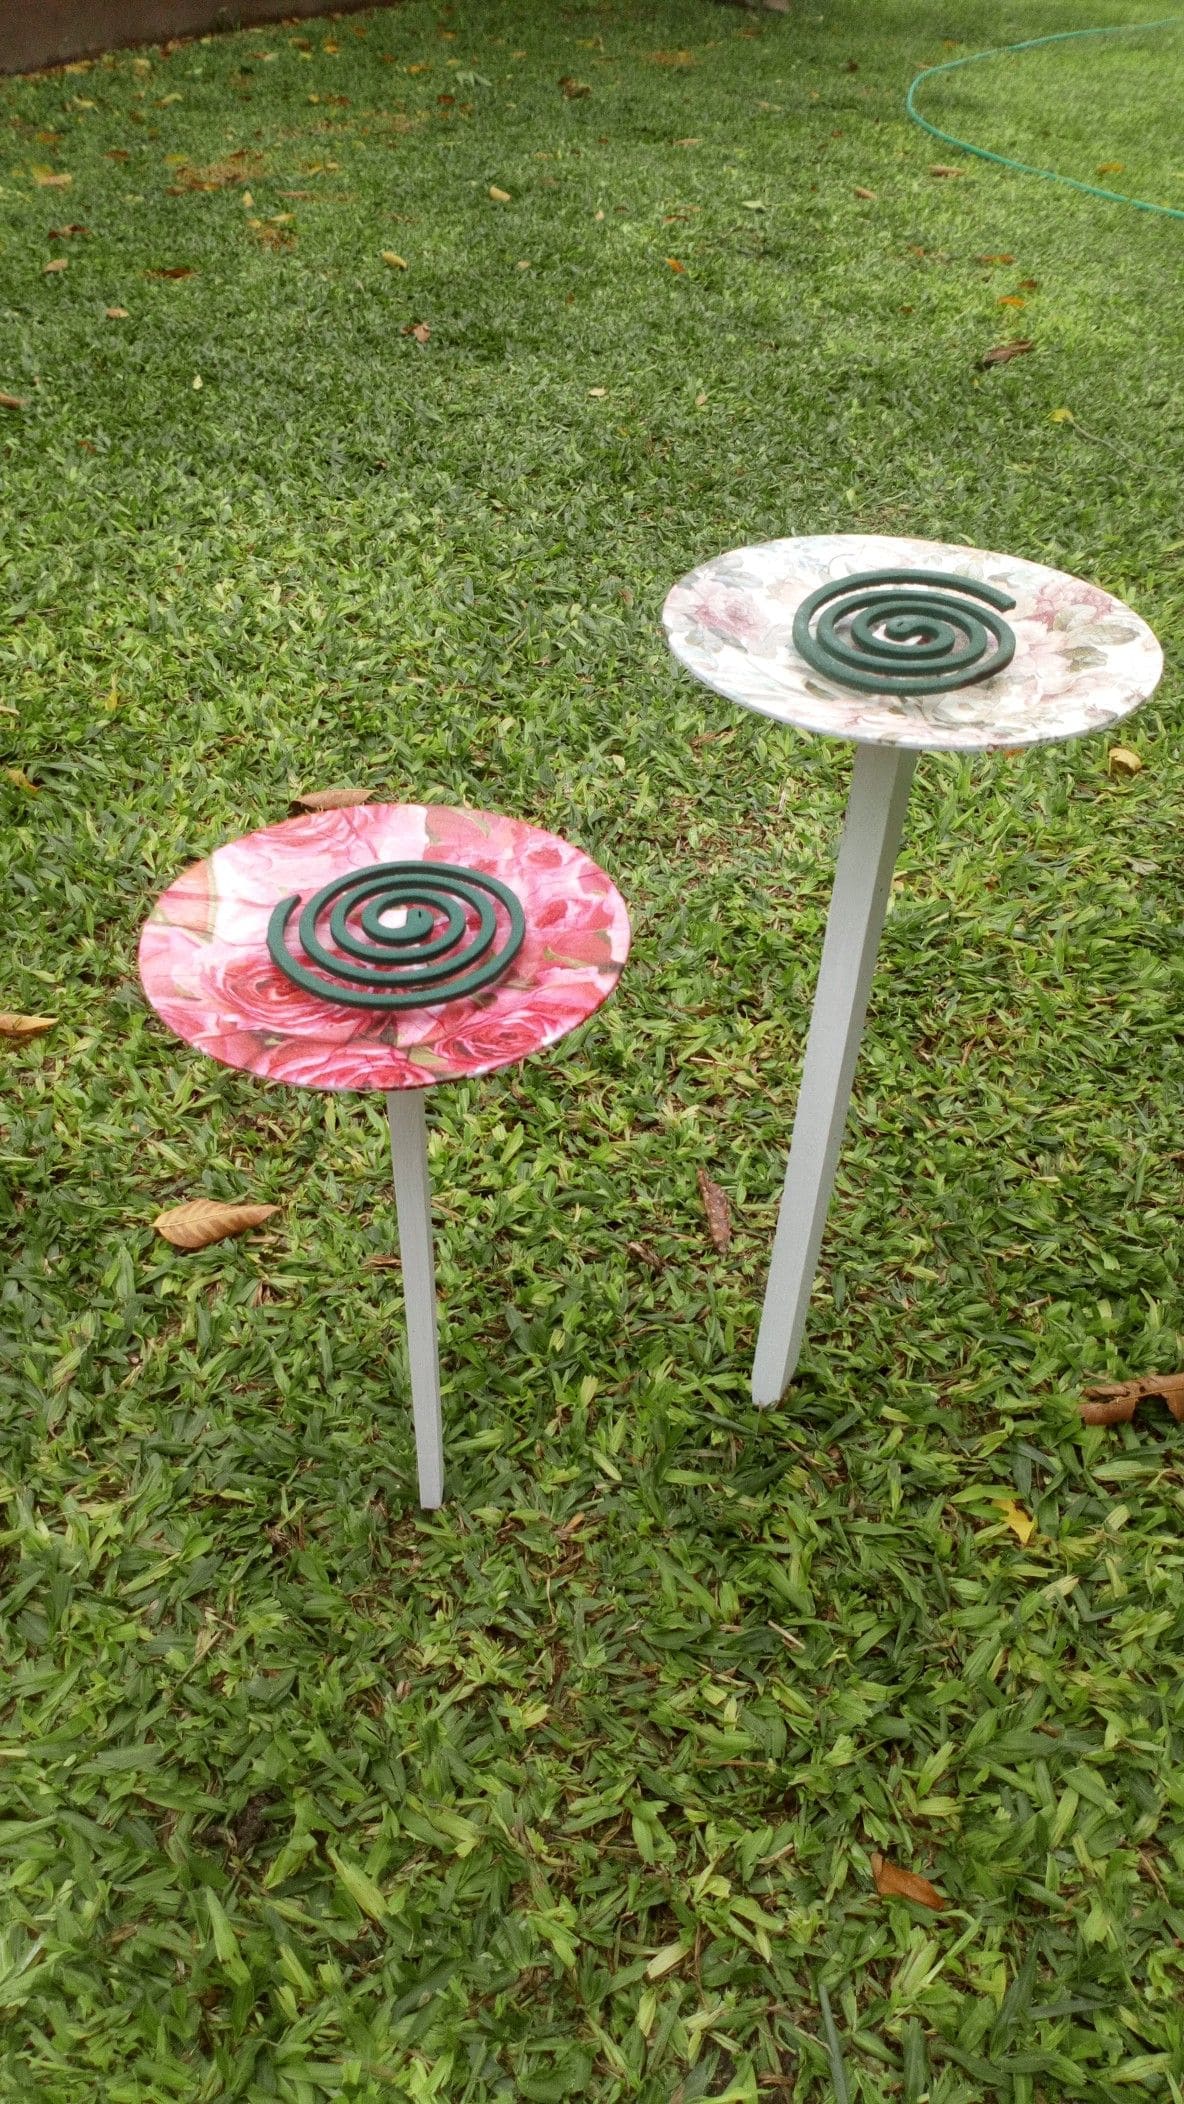
If you enjoy sitting in the garden and want your mosquito coil within easy reach, an elevated plate stand is a charming and practical choice.
By lifting the coil off the ground, you not only help the smoke spread more effectively but also keep it safe from children, pets, and damp grass.
Plus, these stands can be made to match your garden’s personality, you can use plain plates for a minimal look or patterned ones for a cheerful touch.
Materials Needed
- 2-3 wooden or metal stakes (24-30 in long, 1 in thick)
- 2 round plates (8-10 in diameter, heat-resistant)
- Outdoor-safe adhesive or screws
- 2 mosquito coils
- Rust-resistant paint (optional)
Step-by-step Guide
Step 1: Select the spot where you want to place your stands, ensuring stable, level ground.
Step 2: Paint or coat the stakes if you want extra weather protection, letting them dry completely.
Step 3: Attach each plate securely to the top of a stake using outdoor-safe adhesive or screws.
Step 4: Push the stakes 4-6 inches into the soil until they are firm and won’t wobble.
Step 5: Place a mosquito coil at the center of each plate, light the outer tip, and enjoy the steady release of smoke.
#10. Soda Can Mosquito Coil Holder
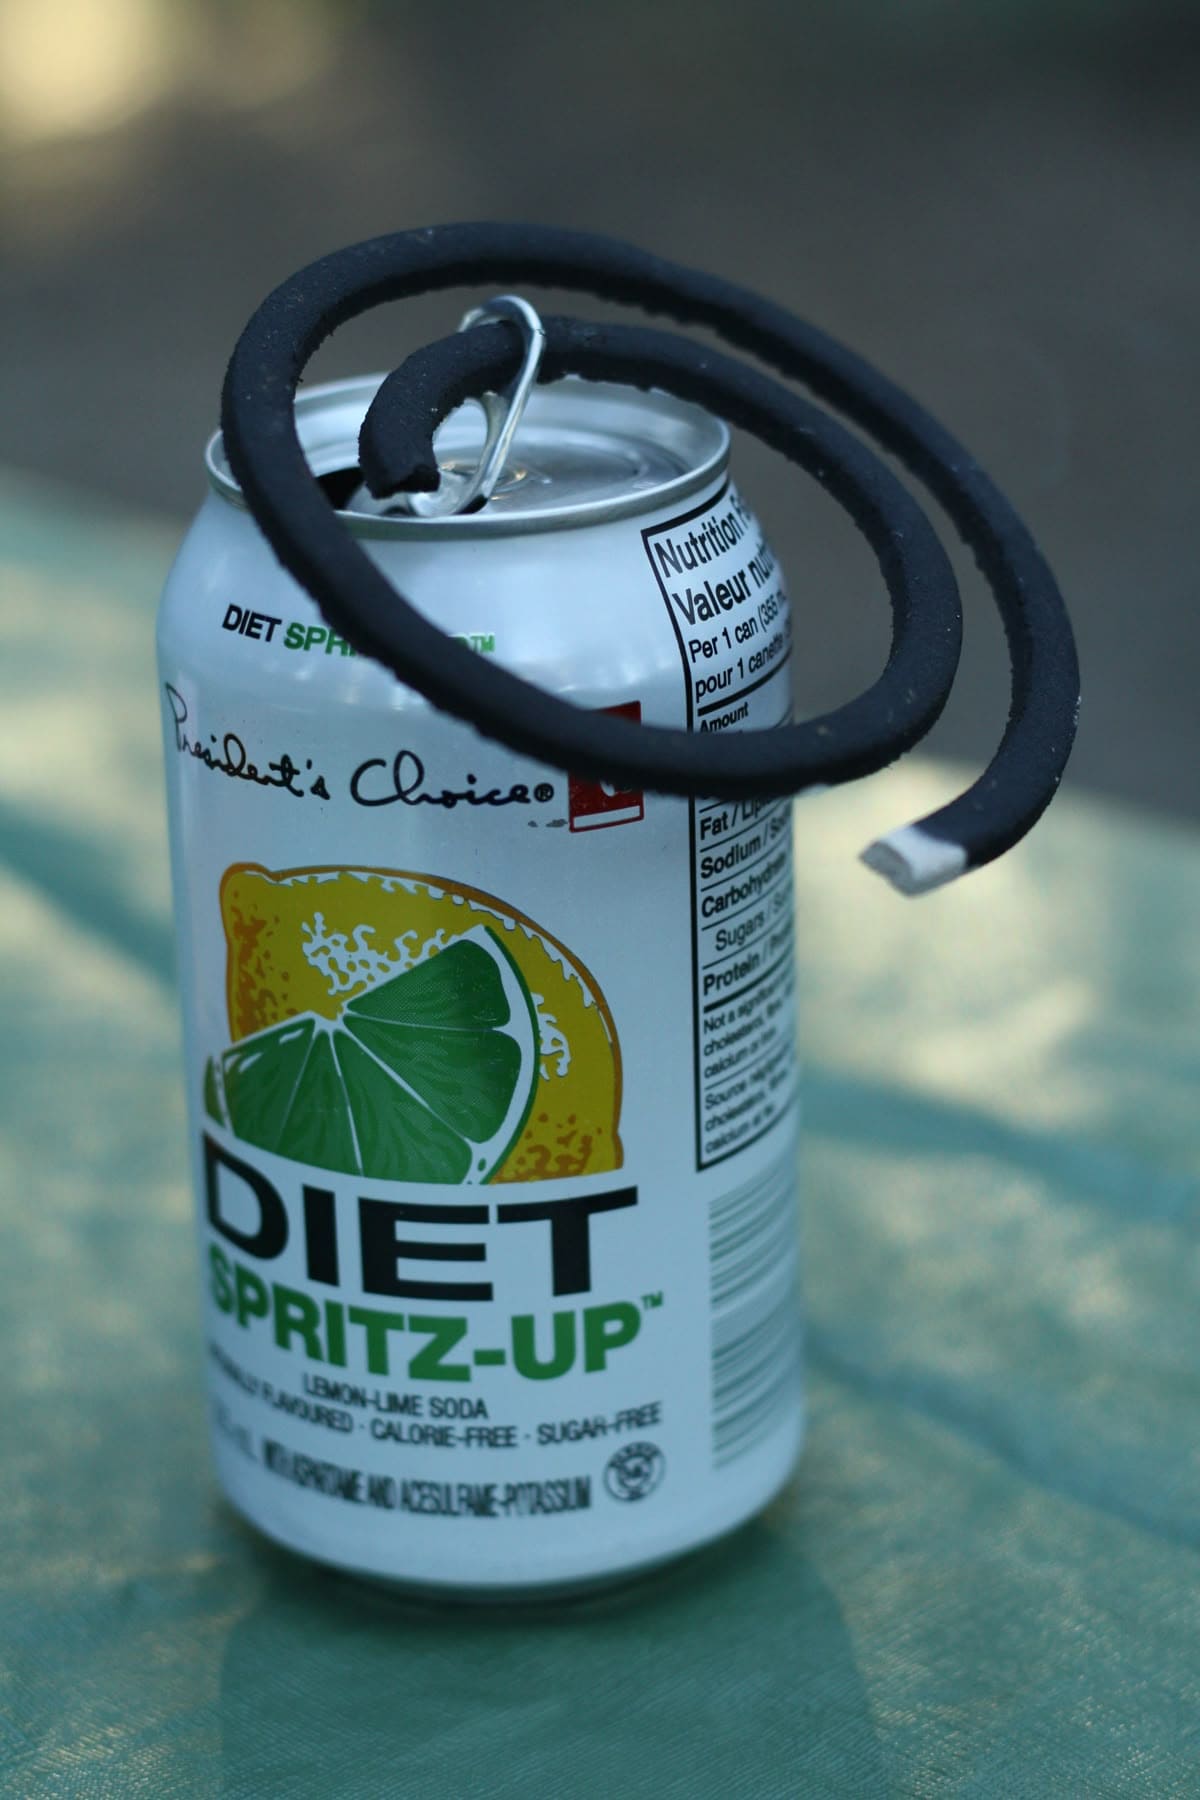
Turning an old tin can into a mosquito coil holder is a perfect example of how a little creativity can give everyday items a new life.
This version, painted in a soft pastel shade and decorated with dreamcatcher motifs, adds a whimsical touch to your outdoor space.
The coil is mounted above the open can, allowing ashes to fall neatly inside for easy cleanup. It’s lightweight, portable, and safe to place on any flat surface.
Materials Needed
- 1 empty tin can (4-6 in height)
- 1 coil-holding wire or metal hook (8-10 in length)
- Spray paint (pastel or color of choice)
- Decorative stickers
- Clear sealant spray
- 1 mosquito coil
Step-by-step Guide
Step 1: Clean and dry the tin can thoroughly, removing any sharp edges around the rim.
Step 2: Spray paint the entire can, allowing it to dry fully before adding designs.
Step 3: Apply decorative stickers or decoupage patterns, then seal with a clear spray for durability.
Step 4: Attach the coil-holding wire across the top so that the coil hangs above the open can.
Step 5: Light the coil, letting the ashes drop inside for mess-free use.
#11. Hanging Mosquito Coil Holder for Garden Spaces
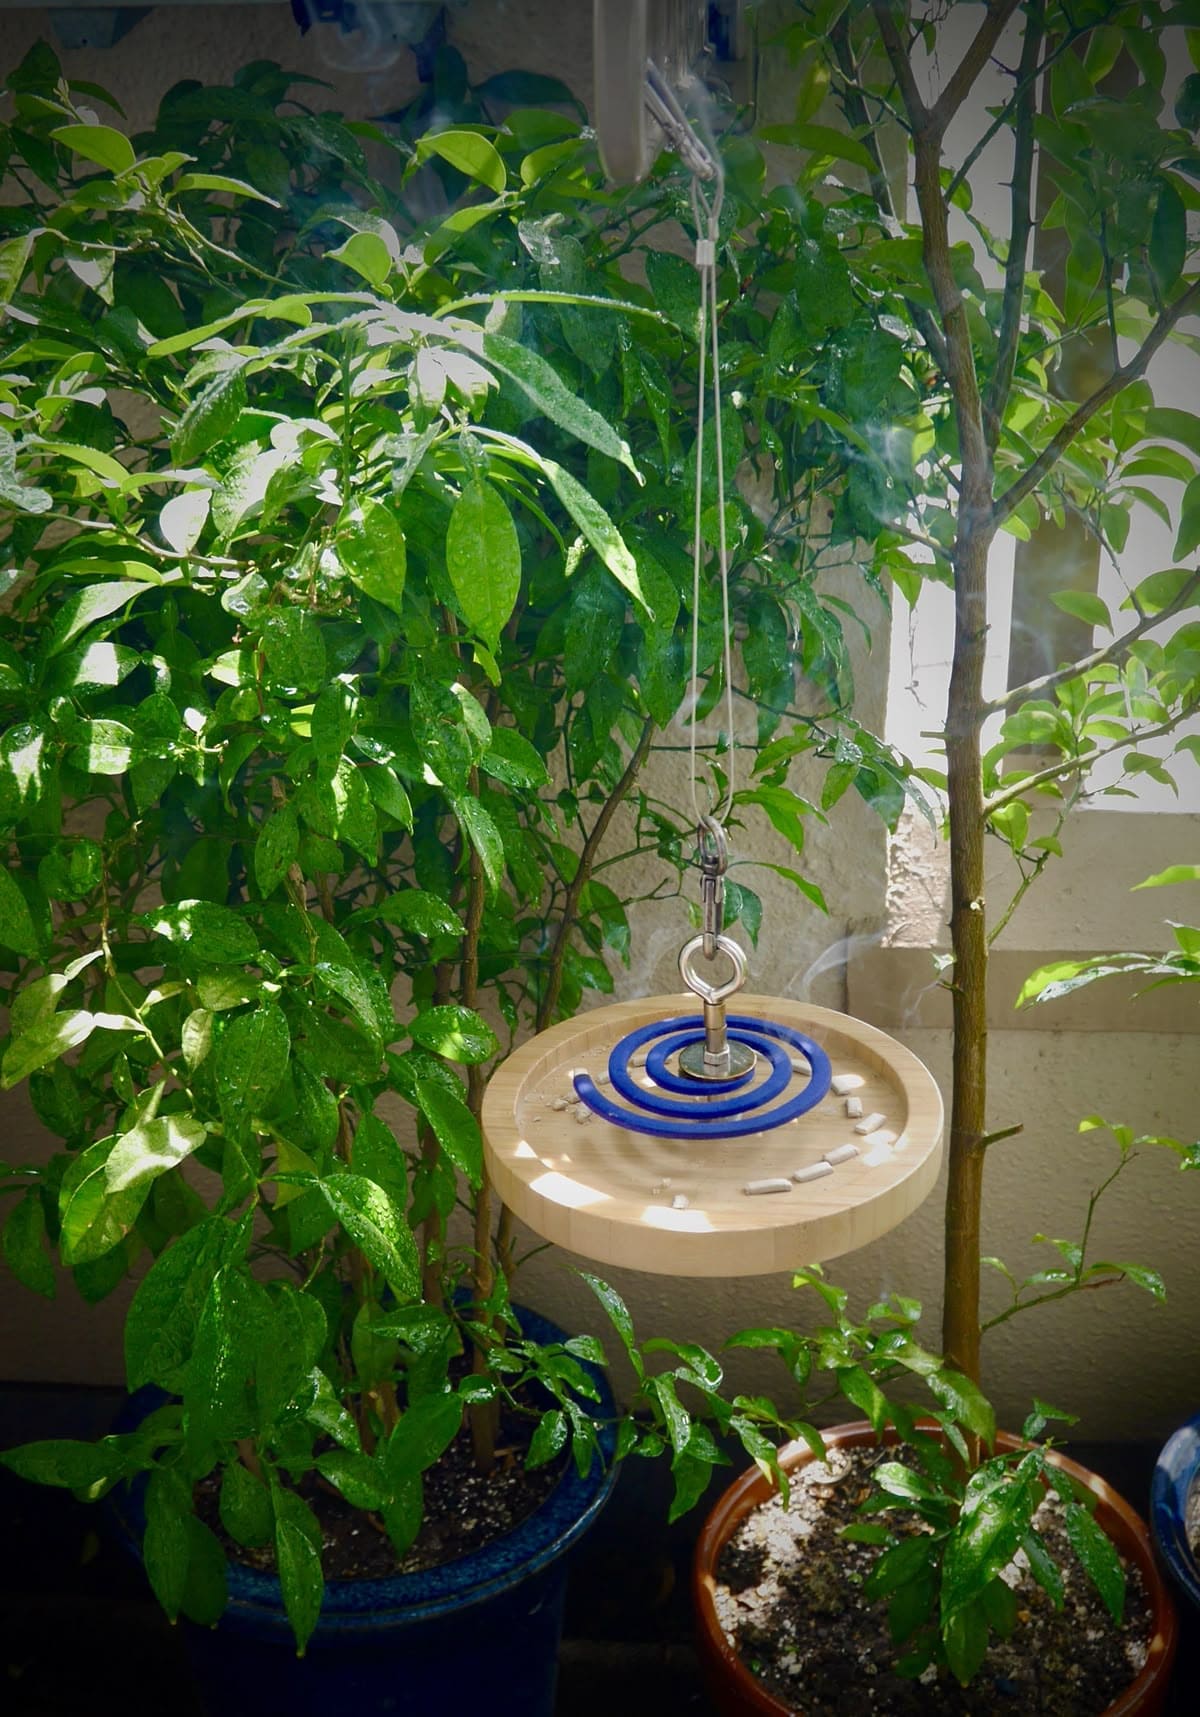
There’s something soothing about a gentle curl of smoke drifting from above while you relax among your plants.
This hanging mosquito coil holder keeps your outdoor seating area free from pests without cluttering the table.
Suspended at just the right height, it allows the smoke to spread evenly while the ashes collect neatly on the wooden base. It’s a great solution for small balconies, patios, or gardens where floor space is limited.
Materials Needed
- 1 wooden disc (6-8 in diameter)
- 1 eye hook screw
- 1 swivel hook or hanging clasp
- 1 length of durable cord or fishing line (18-24 in)
- 1 mosquito coil
- Small metal coil holder clip
Step-by-step Guide
Step 1: Screw the eye hook into the center of the wooden disc.
Step 2: Attach the coil holder clip to the hook so the coil sits in the middle of the disc.
Step 3: Tie or clip the cord to the swivel hook, ensuring it hangs at a safe height above plants and people.
Step 4: Hang the holder from a ceiling beam, pergola, or plant hook. Then light the coil and enjoy the slow drift of smoke as it protects your space.
#12. Rustic Mosquito Coil Holder
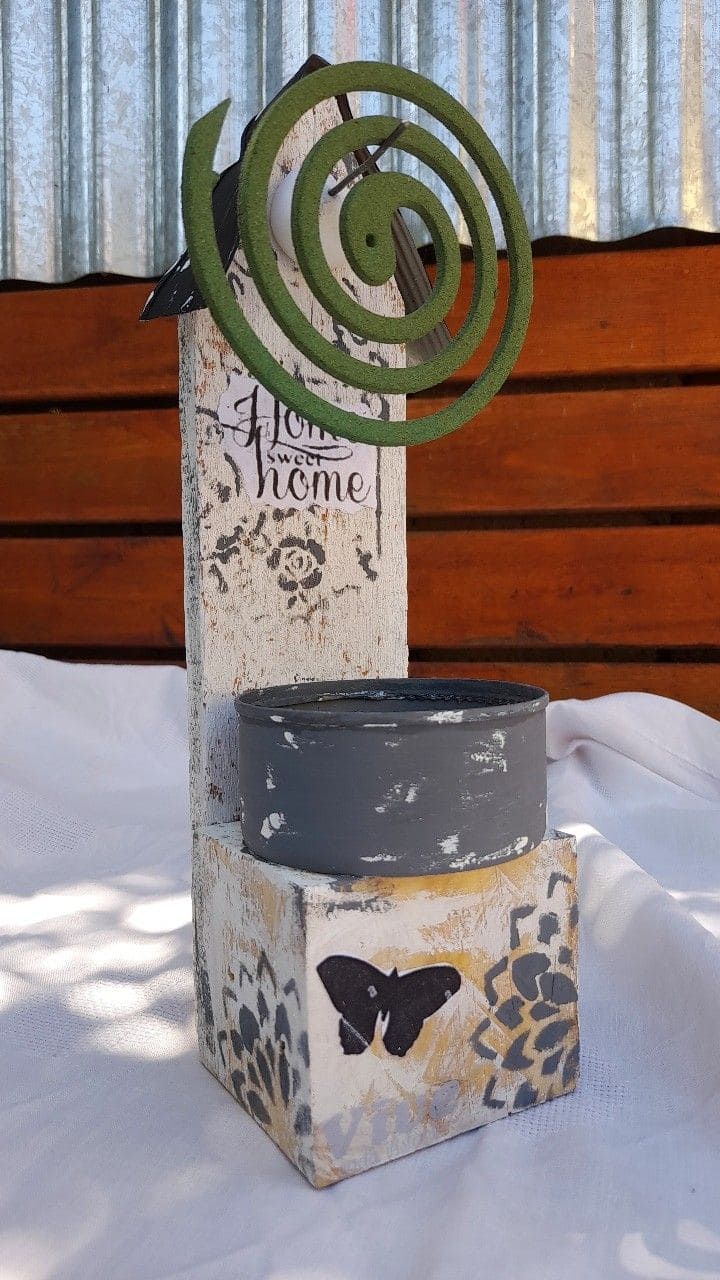
This charming coil holder feels like it belongs on a sunny porch, surrounded by potted flowers and the smell of fresh coffee in the morning.
Its weathered paint finish, stenciled motifs, and “Home Sweet Home” message make it a little piece of décor that fits right into a cozy outdoor setting.
Also, the coil sits elevated on a sturdy hook, while the tin dish below catches the ash neatly. It’s the perfect combination of farmhouse charm and everyday practicality.
Materials Needed
- 1 wooden block stand (8-10 in tall)
- 1 small round tin dish (3-4 in diameter)
- 1 coil-holding hook
- White, grey, and yellow acrylic paint
- Stencil designs (flowers, butterflies, or lettering)
- Sandpaper
- 1 mosquito coil
Step-by-step Guide
Step 1: Sand the wooden block for a smooth finish, then paint it with white acrylic.
Step 2: Lightly distress the edges with sandpaper for a rustic look.
Step 3: Stencil your chosen designs onto the stand using grey and yellow paint.
Step 4: Attach the tin dish to the front to catch ash.
Step 5: Now, you just screw the hook into the upper section to hold the coil, then place and light the coil.
See also: 25 Best Plants That Repel Mosquitos
