Garden & Crafty - Garden, DIY, Home
  • GARDEN
    • Garden Tips
    • Garden Guide
    • Garden Care
    • Garden Ideas
  • DIY
    • Diy Project
    • Crafty Ideas
  • HOME
    • Decoration
    • Cleaning
    • Tips & Hacks
  • About Us
  • GARDEN
    • Garden Tips
    • Garden Guide
    • Garden Care
    • Garden Ideas
  • DIY
    • Diy Project
    • Crafty Ideas
  • HOME
    • Decoration
    • Cleaning
    • Tips & Hacks
  • About Us
No Result
View All Result
Garden & Crafty - Garden, DIY, Home
Home DIY Diy Project

How to Build Your Own Christmas Tree Village In 6 Steps

Lois Capone by Lois Capone
December 9, 2024
in Diy Project
Reading Time: 3 mins read

IN THIS ARTICLE:

Toggle
  • Materials You’ll Need
  • Step-by-step Building A Christmas Tree Village

It all began with Pinterest. Last November, I kept stumbling upon stunning Christmas tree villages that looked both creative and magical.

At first, I thought it was beyond my DIY skills, but after seeing my friend share her version, I was inspired. She insisted it wasn’t as hard as it seemed, so I decided to give it a shot.

A weekend later, I had my own enchanting Christmas tree village that became the centerpiece of my holiday décor. Here’s how you can make yours too!

Materials You’ll Need

1. Wood and Tools:

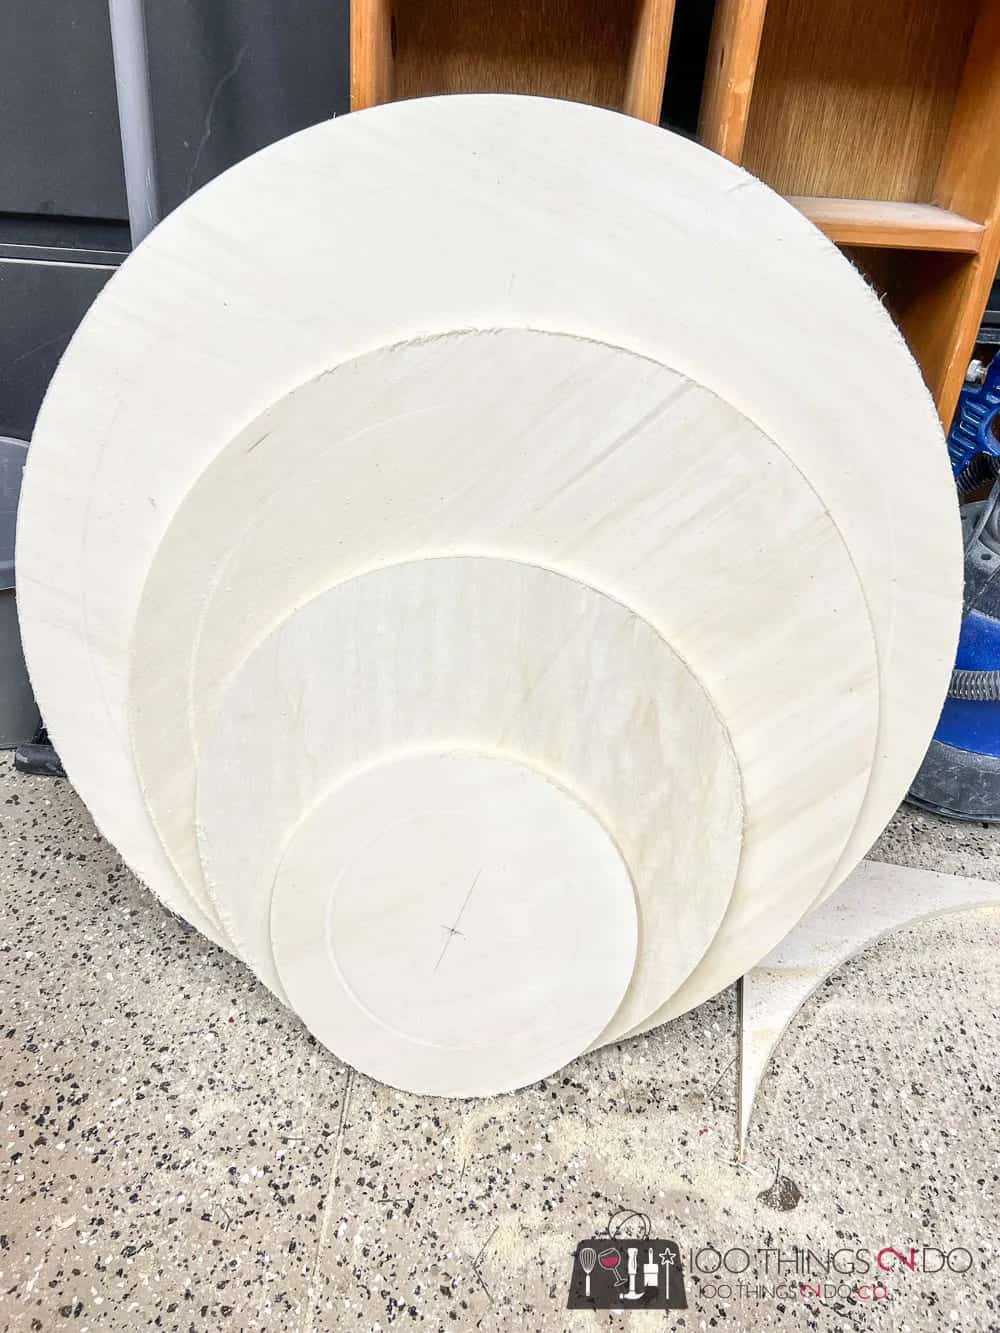
  • 5 Plywood circles (½-inch thick): Base (36-inch diameter), Second tier (30-inch diameter), Third tier (24-inch diameter), Fourth tier (18-inch diameter), Top tier (12-inch diameter)
  • 1 Wooden post: 5 feet tall, 3 inches thick
  • Brackets and screws: Around 10 to secure the tiers
  • Drill and drill bits
  • Circular saw or jigsaw
  • Sandpaper

2. Decorations:

  • Green garlands: Around 50 feet
  • Fairy lights: About 100 feet
  • Artificial snow or white batting: 1-2 bags for layering the tiers
  • Christmas village figurines: 10 Mini houses (3-5 inches tall, battery-operated), 15-20 Trees (4-8 inches tall), 10-15 Figurines (Santa, carolers, snowmen, and ice skaters), 1 Church, small accessories (Benches, street lamps, snow-covered fences, and tiny animals)
  • Optional: Snowman or star topper, dangling ornaments, or ribbons to personalize your tree further

Step-by-step Building A Christmas Tree Village

Step 1: Planning the Design

Before I began, I sketched the plan. I decided on five circular shelves for a tiered look, with each one decreasing in size as it went up. This would make space for the decorations while maintaining the tree-like structure.

Step 2: Cutting the Wooden Circles

Using a circular saw, I cut out the five circles according to the measurements. To get perfect circles, I used a DIY compass made from a wooden strip and a screw as a pivot. After cutting, I sanded the edges to ensure they were smooth and safe to handle.
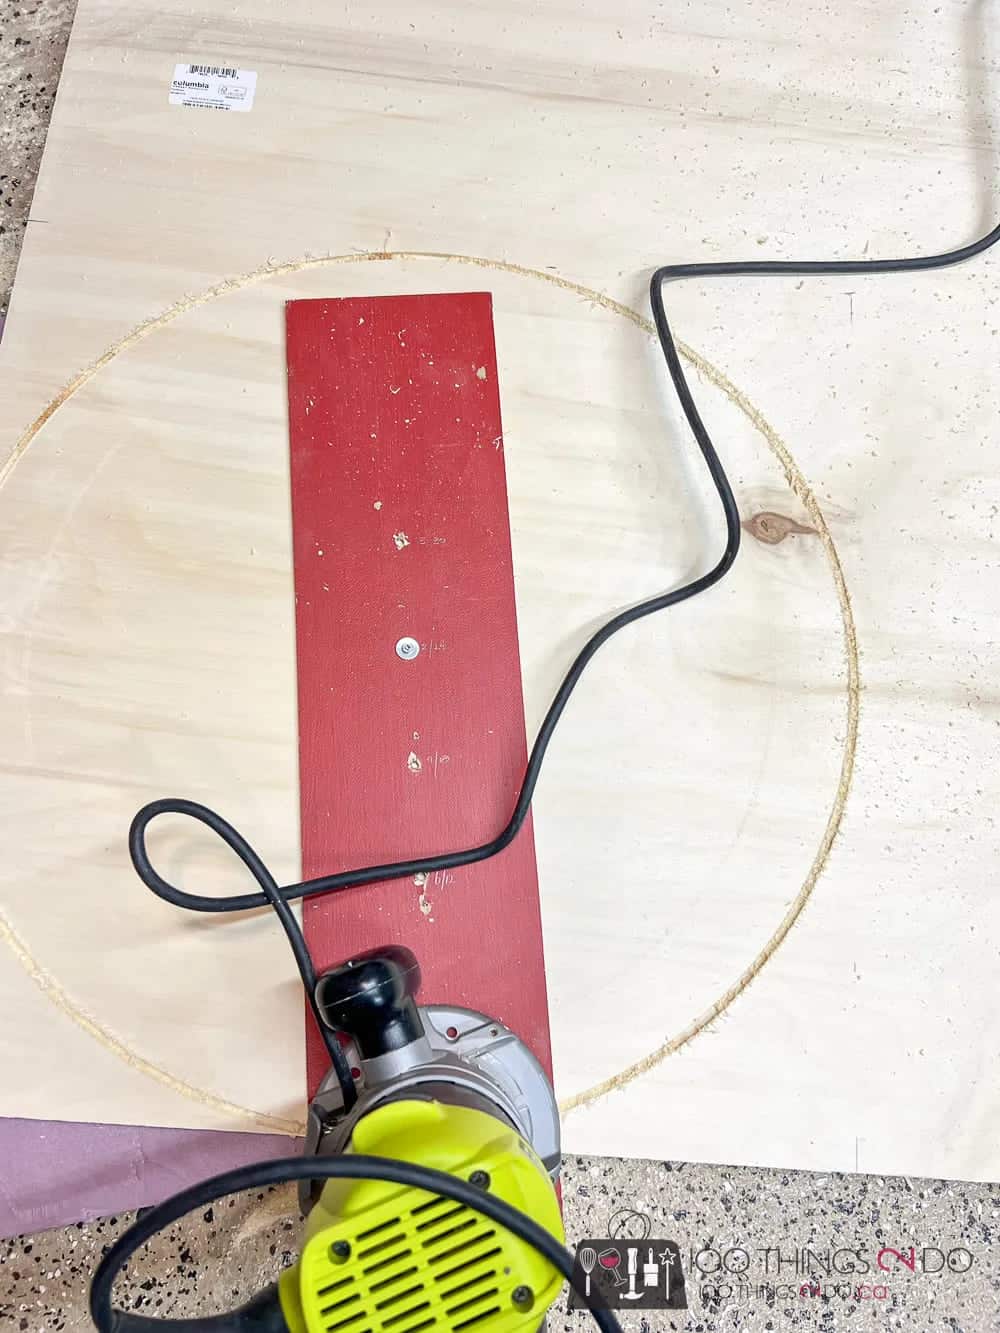
How to Build Your Own Christmas Tree Village In 6 Steps

How to Build Your Own Christmas Tree Village In 6 Steps

Step 3: Assembling the Structure

Drill a center hole in each circle, slightly larger than the wooden post. Start with the largest circle at the base, secure it to the post with brackets, and repeat with the smaller tiers, using wooden blocks as spacers to maintain even gaps.
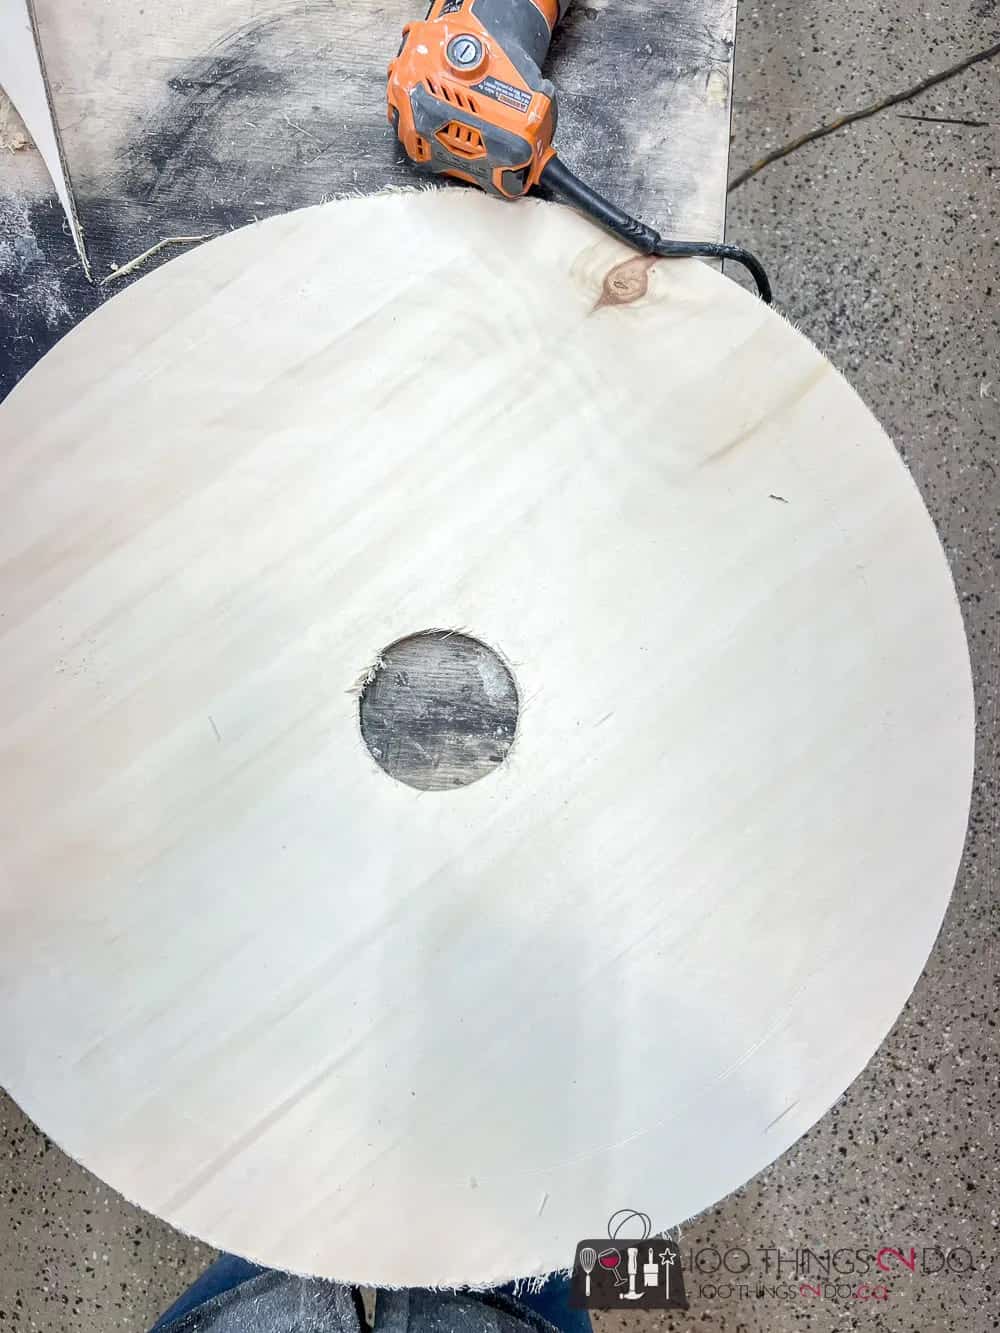
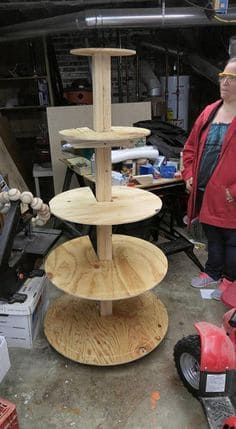
How to Build Your Own Christmas Tree Village In 6 Steps

How to Build Your Own Christmas Tree Village In 6 Steps

Step 4: Wrapping the Tree in Garland

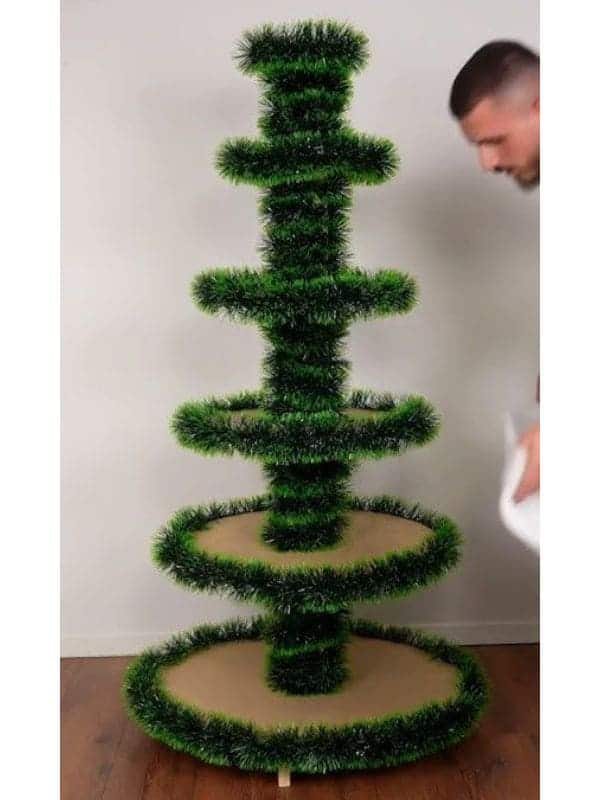
Wrap each tier with green garlands to mimic branches. I secured mine with staples, but you could use a glue gun. Work from the bottom up, ensuring the garland is evenly distributed.
How to Build Your Own Christmas Tree Village In 6 Steps

Step 5: Decorating the Village

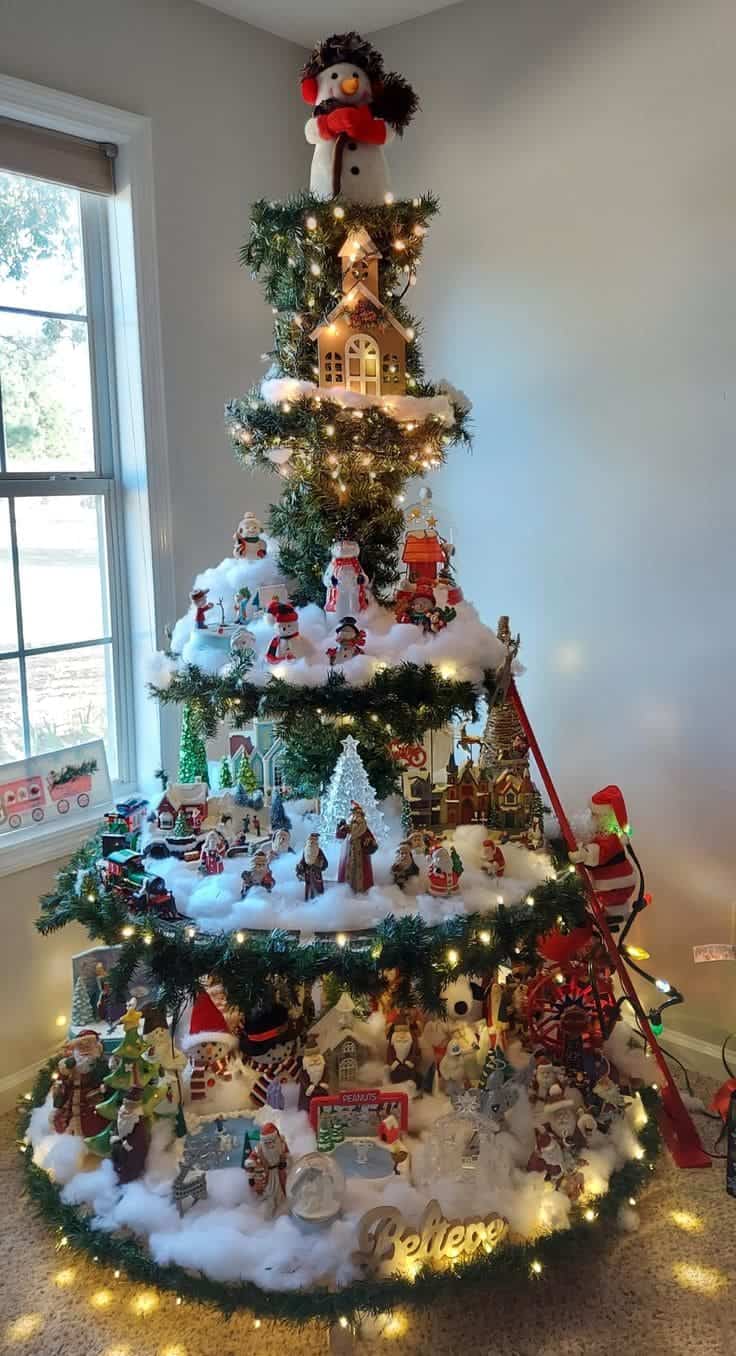
You add decorations layer by layer. For the base tier or the largest one, you lay 4-5 mini houses with lights, 5-7 trees (varying heights), artificial snow spread evenly and small accents like fences, snowmen, and animals.

For the second tier, 3 mini houses, 5 trees, 4 figurines like Santa, carolers, or reindeer are enough. Next, on the third tier, you need 2 mini houses, 3-4 trees, 3 figurines, such as ice skaters or kids playing.

Similarly, you lay 1 mini church as the focal point, 3 trees, 2-3 figurines like a snowman or holiday carolers on the fourth tier.

On the top tier, you just need 1 snowman topper, small trees for accent, then arrange the items evenly across each tier for a balanced look.

Step 6: Adding Lights and Final Touches
How to Build Your Own Christmas Tree Village In 6 Steps

You can wrap fairy lights around the garlands for a warm glow. Use battery-operated lights for the houses to avoid messy wires.

Finally, add a snowman or star topper and some dangling ornaments for a festive finish.
How to Build Your Own Christmas Tree Village In 6 Steps
Tags: Christmaschristmas decorchristmas treechristmas village tree
SharePin1
Lois Capone

Lois Capone

Lois Capone is a wife and mom in her 50s who enjoys sharing gardening, DIY tips, and home decor ideas. She believes that with some inspiration, anyone can create a special feel in their home and garden.

Related Posts

22 Wickedly Fun DIY Witch Crafts to Enchant Your Halloween
Crafty Ideas

22 Wickedly Fun DIY Witch Crafts to Enchant Your Halloween

Looking to add a little hocus-pocus to your Halloween this year? Witch-themed crafts are the perfect way to bring spooky...

by Lois Capone
July 24, 2025
25 DIY Nativity Scene Ideas That Add Heart and Warmth to Christmas
Diy Project

25 DIY Nativity Scene Ideas That Add Heart and Warmth to Christmas

There’s something deeply comforting about a handmade nativity scene. It carries stories, memories, and a quiet kind of reverence that...

by Lois Capone
July 24, 2025
21 Genius Halloween DIYs That Turn Pool Noodles Into Haunted Magic
Diy Project

21 Genius Halloween DIYs That Turn Pool Noodles Into Haunted Magic

Last year, I found a dusty pile of pool noodles in the garage, remnants of summer fun long gone. As...

by Lois Capone
July 23, 2025
Turn Your Garden into a Bone-Afide Party With These 22 Skeleton Halloween Ideas
Diy Project

Turn Your Garden into a Bone-Afide Party With These 22 Skeleton Halloween Ideas

Halloween doesn’t stop at the front door, your garden deserves a spooky makeover too! If you’re ready to take your...

by Lois Capone
July 23, 2025
25 Super Fun and Cute Air-dry Clay Projects You Can’t Miss
Diy Project

25 Super Fun and Cute Air-dry Clay Projects You Can’t Miss

Have you ever picked up a pack of air-dry clay and wondered what fun things you could make with it?...

by Lois Capone
July 22, 2025
22 Disco-Inspired Decor Projects to Add Sparkle to Your Space
Diy Project

22 Disco-Inspired Decor Projects to Add Sparkle to Your Space

Ever wished your home felt a little more like a dance floor? Disco-inspired decor is all about bringing that glittery,...

by Lois Capone
July 21, 2025
Load More

Leave a Reply Cancel reply

Your email address will not be published. Required fields are marked *

Categories

  • Cleaning (8)
  • Crafty Ideas (104)
  • Decoration (132)
  • DIY (8)
  • Diy Project (137)
  • GARDEN (39)
  • Garden Care (50)
  • Garden Guide (112)
  • Garden Ideas (313)
  • Garden Tips (83)
  • HOME (90)
  • Tips & Hacks (20)

Garden & Crafty - Garden, DIY, Home

© 2024 gardenandcrafty.com

Navigate Site

  • About Us
  • Privacy Policy
  • Terms Of Service
  • Disclaimer
  • Cookie Policy
  • Webstories
  • Sitemap

Follow Us

No Result
View All Result
  • GARDEN
    • Garden Tips
    • Garden Guide
    • Garden Care
    • Garden Ideas
  • DIY
    • Diy Project
    • Crafty Ideas
  • HOME
    • Decoration
    • Cleaning
    • Tips & Hacks
  • About Us