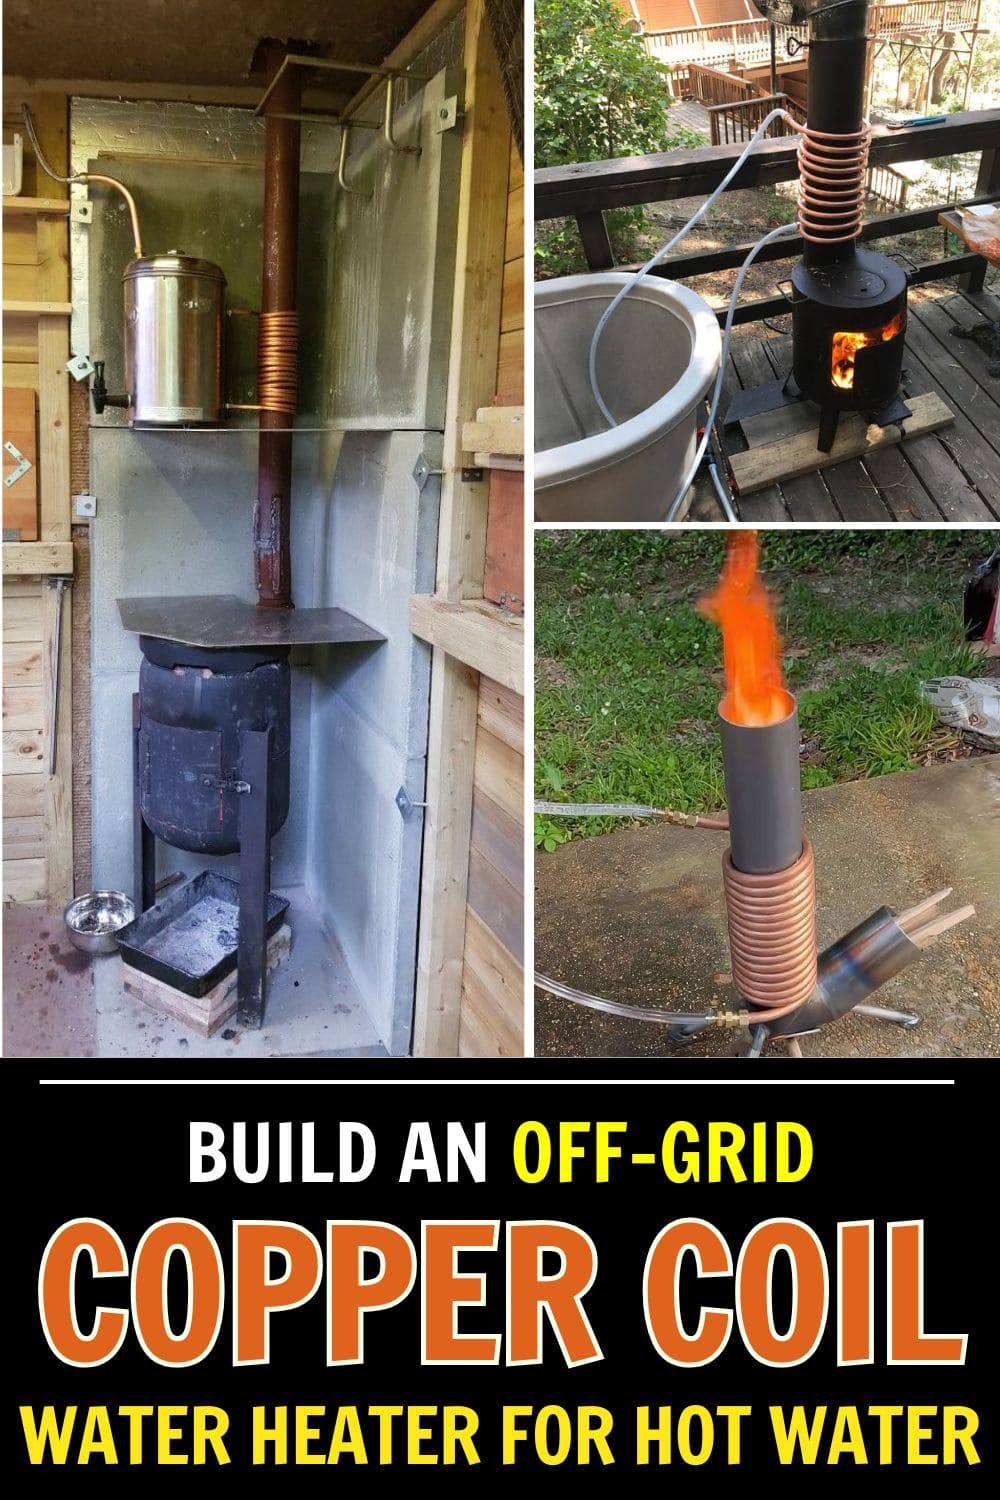
If you’ve ever lived off-grid, camped deep in the woods, or just tried to run a cabin without electricity, you know how precious hot water can be.
There’s nothing quite like washing up with warm water after a long day outside and the good news is, you don’t need fancy equipment or power to make it happen.
With a little copper tubing and a wood stove, you can build your own off-grid water heating system in under an hour.
How the Copper Coil System Works
This setup uses a basic principle of thermodynamics – heat transfer.
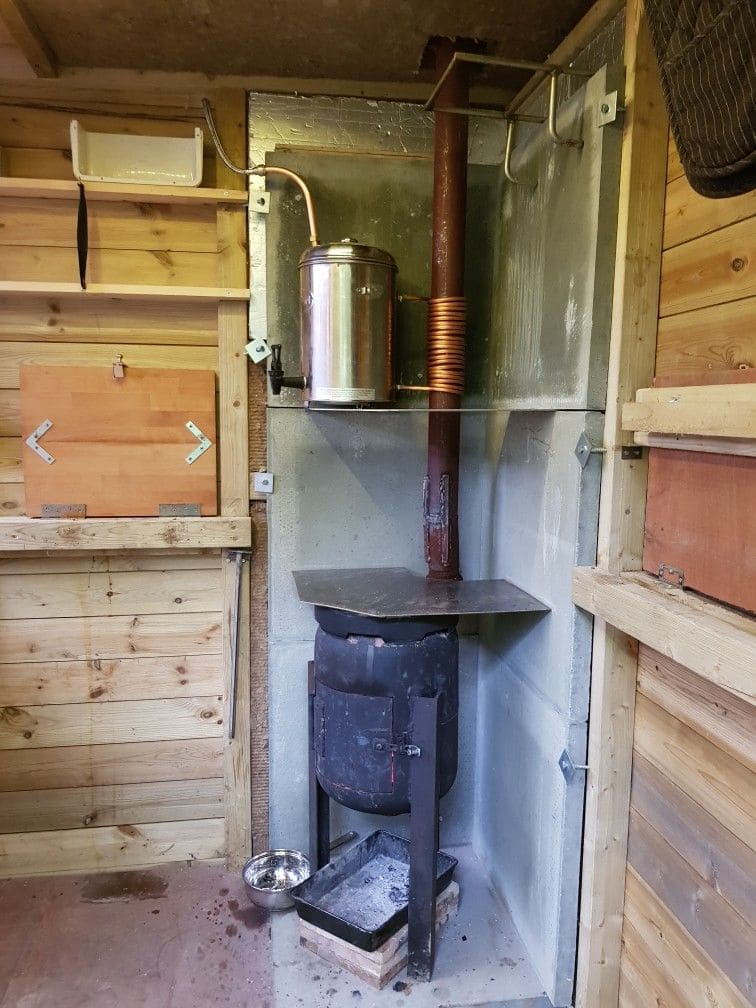
Copper is an excellent conductor, so when it’s coiled around a hot stove pipe, it quickly absorbs the stove’s heat.
As water passes through the tubing, that heat transfers into the water, warming it as it flows.
The best part is that it works continuously. As hot water rises and cooler water sinks, a natural circulation forms, so the system almost runs itself.
What You’ll Need
You don’t need much to build this heater. Here’s a simple list to get started:
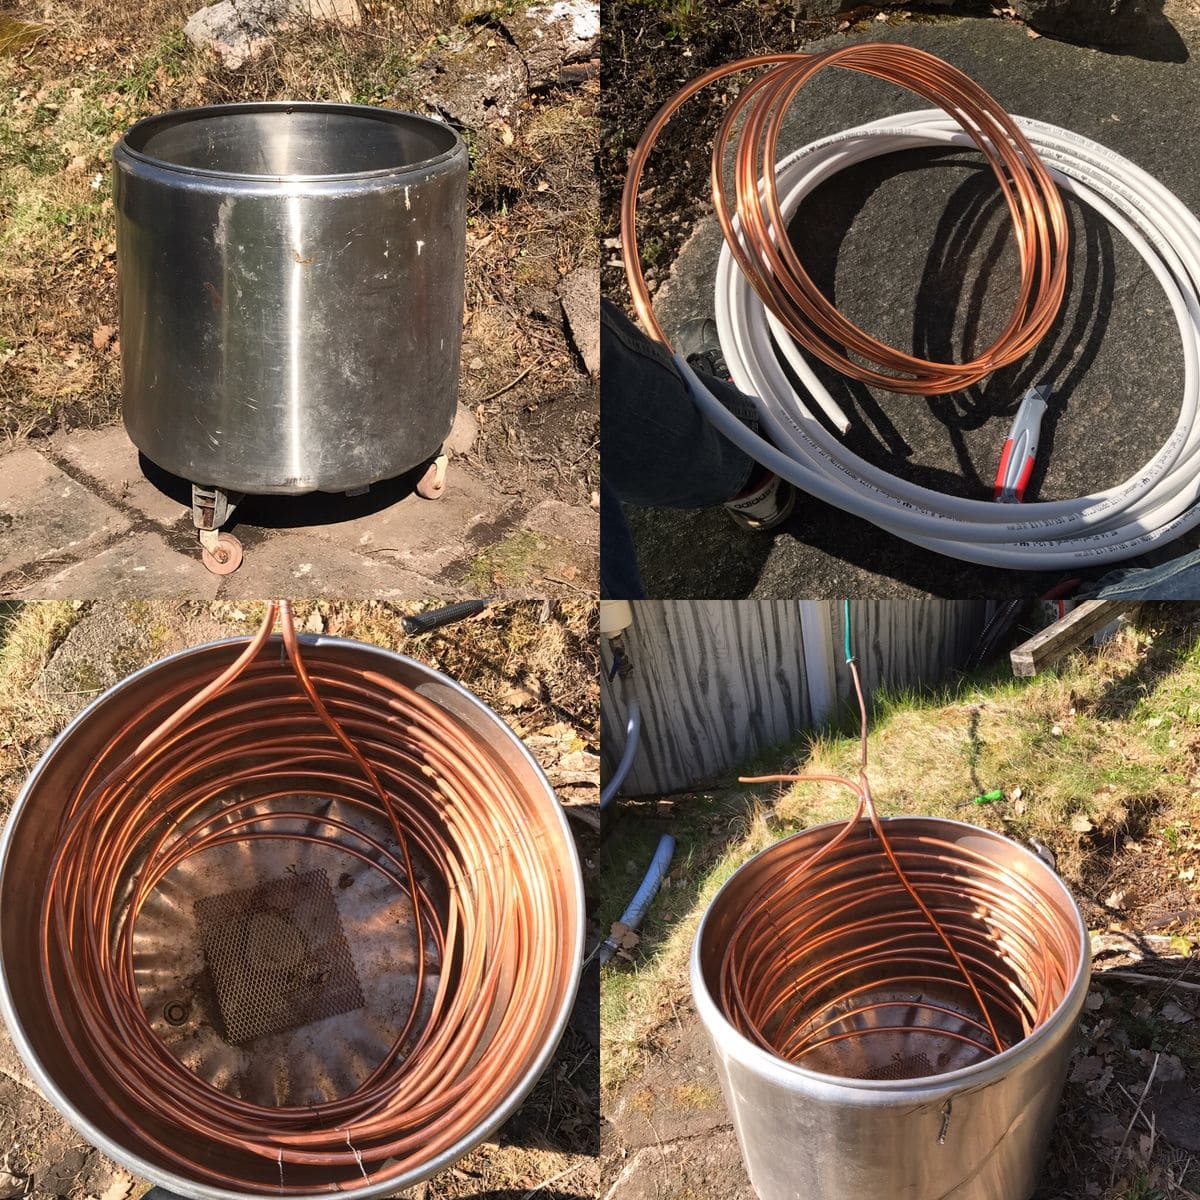
- About 10 to 15 feet of soft copper tubing (⅜ or ½ inch thick works best)
- A wood stove or metal heating stove
- A large water tank or container, even a recycled IBC tote will work
- High-heat hose clamps and connectors
- Optional but helpful: a thermometer or pressure gauge for safety
You can find all of these materials at most hardware stores. The tubing is the key, make sure it’s soft enough to bend without crimping.
Step-by-Step: Building Your Hot Water Coil
Step 1: Shape the Coil
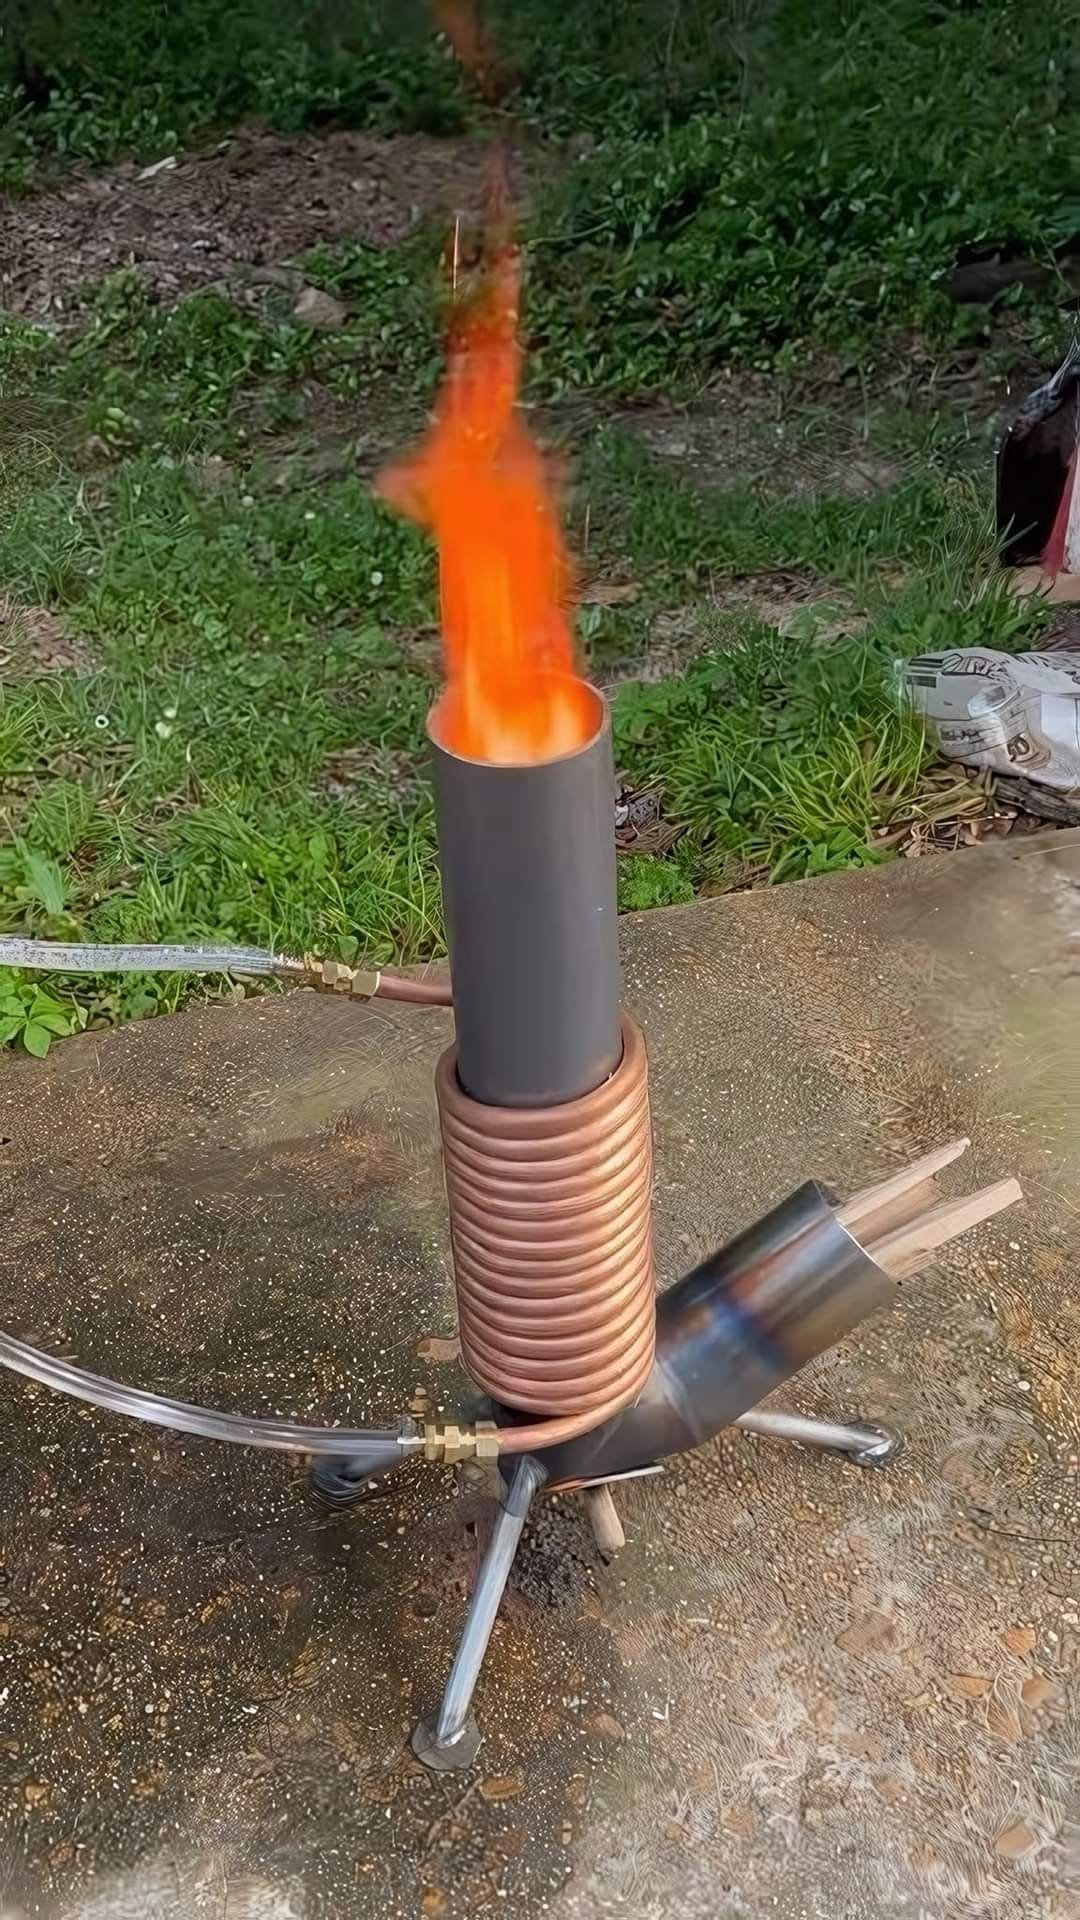
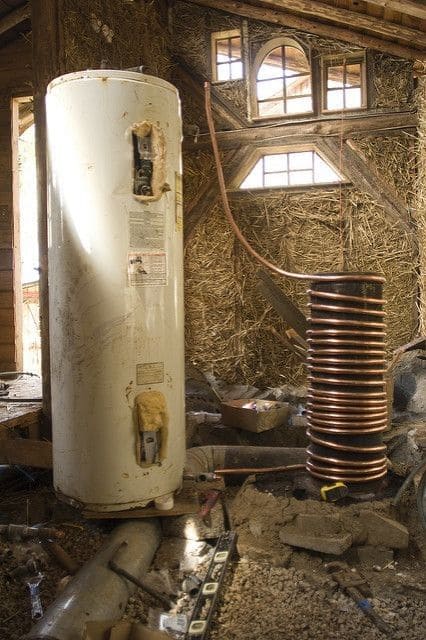
Start by wrapping your copper tubing tightly around the stove’s chimney or flue pipe.
You’ll want about 4-6 wraps for steady heat. Leave both ends of the coil free so one can bring cold water in and the other can send hot water out.
Step 2: Attach the Coil Securely
Now, use hose clamps or metal wire to hold the coil in place. Don’t make it too tight, you don’t want to damage the tubing.
Step 3: Connect to Your Water Source
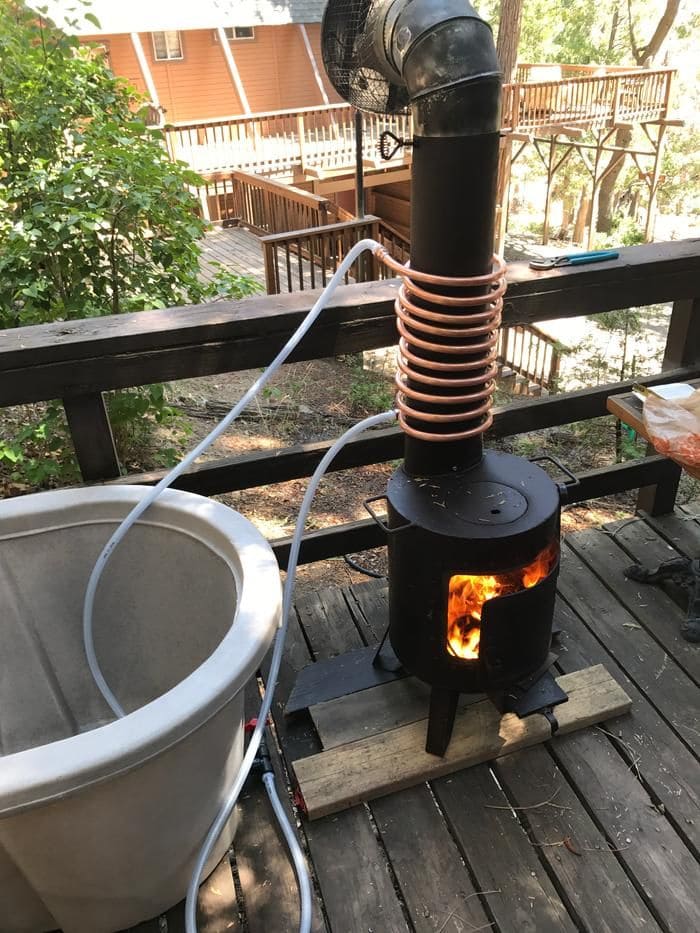
The bottom end of the coil should connect to your water tank’s outlet (cold water in), and the top end should lead back into the tank or directly to your shower.
The setup should use gravity, so your tank should sit slightly higher than the stove’s base.
Step 4: Test It Out
Before lighting the stove, fill the coil with water completely. Heating an empty copper pipe can cause it to warp or even burst.
Once it’s full, light your fire and let the stove do its job. Within minutes, you’ll have warm water flowing through the coil.
Safety Comes First
As with any off-grid project that involves heat and pressure, safety matters.
Always leave at least one outlet open so steam can escape, a sealed coil can build dangerous pressure.
Besides, avoid using plastic or PVC parts near the stove; they’ll melt or release harmful fumes.
You stick to copper and heat-resistant hoses. And make sure the coil sits along the chimney, not inside the firebox.
Ways to Use Copper Coil Water Heater
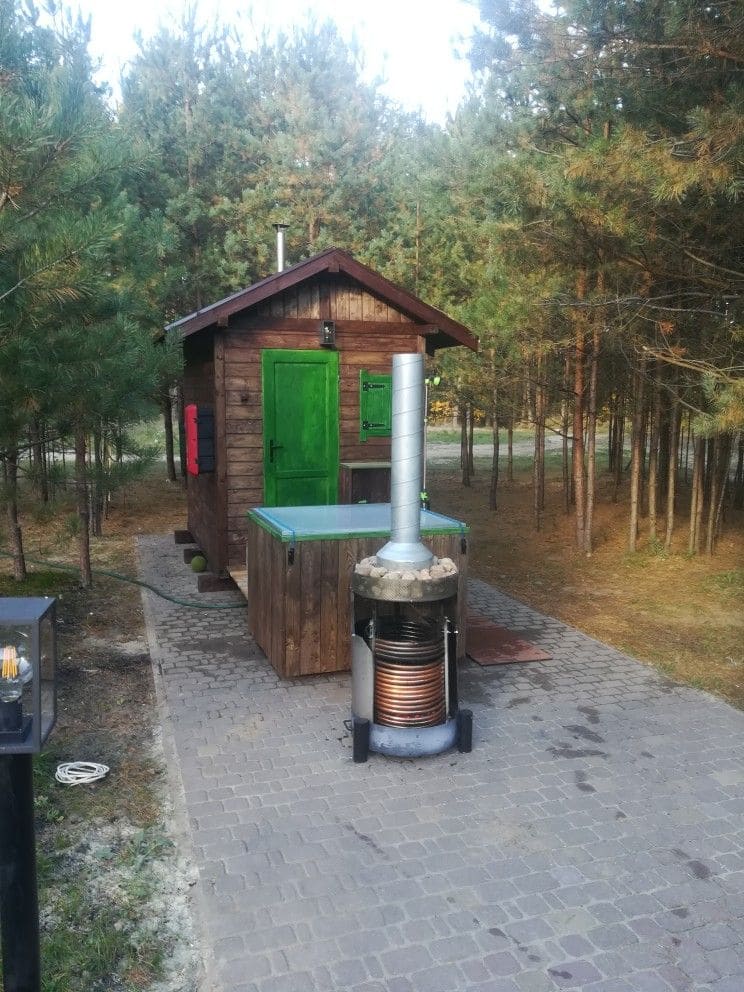
Your system can feed an outdoor shower, warm up wash water for dishes or clothes, or even circulate heat into a greenhouse or small cabin radiator system.
If you’re living off-grid or just experimenting with more sustainable living, this is one of the easiest and most rewarding DIY projects you can try.
It’s also perfect for camping setups or emergency preparedness.
Maintenance and Long-Term Care
Copper tubing is durable, but it does need a little attention. Flush the system once a month to prevent mineral buildup inside the coil, especially if you use hard water.
Additionally, check your connections regularly to make sure there are no leaks.
And keep your stove pipe clean too as soot buildup can block heat transfer. A clean stove means hotter, faster water heating.
Read more: 10 Ways to Heat Your Greenhouse in Winter Without Electricity
