When you keep chickens long enough, you start noticing how much they love to climb, perch, and sleep as high up as they can.
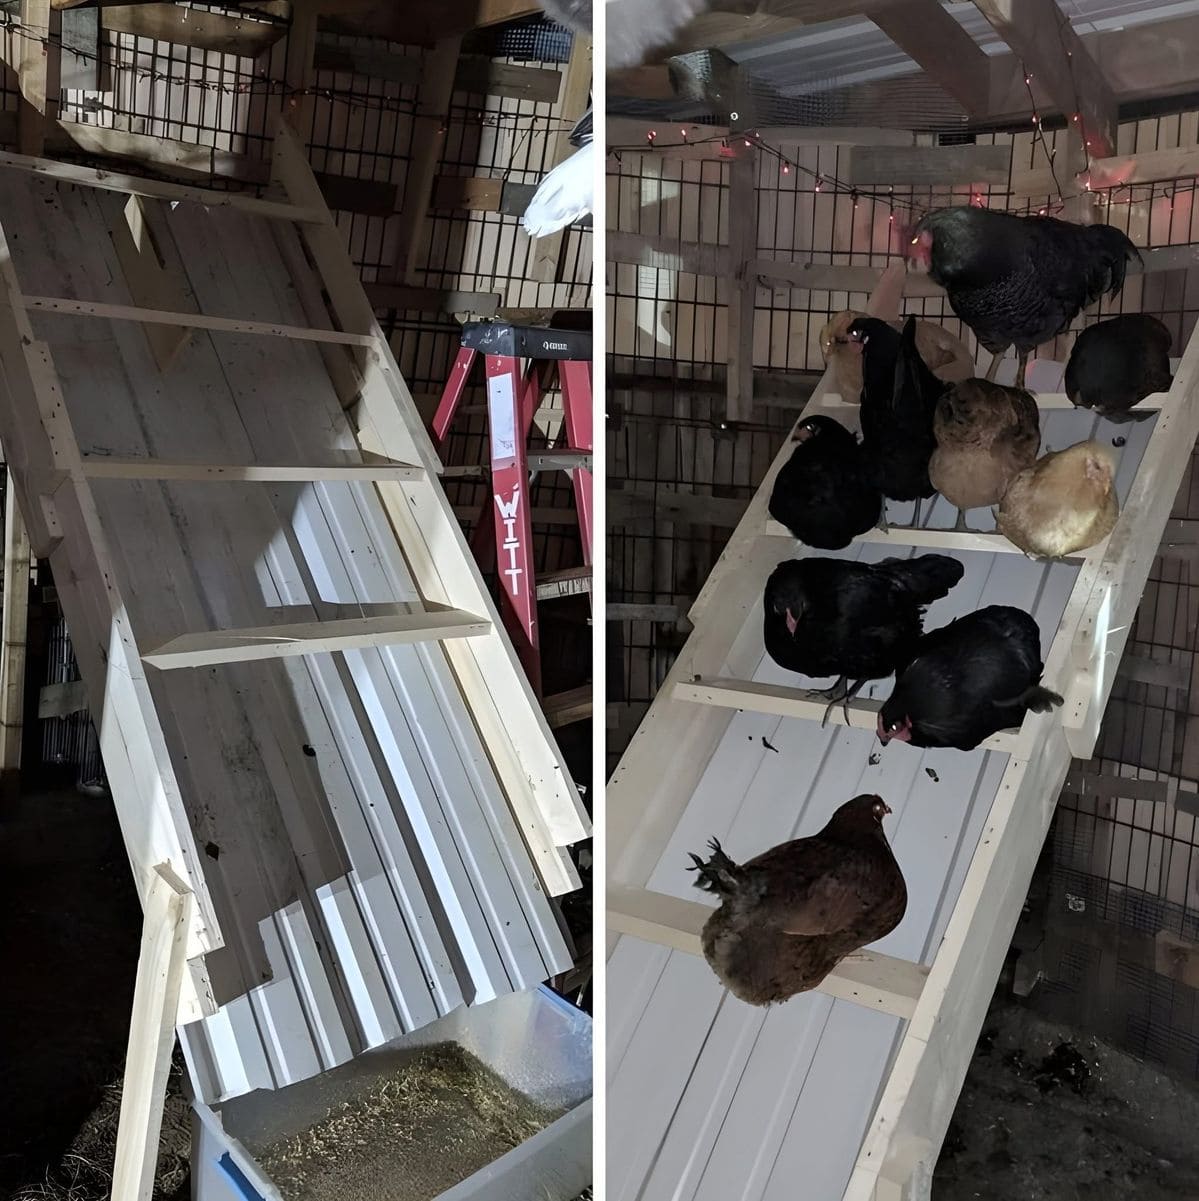
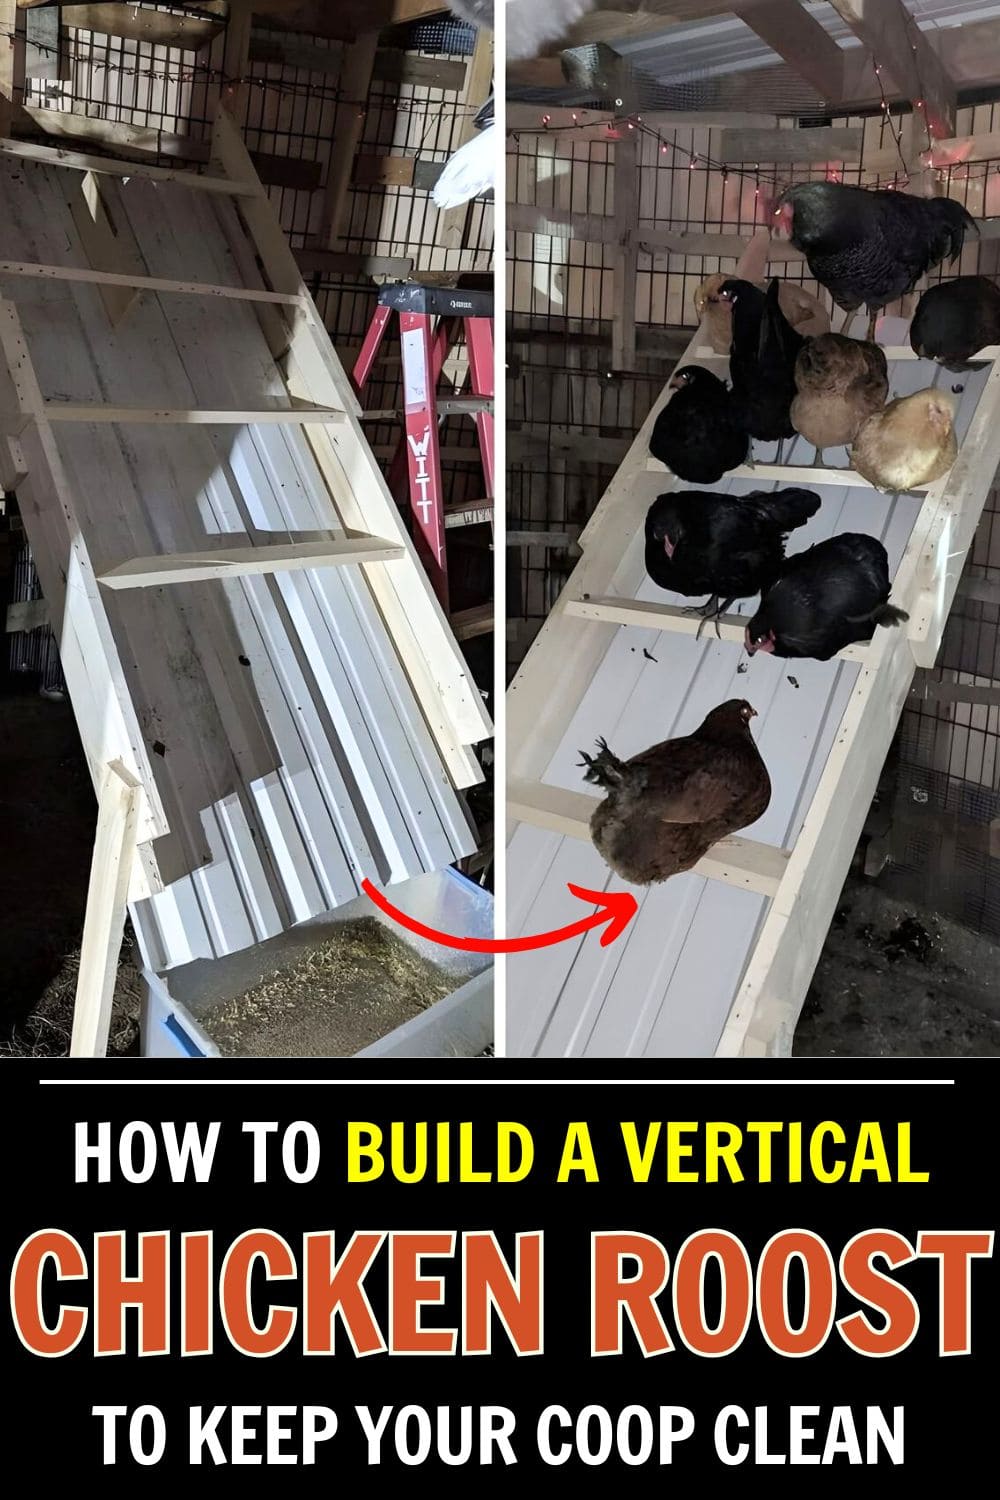
My friend recently decided to take advantage of that instinct by building a vertical roosting ladder in his coop and I have to say, it’s one of the smartest DIY upgrades I’ve seen.
Instead of a traditional flat roost that takes up floor space, this clever design uses the vertical height of the coop, giving the flock plenty of room to perch comfortably while keeping the floor below cleaner and drier.
What Is a Vertical Roosting Ladder?

A vertical roosting ladder is exactly what it sounds like – a tall, angled structure with multiple roosting bars where chickens can perch at different levels.
It’s built to lean slightly against a wall or frame inside the coop.
The main idea is to make better use of vertical space so more chickens can sleep safely off the ground.
Unlike flat roost bars that stretch across the coop, a vertical ladder keeps everything contained in one area.
Why It Works So Well
1. Makes the Most of Small Spaces
If you’ve got a modest-sized coop or a large flock, you know how quickly roosting bars can take over.
Therefore, a vertical ladder stacks the perches upward instead of outward, giving your hens plenty of room without crowding the floor.
It’s the perfect setup for coops where every inch matters.
2. Keeps Chickens Clean and Comfortable
Chickens naturally prefer sleeping off the ground, it keeps them feeling safe from predators and pests.
A vertical roost allows each bird to choose a height they like best while staying above any damp bedding or droppings.
The result is a happier, cleaner flock that rests better at night.
3. Easier Cleanup for You
The angled design is a game-changer for cleaning.
Most droppings slide down the smooth back panel and land in a tray or bin at the bottom.
You can simply remove and empty the bin instead of scraping the coop floor daily. Less mess means less smell and fewer flies.
4. Better Air Circulation
Because the hens are elevated, fresh air can flow more freely through the coop.
That extra ventilation helps reduce humidity, which is especially helpful in rainy or humid climates where dampness can lead to respiratory issues.
Materials You’ll Need
You don’t need fancy tools or expensive lumber to make this. A few sturdy pieces of wood and some basic supplies will do the job:
- 2×4 wooden boards for the frame and roosting bars
- Corrugated metal or plastic sheet for the smooth backing
- Screws and brackets for assembly
- Drill and saw
- A removable plastic bin or tray to collect droppings
- Optional: sanding paper and wood sealant to smooth and protect surfaces
Step-by-Step Building Guide
Step 1: Measure the Space
Start by measuring the wall or corner where you’ll place the ladder. You’ll want enough height to fit at least three or four roosting bars, each spaced about 10-12 inches apart.
Keep in mind the angle, around 45 degrees usually works best so chickens can hop between levels easily.
Step 2: Build the Frame
You cut two long 2×4 boards for the sides and attach horizontal boards between them to create the ladder frame.
Make sure everything is level and sturdy since it needs to support the weight of several birds.
Step 3: Add the Back Panel
Now, attach a sheet of corrugated metal or plastic to the back of the frame.
This smooth surface helps guide droppings down toward the bottom. It also makes cleaning simple, just wipe or hose it off when needed.
Step 4: Install the Perches
Attach your roosting bars across the frame. Rounded edges are best since chickens prefer a comfortable grip. You can slightly sand the tops to avoid splinters.
Step 5: Add a Droppings Bin
You place a bin or removable tray at the base of the ladder.
This will catch most of the droppings overnight and can be emptied daily or weekly depending on your flock size.
Step 6: Secure and Test
Once assembled, secure the ladder to the coop wall using brackets or screws to prevent tipping. Then, introduce it slowly to your flock.
Chickens are curious, it won’t take long before they start exploring and claiming their favorite spots.
Maintenance and Cleaning Tips
Keeping your vertical roosting ladder clean is straightforward. Empty the droppings bin regularly and rinse it with mild soap or vinegar.
Also, wipe the metal or plastic panel as needed to prevent buildup. Every few weeks, check the wood for rough spots or loose screws, especially if your flock is large and active.
Moreover, a quick 10-minute maintenance routine will keep it in great shape for years.
Common Mistakes to Avoid
Even simple projects can have small hiccups. Here are a few things to watch out for:
- Avoid making the ladder too steep as your chickens may struggle to hop up.
- Don’t use slick wood for perches; they need grip to stay comfortable.
- Leave enough space between bars so droppings from higher levels don’t land on birds below.
- Always secure the ladder firmly to prevent wobbling.
Final Thoughts
A vertical chicken roost is one of those small DIY projects that makes a big difference in your coop. It saves space, cuts cleaning time, and gives your flock a safe, cozy spot to rest.
The best part is that it doesn’t require much money or skill, just a bit of wood, a few tools, and a free afternoon.
Once your hens start using it, you’ll wonder how you ever managed without one.


