If you’ve ever grown peas, you know they have a knack for climbing, turning any garden into a tangled mess if left unchecked.
That’s why trellises are essential. They provide support, keep plants off the ground, and improve air circulation, which means fewer pests and diseases.
But why spend money on store-bought options when you can create your own?
Types of Peas
- Snow Peas
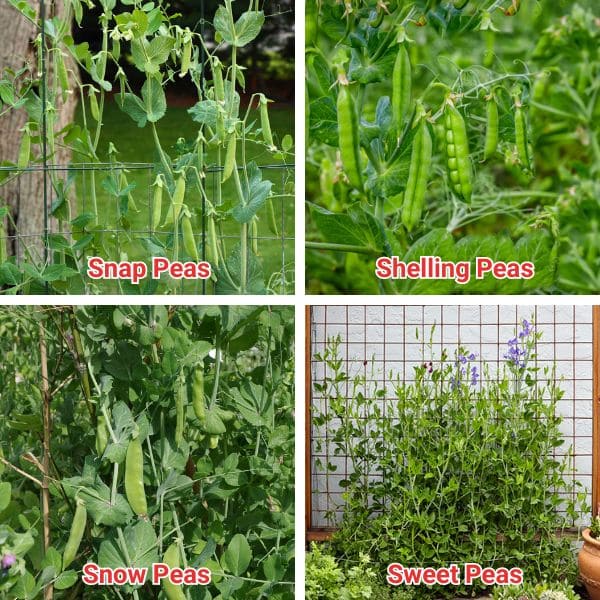
Snow peas grow to about 2-3 feet with their flat, bright green pods. They thrive on trellises with minimal support.
Common in Asian cuisine, they offer a sweet and tender taste perfect for fresh snacking or adding crisp texture to stir-fries and salads.
- Snap Peas
Snap peas are characterized by their plump, rounded pods, growing up to 6 feet with sturdy support.
These vigorous climbers offer sweet and crunchy pods that are edible.
- Shelling Peas
Shelling peas offer larger, plump peas inside inedible pods, growing to about 3-5 feet with moderate support.
They are easy to grow, versatile and suitable for any home garden.
- Sweet Peas
Sweet peas are grown for their fragrant flowers rather than edible pods. Their beautiful blooms attract many pollinators.
With the heights of 6-8 feet, they require robust support.
3 Factors to Consider DIY Pea Trellis
Space Available
How much room do you have for the trellis? For a row of peas, a narrow trellis made from upright stakes with nylon or plastic netting works well.
If you have a raised bed garden or more space, consider a larger trellis made from bamboo or small saplings.
These tripod-style trellises use three or more supports secured at the top and are also great for other climbing vegetables like pole beans and cucumbers.
Height And Width Needed
Snow peas typically grow to about 2-3 feet. You should use a compact trellis made from wire netting or a simple wooden frame to keep the plants upright.
Snap peas are more vigorous climbers, reaching up to 6 feet. They require a taller and sturdier structure, such as a trellis made from bamboo poles or cattle panels.
For shelling peas, which usually grow to around 3-4 feet, a trellis made from stakes and string or plastic netting can support these peas well.
Although primarily grown for their beautiful and fragrant flowers, Sweet peas can climb 6-8 feet. So, tall tripod-style trellises made from bamboo or small saplings will be best.
Durability And Sustainability Of Materials
Durable materials like bamboo, metal, and wood ensure that your trellis can withstand various weather conditions.
Besides, you can consider recycled or repurposed materials to reduce waste and optimize your budget.
Tools for DIY Pea Trellis
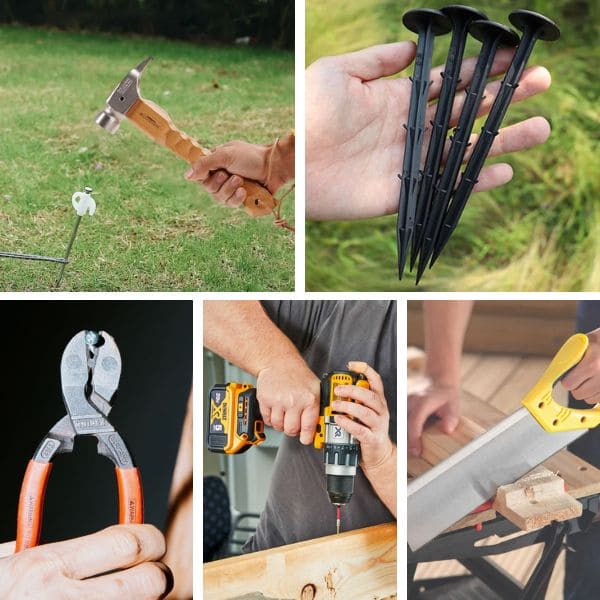
You need to prepare tools such as a hammer, nails, and screws, a drill and a cutting wood or bamboo.
Besides, you also need to differentiate materials. Wood is natural, durable, and easy to work with. Metal is strong, long-lasting, and weather-resistant.
Plastic is lightweight, affordable, and weather-resistant, while twine is flexible, biodegradable, and easy to replace.
4 DIY Pea Trellis Ideas
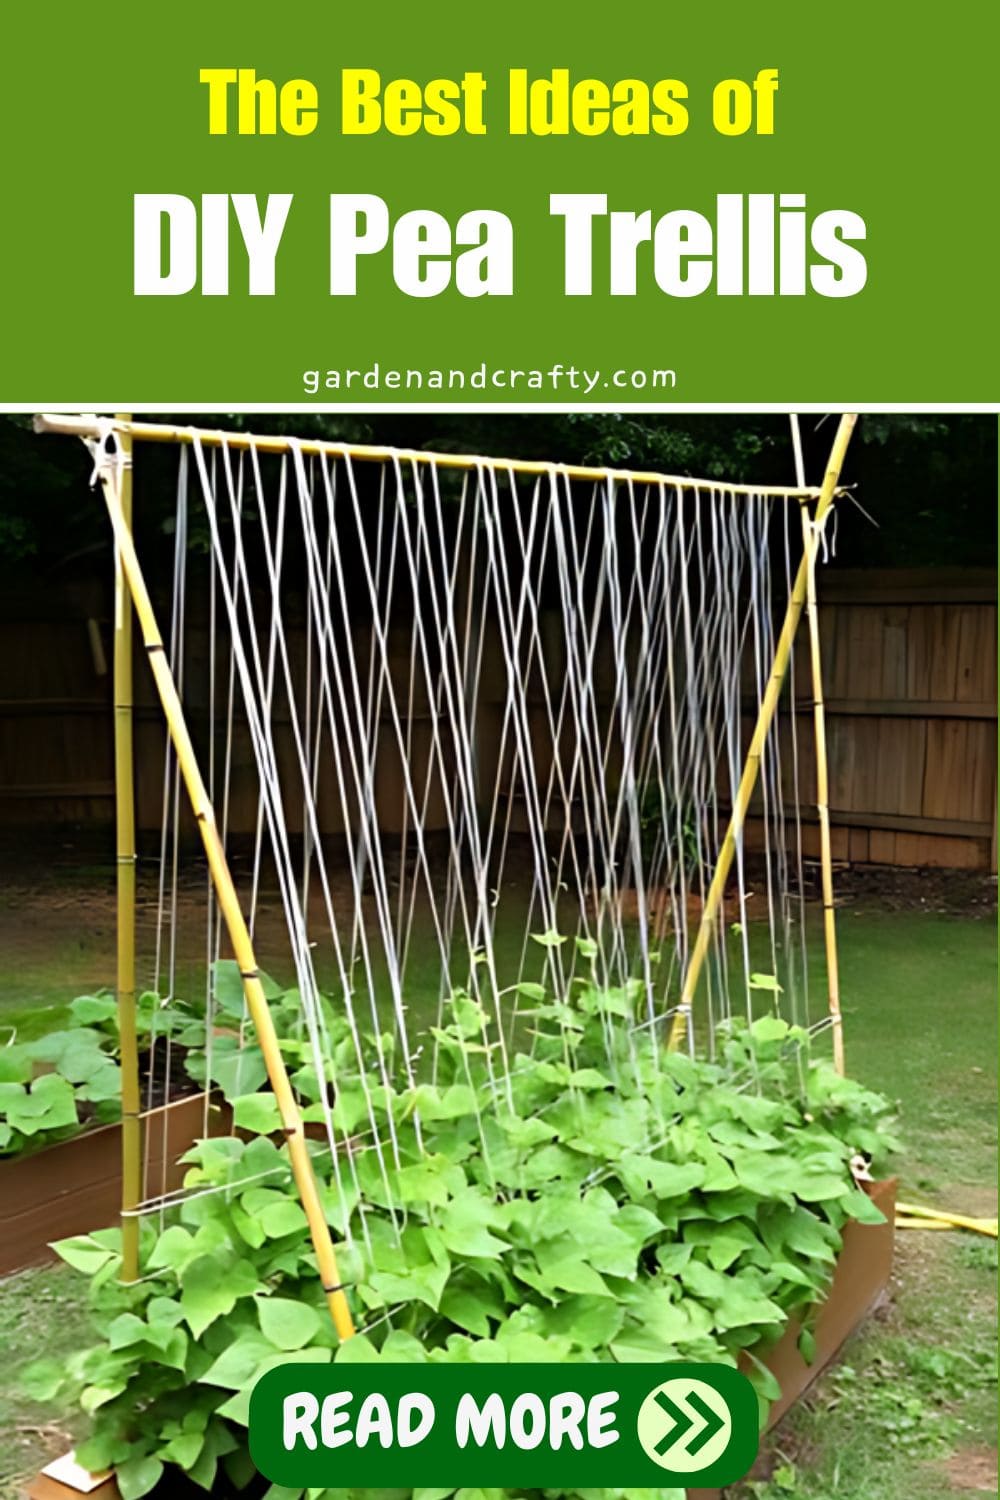
A-Frame Trellis
First, measure the area for the trellis and mark corners with garden stakes to outline the trellis location.
Next, cut wooden planks or select bamboo poles (4-6 feet). Ensure you have four equal-length pieces and shorter crossbars (1-2 feet).
From two long pieces prepared, you can form an “A” shape, then attach a crossbar near the top and another halfway down.
Repeat for the second A-frame and connect the A-frames with crossbars at the base and midway up.
Finally, position the A-frame in the marked area and push legs into the soil. Tie twine or wire horizontally for climbing support.
After finishing the trellis you can start growing your peas. Remember to space them 2-3 inches apart.
Materials for a 6-foot tall, 4-foot wide A-frame trellis:
- Bamboo poles or wooden planks: $15-$20
- Screws or nails: $5
- Twine or garden wire: $3
Total estimated cost: $23-$28
Teepee Trellis
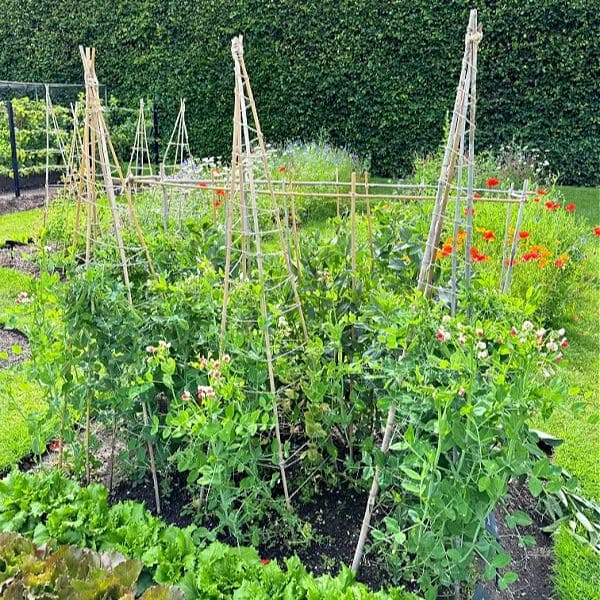
First, you’ll need to choose a spot where you have about 3-4 feet in diameter. It’s a good idea to use a garden hose to outline the circle and visualize the space.
Next, prepare at least six bamboo poles, each about 6-8 feet long. Place the poles in a circle, spacing them evenly, and push them into the soil about a foot deep.
Gather the tops of the poles together and tie them securely with strong twine or garden wire.
Then, wrap additional twine or wire horizontally around the structure, creating levels for the pea plants to climb.
Finally, place it in the marked garden area and plant your peas around the base of the teepee.
Materials for a 6-8 foot tall teepee trellis:
- Bamboo poles: $10-$15
- Twine or garden wire: $3
Total estimated cost: $13-$18
Vertical Garden Trellis
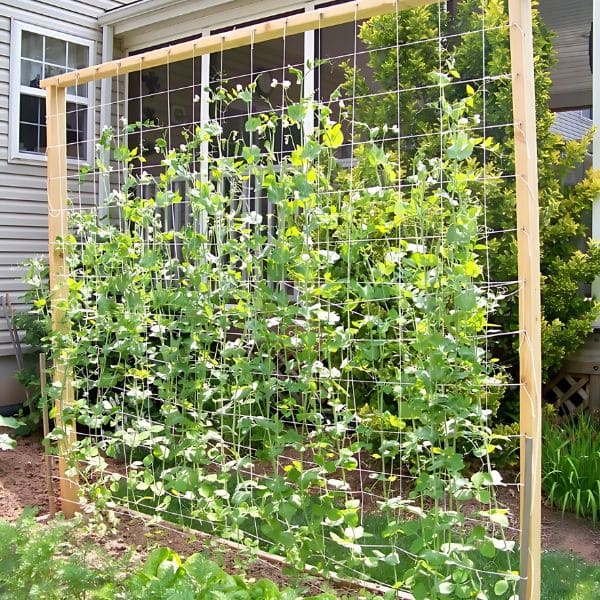
First, measure and mark your chosen spot. Even a narrow strip of soil or a container can work.
Next, you’ll need a sturdy wooden pallet or a frame, along with some wire mesh or netting. Secure the wire mesh to the back of the pallet using a staple gun or nails.
Place the pallet or frame vertically against a wall or railing. If necessary, use brackets or hooks to secure the top of the pallet to the wall.
Once installed, fill the base with soil and plant your peas at the bottom. This vertical garden trellis is simple to build and space-saving.
Materials for a vertical garden trellis:
- Wooden pallet or frame: $10-$20
- Wire mesh or netting: $5
- Staples or nails: $2
Total estimated cost: $17-$27
String Trellis
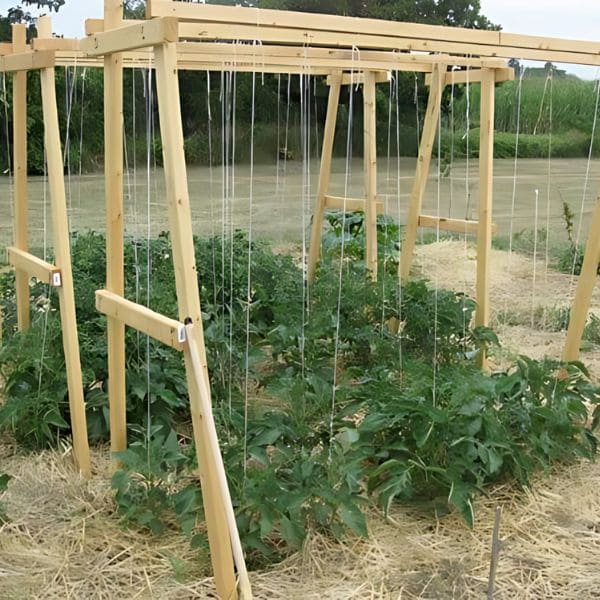
First, choose a suitable location in your garden or along a fence. Measure and mark the area where you want to install the trellis.
Next, you’ll need sturdy stakes, about 6 feet tall, and strong garden string or twine. Then place the stakes into the ground at each end of your marked area.
Tie the garden string or twine to the bottom of one stake and stretch it tightly to the other stake. Secure it at intervals, moving upward every 6-8 inches creating horizontal lines.
In my experience, using a double knot ensures the string stays taut. Once installed, plant your peas at the base of the stakes, spacing them about 2-3 inches apart.
This string trellis is not only easy to set up, but it also provides an effective climbing structure for your peas, it is suitable for gardeners of all skill levels.
Materials for a string trellis:
- Sturdy stakes: $5-$10
- Garden string or twine: $3
Total estimated cost: $8-$13
Maintaining Your Trellis and Pea Plants
Checking Trellis Regularly
You should make it a habit to inspect the trellis every week.
Over time, weather and plant growth can loosen components, so you need to re-tighten or replace any loose strings, nails, or ties.
Proper Watering And Fertilizing
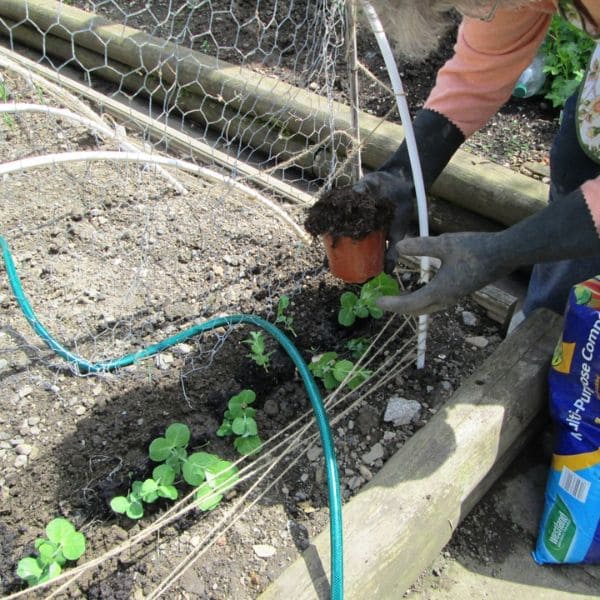
Ensure your peas receive consistent moisture, especially during dry spells. You should water early in the morning to minimize evaporation.
Besides, you can apply a light compost around the base of my plants every few weeks to keep them healthy and vigorous.
Pruning And Training
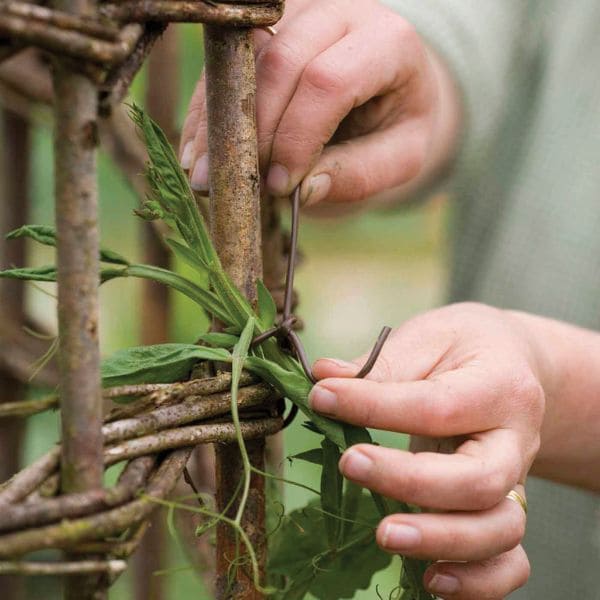
You should spend a few minutes each week gently guiding stray tendrils back onto the trellis using soft garden ties or twine.
Additionally, remove any dead or damaged leaves to promote healthy growth and better airflow.
Monitoring For Pests And Diseases
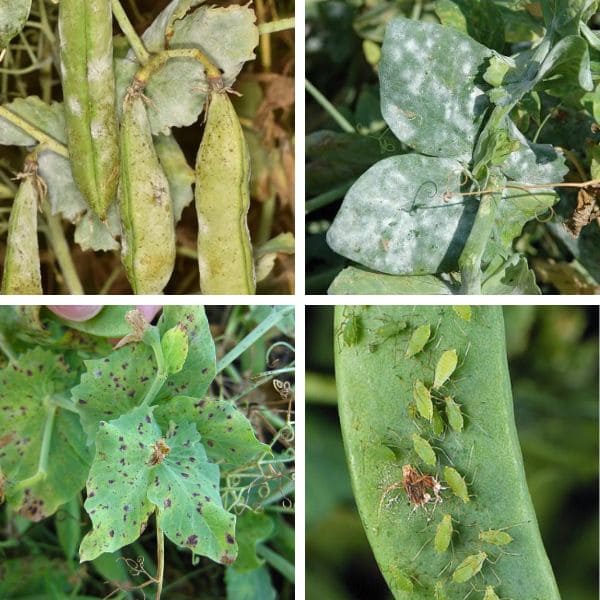
You need to inspect around the base and on the underside of leaves, where aphids and powdery mildew like to hide.
If you spot any, use an organic insecticidal soap or a DIY spray of water and dish soap to tackle them.
Moreover, to maximize your crops and minimize pests, consider growing companion plants with your peas.
Flowers like marigolds repel pests, while herbs such as basil and mint deter insects and add variety to your garden.
Specially, lettuce and spinach grow well in the shade provided by the trellis making the most of your garden space.
