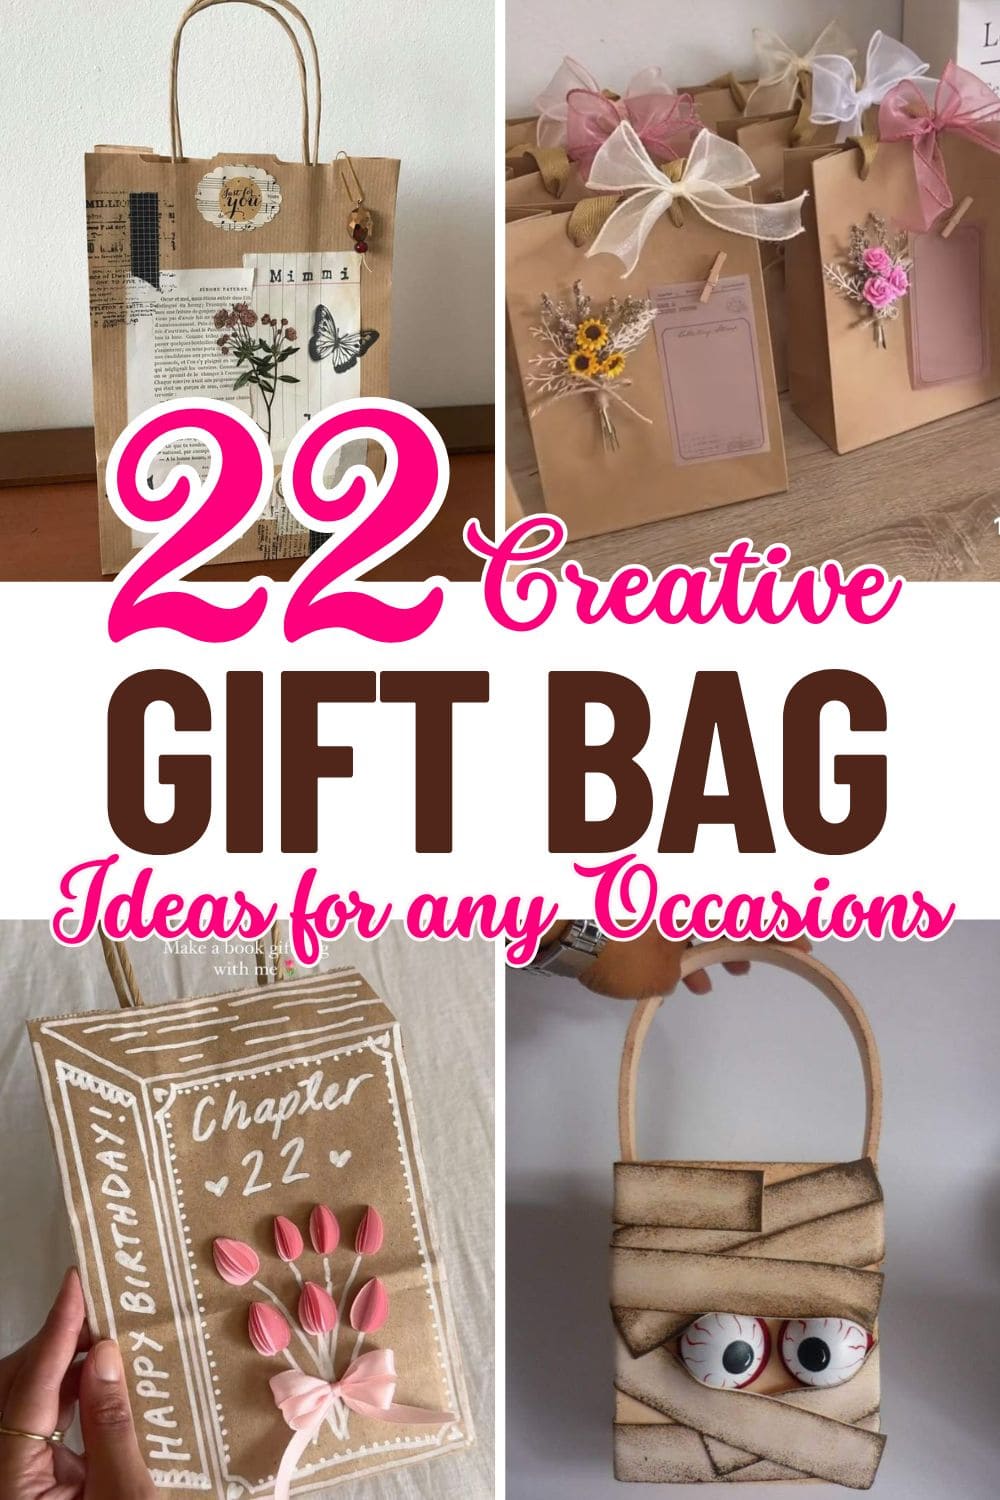
Why settle for store-bought when you can create something truly memorable? These 22 impressive DIY gift bag ideas are here to help you turn simple packaging into a heartfelt, handcrafted detail that stands out.
Whether it’s a birthday, holiday, wedding, or just-because gift, a personalized bag adds that extra spark of effort and charm.
These bags aren’t just wrappers, they’re part of the present. Grab your scissors, glue, and creativity, it’s time to make gifting even more special, one beautifully crafted bag at a time.
#1. Glitter-Dipped Party Gift Bags
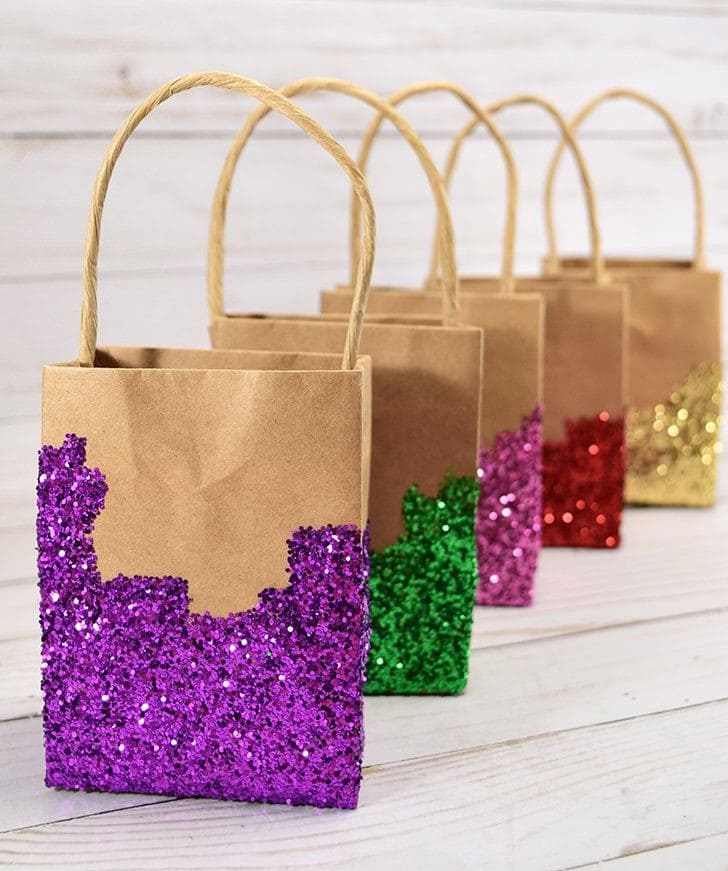
Who doesn’t love a bit of sparkle? These glitter-dipped bags are ridiculously fun to make and instantly turn any plain kraft bag into a showstopper.
Materials Needed
- Plain kraft paper bags (medium size, 5×8 in recommended)
- Mod Podge or craft glue
- Chunky glitter in assorted colors (about 2 tbsp per bag)
- Sponge brush or paintbrush
- Large paper sheet
- Clear acrylic spray sealant (optional)
Step-by-step Guide
Step 1: Lay down paper or a tray to protect your workspace.
Step 2: Using a sponge brush, apply glue to the bottom half of the bag in a wave or angled line.
Step 3: Pour glitter generously over the glued area. Tap off the excess.
Step 4: Let dry fully, then optionally spray with a clear sealant to prevent glitter fallout.
#2. Origami Fan-Fold Ribbon Gift Bags
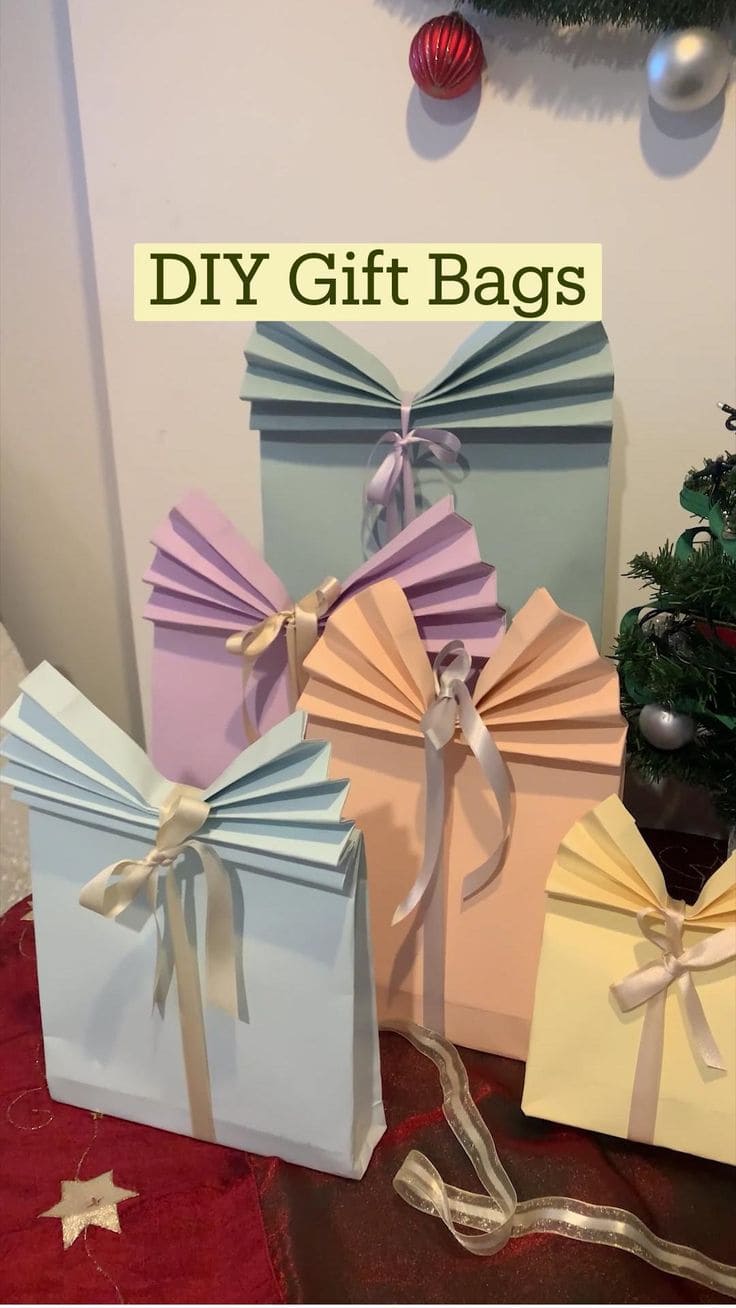
These pastel-colored DIY bags feel like they stepped out of a boutique window! The top-fold fan adds elegance, while the satin ribbon gives it that perfect finish.
Materials Needed
- Colored A4 cardstock (150–200 gsm), 1 sheet per bag
- Satin ribbon (1.5–2 cm wide), 50–60 cm per bag
- Double-sided tape or glue
- Scissors
- Bone folder (optional for cleaner folds)
Step-by-step Guide
Step 1: Fold the cardstock into a rectangular bag shape and glue the edges. Let dry.
Step 2: Pinch the top flat and fold accordion-style (approx. 1 cm pleats) to form a fan.
Step 3: Fold the fan inward like butterfly wings and hold it with a clip.
Step 4: Tie the ribbon around the fan to secure the closure and create a bow.
#3. Romantic Dried Flower Kraft Gift Bags
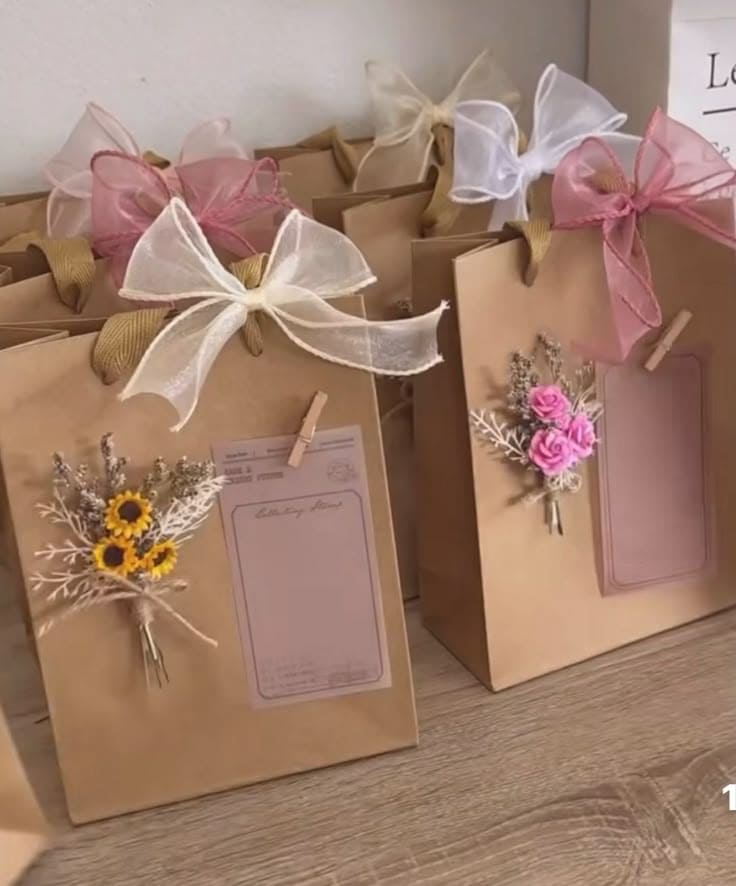
These kraft bags are the definition of charming. With dainty dried flower bouquets, pastel tags, and oversized bows, they feel like something from a vintage stationery shop.
Materials Needed
- Kraft gift bags (5″ x 8″)
- Mini dried flower bundles (baby’s breath, roses, sunflowers, etc.)
- Small paper tags or faux receipts (~3″ x 4″)
- Mini clothespins
- Ribbon bows (organza or grosgrain, 10″–12″ each)
- Hot glue or glue dots
Step-by-step Guide
Step 1: Glue the tag onto the front of the bag and clip a mini clothespin to its corner.
Step 2: Attach a small bouquet beside the tag using hot glue.
Step 3: Tie a large ribbon bow and glue or tape it to one of the bag handles.
#4. DIY Cardboard Gift Purse with Beaded Handle
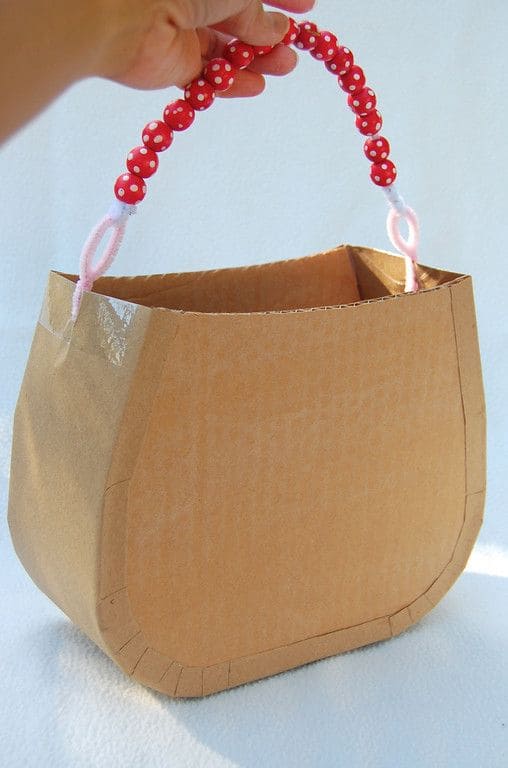
This adorable cardboard “purse” is perfect for kids’ parties, handmade gifts, or crafty packaging. It looks like a boutique gift.
Materials Needed
- Cardboard (two 8″ x 6″ pieces + 1 strip for side, ~3″ x 20″)
- Yarn or pipe cleaners (2 pieces, 10″ each)
- 12–16 plastic craft beads
- Clear tape or hot glue
- Scissors or craft knife
Step-by-step Guide
Step 1: Cut two identical purse-shaped panels and one long strip for the side wall.
Step 2: Tape or glue the strip between the panels to form a 3D purse.
Step 3: Thread beads onto pipe cleaners or yarn, then poke holes and attach as a handle.
#5. Gingerbread House-Inspired Gift Bag
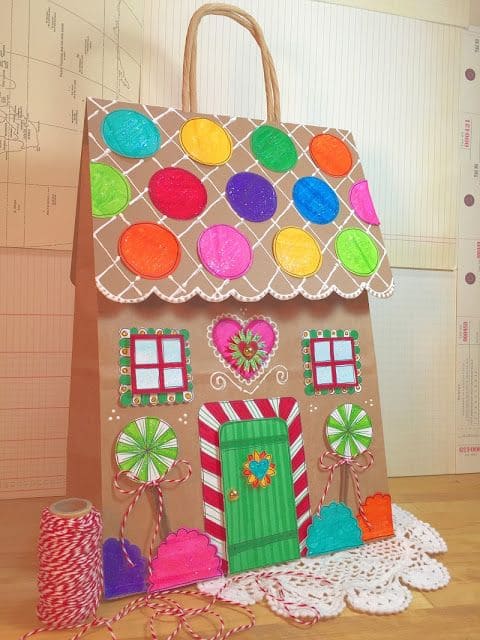
Designed like a gingerbread house, it’s perfect for Christmas, birthdays, or candy-themed parties.
Materials Needed
- Brown kraft gift bag (large)
- Colored construction paper (various bright colors)
- White paint pen or correction fluid (for frosting lines)
- Glue stick or hot glue
- Twine or baker’s string (optional, for accents)
- Scissors and markers
Step-by-step Guide
Step 1: Cut out candy shapes, doors, windows, and gumdrops from colorful paper.
Step 2: Use a white paint pen to draw frosting-like lattice on the “roof” and swirl details.
Step 3: Glue on the candy cutouts in layers—start with the door and windows, then add accents like lollipops, hearts, and gumdrops.
Step 4: Tie baker’s twine into bows and add for extra sweetness. Let everything dry before filling.
#6. Silly Clown Face Gift Bags
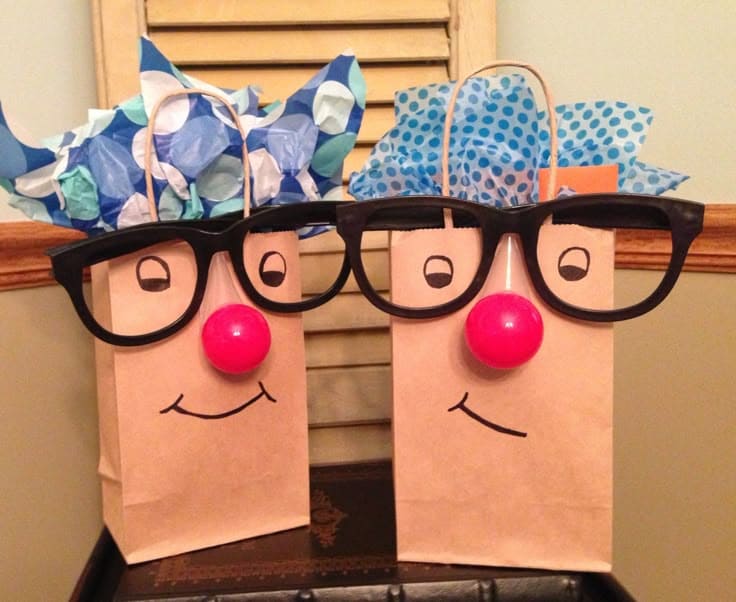
These goofy clown bags bring instant smiles! Perfect for birthday parties or gag gifts, they’re super easy to make and guaranteed to be remembered.
Materials Needed
- 2 brown paper gift bags
- 2 pairs novelty glasses (plastic or paper cutouts)
- 2 red pom-poms or plastic balls (1.5–2 in diameter)
- Black marker
- Colored tissue paper (4–6 sheets in blue, white, or multicolor)
Step-by-step Guide
Step 1: Use the marker to draw eyes and a smile on the front of the bag.
Step 2: Glue the red nose in the center and attach the glasses just above it.
Step 3: Crumple up tissue paper sheets and tuck them into the top to mimic wild clown hair.
#7. DIY Teddy Bear Gift Bag
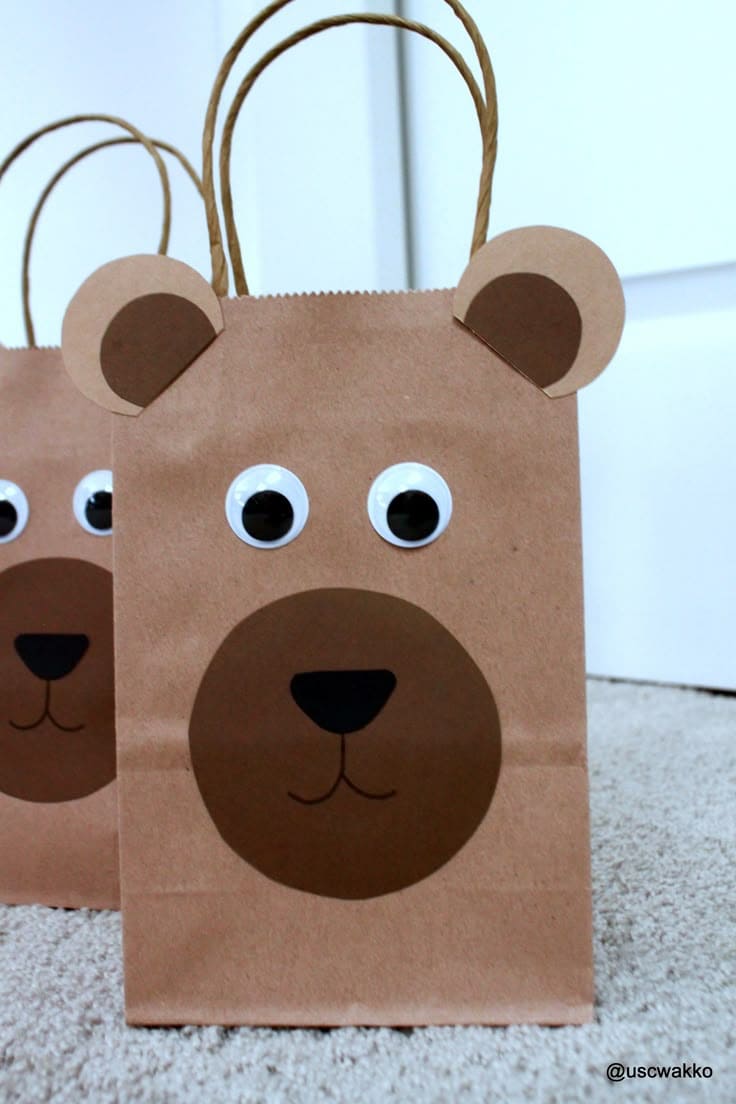
This teddy bear bag is the ultimate party charmer, perfect for baby showers, toddler birthdays, or classroom celebrations.
Materials Needed
- Brown paper bag with handles
- Googly eyes (2 per bag, 1″ size)
- Light and dark brown cardstock (for ears, muzzle)
- Black paper or marker (for nose/mouth)
- Glue stick or hot glue
Step-by-step Guide
Step 1: Cut two small ear shapes from light brown paper and smaller inner circles from dark brown paper. Glue them together and attach to the top of the bag.
Step 2: Cut a large oval for the snout and a small black oval for the nose. Glue both to the front of the bag.
Step 3: Add googly eyes above the snout. Draw or glue on a little mouth.
#8. Chapter 22 Book-Themed Gift Bag
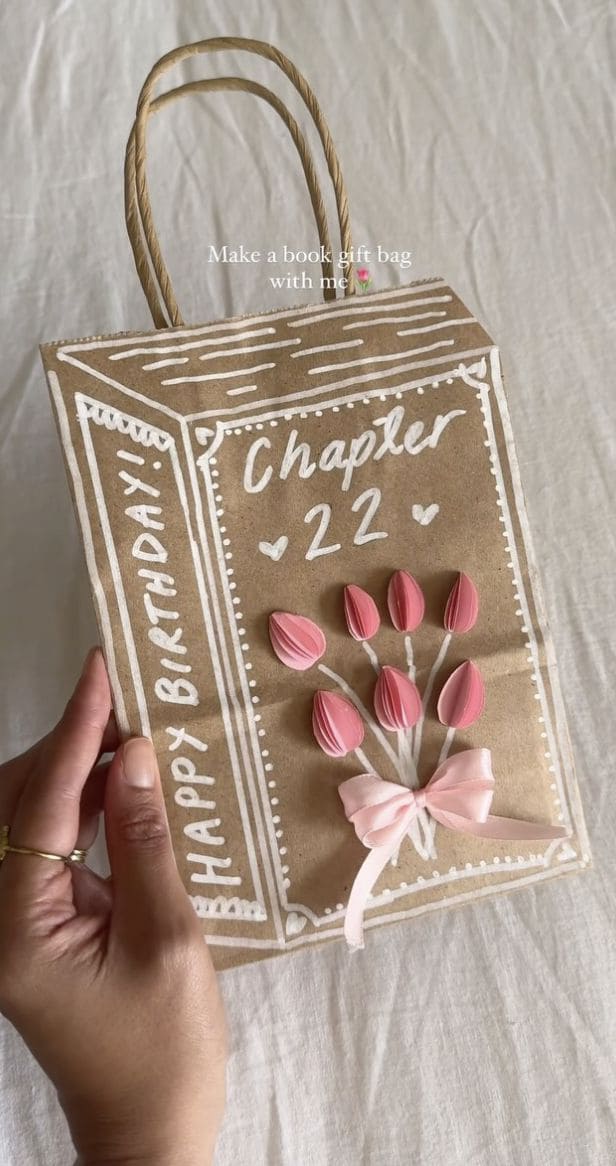
This book-inspired birthday bag is one of the most charming ways to wrap a present, especially for a reader, a writer, or anyone beginning a new chapter in life.
Materials Needed
- Brown kraft paper gift bag
- White paint marker or gel pen
- Pink paper (for petals)
- Pink ribbon (10–12 inches)
- Glue stick or hot glue
Step-by-step Guide
Step 1: Use a white paint pen to draw book-like edges and a “spine” on the front of the bag.
Step 2: Write the recipient’s age or milestone as “Chapter [Number]” and add details like hearts or dotted lines.
Step 3: Cut and fold pink paper petals to form 3D tulips, then glue them into a bouquet shape.
Step 4: Add a ribbon bow beneath the bouquet for a soft, celebratory touch.
#9. Wire Grid Gift Bag with Charms
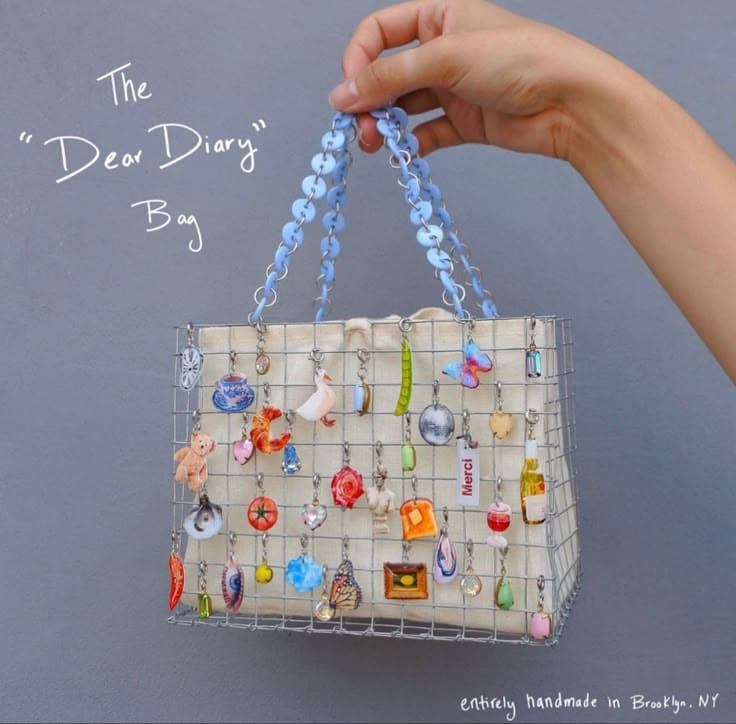
This gift bag is pure personality. Crafted with a wire frame and decked out in colorful trinkets, it’s like gifting a little gallery of memories.
Materials Needed
- Wire mesh sheet (about 9″ x 6″, foldable into bag shape)
- Lining fabric or drawstring pouch (to fit inside)
- Colorful charms, trinkets, or mini toys (20–30 pieces)
- Split rings or jump rings
- Chain or plastic links for handle
- Pliers
Step-by-step Guide
Step 1: Fold and shape the wire mesh into a rectangular bag form; secure the edges with wire or twist ties.
Step 2: Insert the fabric pouch or lining inside the mesh to hold contents.
Step 3: Attach charms to the wire grid using split rings and pliers.
Step 4: Add a chain or link-style handle to the top edges and secure tightly.
#10. Upcycled Newspaper Gift Bag
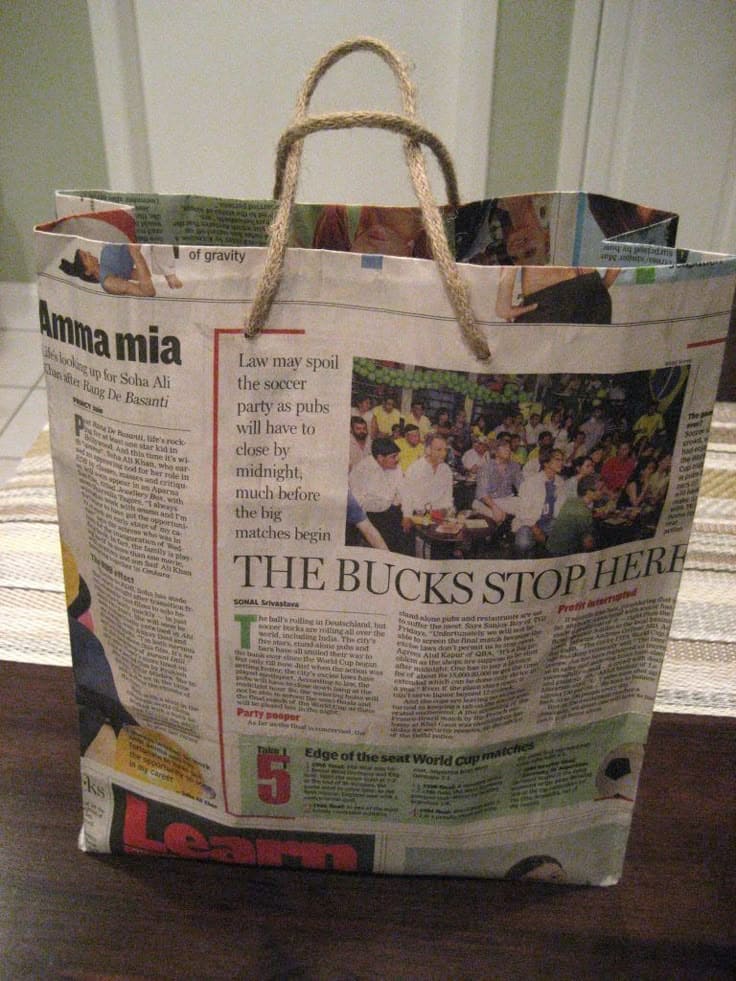
This DIY gift bag is as clever as it is eco-friendly. Made entirely from old newspapers and twine, it’s the kind of thing that makes both the gift and the wrapping memorable.
Materials Needed
- 2 full newspaper sheets (approx. 22″ x 12″)
- 2 pieces of jute twine (12″ each)
- Glue stick or liquid glue
- Hole puncher
- Optional: cardboard base insert (6″ x 3″)
Step-by-step Guide
Step 1: Fold one sheet in half vertically. Overlap and glue the side edge to form a cylinder.
Step 2: Fold the bottom up 2″, then open and flatten the fold into a diamond. Fold and glue flaps inward to close the bottom.
Step 3: Reinforce the top edge by folding it down 1″. Punch two holes on each side.
Step 4: Thread and knot twine handles through holes. Add a cardboard base inside if needed for extra strength.
#11. Vintage Collage-Inspired Gift Bag
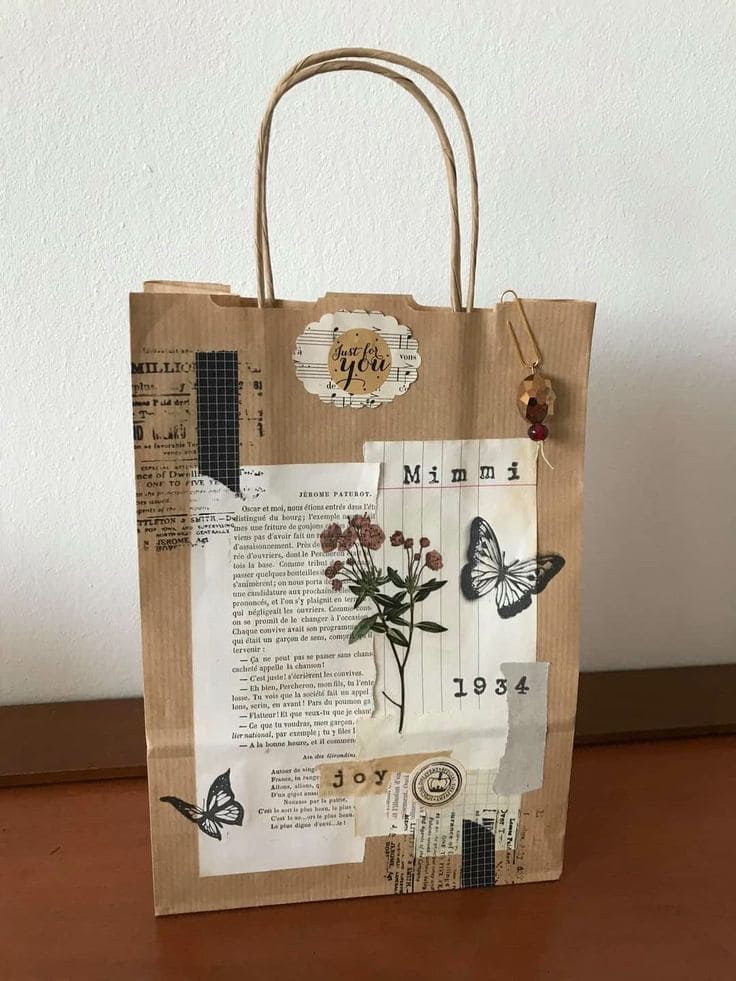
This one speaks like a letter from the past, handwritten fonts, dried blooms, torn book pages, and a soft palette of aged papers.
Materials Needed
- 2 full newspaper sheets (approx. 22″ x 12″)
- 2 pieces of jute twine (12″ each)
- Glue stick or liquid glue
- Hole puncher
- Optional: cardboard base insert (6″ x 3″)
Step-by-step Guide
Step 1: Fold one sheet in half vertically. Overlap and glue the side edge to form a cylinder.
Step 2: Fold the bottom up 2″, then open and flatten the fold into a diamond. Fold and glue flaps inward to close the bottom.
Step 3: Reinforce the top edge by folding it down 1″. Punch two holes on each side.
Step 4: Thread and knot twine handles through holes. Add a cardboard base inside if needed for extra strength.
#12. Dapper Bowtie Gift Bag for Boys
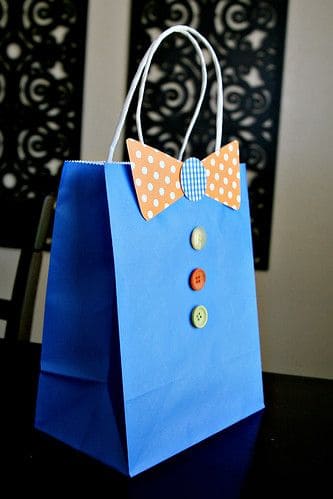
This charming gift bag adds a fun, dressed-up twist to any celebration. With its bright buttons and bowtie, it’s perfect for birthdays, baby showers, or Father’s Day.
Materials Needed
- 1 blue paper gift bag (medium size)
- 1 patterned paper bowtie cutout (~5″ wide)
- 3 colorful buttons
- 1 small circle of patterned paper (bowtie center)
- Glue or double-sided tape
Step-by-step Guide
Step 1: Cut out a bowtie shape from cardstock and a small circle for the knot.
Step 2: Glue the bowtie near the top of the bag and center the circle to finish it off.
Step 3: Glue buttons vertically down the center to mimic a shirt front.
#13. Word Search Gift Bag with Custom Name Tag
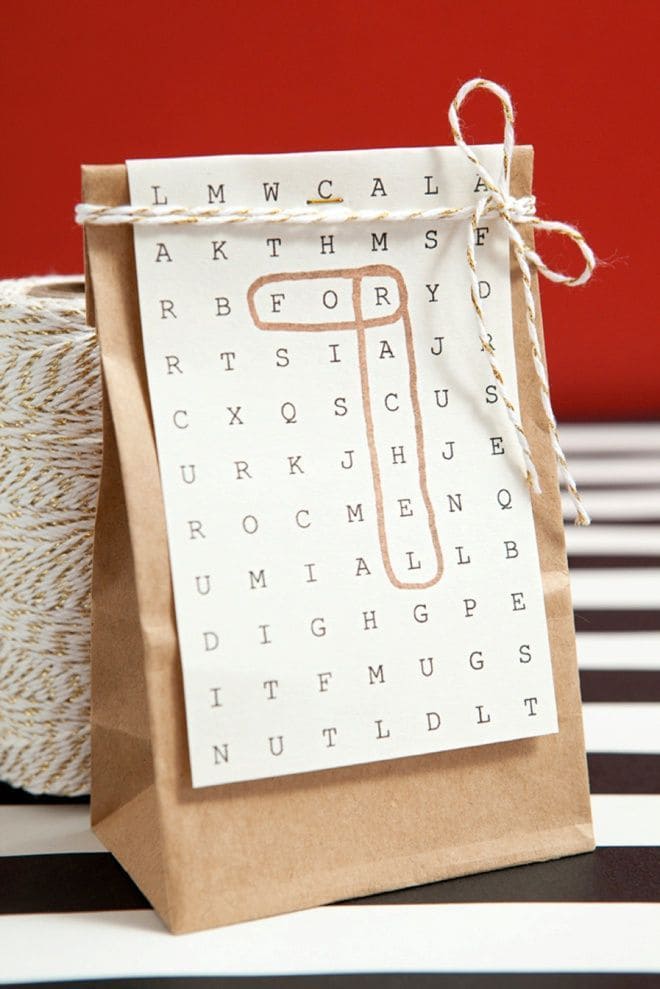
The custom word search adds a fun interactive twist, and the minimalist kraft paper bag keeps it chic.
Materials Needed
- 1 small kraft paper bag (5″ x 8″)
- 1 printed word search card (custom name, ~4″ x 6″)
- Twine or baker’s string (12″)
- Hole punch or small clothespin
- Pen or marker (to circle the name)
Step-by-step Guide
Step 1: Design a word search on your computer with the recipient’s name included; print and cut to size.
Step 2: Circle the name or let the recipient find it themselves for added fun.
Step 3: Punch a hole in the card and tie it to the top of the bag with string.
#14. Sentimental Mothers Day Photo Gift Bag
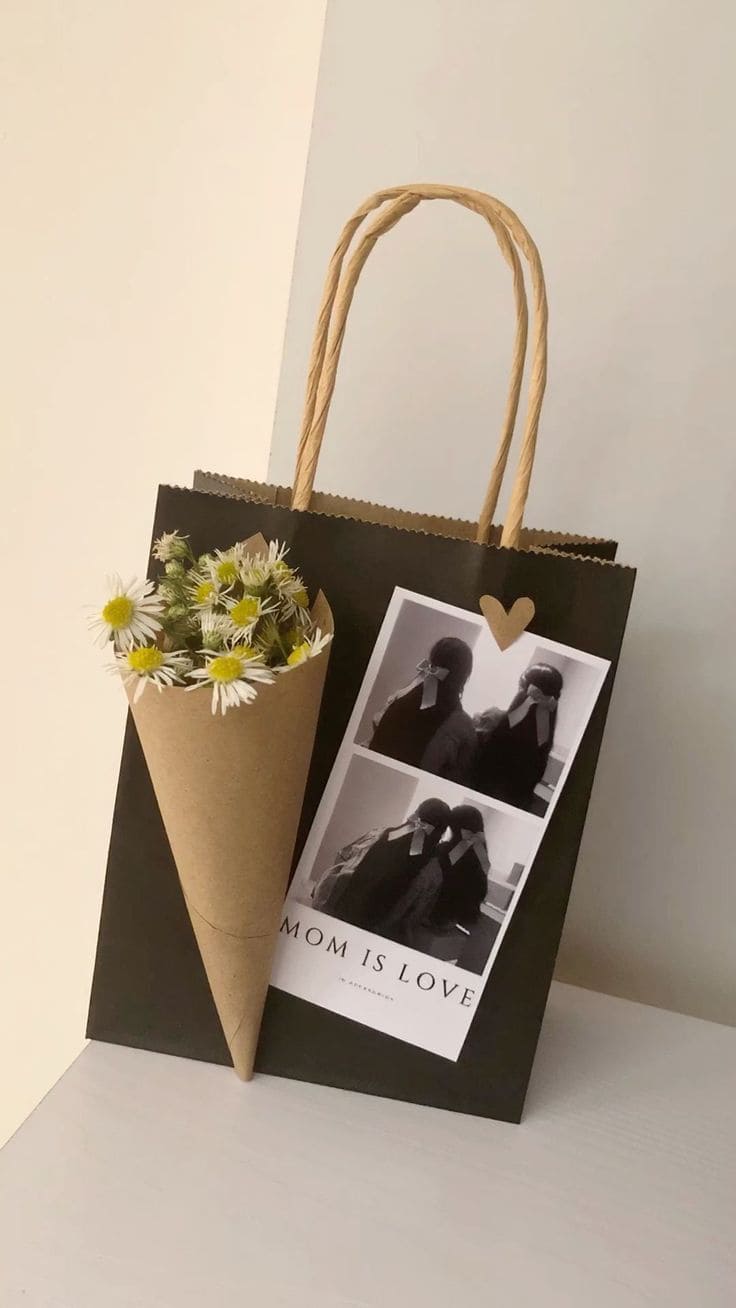
A sweet mini bouquet wrapped in kraft paper, paired with a heartfelt photo strip and the words “Mom is love”, it’s simple, personal, and deeply moving.
Materials Needed
- Black kraft gift bag
- Printed photo collage or strip (approx. 4″ x 6″)
- Kraft paper for flower cone
- Mini bouquet (fresh or faux daisies work beautifully)
- Small heart cutout or sticker
- Glue dots or double-sided tape
Step-by-step Guide
Step 1: Print your favorite photo(s) and trim into a vertical collage.
Step 2: Glue the photo strip to the front of the bag and attach a heart embellishment at the top.
Step 3: Roll a kraft paper cone and place a small bouquet inside. Secure the cone to the bag with tape or glue.
#15. Vintage Book Page Gift Bags
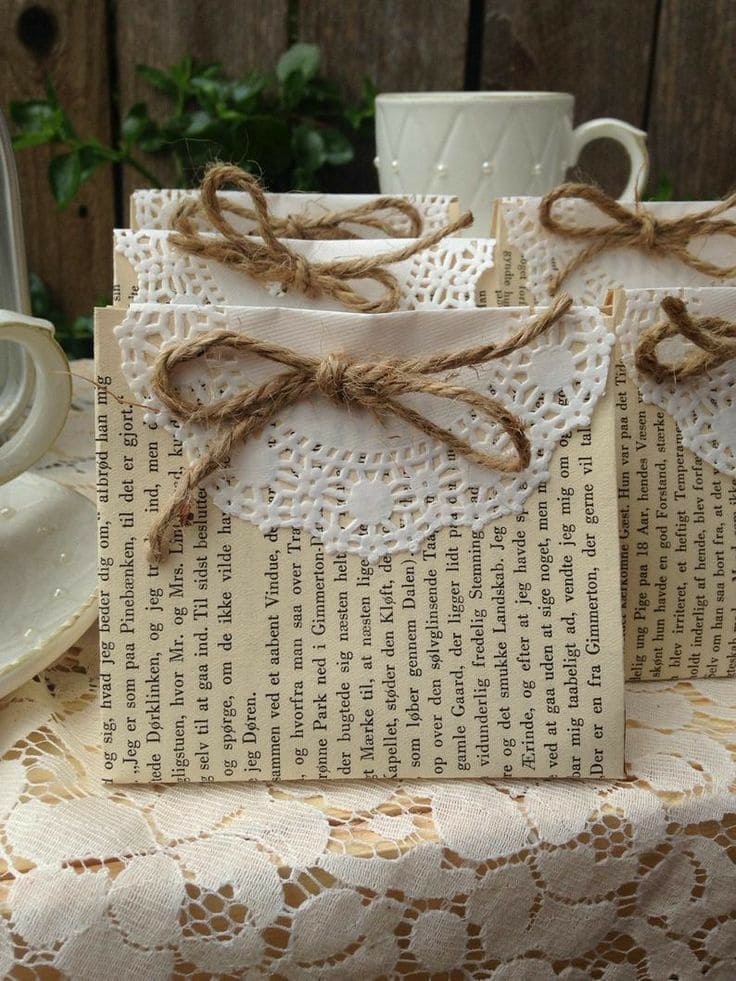
These charming little bags look like they belong at a tea party in an old English garden. Made from vintage book pages, paper doilies, and rustic twine, they feel romantic, delicate, and handmade with love.
Materials Needed
- 2 book pages (per bag, approx. 8″ x 11″)
- 1 paper doily (4″ round)
- Twine (10″ per bag)
- Glue stick or craft glue
- Optional: tape or mini clothespin for back support
Step-by-step Guide
Step 1: Fold and glue two book pages into a rectangular bag shape, creating a flat bottom.
Step 2: Fold a doily over the top edge of the bag like a flap.
Step 3: Tie a twine bow around the doily flap to secure it closed.
#16. Vintage-Inspired Dictionary Page Gift Bags
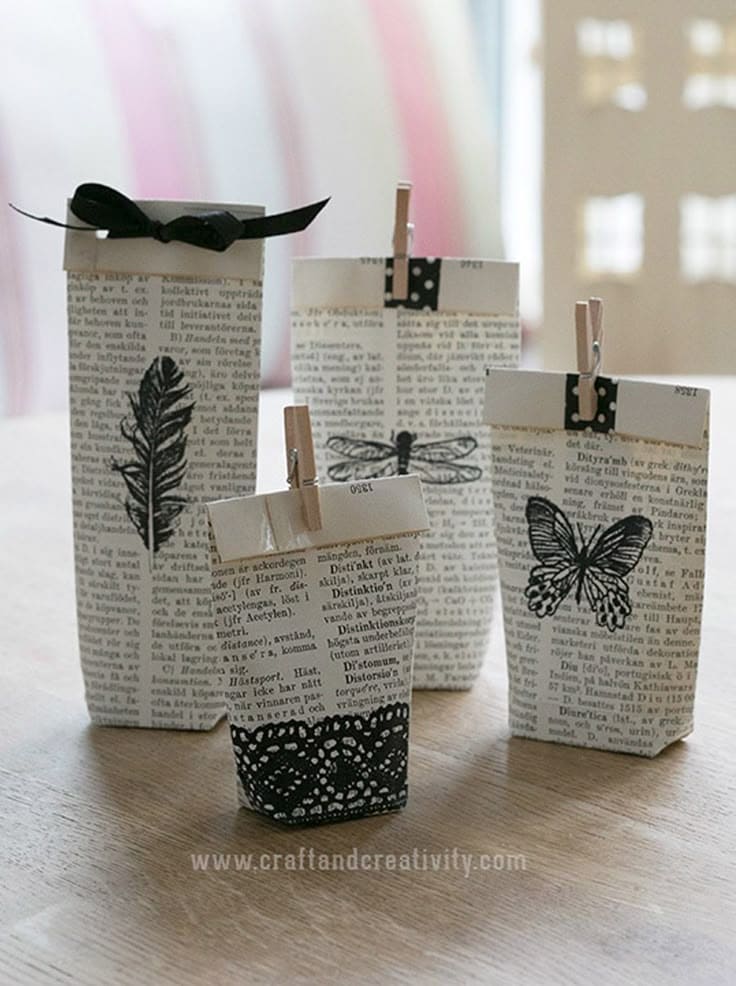
Made from recycled dictionary pages and stamped with simple black illustrations, they feel timeless, perfect for a handmade soap, dried tea sachet, or a tiny note that says “thinking of you.”
Materials Needed
- Old dictionary pages or newspaper sheets (1 per bag)
- Glue stick or double-sided tape
- Black stamps (feather, butterfly, dragonfly, lace)
- Ink pad (black)
- Mini clothespins or ribbon for closure
Step-by-step Guide
Step 1: Fold your dictionary page into a rectangular bag shape and glue the sides and bottom securely.
Step 2: Stamp a design onto the front of each bag using black ink.
Step 3: Once dry, fill with your chosen gift.
Step 4: Fold the top closed and clip with a mini clothespin or tie with thin ribbon.
#17. Butterfly-Inspired Folded Gift Bag
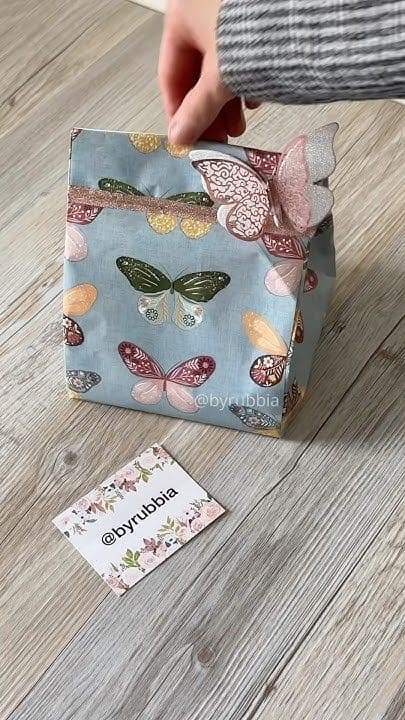
With a clean, seamless fold and finished off with a glitter ribbon and a 3D butterfly on the closure, it feels store-bought but is totally handmade.
Materials Needed
- Patterned butterfly wrapping paper (cut to approx. 10 x 14 in)
- Double-sided tape or glue
- Small glitter ribbon (about 6 in)
- Foam butterfly sticker or paper cut-out
Step-by-step Guide
Step 1: Fold your wrapping paper into a rectangular bag shape and seal the side using tape or glue.
Step 2: Fold the base inward like you would a standard gift bag, securing with glue.
Step 3: Once your gift is inside, fold down the top edge neatly and secure with the ribbon.
Step 4: Finish by placing the butterfly sticker at the closure point for a soft, magical touch.
#18. Elegant Wedding Welcome Gift Bags
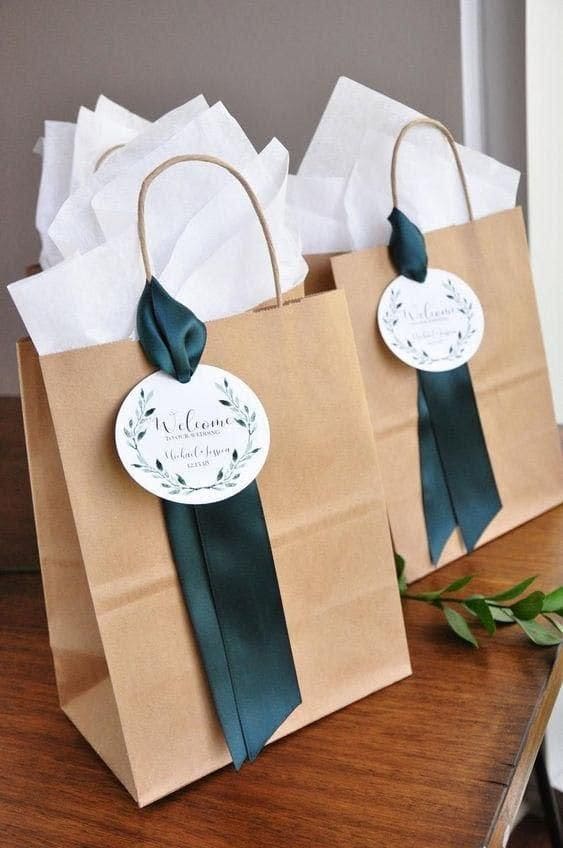
Simple, classy, and easy to customize, these wedding welcome bags strike the perfect balance between handmade and polished.
Materials Needed
- Kraft paper gift bags (medium size, 5″ x 8″)
- White tissue paper (2–3 sheets per bag)
- Dark green or navy satin ribbon (12″–14″)
- Custom round tags (3″ diameter)
- Hole punch + glue dots or small safety pins
Step-by-step Guide
Step 1: Fill each bag with guest essentials (snacks, water, a welcome note, etc.) and top with fluffed white tissue.
Step 2: Punch a hole in each custom tag and thread the ribbon through.
Step 3: Tie the ribbon to one handle, letting the tag and ribbon drape nicely.
#19. Country Cottage Fabric Gift Sacks
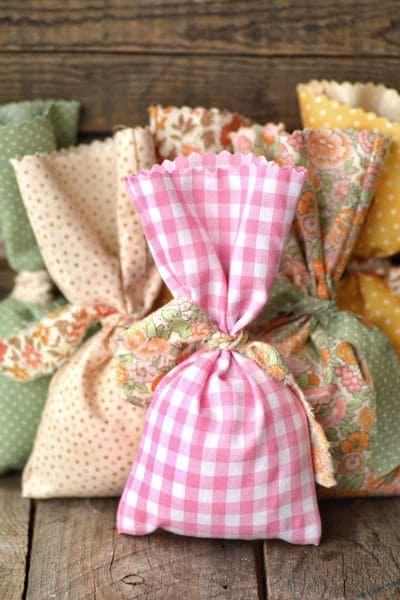
These soft, homey fabric gift sacks feel like a hug from grandma’s kitchen. With their gingham and floral patterns, they’re perfect for soaps, tea blends, or anything heartfelt and handmade.
Materials Needed
- Cotton fabric squares (7″ x 9″ each)
- Coordinating ribbon or fabric ties (12″–15″)
- Pinking shears (for zigzag edges)
- Sewing machine or fabric glue
- Optional: dried lavender, herbs, or filler gifts
Step-by-step Guide
Step 1: Fold each fabric square in half, right sides together. Sew or glue the sides, leaving the top open.
Step 2: Trim the top edge with pinking shears for a charming finish.
Step 3: Turn the bag right side out, fill with treats or goodies.
#20. Transparent Floral Fantasy Gift Bag
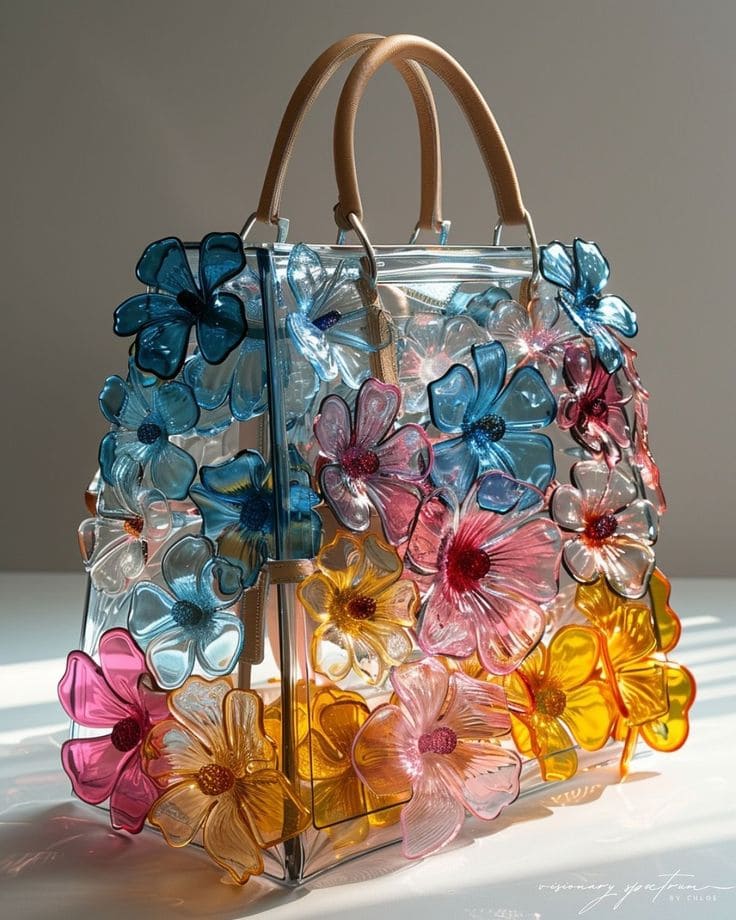
With vibrant, oversized translucent flowers clinging to a clear box frame, it radiates joy and luxury.
Materials Needed
- Clear acrylic box or sheet folded into a bag shape (approx. 10″ x 8″ x 4″)
- 30 flaux glass/acrylic flower embellishments
- Strong glue
- Leather or faux leather handles (2 pieces, 10″–12″ each)
- Optional: inner drawstring pouch
Step-by-step Guide
Step 1: Arrange your acrylic flowers on the clear bag to plan placement.
Step 2: Glue flowers to the outer surface, spacing them for full coverage and dimension. Let dry.
Step 3: Attach handles securely to the top edge with strong adhesive or small screws/rivets.
#21. DIY Mummy Gift Bag for Halloween
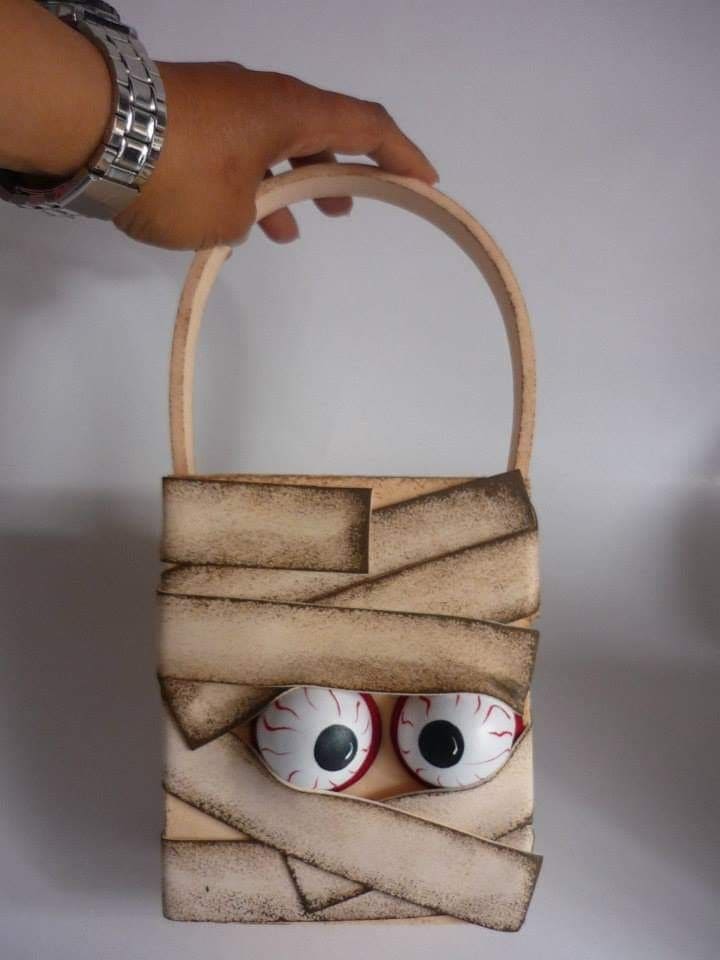
With bulging eyeballs peeking through tattered bandages, it’s a hit for Halloween party favors or trick-or-treat surprises.
Materials Needed
- 1 small plain paper bag or cardboard box (6″ x 4″)
- Light beige or cream foam sheets (2–3, cut into strips)
- Black ink pad or soft brown paint (for shading)
- 2 plastic eyeballs or printed ones
- Glue gun or strong craft glue
Step-by-step Guide
Step 1: Cut foam sheets into strips about 1″ wide. Smudge the edges with black or brown ink for a dusty effect.
Step 2: Glue strips across the front of the bag, overlapping randomly like mummy bandages. Leave a small gap for eyes.
Step 3: Glue the eyeballs behind the gap so they peek through.
#22. Playful Painted and Pom-Pom Gift Bags
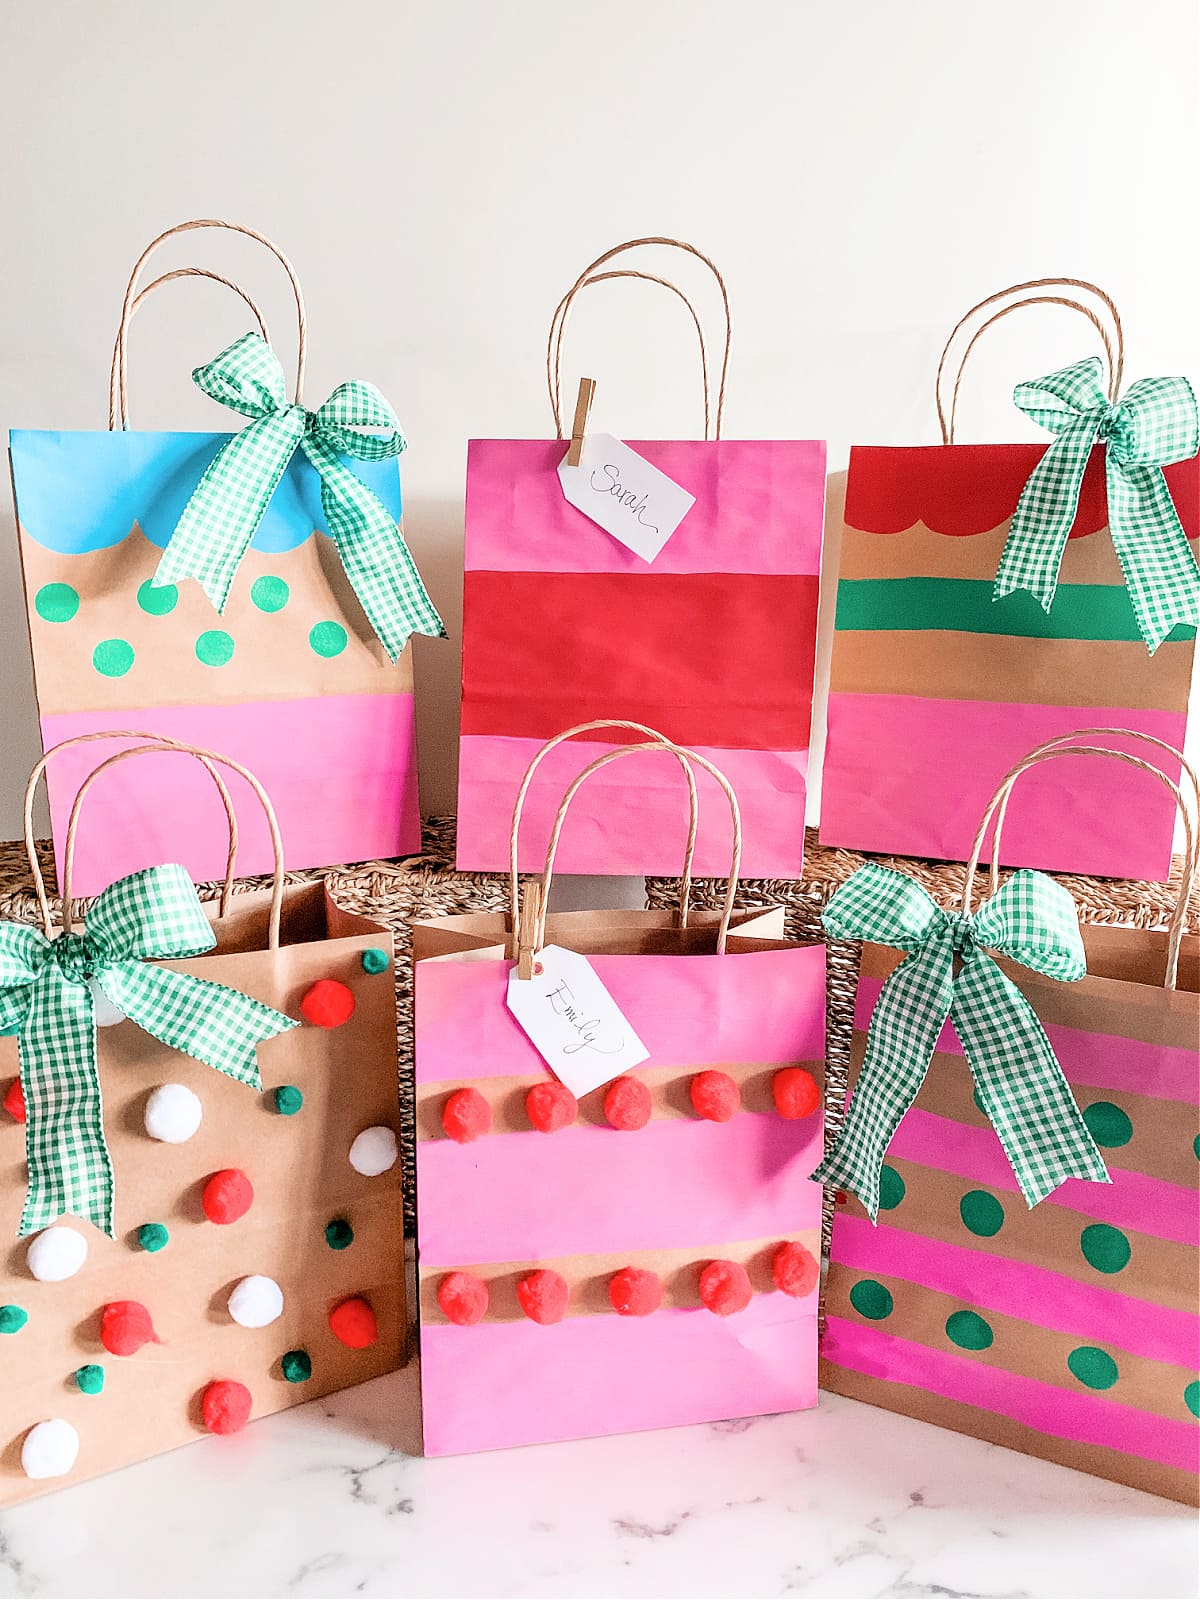
These DIY gift bags are pure joy in paper form. Bursting with hand-painted stripes, dots, and textured pom-poms, they’re perfect for birthdays or holidays.
Materials Needed
- Kraft paper gift bags (7×9 in or any size you prefer)
- Acrylic paint (variety of colors – pink, red, blue, green)
- Paintbrushes or foam brushes
- Mini pom-poms (red, green, white) – approx. 10–12 per bag
- Craft glue
- Green gingham ribbon (approx. 18″ per bow)
- Gift tags + mini clothespins (optional)
Step-by-step Guide
Step 1: Paint your desired patterns like stripes, polka dots, or color-blocked tops. Let them dry fully.
Step 2: Glue on pom-poms to form lines, polka dots, or clusters.
Step 3: Tie a ribbon bow and attach it to one handle with hot glue.
