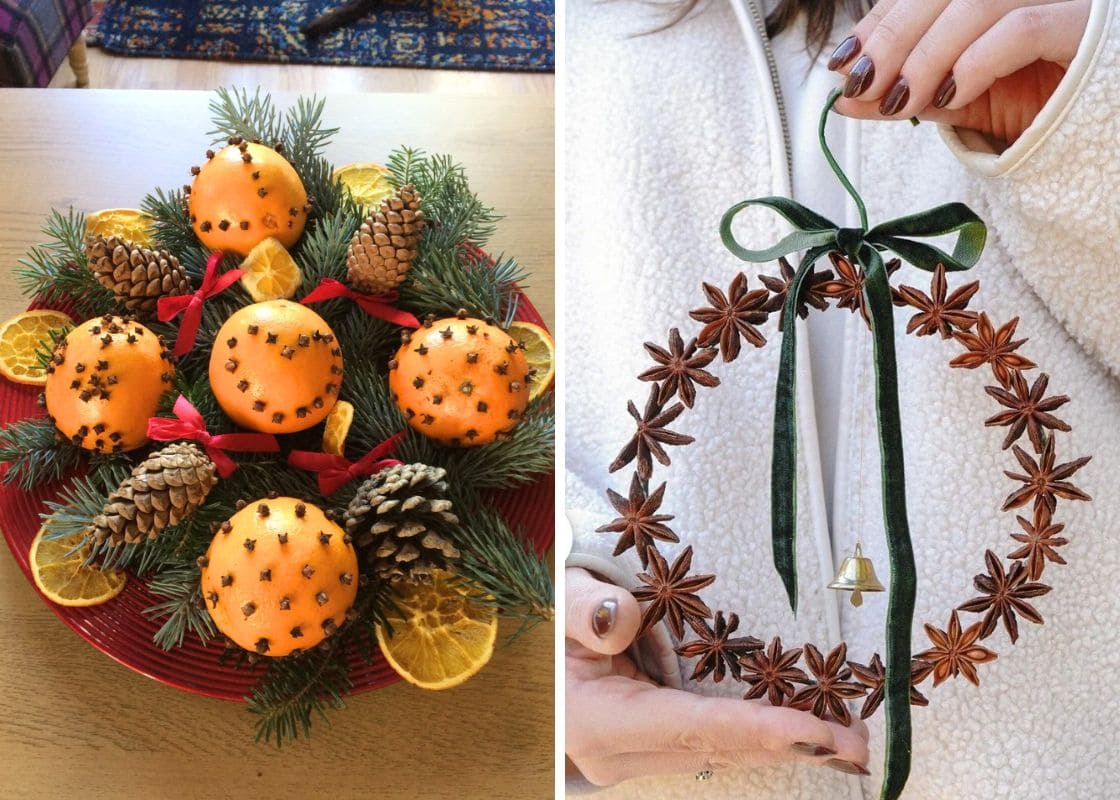
Looking to add a little Christmas magic without crowding your floors or tabletops?
Wall hangings are the perfect way to bring holiday cheer into your home with style and personality.
These stunning decorations create a focal point that feels warm, festive, and full of charm.
If you’re hoping to make a statement that’s both merry and meaningful, these 23 Christmas wall hanging ideas might be just what your space needs.
#1. Modern Geometric Christmas Wall Hanging

This bold and artistic wall hanging brings a fresh spin to holiday decor, combining geometric wooden shapes with evergreen sprigs and classic baubles.
The half-moon base sets the tone with minimalist flair, while the layered circles in vivid mustard, crimson, and teal create a dynamic, playful rhythm.
Tucked among pine branches and frosted pinecones, the colors pop beautifully against any dark or neutral wall.
Materials Needed
- Wooden circle and crescent shapes (various sizes)
- Paint in mustard, red, teal, and cream
- Small red and gold ornaments
- Faux evergreen sprigs and pinecones
- Hot glue gun and glue sticks
- Twine or ribbon for hanging
Step-by-step Guide
Step 1: Paint each wood shape in your chosen festive colors and let them dry completely.
Step 2: Arrange the shapes into a cascading design, layering the crescent behind the circles.
Step 3: Glue the shapes together firmly, reinforcing with extra adhesive on the back.
Step 4: Attach faux greenery and pinecones along the top for texture and holiday charm.
Step 5: Finally, add small ornaments for sparkle and attach twine at the top for hanging.
#2. JOY Christmas Card Display Wall
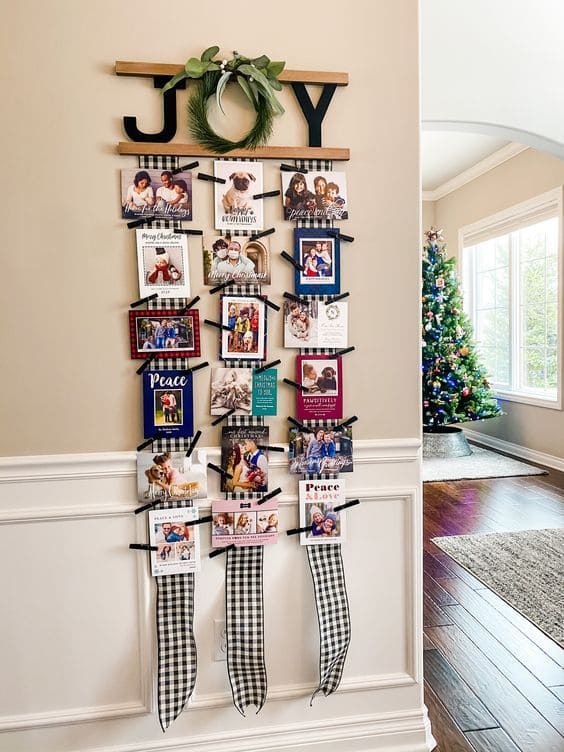
This charming wall hanging lets you celebrate the season by showcasing what truly matters.
Built around a simple wooden “JOY” sign topped with greenery, this project features cascading ribbons to hold all the holiday cards from friends, family, and neighbors.
You’ll love how it grows throughout December as more cards arrive, becoming a heartwarming tapestry of love, faces, and festive wishes.
Materials Needed
- 2 wood slats (about 30″ wide)
- JOY letters (12″ tall)
- Mini wreath or greenery stem
- 3 ribbons (each 4″ wide × 60″ long)
- Clothespins or small clips (20-30 pcs)
- Double-sided tape or command strips
- 3 hanging stockings (optional)
Step-by-step Guide
Step 1: Attach your JOY letters to the wood slat using hot glue or wood adhesive. Replace the “O” with a faux wreath for a fresh, festive touch.
Step 2: Secure the wood slat to your wall using nails or adhesive wall mounts.
Step 3: Attach the plaid ribbons evenly below the wood base, allowing them to hang straight down.
Step 4: Clip your holiday cards to the ribbon using mini clothespins, spacing them neatly down each row.
Step 5: Hang stockings at the base of each ribbon if desired, adding depth and function to your display.
#3. Framed Fabric Christmas Wall Art
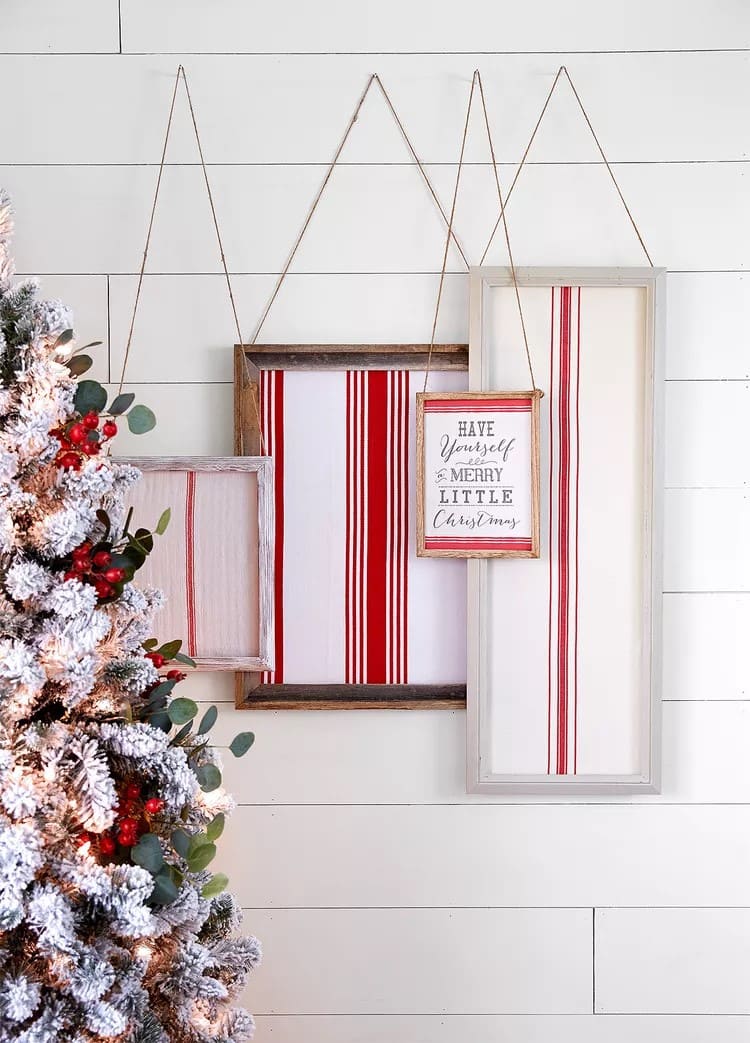
Amazingly, this layered wall art uses simple picture frames and festive fabric to create a playful and rustic Christmas display.
The bold red and white stripes bring a vintage flair, reminiscent of grain sack or candy cane patterns.
By overlapping frames of various sizes and depths, the setup adds dimensional charm without overwhelming the space.
Materials Needed
- Assorted wooden picture frames
- Red and white striped fabric (grain sack style)
- Printed Christmas quote or printable sign
- Staple gun or hot glue
- Twine or jute string
- Hooks or nails for hanging
Step-by-step Guide
Step 1: Remove glass and backing from your frames, leaving only the wooden borders.
Step 2: Cut fabric to fit the back opening of each frame and attach it using a staple gun or glue.
Step 3: For the centerpiece, print or use a pre-made sign with a holiday saying and place it in a smaller frame.
Step 4: Tie twine to each frame and hang them at varied heights for a layered effect.
Step 5: Arrange and secure the frames to the wall, overlapping slightly for an organic, relaxed style.
#4. Floating Gift Wall Advent Calendar
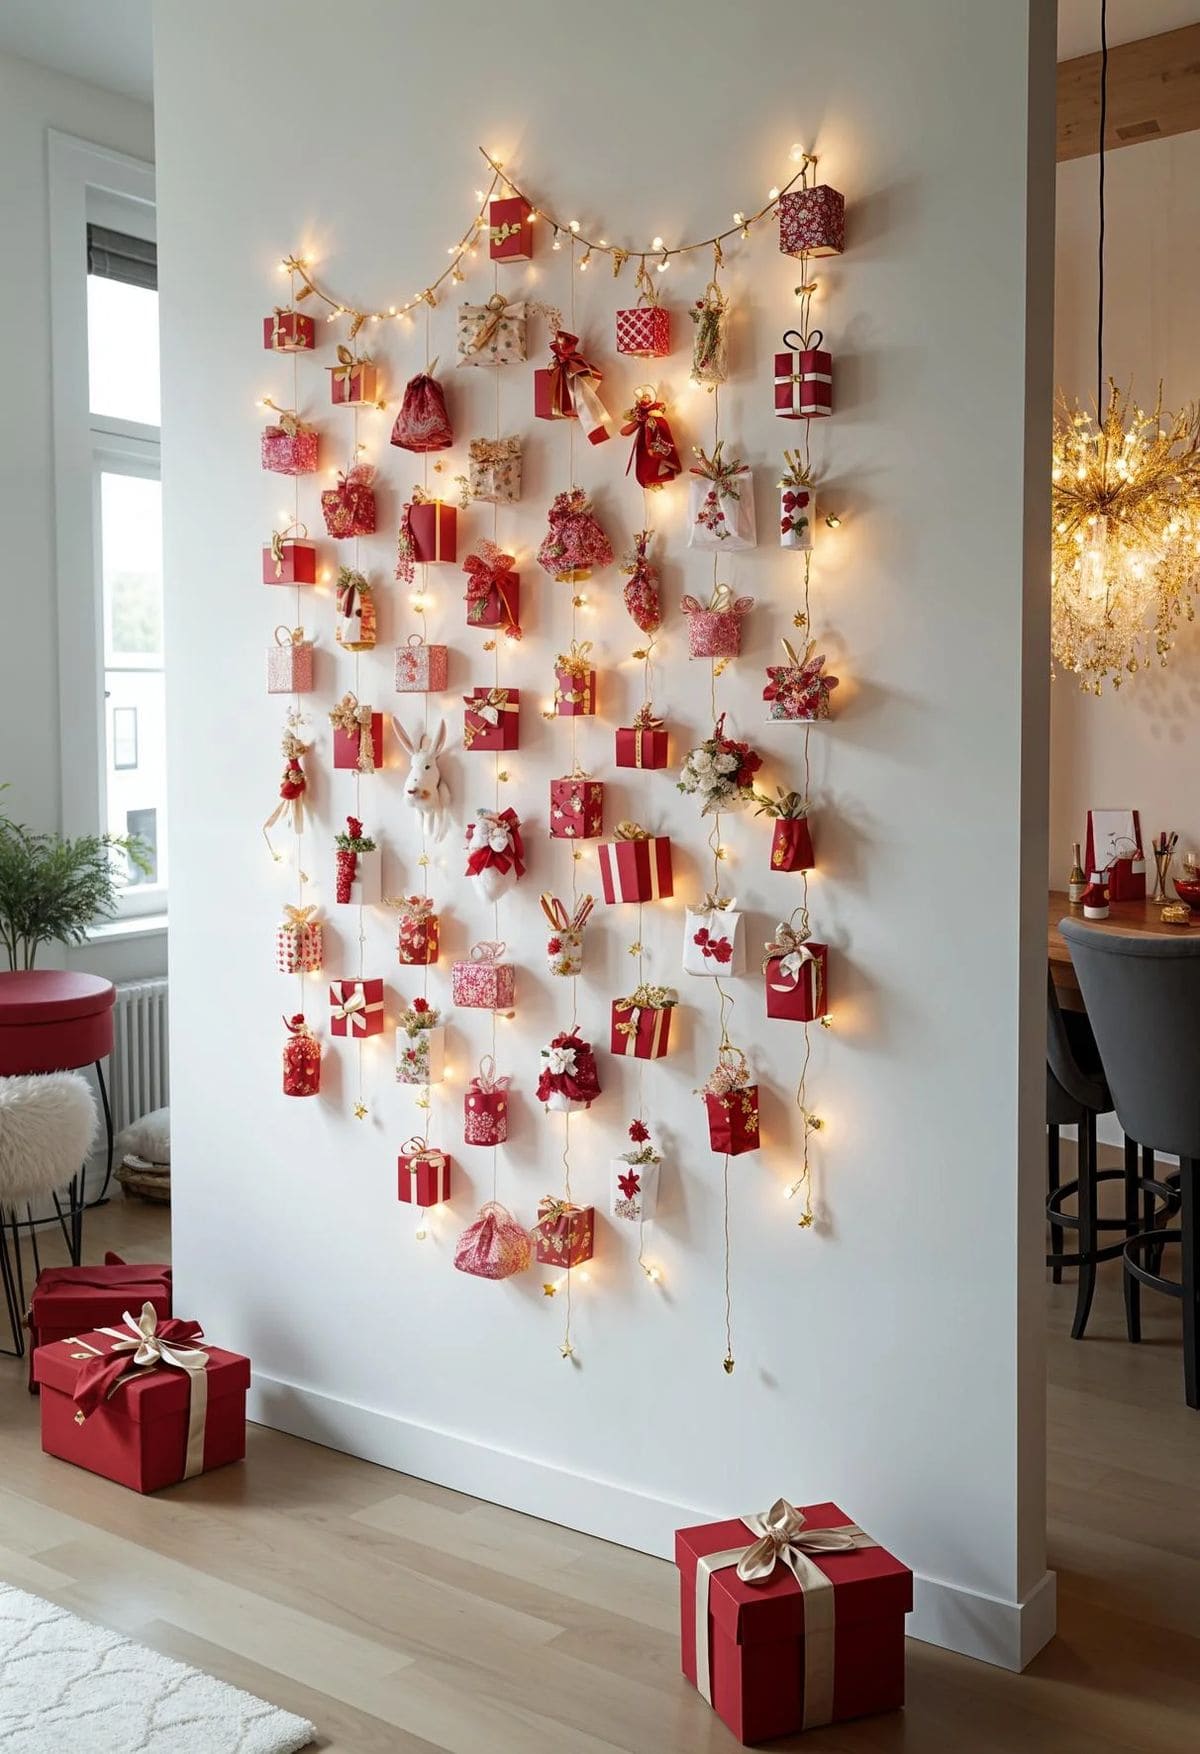
This magical wall of hanging presents turns your holiday countdown into a glowing moment of anticipation.
With tiny red and white gift boxes suspended in perfectly spaced rows, it feels like joy is blooming right from your wall.
The gentle fairy lights strung through add warmth and wonder, turning this setup into a functional art piece you’ll be proud to show off.
Materials Needed
- 50-60 mini gift boxes (3″×3″ or smaller)
- Wrapping paper and ribbons (red, white, and gold)
- Fairy light string (12-15 ft, battery-powered)
- Command hooks or removable wall tape
- Fishing line or strong thread
- Mini clothespins or hot glue
Step-by-step Guide
Step 1: Wrap each box with festive paper and embellish with bows, ornaments, or gift tags.
Step 2: Attach clear fishing line to the top flaps of each box, creating lengths between 12-48 inches for staggered height.
Step 3: Affix command hooks at the top of your wall in a gentle arch. Hang the fairy lights across these hooks.
Step 4: Tie or glue your hanging boxes directly to the fairy light cord or from the hooks, spacing them evenly.
Step 5: Tuck small surprises inside each box for a daily Advent experience that’s as beautiful as it is joyful.
#5. Glowing Tin Can Lantern Garland

Warm, glowing, and charmingly rustic, this hanging lantern display turns ordinary tin cans into magical wall lights.
Each can is painted matte black on the outside and gold inside to reflect the soft flicker of flameless tea lights.
Bonus, the staggered arrangement adds depth and dimension, giving your wall a gentle cascade of light.
Materials Needed
- 7-10 clean tin cans (3″–4″ in diameter)
- Black and gold spray paint
- Battery-operated tea lights
- Jute twine (about 4 ft total)
- Small tree branch or wooden dowel (about 24″ long)
- Faux ivy garland or leaves
- Hot glue gun
- Drill with small metal bit (for twine holes)
Step-by-step Guide
Step 1: Drill two small holes near the open edge of each can for hanging.
Step 2: Spray the outer surface black and the inside gold. Let dry completely.
Step 3: Insert one tea light into each painted can.
Step 4: Thread twine through the holes, tie bows, and adjust the lengths for layering.
Step 5: Wrap the branch in faux ivy and hang it securely, then attach the lanterns to it.
#6. Mini Paper Village Hanging Display
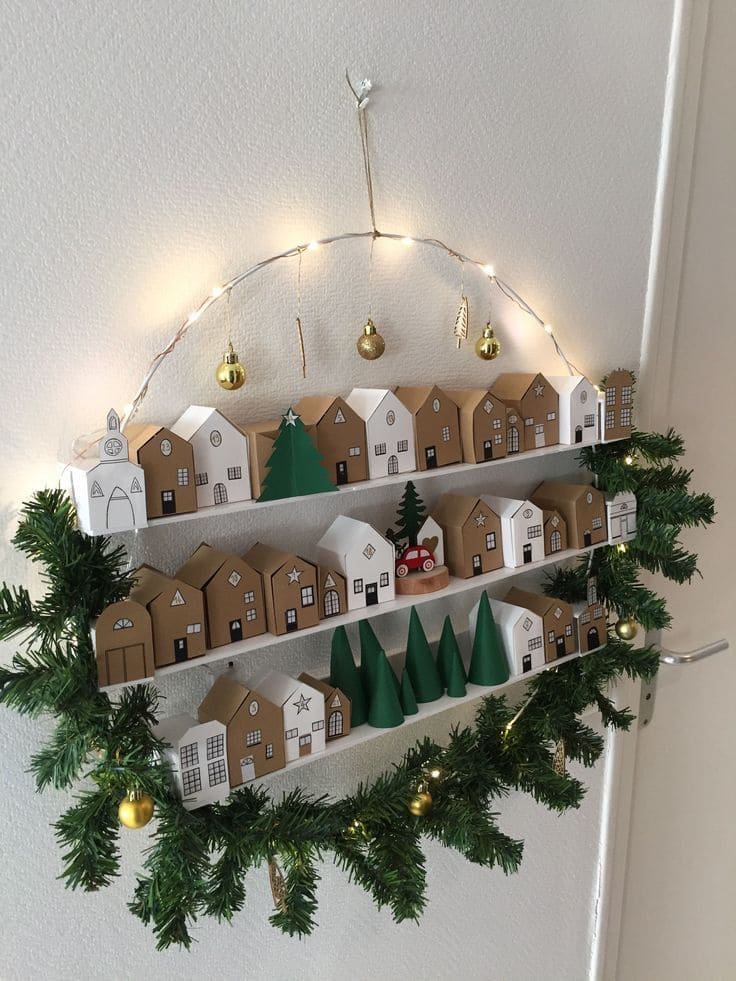
How about turning your wall into a whimsical winter wonderland with this enchanting paper village display?
Every tiny cardboard house, snow-kissed and full of charm, creates a sense of cozy magic.
This layered look adds depth and storytelling to your decor, inviting you to pause and admire the details.
Materials Needed
- Printable paper house templates (or small gift boxes)
- Brown kraft paper and white cardstock
- Green paper or felt (for trees)
- String lights (warm white)
- Wire wreath frame or hanging rack
- Mini ornaments (gold or neutral)
- Hot glue gun or double-sided tape
- Mini garland or faux greenery
Step-by-step Guide
Step 1: Assemble paper houses using templates and cardstock or small boxes wrapped in kraft and white paper.
Step 2: Add details like windows, stars, and doors using a black marker or printable stickers.
Step 3: Attach the houses in rows onto a flat shelf or wooden slats inside the wire frame.
Step 4: Place small green paper trees and miniature props (like a red car) between the houses.
Step 5: Decorate the frame with a mini garland, string lights, and ornaments, then hang it securely on the wall.
#7. Festive Quilted Wall Hanging
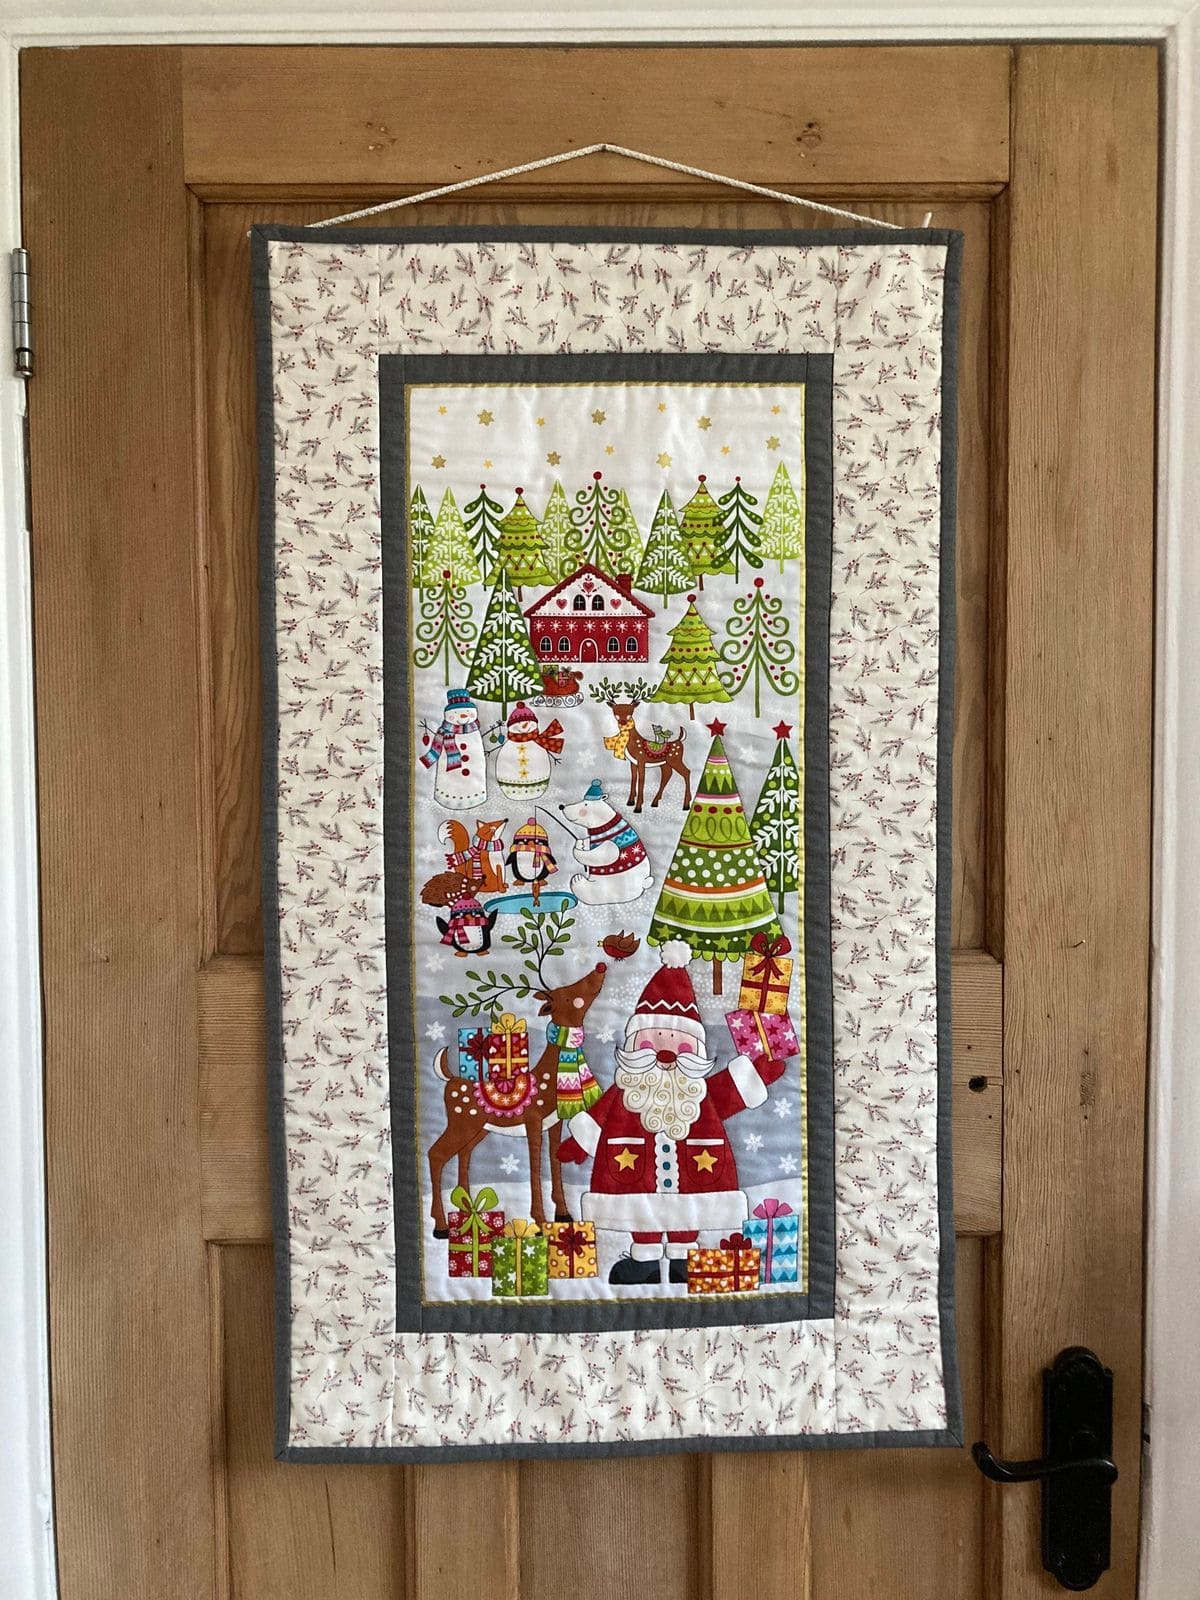
This cozy Christmas wall hanging captures the wonder of the season in a soft, storybook style.
Featuring Santa, reindeer, snowmen, and woodland creatures surrounded by gifts and evergreen trees, this quilted piece feels like a page out of a holiday fairytale.
The border adds a lovely framed finish, and its vertical shape makes it ideal for hanging on narrow walls or doors.
Materials Needed
- Holiday-themed fabric panel or printed fabric (approx. 18″x30″)
- Coordinating fabric for borders and backing
- Quilt batting (same size as panel)
- Bias tape or fabric strips for binding
- Sewing machine and thread
- Iron-on fusible web (optional, for extra stiffness)
- Wooden dowel or rope for hanging
Step-by-step Guide
Step 1: Cut your panel and borders, then layer the backing, batting, and top panel to form a quilt sandwich.
Step 2: Sew the layers together using straight or decorative quilting lines.
Step 3: Attach border strips around the panel, pressing seams flat as you go.
Step 4: Bind the edges with bias tape or handmade binding for a clean finish.
Step 5: Finally, sew a sleeve or attach a string at the top to hang on a wall or door.
#8. Wall-Hanging Christmas Tree With Ornaments
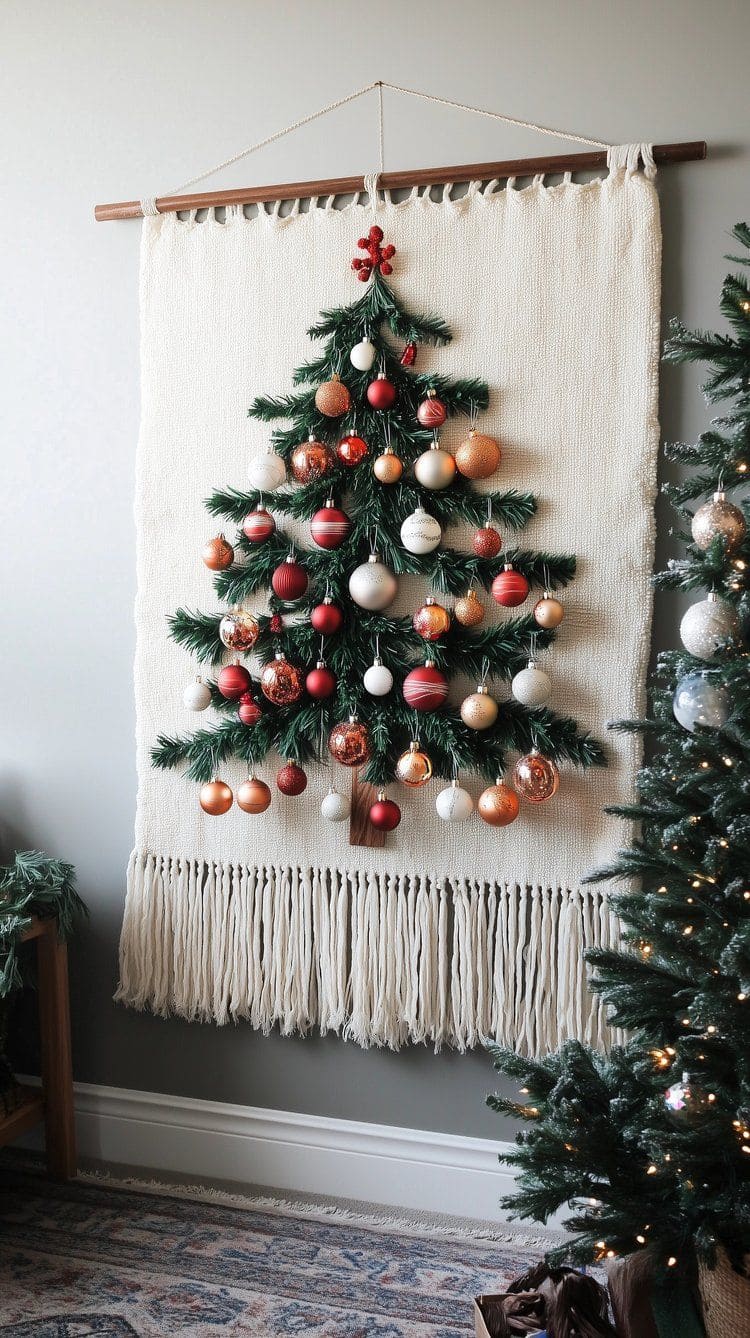
This elegant wall-hanging Christmas tree brings all the festive sparkle without taking up floor space.
Set on a creamy woven textile with a macrame-style fringe, artificial pine garlands are shaped into a lush tree and adorned with a curated mix of metallic, matte, and glossy ornaments.
The entire piece hangs like art, blending traditional holiday cheer with a modern boho twist.
Materials Needed
- Large woven wall tapestry or macrame backdrop
- Artificial pine garland or greenery
- Assorted Christmas ornaments (30–40 pieces)
- Ornament hooks or floral wire
- Wooden dowel and rope for hanging
Step-by-step Guide
Step 1: Lay out the greenery in a tree shape on the backdrop, adjusting fullness and spacing as needed.
Step 2: Secure the greenery with strong glue or stitch it into place with thread or floral wire.
Step 3: Hang the tapestry on a wooden dowel using strong twine or rope.
Step 4: Decorate the tree with your chosen ornaments, distributing them evenly for balance and visual interest.
Step 5: Add a tree topper or ribbon flourish to finish the look and hang it proudly on your wall.
#9. Cozy Stocking Wall Display with Wooden Sign
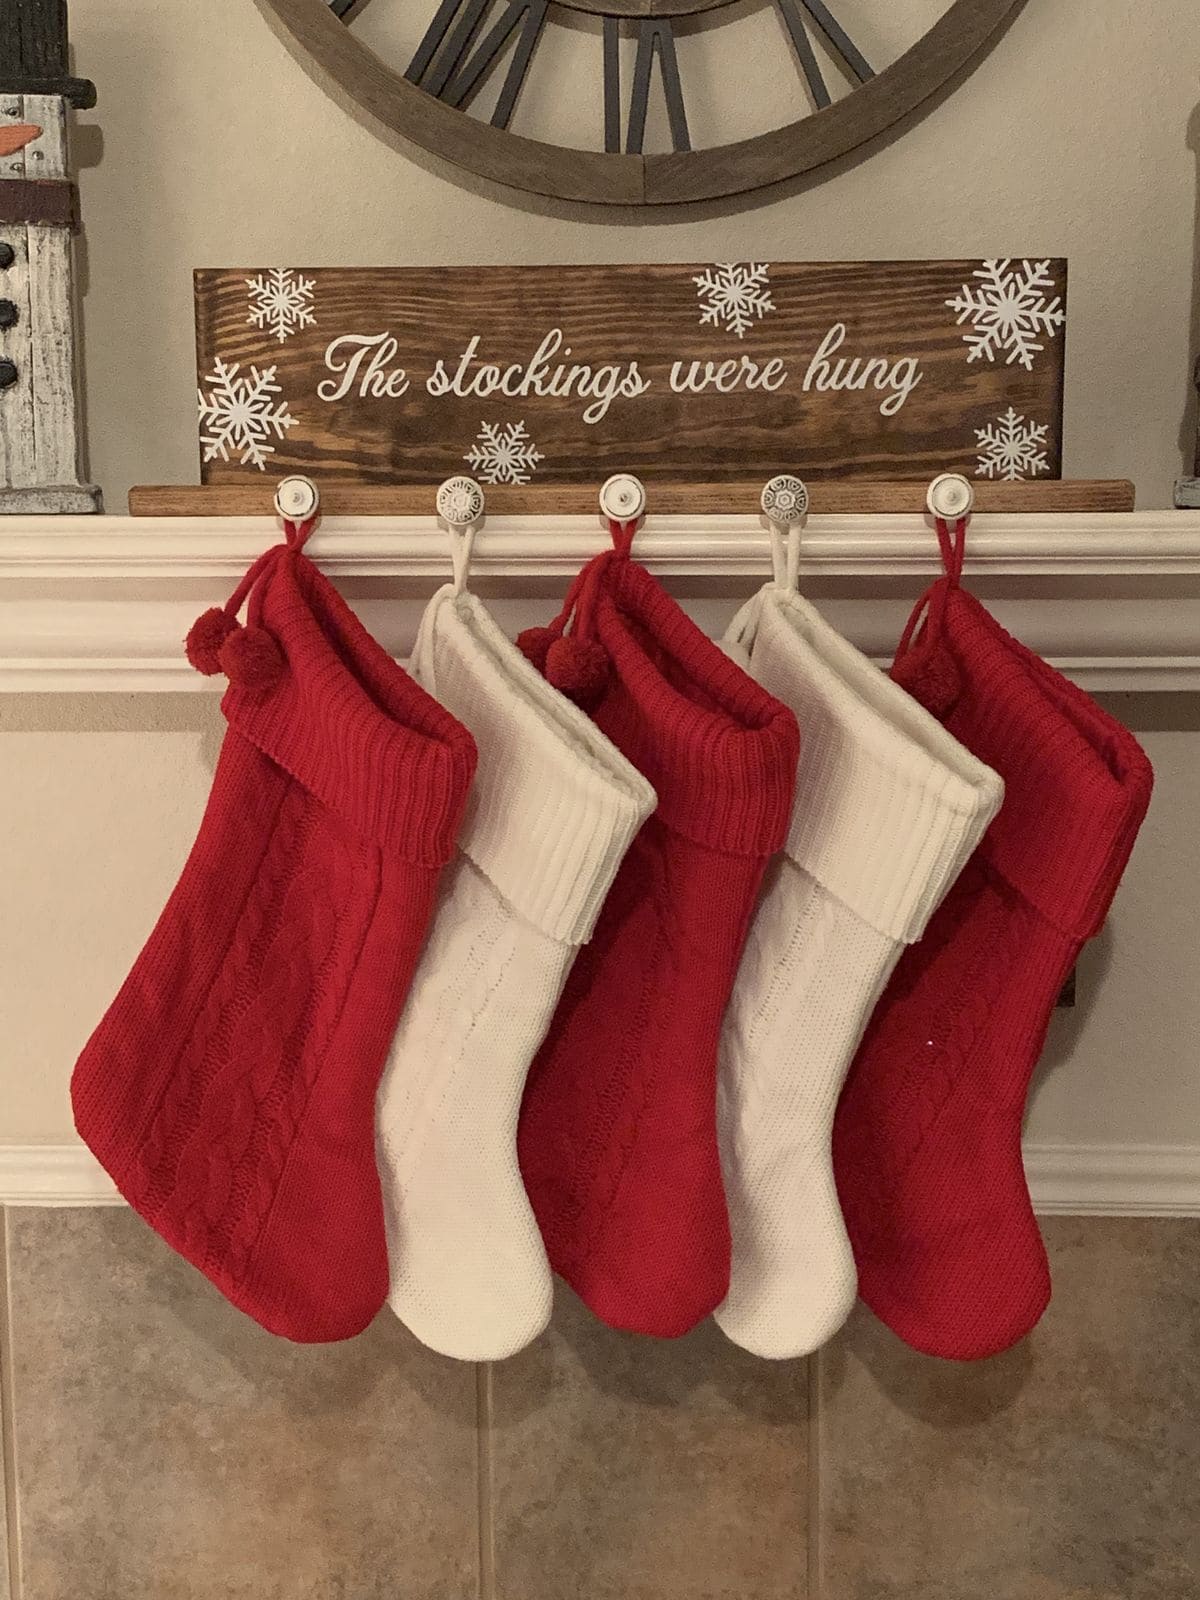
There’s something timeless and comforting about seeing stockings lined up, waiting to be filled with little surprises.
This display combines classic red and white knit stockings with a charming wooden sign.
Perfect for above a mantel or entryway wall, this setup makes your space feel festive with minimal effort.
Materials Needed
- 5 knit Christmas stockings (3 red, 2 white or your own mix)
- Wooden plaque (approx. 18″x5″)
- White paint and snowflake stencils
- Hooks or knobs for hanging
- Wall-mounted shelf or sturdy wall hooks
- Paint pen or stencil for quote
Step-by-step Guide
Step 1: Paint your quote onto the wooden plaque using stencils or freehand, then decorate with snowflake details.
Step 2: Let the paint dry completely and seal if desired for durability.
Step 3: Install hooks or knobs on the wall or shelf, spaced evenly for each stocking.
Step 4: Hang the plaque above or just behind the stockings for a layered look.
Step 5: Add your stockings and fluff for fullness, ready to be filled with love!
Tip: You can also add name tags or wooden initials to personalize each stocking for family members or guests.
#10. Gingerbread Village Wreath with Lights
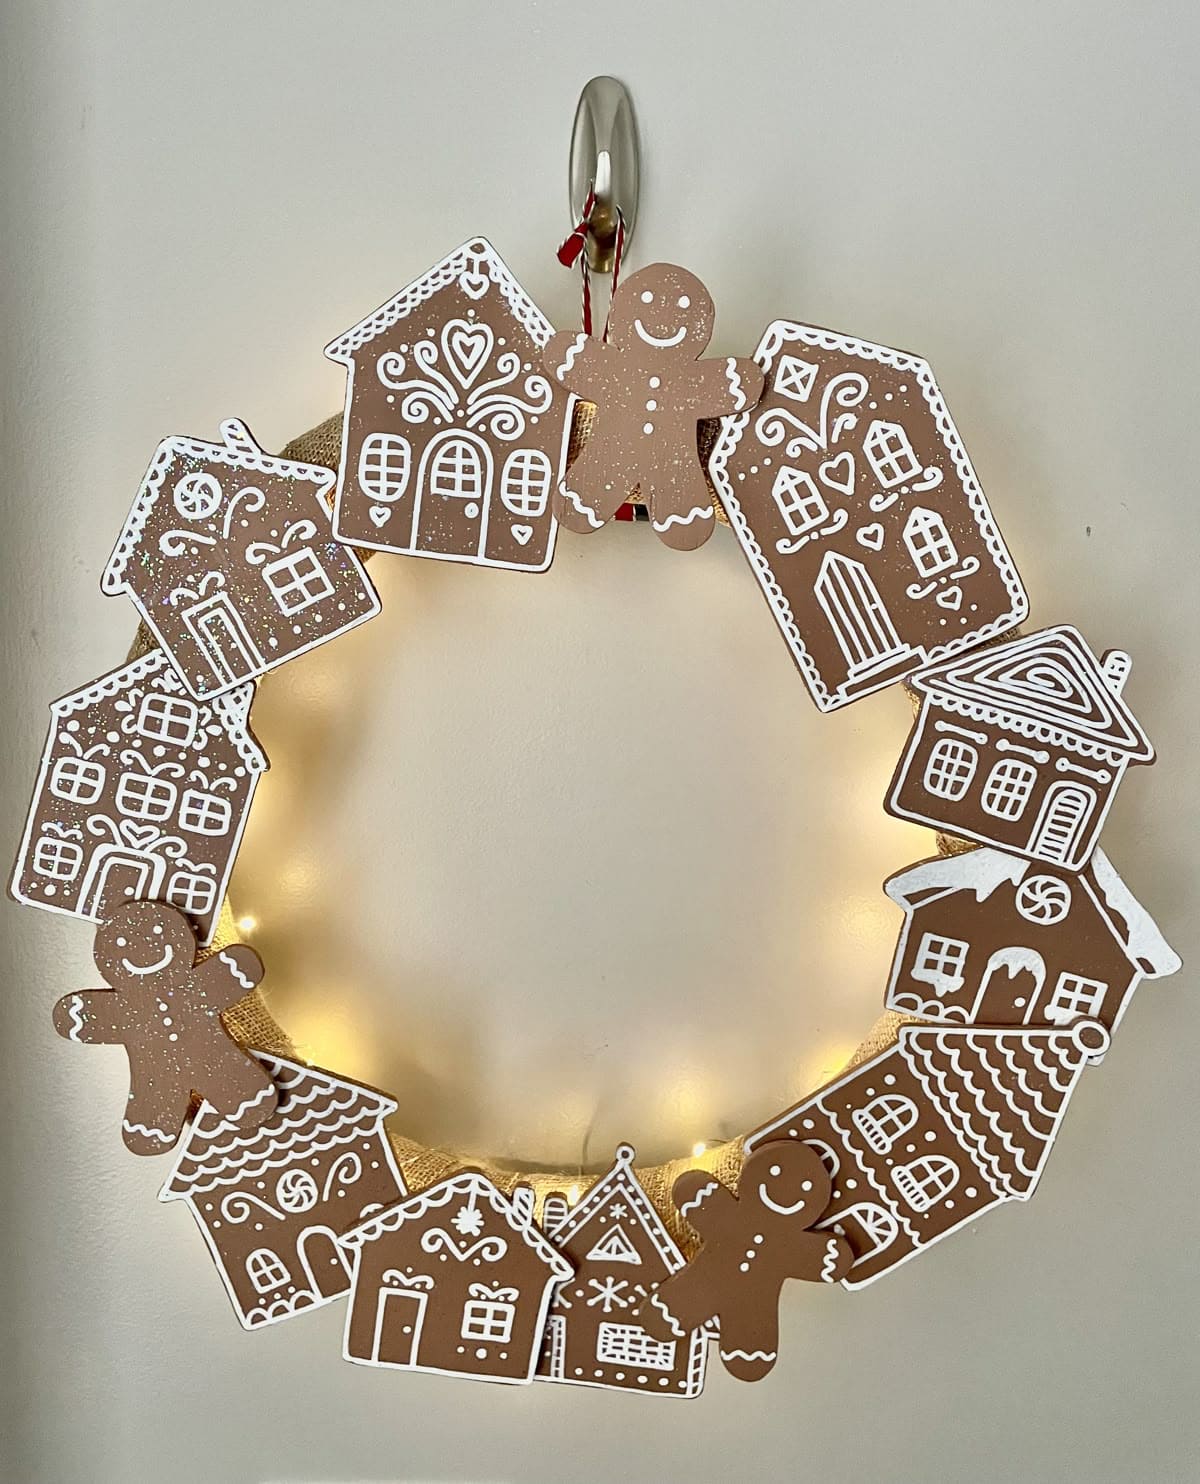
This adorable gingerbread-themed wreath blends cozy tradition with cheerful whimsy.
A collection of paper gingerbread houses and smiling cookie figures is arranged around a circular base, each one detailed with intricate white icing-style patterns.
Behind them, a warm string of mini LED lights tucked under burlap ribbon gives the whole wreath a magical, holiday glow.
Materials Needed
- 12-14 printed or cut gingerbread house shapes (approx. 4″ tall)
- 3-4 gingerbread figure cutouts (approx. 3″ tall)
- Foam or wire wreath form (12″ diameter)
- Battery-powered LED fairy lights (1 strand, 6-8 ft)
- Burlap ribbon (2″ wide, 5 ft long)
- Hot glue gun
- Command hook or ribbon for hanging
Step-by-step Guide
Step 1: Wrap the wreath form in burlap ribbon, securing with hot glue as needed.
Step 2: Tuck the LED light strand beneath the burlap and wrap evenly around the form.
Step 3: Arrange the house cutouts evenly in a circular pattern and glue them in place.
Step 4: Add gingerbread people between houses for playful accents.
Step 5: Attach a hook or ribbon to the top for easy wall or door hanging.
#11. Rustic Nature-Inspired Pinecone Frame
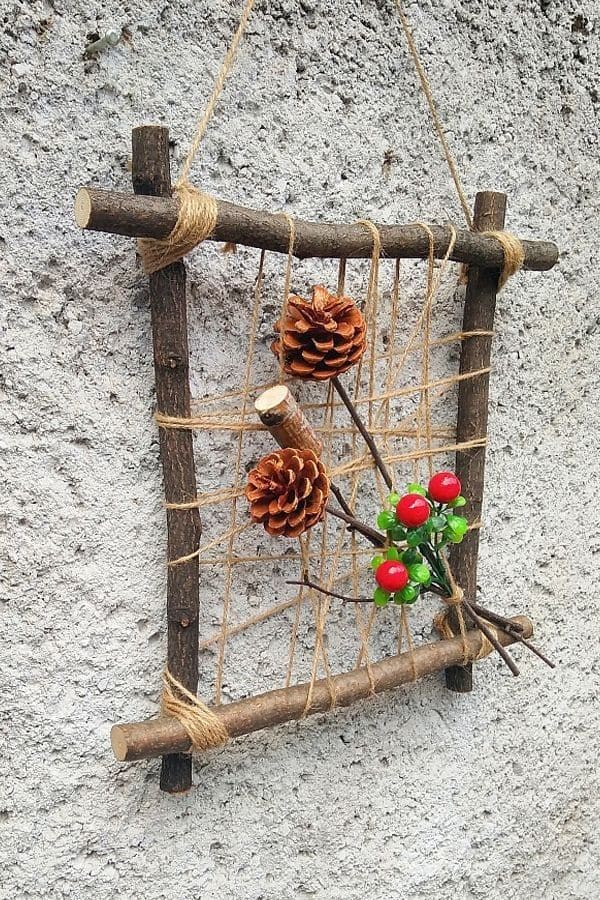
Look at this earthy and artistic piece! It brings a peaceful woodland vibe straight to your wall.
Created with natural twigs, twine, and pinecones, the handmade frame feels like a cozy nod to winter’s simplicity.
The open-weave grid gives it a slightly bohemian look, while the pop of red berries adds just the right amount of festive cheer.
Materials Needed
- 4 straight twigs or sticks (approx. 12″ length)
- Natural twine or jute rope
- 2-3 pinecones
- Small faux red berries and greenery
- Hot glue gun
- Scissors or garden shears
Step-by-step Guide
Step 1: Arrange the twigs into a square or rectangle and tie the corners tightly with twine to form a frame.
Step 2: Weave twine vertically and horizontally across the frame to create a loose grid pattern.
Step 3: Glue or tie the pinecones and berry sprigs to one side of the frame for visual balance.
Step 4: Add a loop of twine to the top for hanging, securing with extra knots for strength.
Step 5: Hang on a wall, door, or fence where it can catch the light and stand out naturally.
#12. Candy Cane Rope Christmas Tree Card Holder
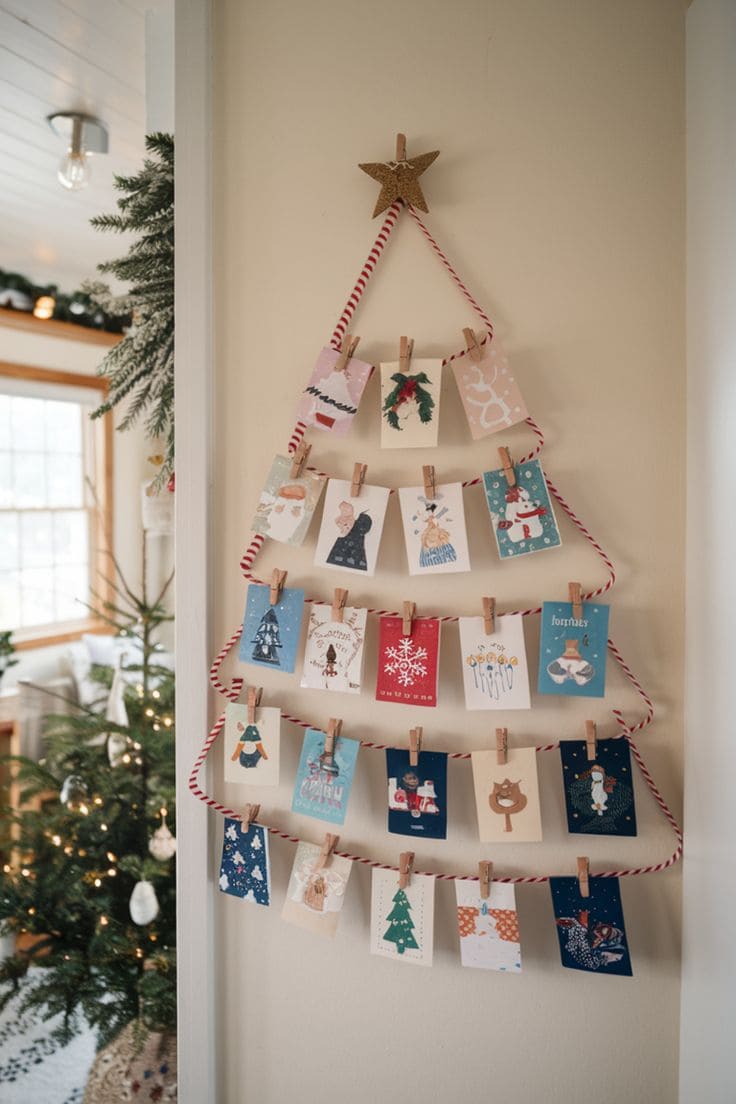
There’s something magical about transforming a blank wall into a story tree.
This candy cane rope card holder captures the shape of a Christmas tree with a playful twist.
As your loved ones’ greetings roll in, you’ll have the perfect place to pin them up in neat, joyful rows.
Materials Needed
- 1 red and white twisted rope (at least 10 ft long)
- 1 star ornament or cutout (around 4″ wide)
- 20–24 mini clothespins
- Clear tape or wall-safe hooks
- Holiday greeting cards
Step-by-step Guide
Step 1: Cut several lengths of the rope to gradually decrease in size—like tiers of a Christmas tree.
Step 2: Starting from the top, use tape or small wall hooks to secure each length of rope to the wall, forming a tree silhouette.
Step 3: Affix a golden star at the top to complete the tree shape.
Step 4: Clip your holiday cards along the ropes, spacing them out for balance and visual delight.
#13. Christmas Diorama Skillet Scene
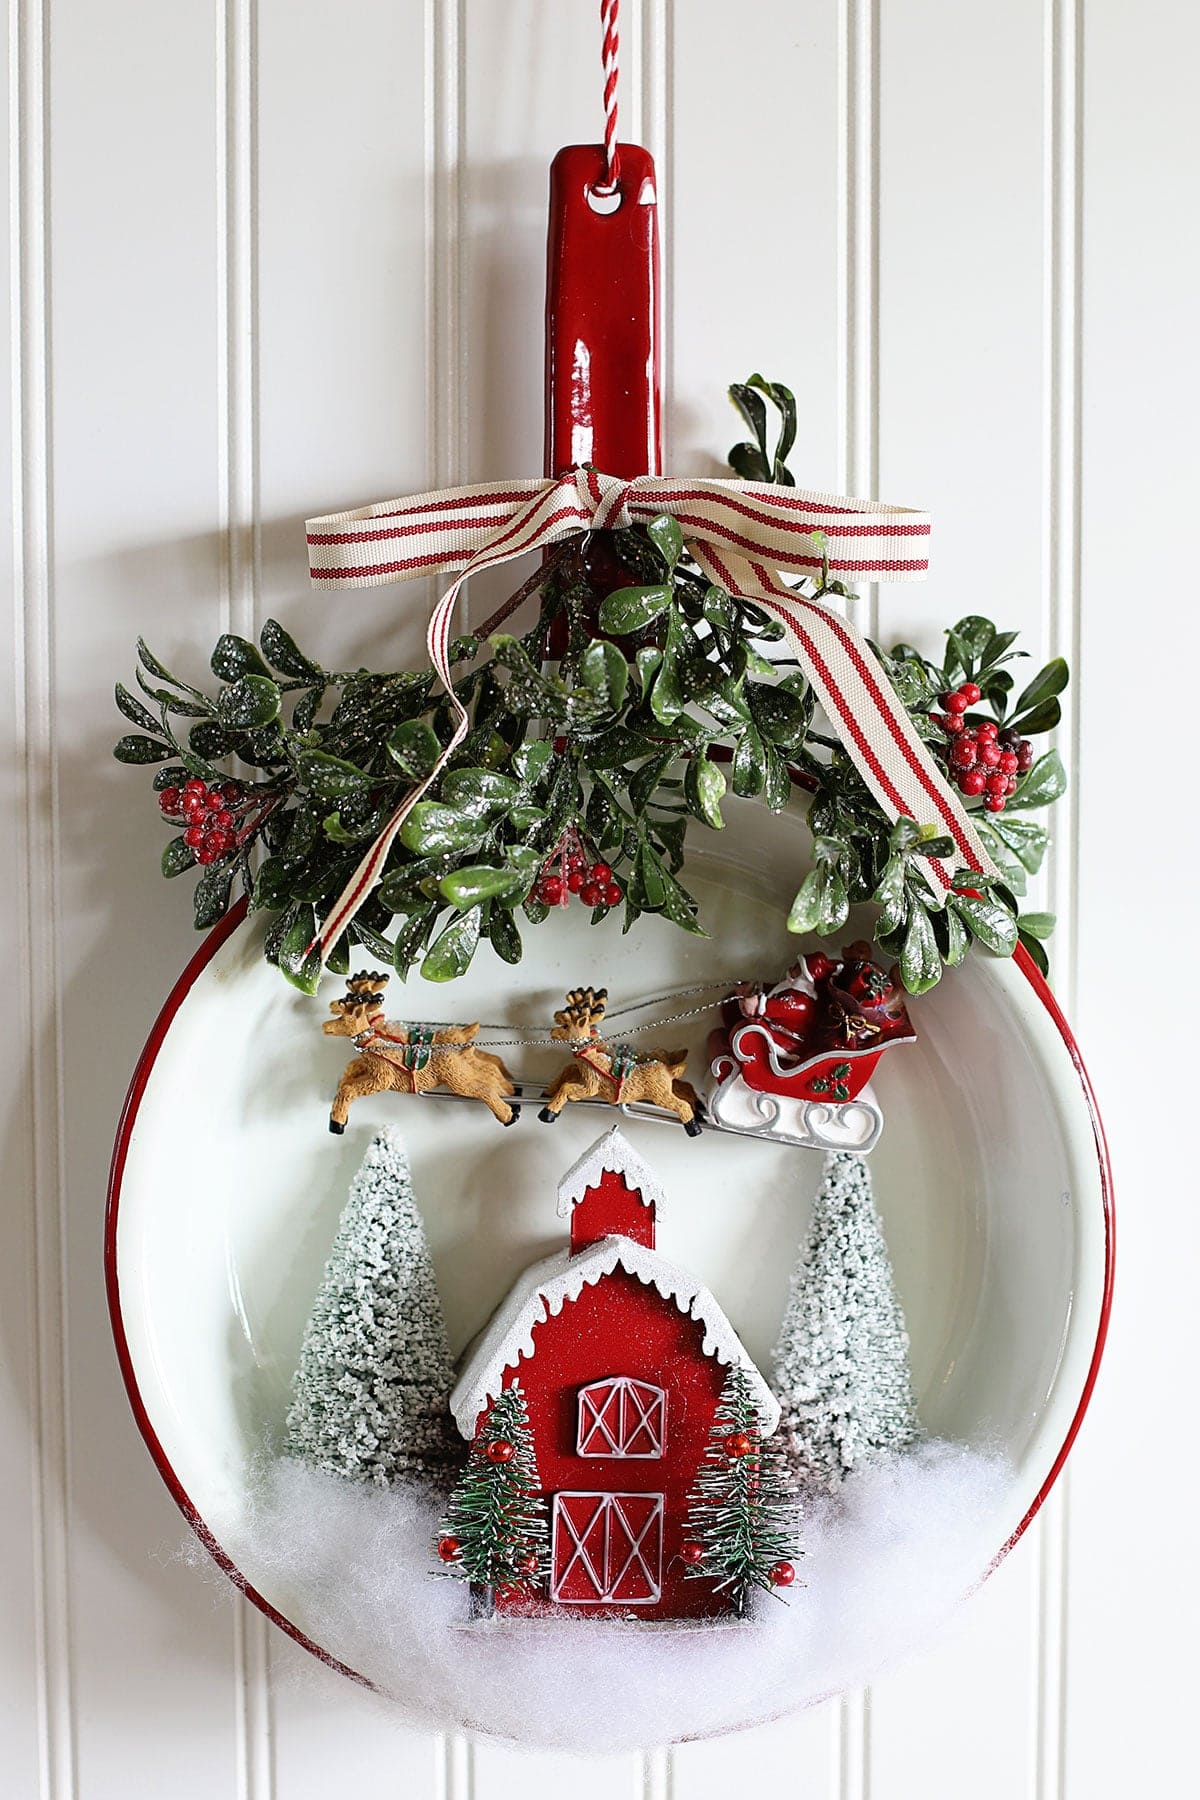
This upcycled skillet transforms into a charming Christmas diorama that captures the nostalgic warmth of a snowy village.
A bright red barn steals the spotlight, nestled between snowy bottle brush trees and surrounded by tufts of soft faux snow.
Above it, Santa and his sleigh glide through the air, bringing a dash of whimsy to this delightful winter vignette.
Materials Needed
- Old skillet or frying pan (10–12” wide)
- Miniature barn or house ornament
- Small bottle brush trees
- Santa and sleigh miniature
- Faux snow or polyfill stuffing
- Holiday greenery sprigs
- Decorative ribbon and twine for hanging
- Hot glue gun
Step-by-step Guide
Step 1: Clean and dry your skillet, then paint the outer rim if desired for a festive touch.
Step 2: Attach the barn or house to the base using hot glue, positioning trees around it.
Step 3: Add tufts of faux snow to create a cozy winter floor inside the pan.
Step 4: Secure the Santa sleigh across the upper part using glue or string to suspend it.
Step 5: Finish with mistletoe or faux greenery on the handle and tie a ribbon for extra cheer.
#14. Heart and Pinecone Garland Wall Hanging
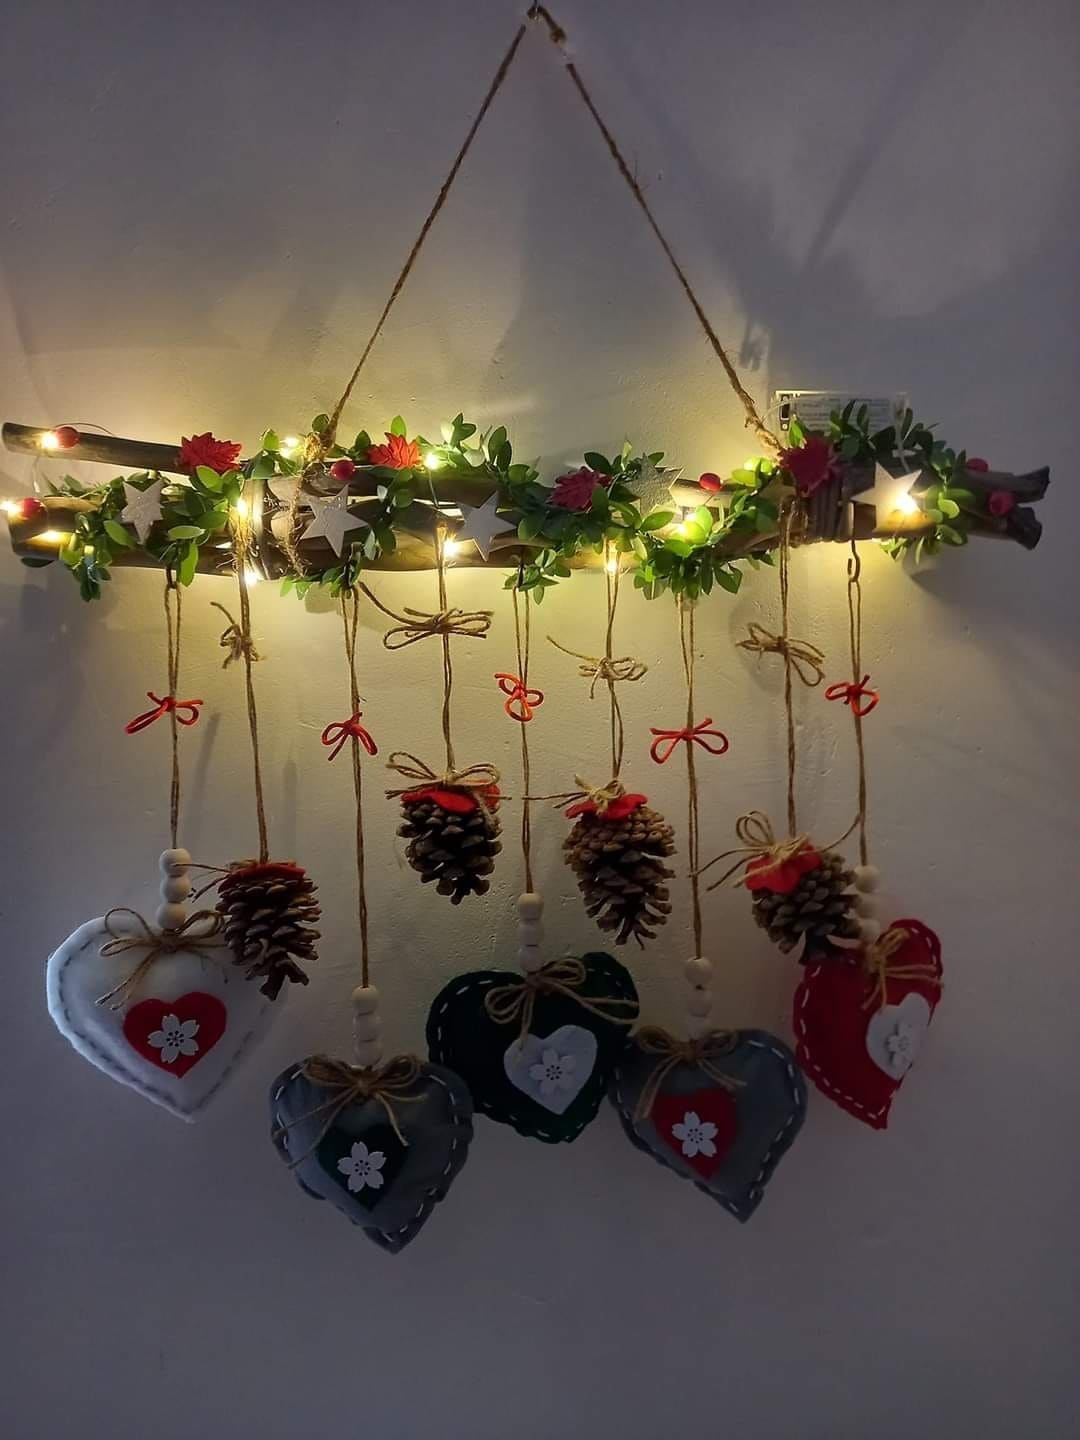
You can see a rustic wooden branch, wrapped in glowing fairy lights and green foliage, serves as the anchor for a charming mix of felt hearts and pinecones.
Each element sways gently from jute strings adorned with little wooden beads, bows, and stitched felt accents.
The layered hearts, cut from soft fabric in shades of red, white, green, and gray, give it a sweet, homespun charm.
Materials Needed
- 1 wooden branch or driftwood (around 20-24 inches long)
- 6-7 pinecones
- 6-7 felt hearts (hand-stitched or pre-made)
- Jute twine
- Mini string lights (battery-operated)
- Artificial greenery, small flowers, or stars
- Wooden beads, hot glue, scissors
Step-by-step Guide
Step 1: Wrap the branch with fairy lights and secure a few greenery pieces and stars with hot glue.
Step 2: Cut 7 equal lengths of twine (around 10–12 inches each) and tie them to the branch in evenly spaced intervals.
Step 3: Attach pinecones and felt hearts alternately using hot glue or tied loops. Add wooden beads for detail.
Step 4: Tie a long twine loop at both ends of the branch for easy wall hanging.
Step 5: Turn on the lights and hang the piece in a spot that catches ambient glow.
#15. Reindeer Cup Countdown Wall Hanging
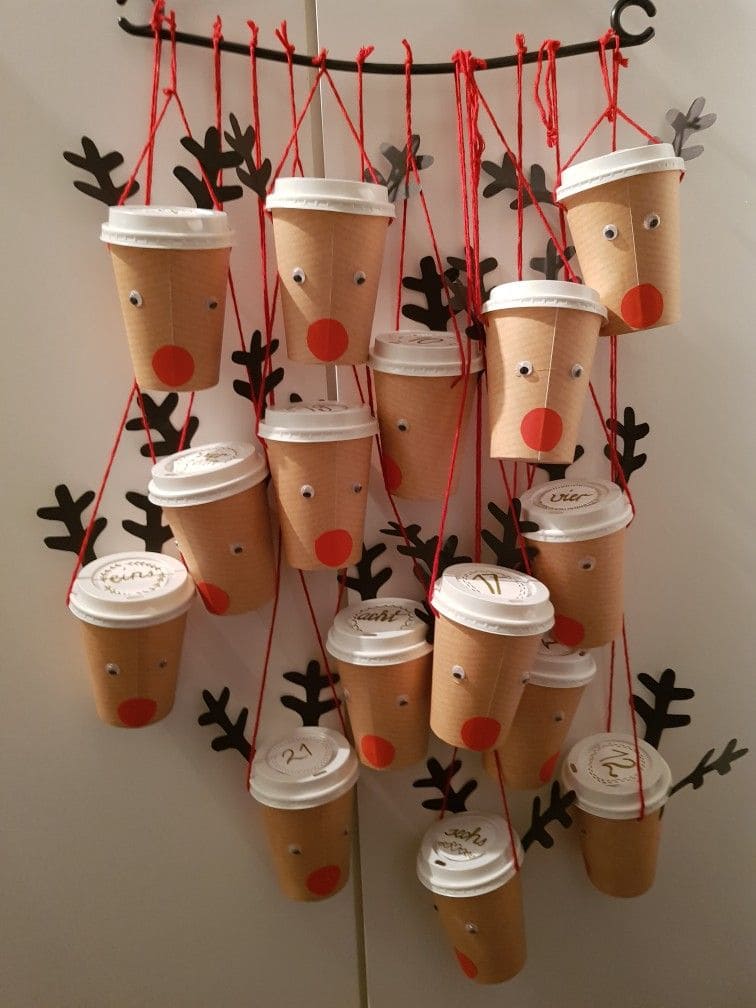
Playful, practical, and packed with charm, this DIY wall advent calendar made of paper coffee cups transforms a plain space into a festive game of daily surprises.
Each cup becomes a reindeer face with googly eyes, red noses, and adorable antlers, strung up with bright red yarn that pops against the neutral tones.
Perfect for classrooms, kid’s rooms, or cozy corners, this idea brings a crafty, whimsical vibe to your holiday countdown.
Materials Needed
- Brown paper coffee cups with lids (24)
- Googly eyes (48 pieces)
- Red paper or felt (for noses)
- Black cardstock (for antlers)
- Red yarn or string
- Hot glue gun
- Marker for numbering
- Sturdy rod or coat hanger for hanging
Step-by-step Guide
Step 1: Glue googly eyes and a red circle nose onto each cup to create the reindeer faces.
Step 2: Cut out antler shapes from black cardstock and attach them to the back of each cup.
Step 3: Fill each cup with a small gift, candy, or note, then secure the lid back on.
Step 4: Tie each cup with red yarn and suspend it from a metal rod or hanger.
Step 5: Arrange the cups in a tree-like pattern or staggered rows for visual balance.
#16. Hanging Twig Tree with Fabric Ornaments
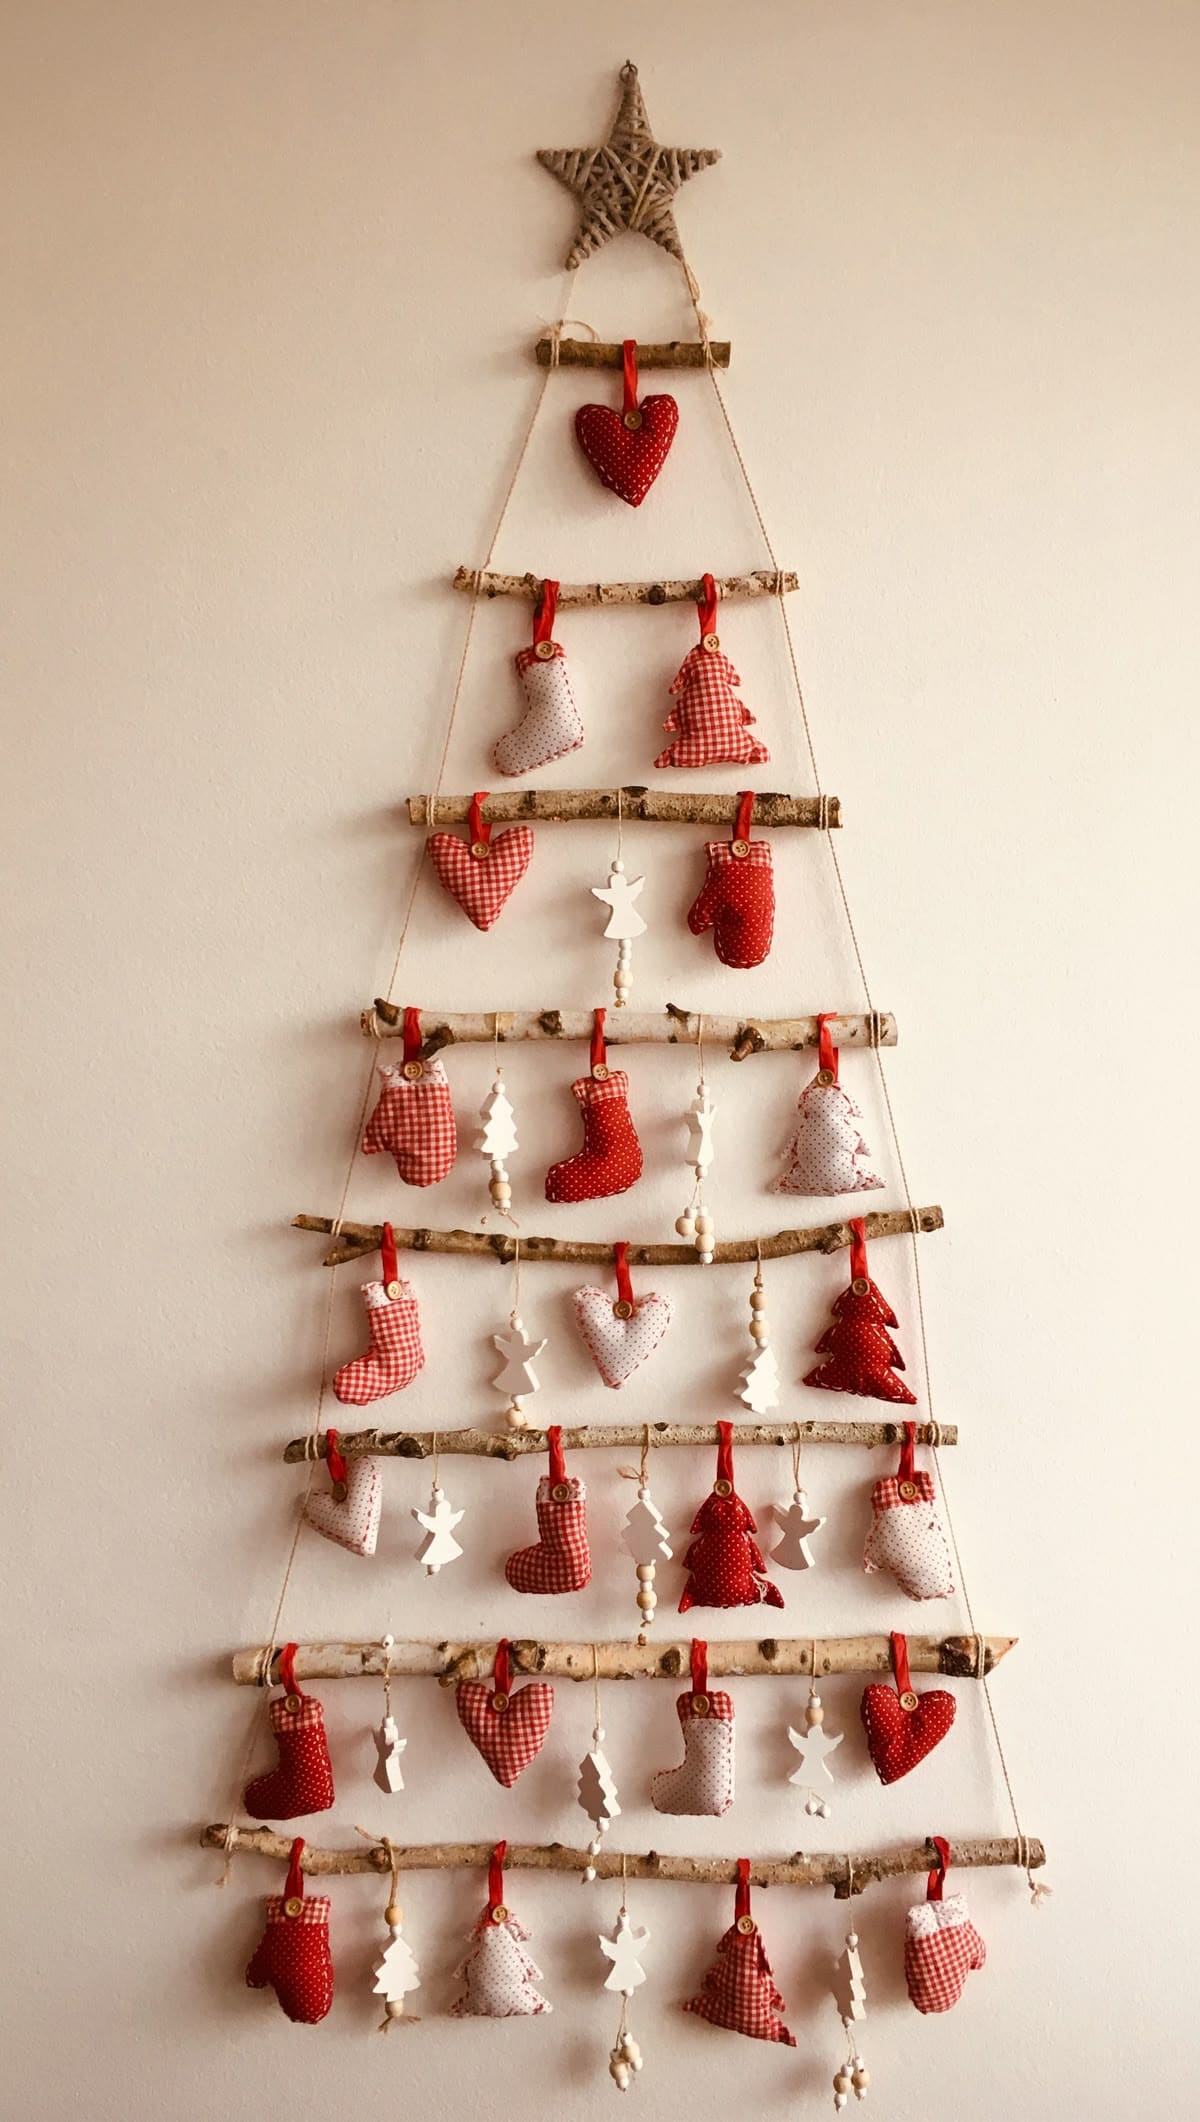
This creative wall-hanging brings rustic charm and handmade joy together in the shape of a minimalist Christmas tree.
Crafted from natural birch sticks and sturdy twine, each tier of this tree-like frame is adorned with soft red-and-white fabric ornaments.
Between them hang delicate wooden cutouts, angels and pines, accented with wooden beads for a cozy, Scandinavian touch.
Materials Needed
- 6-7 birch branches in descending lengths
- Twine or strong jute string
- Assorted soft fabric ornaments (handmade or store-bought)
- Wooden cutout decorations and beads
- Hot glue or sewing supplies (optional)
- Wicker or rattan star for top
Step-by-step Guide
Step 1: Cut and arrange sticks into a tree shape, longest at the bottom and shortest at the top.
Step 2: Tie twine vertically from top to bottom on both sides to connect the sticks securely.
Step 3: Hang soft fabric ornaments evenly across each level using loops or ribbons.
Step 4: Add wooden beads and small cutouts with string in between ornaments for extra charm.
Step 5: Finish with a woven star at the top and a hanging loop for wall display.
#17. Rustic Hanging Ladder Tree
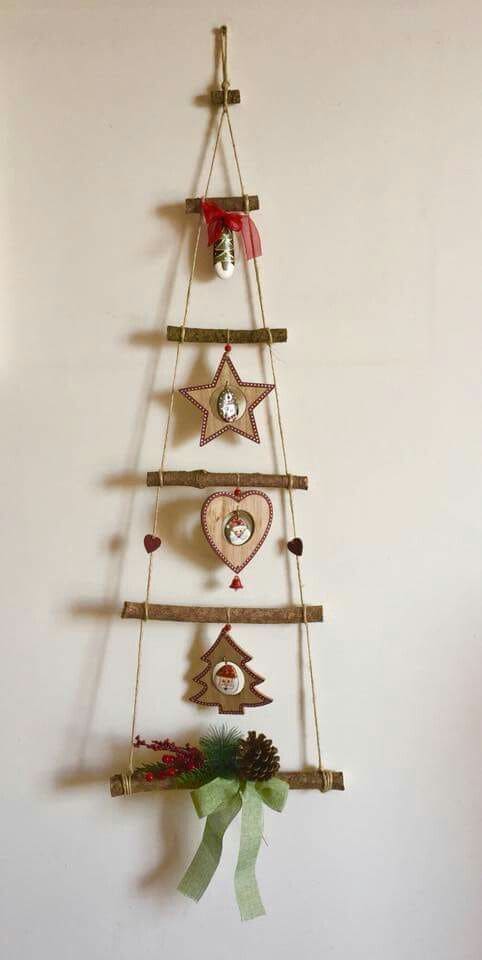
This ladder-style wall hanging is a charming way to bring natural texture and festive cheer into your space.
Built from real branches arranged in a triangle like a Christmas tree, it’s decorated with heartwarming wooden ornaments, pinecones, and a soft green bow that adds a gentle forest-inspired touch.
The simplicity of the design is what makes it shine, each tier holds a single ornament, allowing the eye to rest on each detail.
Materials Needed
- 4 small branches (12-18″ long, 0.5-1″ thick)
- Natural jute rope or twine (approx. 8-10 ft)
- 4-5 wooden ornaments (star, heart, tree, etc.)
- Mini pinecones, faux berries, and greenery
- Hot glue gun
- Green ribbon (1.5″ wide, 2 ft long)
- Wall hook or nail for hanging
Step-by-step Guide
Step 1: Lay out the branches in a tree-shaped triangle, with the longest branch at the base.
Step 2: Tie the branches together on both sides using jute rope, leaving extra rope at the top for hanging.
Step 3: Attach your ornaments at the center of each rung with twine or glue.
Step 4: Decorate the bottom rung with pinecones, berries, and greenery, securing with hot glue.
Step 5: Tie a bow with your green ribbon and attach it below the greenery for a finished look.
#18. Minimalist Hanging Pillow Box Countdown
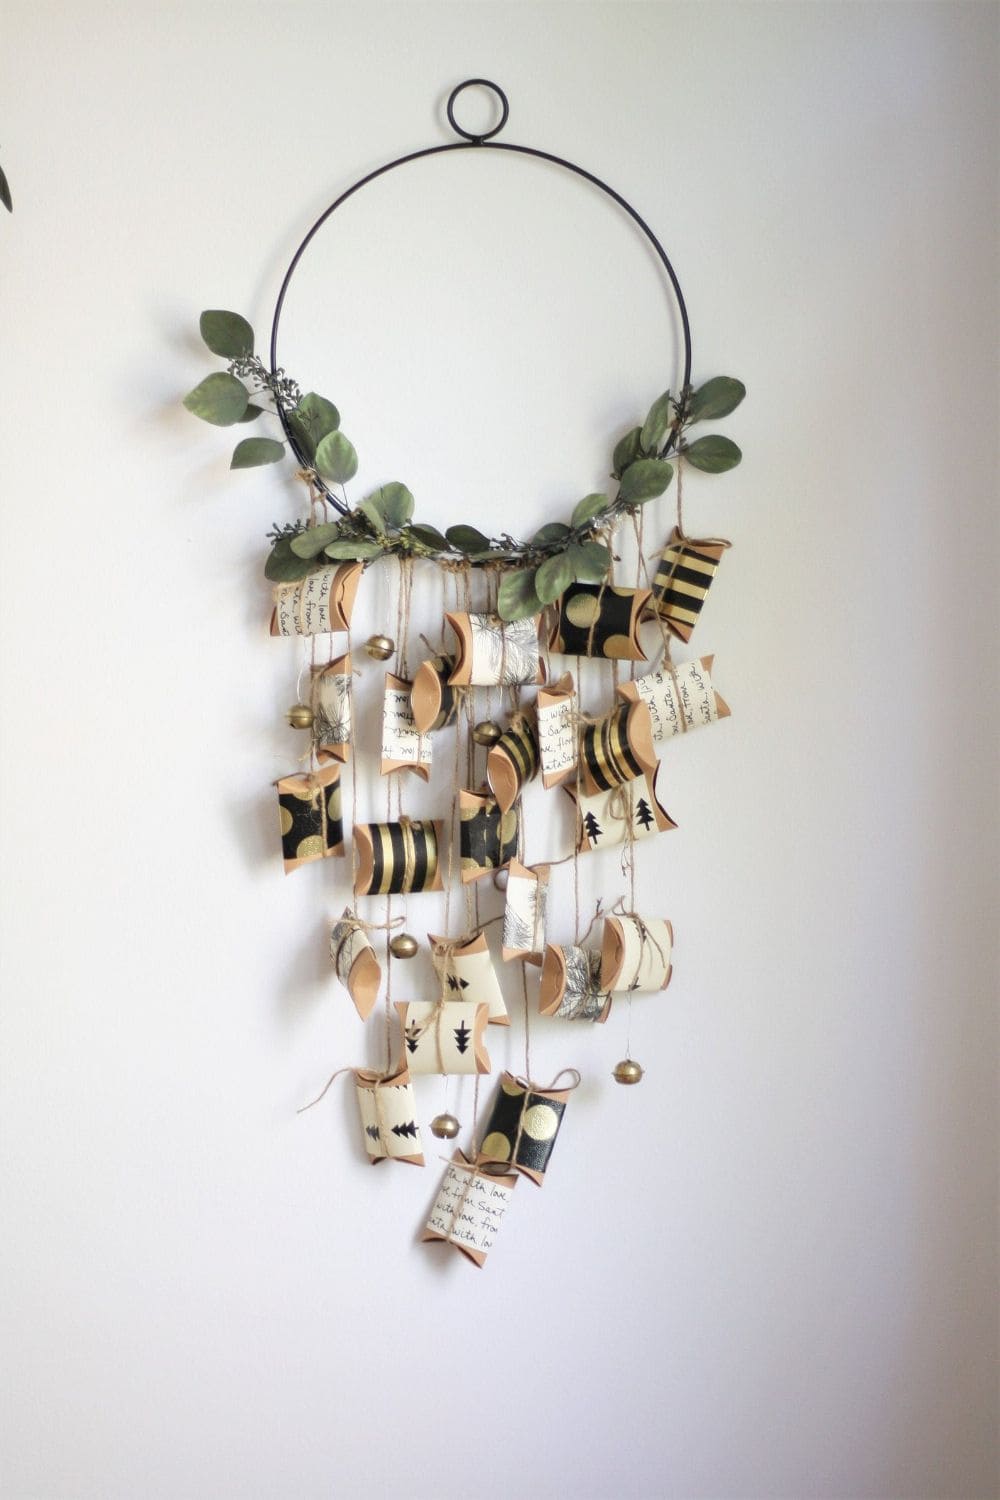
Simple yet striking, this modern advent calendar features pillow boxes, strung vertically from a metal hoop adorned with eucalyptus leaves.
It’s an elegant, space-saving option that feels both festive and refined.
The boxes are decorated with geometric patterns, handwritten notes, and evergreen shapes, making each one feel personal and intentional.
Materials Needed
- 24 small kraft pillow boxes (approximately 4″ x 2″)
- Black, white, and gold craft paper or washi tape
- Natural jute twine or string
- Decorative hoop (12-16” diameter)
- Faux eucalyptus or greenery stems
- Mini bells or beads (optional)
- Glue gun or craft glue
Step-by-step Guide
Step 1: Decorate pillow boxes using washi tape, patterned paper, or stamps to create unique designs.
Step 2: Write daily messages, quotes, or tuck in small treats inside each box.
Step 3: Fold and tie each box with jute twine, leaving extra string to hang.
Step 4: Attach boxes in vertical rows to the bottom half of the hoop with evenly spaced twine.
Step 5: Wrap faux greenery around the top half of the hoop and secure with floral wire or glue.
Tip: You can swap pillow boxes for toilet paper rolls shaped into boxes for a zero-waste version.
#19. Yarn Christmas Tree Wall Hanging
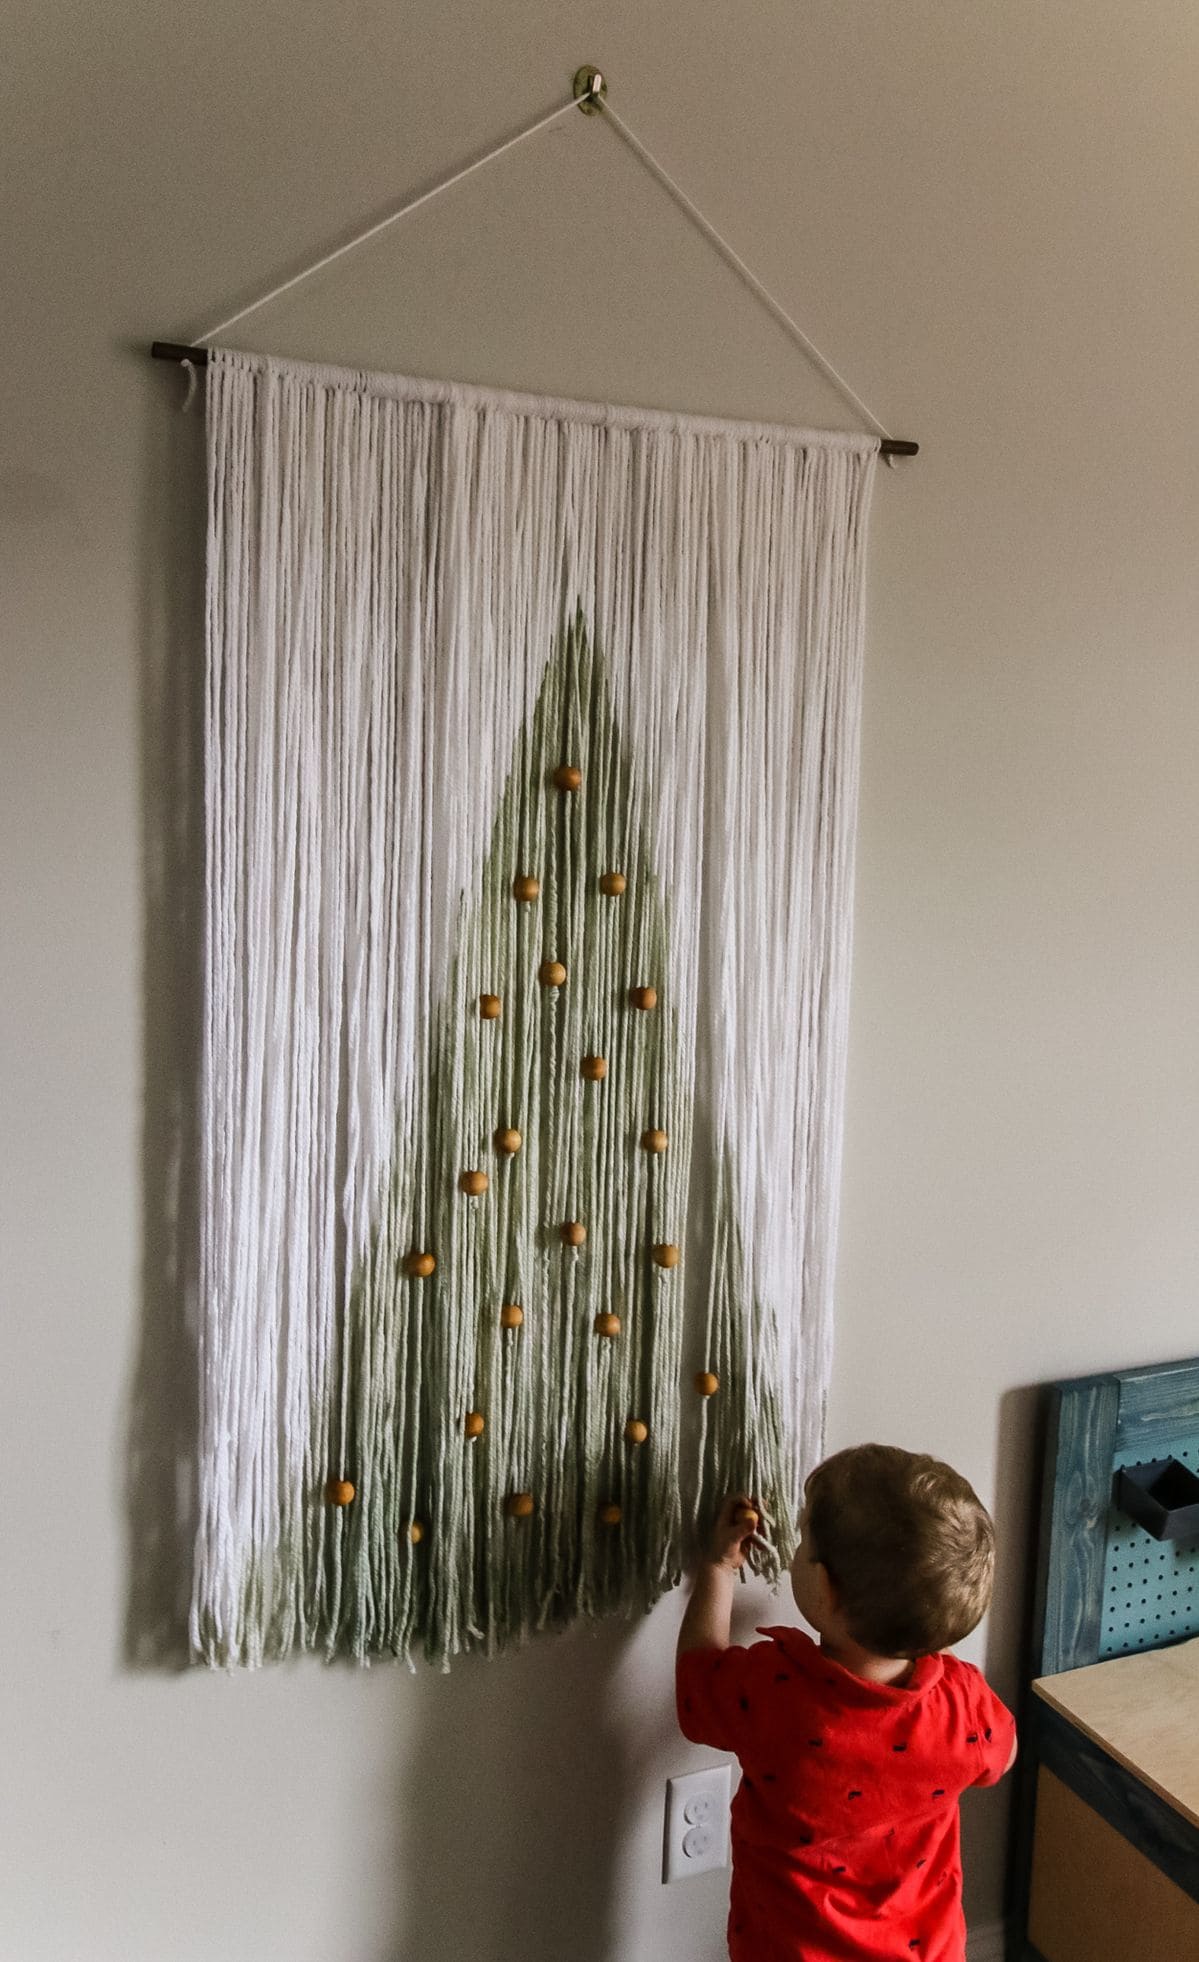
Wow, this minimal and modern yarn wall hanging turns simple strands into a playful Christmas tree alternative.
A cascade of white yarn forms the canvas, with green-dyed strands shaped into a subtle triangle silhouette resembling a pine tree.
Wooden beads scattered across the branches mimic ornaments, and the interactive texture makes it perfect for little hands to explore safely.
Materials Needed
- White and green yarn (or fabric dye for coloring)
- Wooden beads (25-30 pieces)
- Wooden dowel or rod (about 20-24 inches)
- Sharp scissors
- Hanging string or twine
Step-by-step Guide
Step 1: Cut long pieces of white yarn (about 40–50 strands, each 3–4 feet long).
Step 2: Tie each strand onto the dowel using a lark’s head knot until it’s fully covered.
Step 3: Use green dye or green yarn to create a tree-shaped pattern in the center section.
Step 4: Thread wooden beads onto the green strands, evenly spaced like ornaments.
Step 5: Attach a string to both ends of the dowel and hang it securely on the wall.
#20. Fabric Advent Calendar Pouch Display
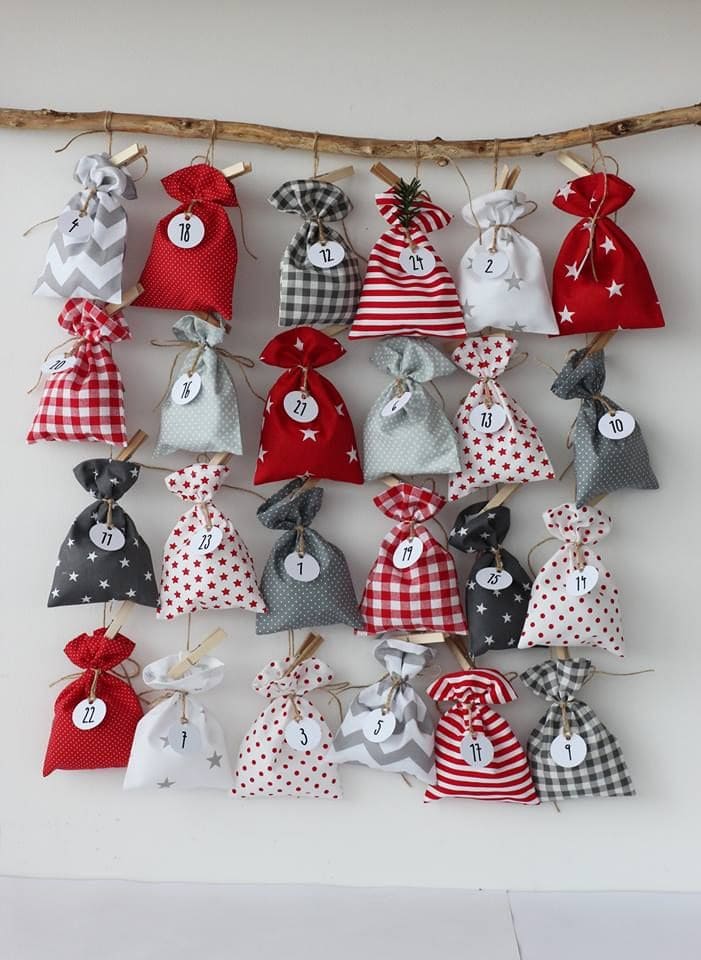
Count down to Christmas with a handmade advent calendar that feels like a warm hug.
These fabric pouches, each with their own personality such as polka dots, gingham, stars, and stripes are clipped to twine and hung from a rustic branch.
You’ll love watching little hands reach for them each morning in December.
Materials Needed
- 24-25 small fabric drawstring bags (assorted patterns)
- Numbered tags or stickers (1-25)
- Mini clothespins or clips
- Twine or strong string
- One sturdy tree branch or wooden dowel
- Small treats or notes to go inside
Step-by-step Guide
Step 1: Tie or clip the numbered bags evenly across a length of twine.
Step 2: Secure the twine to your chosen branch or dowel, spacing the rows to avoid crowding.
Step 3: Fill each pouch with a tiny gift, treat, or thoughtful message.
Step 4: Hang the branch on the wall using hooks or wall-safe adhesive strips.
#21. Hanging Reindeer Envelope Countdown
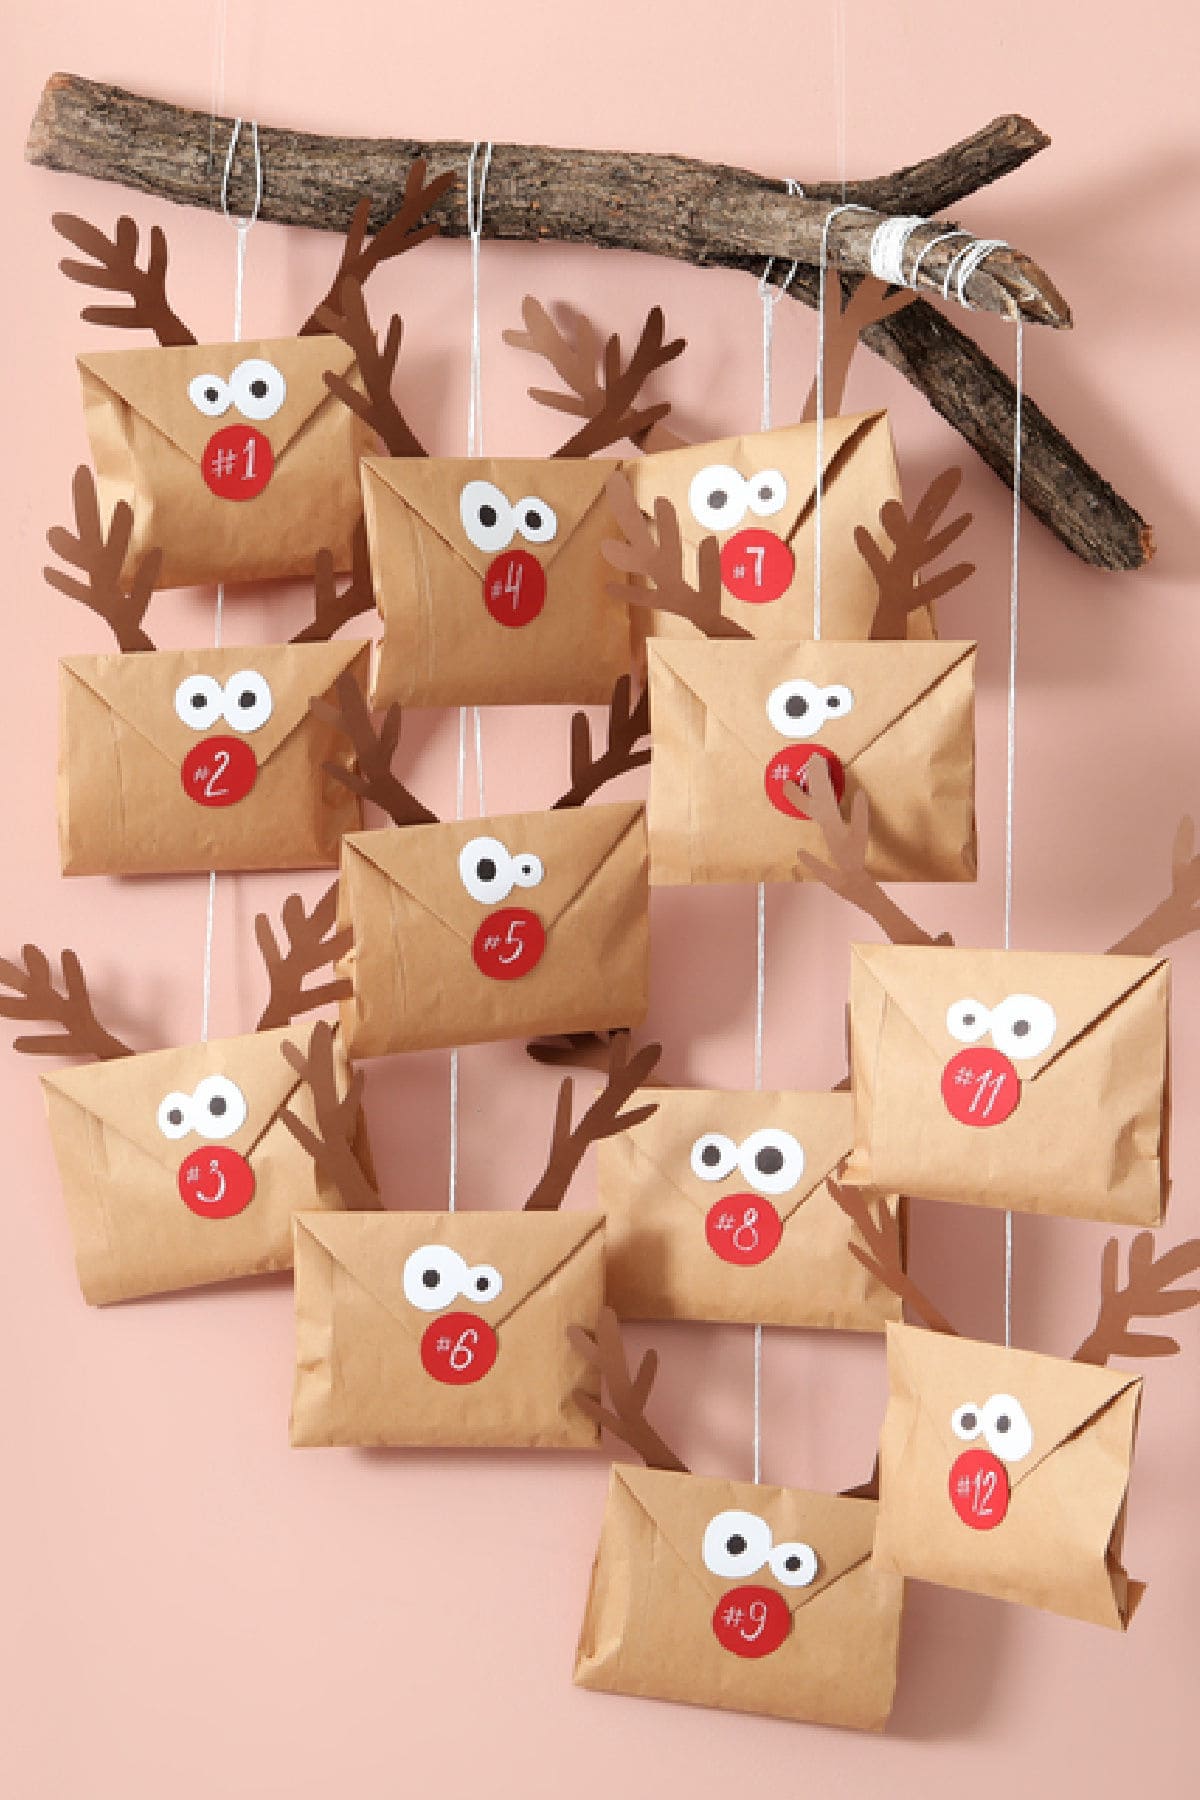
This rustic and charming reindeer-themed countdown makes use of the simplest materials for maximum cuteness.
Each kraft paper envelope is turned into a wide-eyed Rudolph, complete with googly-style paper eyes, twig-like antlers, and red circle noses bearing a countdown number.
Hung from a natural branch with white twine, this display feels delightfully handmade and warm.
Materials Needed
- Kraft paper envelopes (12–24 count)
- Red paper circles for noses (numbered)
- White and black paper for eyes
- Brown cardstock for antlers
- Glue stick or craft glue
- String or twine
- Thick tree branch or wooden dowel for hanging
Step-by-step Guide
Step 1: Cut out red circles and write countdown numbers on them, one for each envelope.
Step 2: Create eyes by layering white and black paper circles and glue them above the nose.
Step 3: Cut out antlers from brown cardstock and glue them behind the envelope flaps.
Step 4: Fill each envelope with your surprise or message.
Step 5: Use string to hang the envelopes from a sturdy branch, spacing them out evenly.
#22. Macrame Advent Calendar with Cardboard Houses
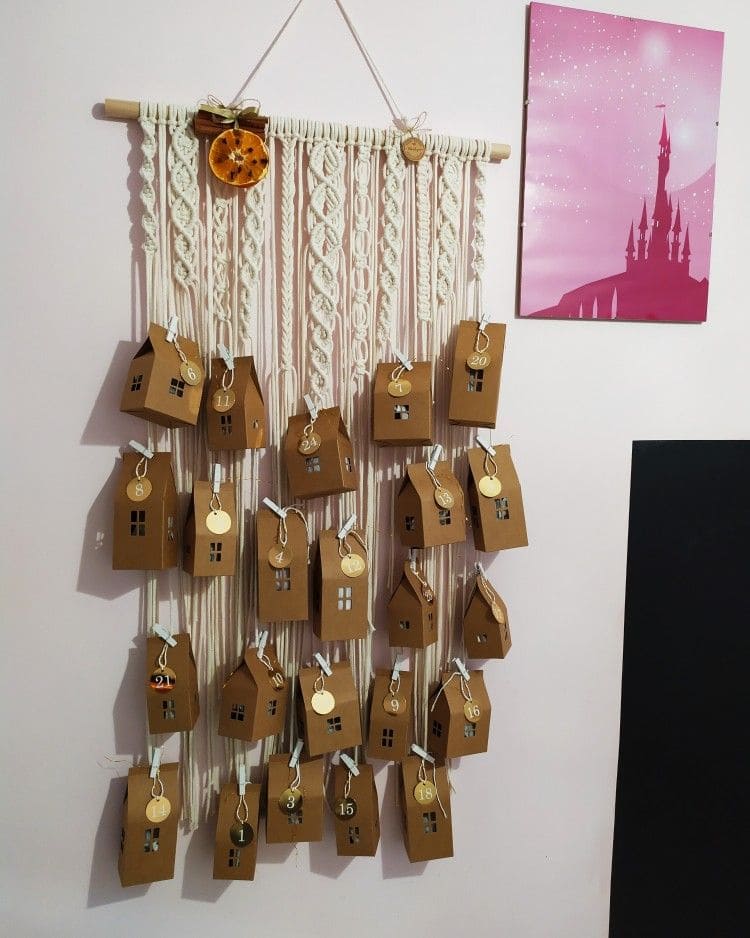
This charming wall-hanging doubles as a minimalist Advent calendar that radiates warmth and anticipation.
Made from a knotted macrame backdrop, each string holds a tiny kraft paper house or tag-style box, numbered from 1 to 24.
The little boxes resemble miniature homes with cut-out windows and doors, adding a cozy village feel to the countdown.
Materials Needed
- Macrame wall hanging or cotton rope on a wooden dowel
- 24 small kraft paper house or gift box templates
- Numbered gift tags (1-24)
- Ribbon or twine for tying
- Mini treats or surprises to go inside
Step-by-step Guide
Step 1: Assemble your macrame wall hanger or use a premade one with several vertical cords.
Step 2: Fold and secure the paper house boxes, making sure each has a number tag.
Step 3: Tie each numbered house to a macrame strand using ribbon or jute.
Step 4: Add small surprises or positive messages inside each house.
Step 5: Hang the whole piece on your wall and enjoy the countdown to Christmas!
#23. Hanging Gift Box Garland Display
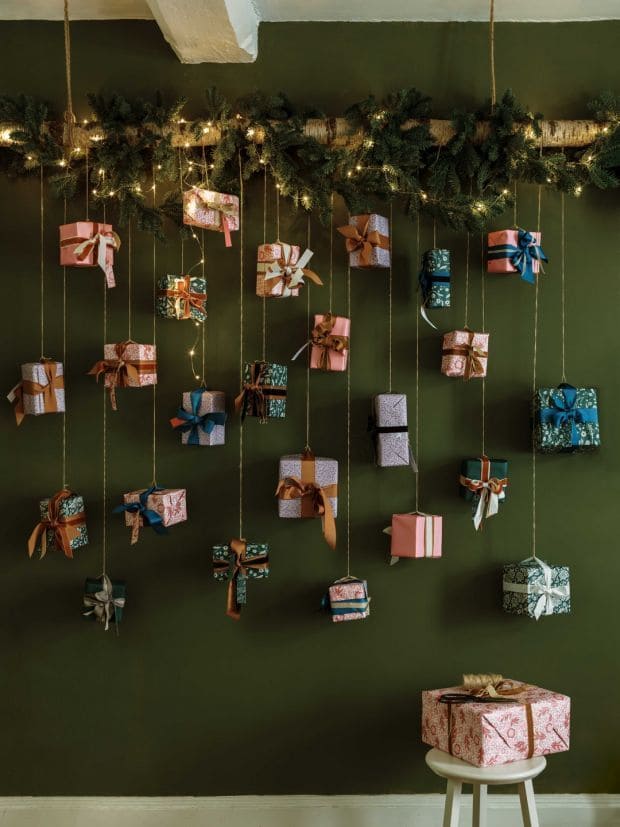
Dozens of beautifully wrapped mini presents are suspended at different heights from a rustic wood branch, twinkling under the warm glow of fairy lights and evergreen garland.
It feels like a whimsical holiday dream frozen midair, perfect for adding a festive statement to a blank wall or hallway.
You can customize the look with wrapping paper that suits your color scheme.
Materials Needed
- Cardboard boxes (various sizes)
- Gift wrap and ribbons
- Twine or string
- Thick branch or wooden dowel
- Command hooks or ceiling anchors
- Fairy lights and faux garland (optional)
Step-by-step Guide
Step 1: Wrap all your cardboard boxes in different papers and tie each with decorative ribbon.
Step 2: Attach twine securely to the top of each box for hanging.
Step 3: Suspend the branch from your ceiling using hooks, and drape it with garland and lights.
Step 4: Tie each wrapped gift at various heights to the branch, adjusting spacing to keep balance and flow.
Step 5: Turn on the lights, and enjoy the magical floating gift effect.


