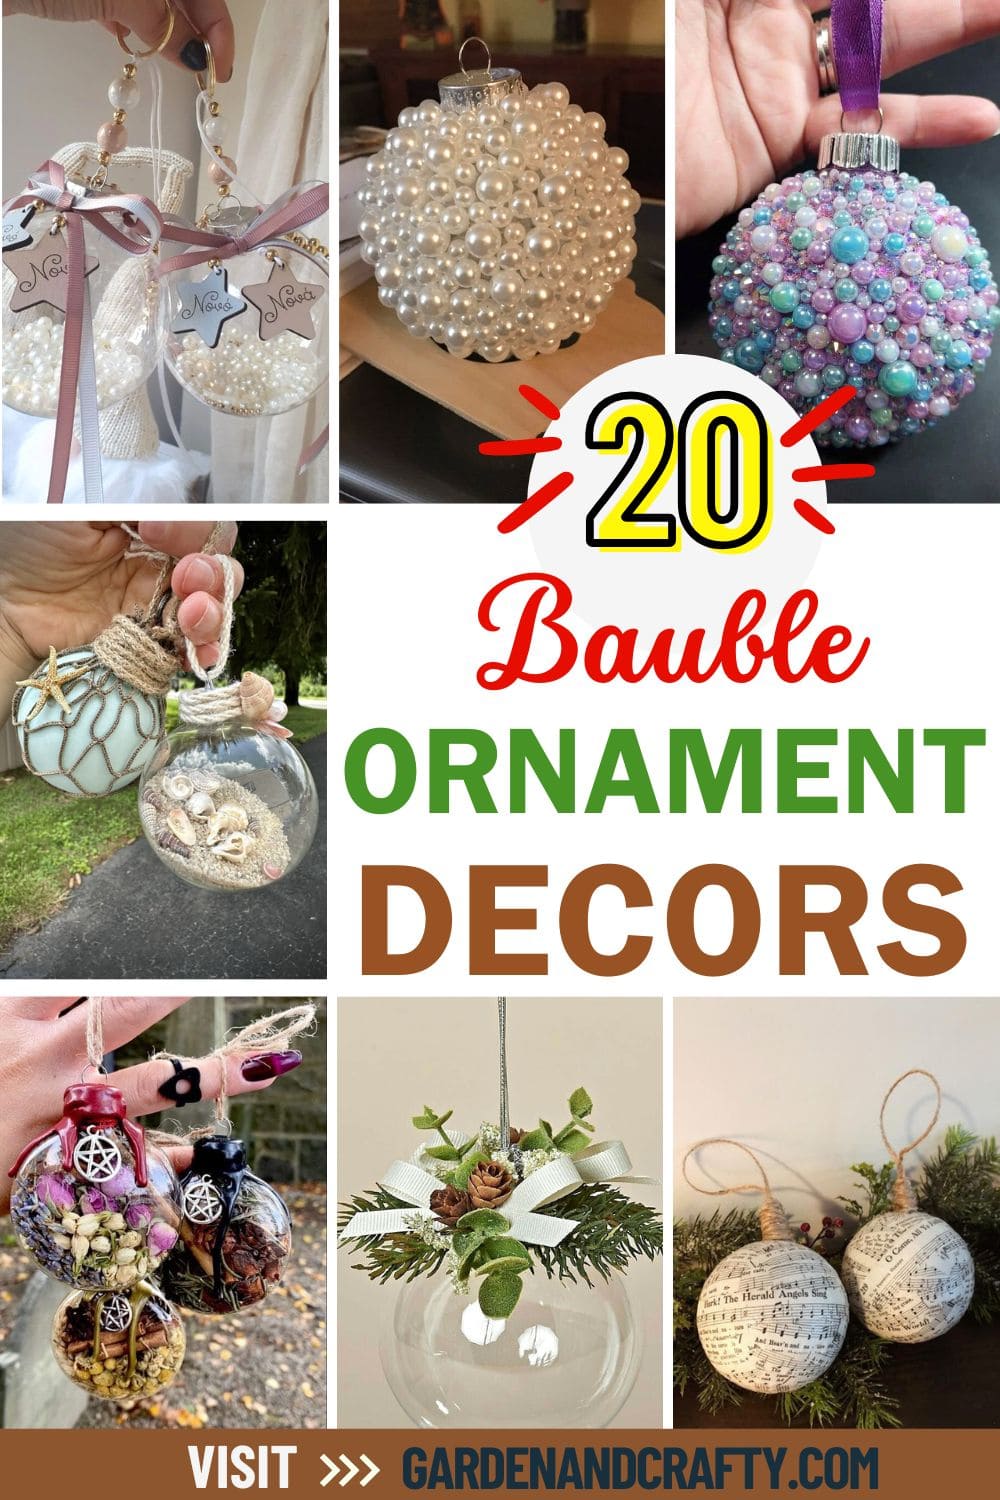
Ever looked at your Christmas tree and felt like it’s missing that one special touch? I’ve been there due to boxes of generic ornaments, but nothing that truly made it mine. That’s when I discovered the joy of crafting and curating bauble ornaments that actually mean something.
Whether it’s a clear globe filled with beach sand from your last vacation, or a glitter-dipped keepsake that catches the light just right, baubles can hold stories, memories, and heart.
In this article, you’ll find 20 bauble ornament ideas that go beyond store-bought sparkle. They’re personal, charming, and each one is designed to make your tree feel like a true reflection of you.
#1. Dried Herb Spell Ball Ornaments
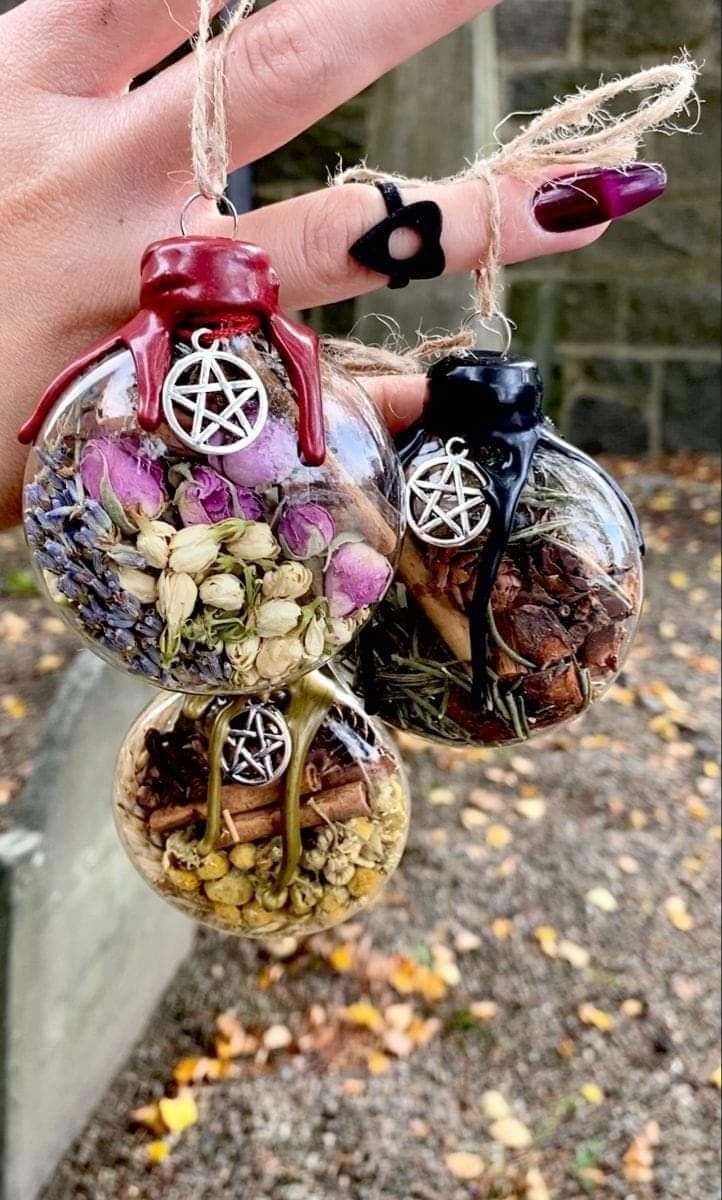
Whether you’re into herbal healing, cottagecore vibes, or spiritual symbolism, these spell balls add magic to any corner.
Specially, you can customize the scents and energies. They’re budget-friendly, soul-soothing to assemble, and make wonderful personal gifts during the holidays or solstices.
Materials Needed
- 3 clear fillable plastic or glass ball ornaments (around 3″ wide)
- Dried herbs and botanicals: rosebuds, lavender, rosemary, cinnamon sticks, chamomile, cloves (about 1 tablespoon of each)
- 3 sealing wax sticks
- 3 small metal charms
- Jute twine (6-8 inches per ornament)
- Lighter or candle
- Optional: funnel
Step-by-step Guide:
Step 1: Start by unscrewing or gently popping off the top of the ornament and setting it aside somewhere safe.
Step 2: Fill the ornament about two-thirds full with your dried ingredients, layering them however feels right.
Step 3: Once it’s filled, pop the top back on, then carefully drip melted sealing wax around the opening, letting it drip for that beautiful, moody effect.
Step 4: While the wax is still warm and soft, press your charm into place so it holds firm as the wax cools.
Step 5: Finally, tie a loop of twine through the ornament’s hook.
#2. Pearl Galaxy Bauble
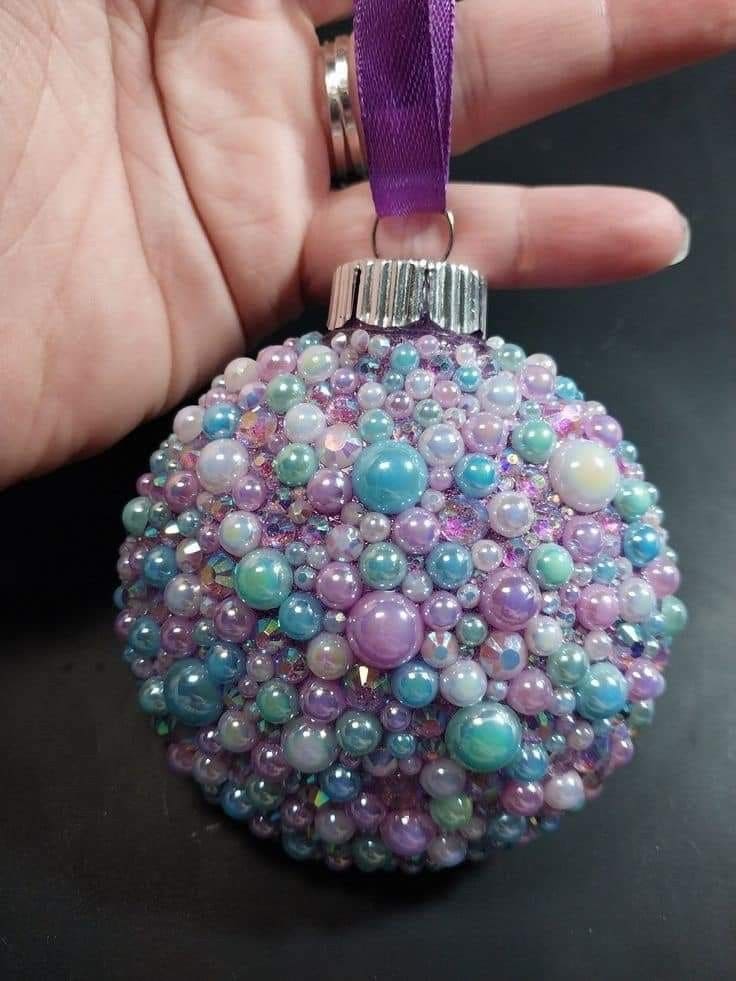
If your tree needs a little celestial magic, this beaded beauty will feel like hanging a galaxy right in your living room.
Each pearly dot catches the light in a dreamy way. Plus, you don’t need to be a jewelry artist to pull this off; it’s just patience, glue, and a sprinkle of whimsy.
Materials Needed:
- 1 plain plastic ornament ball (3-4 inches)
- 200 mixed-size flat-back pearls and rhinestones
- Strong craft glue
- Tweezers
- Ribbon (½ inch wide)
Step-by-step Guide:
Step 1: Start by unscrewing or removing the top of the ornament and setting it aside so you can easily hold the base.
Step 2: Begin adding small dots of glue in sections and placing your largest pearls first.
Step 3: Fill in the spaces between the big beads with medium and small ones, mixing shapes and colors as you go to create that dreamy constellation effect.
Step 4: Once the entire ball is covered and dry, reattach the ornament top and tie on your ribbon.
#3. Evergreen Elegance Ornament
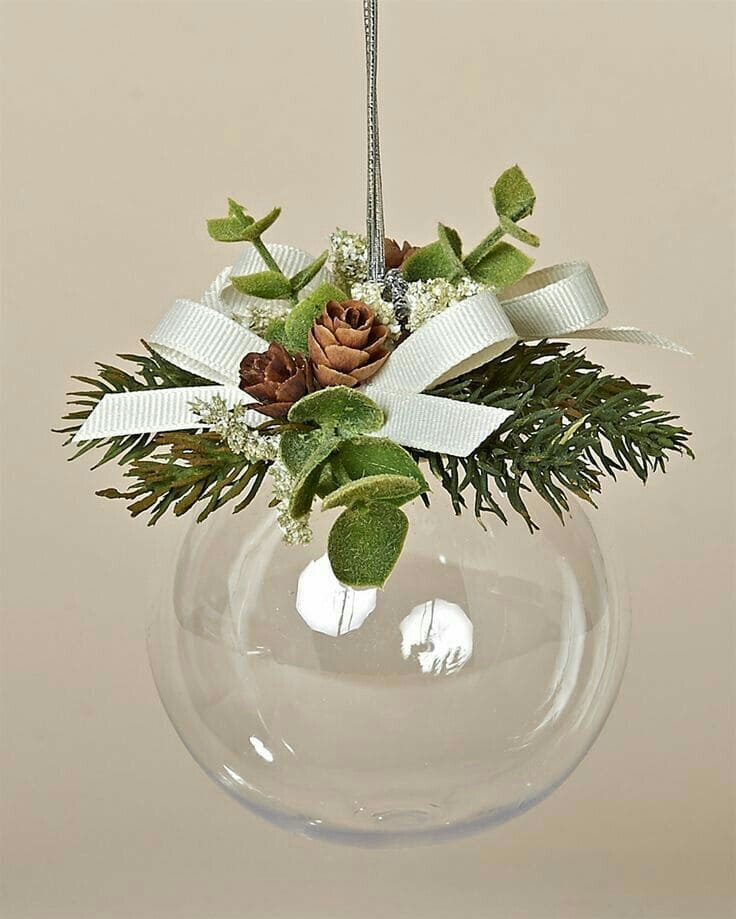
Wow, this simple, nature-inspired ornament brings that peaceful, woodsy magic right into your home. It’s the kind of piece that feels like a quiet walk in the woods.
It’s also a great way to reuse small artificial branches from old wreaths or floral stems.
Materials Needed:
- 1 clear plastic or glass ball ornament (3-4 inches)
- Faux greenery sprigs about 3″ each
- 4 mini pinecones
- White ribbon (½ inch wide, 6-8 inches long)
- A touch of faux baby’s breath (optional)
- Hot glue gun and glue sticks
- Silver cord
Step-by-step Guide:
Step 1: Start by unscrewing or popping off the top of the ornament and setting it aside while you work on the decorative topper.
Step 2: Arrange your greenery pieces, pinecones, and floral accents into a tiny bouquet, layering them until you’re happy with the fullness.
Step 3: Glue the bundle onto the ornament top, positioning it so it nestles evenly around the loop where the hanger will go.
Step 4: Finally, add a ribbon bow to the center front for that classic wintery finish.
#4. Shimmer and Shine Sequin Baubles
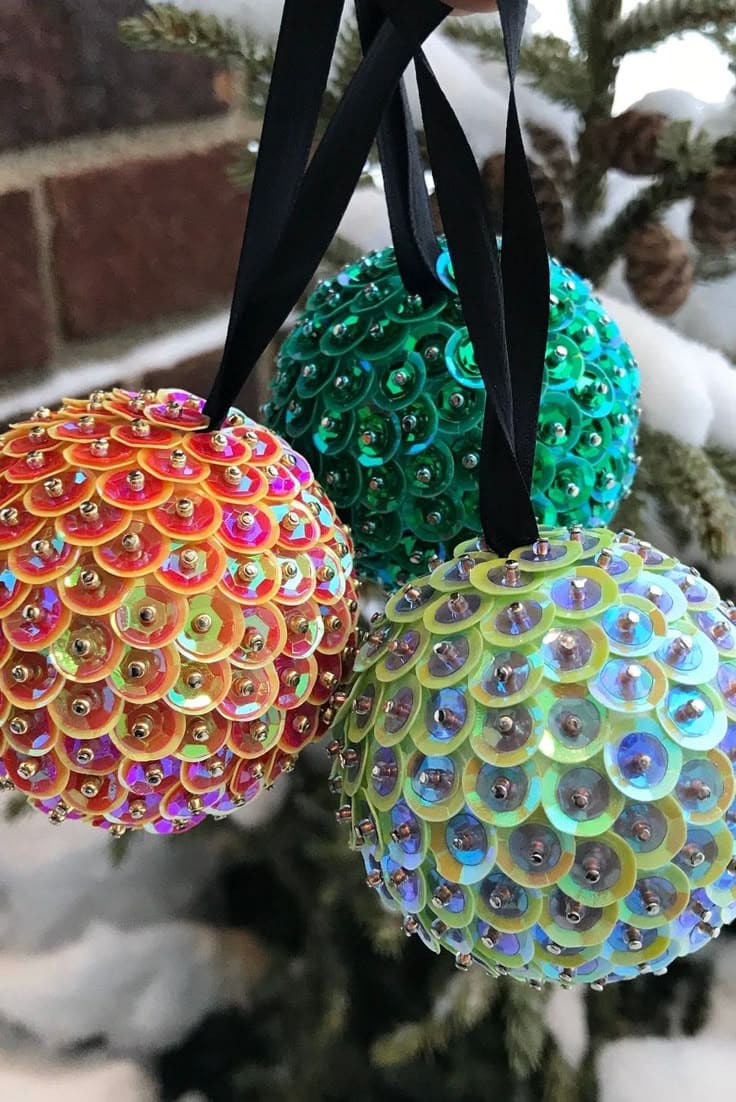
If you’ve ever wanted your tree to look like it’s throwing a tiny disco party, these sequin baubles are your glittery dream come true.
I believe you’ll love how the sequins catch every bit of twinkling light, and kids can even join in for an afternoon of quiet crafting.
Materials Needed:
- 3” foam ball ornaments
- 400 flat sequins in your chosen colors
- Sequin pins
- Satin ribbon (about 12″ per bauble)
- Thimble (optional)
Step-by-step Guide:
Step 1: Start by pushing a sequin pin through the center of your first sequin and pressing it into the foam ball.
Step 2: Layer the next sequin so it slightly overlaps the first, continuing in rows to cover the ball.
Step 3: Once you’ve covered the whole ball, loop your ribbon, pin it securely at the top, and tie a neat knot or bow for hanging.
Step 4: Give it a gentle shake under the light and watch it sparkle like a festive little planet.
#5. Beachy Keepsake Ornament
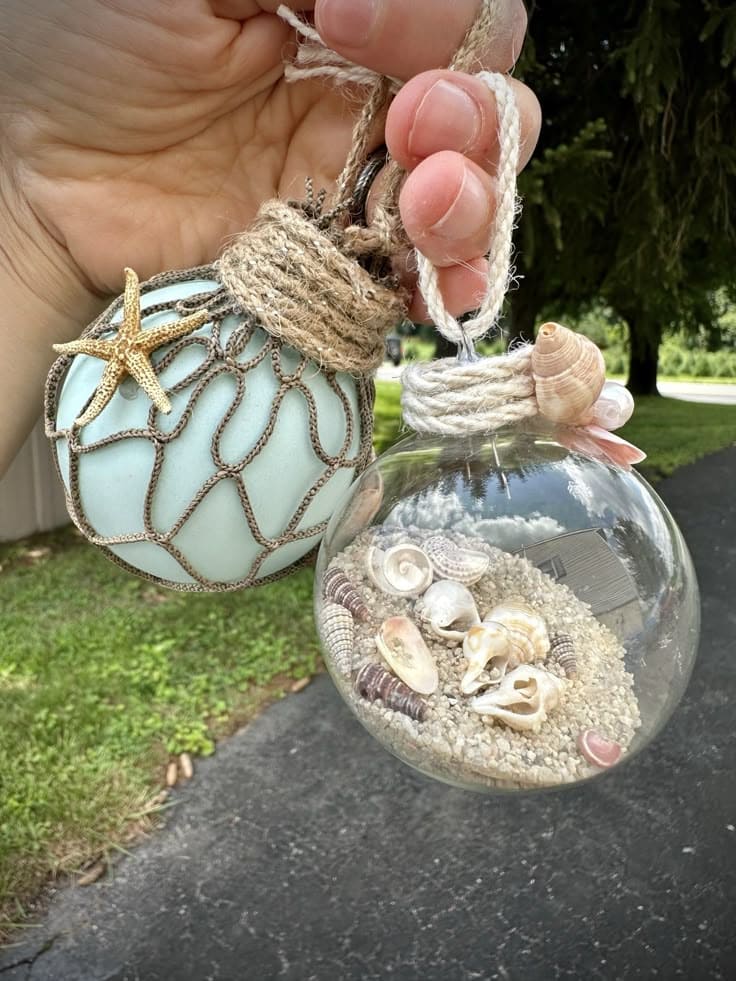
This coastal-inspired ornament is like bottling up a day at the beach and hanging it from a tree. Whether you’re dreaming of summer or missing the sound of the waves, this ornament brings a warm, sandy memory to life.
Besides, one features miniature shells and crushed sand tucked inside a clear globe, while the other is styled with seafoam paint, netting, and twine.
Materials Needed:
- Clear plastic or glass ornaments (2.5″-4″)
- 2 fine craft sand
- Mini seashells, coral bits, or tiny driftwood
- Twine rope (approx. 20″ per ornament)
- Small starfish or shell embellishments
- Acrylic paint
- Decorative netting (optional)
- Hot glue gun
Step-by-step Guide:
Step 1: Start by unscrewing or popping off the top of your ornament. Gently fill the globe with a small scoop of sand, then add a handful of mini shells or beach finds.
Step 2: For the painted version, coat the outside of the ornament in seafoam paint and let it dry completely. You can wrap twine around the neck and secure it with hot glue.
Step 3: Drape your netting or decorative cord around the painted globe and glue it in place for that fisherman’s float look.
Step 4: Add a mini starfish or shell to the front, tie a loop with twine, and it’s ready to hang like a memory of sunshine.
#6. Retro Beaded Swirl Ornament
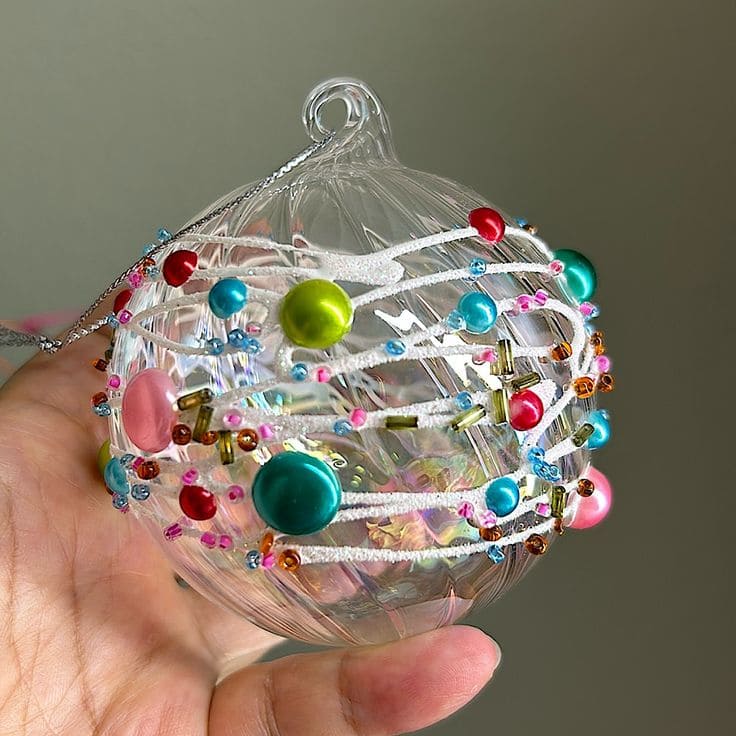
This playful ornament channels the nostalgic charm of a 1960s tinsel tree, but with your own twist.
Plus, the beads shimmer like gumdrops, the colors pop like holiday candy, and the clear globe gives it a floating, magical feel. This is the kind of project that lets you get a little messy, a little sparkly, and fully creative.
Materials Needed:
- 1 clear plastic or glass ornament (around 3-4 inches wide)
- Iridescent glitter ribbon (¼ inch or thinner, about 18 inches)
- Assorted beads: metallic pearls, seed beads, tube beads
- Hot glue gun
- Scissors
- Hanging cord
Step-by-step Guide:
Step 1: Start by unscrewing or removing the top of the ornament and setting it aside for now.
Step 2: Wrap your glittery ribbon around the ball like a spiral, gluing it gently in place as you go.
Step 3: Begin adding beads along the ribbon line, mixing up colors and shapes as you go. Then, glue them down individually, leaving little space between each for a clustered, festive effect.
Step 4: Once everything is dry, reattach the ornament top, thread in your hanging cord, and give it a gentle shake.
#7. Melted Crayon Glass Ornament
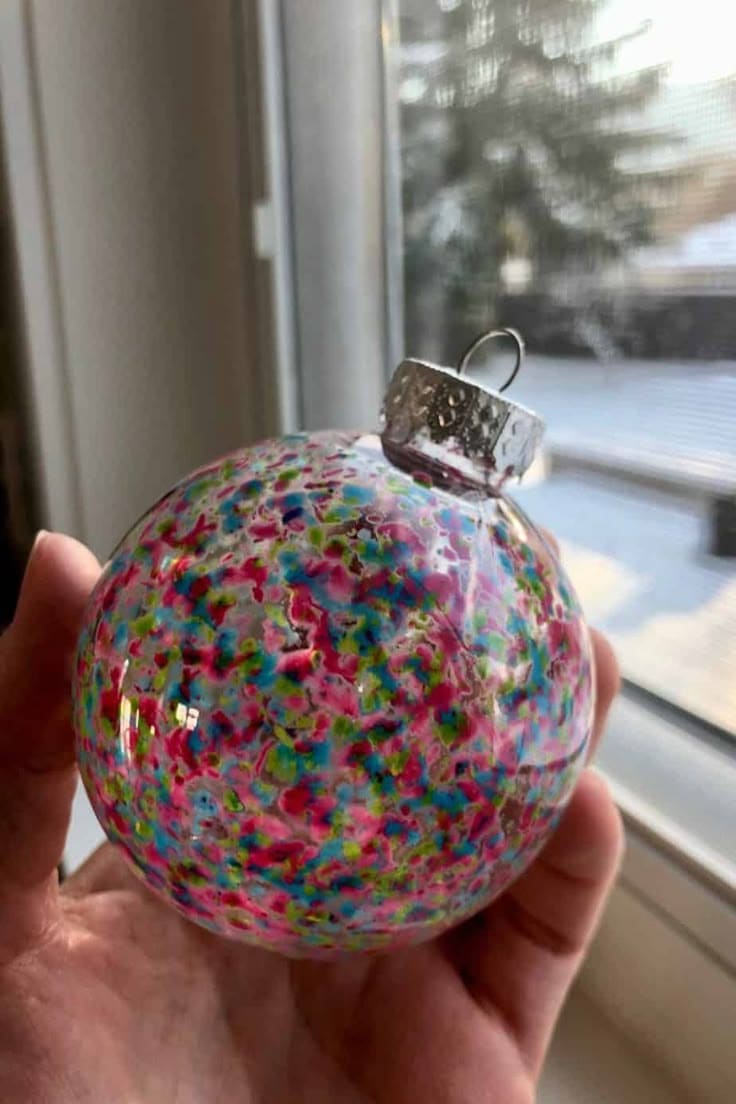
If you’re the kind of person who never wants to toss even a tiny crayon nub, this ornament is calling your name.
Also, melting crayons inside a clear ornament creates a mesmerizing marbled effect that’s different every time.
Materials Needed:
- Clear glass or plastic ornament
- Assorted crayon bits (1-2 colors per ornament works well)
- Hair dryer
- Parchment paper
- Gloves or oven mitt (optional)
Step-by-step Guide:
Step 1: Start by removing the top of your ornament and carefully dropping in your crayon bits.
Step 2: Holding the ornament with a glove or mitt, aim your hair dryer at it and rotate slowly. The wax will start melting and swirling inside.
Step 3: Keep rotating until the colors have blended in a marbled pattern. Let it cool on a paper towel and then replace the ornament cap.
#8. Snowman Head Ornaments with Ear Muffs
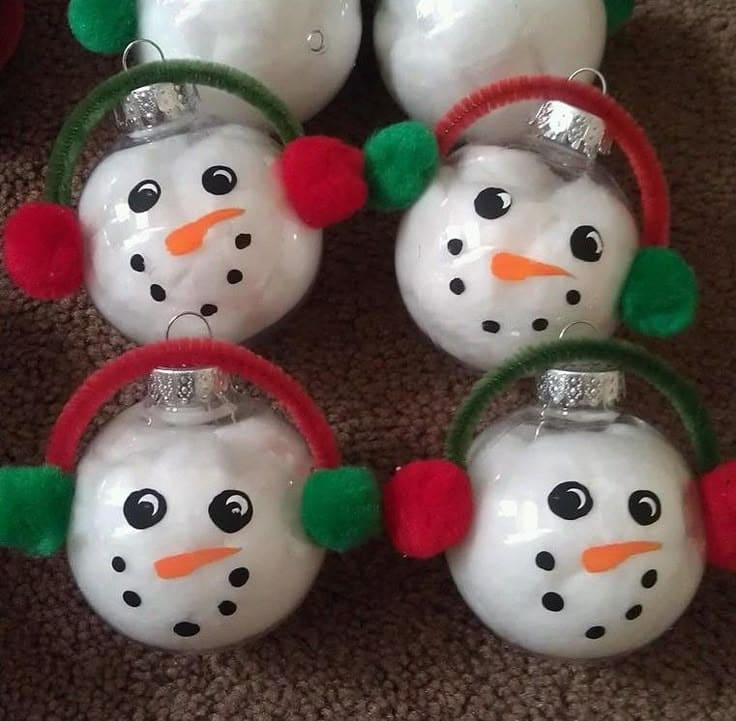
These snowman head ornaments are cheerful, fluffy, and just the right amount of silly to make everyone smile.
Whether you’re crafting for your own tree or making a few as handmade gifts, this project is budget-friendly and super fun to do with kids. You’ll love how easy they come together with just a few basic materials.
Materials Needed:
- Clear plastic ornaments (3″ size works best)
- Cotton balls
- Orange foam or felt
- Black dot stickers
- 1 green and 1 red pipe cleaner per ornament
- 2 pom-poms per ornament (red, green, or mix)
- Hot glue gun and glue sticks
Step-by-step Guide:
Step 1: Start by unscrewing or removing the top of your ornament. Then gently stuff it with cotton balls or fiberfill until it looks full and fluffy.
Step 2: Once stuffed, secure the top back on and begin building the face. You can use glue to attach eyes, mouth dots, and a little orange triangle for the carrot nose.
Step 3: Bend a pipe cleaner into a semi-circle and glue it to each side of the ornament top to form the earmuff band.
Step 4: Finally, glue one pom-pom to each end of the pipe cleaner to complete the cozy earmuffs.
#9. Twinkle Light Glitter Ornament
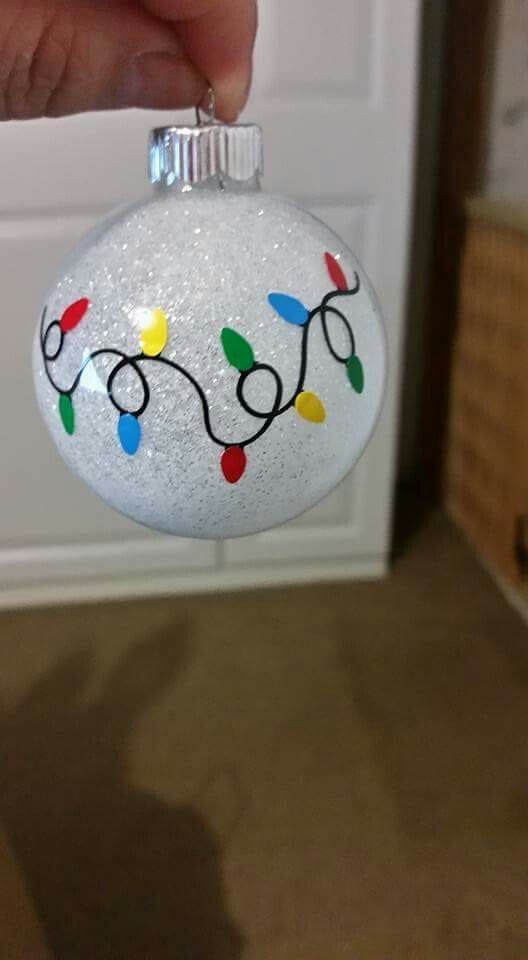
You can see this little bauble brings that magical holiday sparkle to life. Also, a swirl of white glitter inside the ornament gives it a snow-dusted shimmer, while the hand-drawn string of holiday lights adds just the right pop of color.
Materials Needed:
- Clear plastic or glass ornament
- Extra fine white glitter (about 1-2 tablespoons)
- Floor polish
- Black paint pen
- Multicolored vinyl, paint pens, or sticker dots
- Small funnel (optional)
Step-by-step Guide:
Step 1: Start by unscrewing or removing the top of your ornament, then pour in a swirl of floor polish or adhesive. You gently rotate to coat the inside, then drain out the excess.
Step 2: Add the glitter through a funnel, cover the hole with your thumb, and shake to coat the interior.
Step 3: Using your black paint pen, draw a playful looped string all around the outside.
Step 4: Add tiny colorful bulbs, either stick them on using vinyl dots or carefully paint them in and let dry fully before hanging.
#10. Reindeer Glam Ball Ornament

This reindeer ornament isn’t just festive, it’s a whole vibe. With sparkling antlers, a glitzy brown finish, and sweet little floral accents, it feels like Rudolph got a glamorous holiday makeover.
If you’re someone who loves adding whimsical charm to your tree or just wants a fun craft night project, this is one you’ll adore.
Materials Needed:
- Clear plastic or glass ball ornament
- Brown glitter (1-2 tablespoons)
- Floor polish
- Black and red vinyl
- Brown cardstock
- Faux branches with beads or glitter
- Red paper or felt roses
- Hot glue gun
Step-by-step Guide:
Step 1: Start by unscrewing or popping off the ornament’s top. Then pour in floor polish or adhesive and swirl it around inside until fully coated.
Step 2: Add brown glitter inside the ball, then shake it gently to coat all the sides evenly. Once you’re happy with the coverage, reattach the top.
Step 3: Cut and glue on the reindeer’s ears from brown cardstock, tucking them just under the ornament cap.
Step 4: Arrange and glue down your sparkly faux branches to act as antlers. Then add your red roses across the top for a sweet, festive crown.
Step 5: Finally, use black paint pen to draw on sweet closed eyes with lashes, and finish with a little red oval nose.
#11. Elegant Pearl Name Ball Ornament
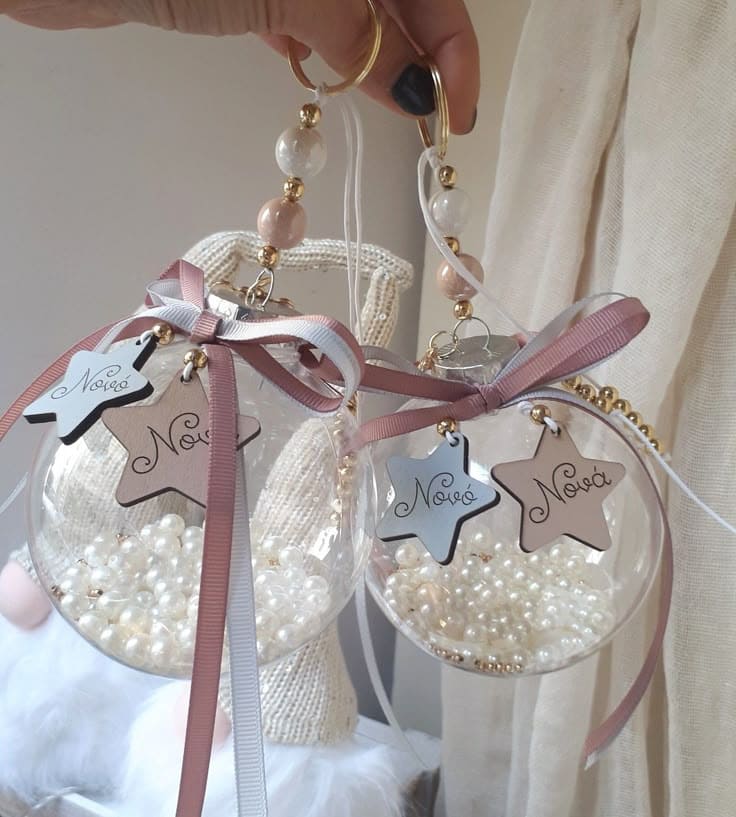
Oh my god, this ornament brings together simple charm and classy elegance. Filled with pearlescent beads and finished with soft satin bows and a personalized star name tag, it makes a beautiful keepsake for weddings, baby showers, or Christmas.
Bonus, it’s super beginner-friendly and feels like a little moment of luxury hanging from a tree.
Materials Needed:
- 1 clear plastic ball ornament (3-4 inches wide)
- 1/4 cup of faux pearl beads
- 2 ribbon strands (1/4 inch width, any two soft tones, 14″ each)
- 1 personalized star tag
- Mini gold beads
- Gold jump ring
- Small beads (optional)
- Hot glue
Step-by-step Guide:
Step 1: Start by unscrewing or removing the top of the clear ornament and gently pouring in your faux pearl beads. Then you fill to about one-third of the way for a balanced look.
Step 2: Thread your name tag onto a gold jump ring, and attach it to the ornament’s top. You can also add a few small decorative beads if you want extra sparkle.
Step 3: Tie a soft, double-layered bow using two ribbons in complementary colors.
Step 4: If you’d like, add a loop of beaded string or pearls at the top for hanging instead of a plain hook.
#12. Hand-Painted Floral Rose Ornament
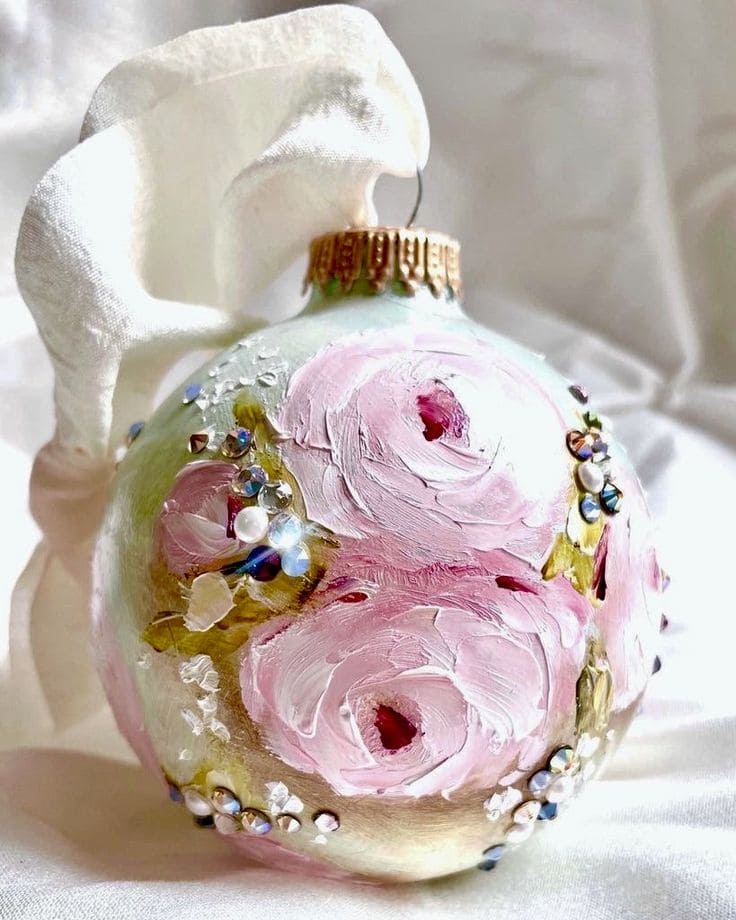
This beautiful globe carries vintage charm and painterly elegance in every brushstroke.
If you love crafting with a hint of cottagecore and French garden vibes, this project is a heart-stealer. Perfect for weddings, anniversaries, or heirloom gifting, it’s a gentle way to wrap memories in petals and pearls.
Materials Needed
- 1 matte or pearl-finished glass ornament (3-4 inch)
- Acrylic paint (pink, white, green, crimson)
- Small flat and detail brushes
- Rhinestones
- Clear glue
- Soft fabric ribbon
- Optional: gold leaf or shimmer paint
Step-by-step Guide
Step 1: Start by unscrewing or removing the top of the ornament and cleaning the surface with a dry cloth to ensure smooth paint application.
Step 2: Using a flat brush, paint loose circular shapes for roses with pink and white, blending them slightly. Then add green strokes for leaves and a tiny dab of crimson in the center of each rose for depth.
Step 3: Once the paint dries completely, glue rhinestones and tiny pearls around the flowers to give your ornament a sparkling, jewel-like frame.
Step 4: Tie a soft fabric ribbon through the top loop to give your ornament an elegant, finished look.
#13. Cozy Crochet Mandala Ornament Covers
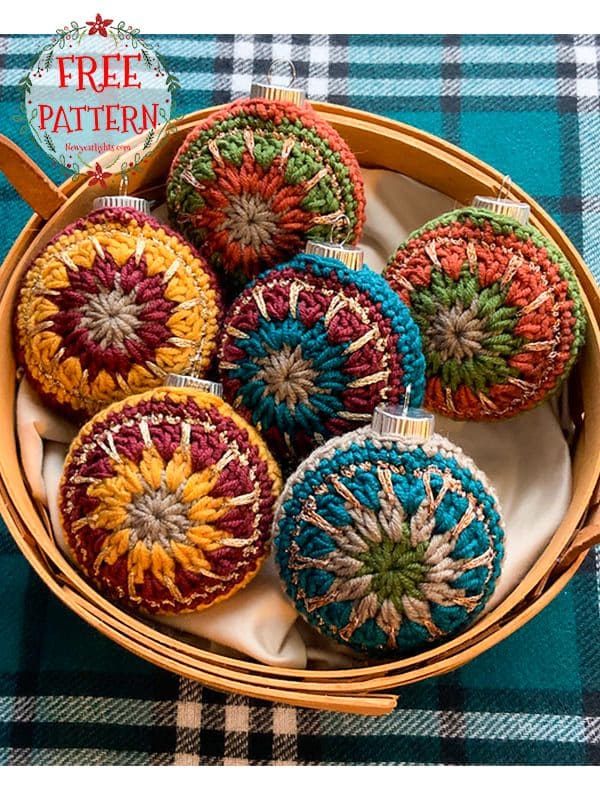
These crocheted mandala ornaments are like tiny blankets for your Christmas tree. Whether you’re cozying up by the fire or adding a handmade touch to a gift, these textured beauties turn any basic ball ornament into a keepsake.
Additionally, the color combinations can reflect anything from earthy autumn vibes to vintage holiday charm, and they’re a joy to stitch up.
Materials Needed
- 6 plastic round ornaments (2.5-3″ diameter)
- Worsted weight yarn in 4-6 cozy colors
- 3.5 mm (E) crochet hook
- Yarn needle
- Small scissors
- Optional: metallic thread
Step-by-step Guide
Step 1: Start by crocheting a magic circle and work your first round with 12 double crochets.
Step 2: Build outward in increasing rounds using combinations of front post stitches, back loops, or puff stitches to add depth and dimension. Feel free to alternate your colors as you go to make the design pop.
Step 3: Once your mandala disc is slightly smaller than the ornament’s diameter, begin shaping the piece to cup the globe. Then, switch to tighter stitches like single crochet to pull it inward.
Step 4: Make two identical mandalas and slip them over each side of the ornament. Now, you use a yarn needle to stitch the edges together, leaving a hole for the top hanger loop to peek through.
#14. Elegant Pearl-Covered Ornament
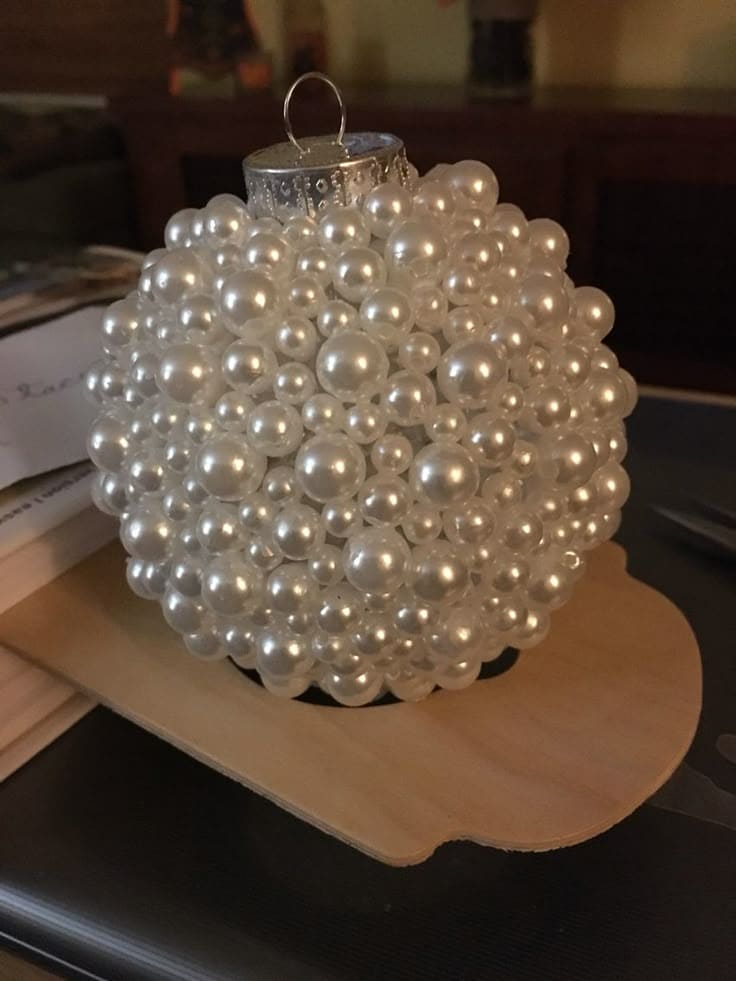
This ornament is the kind of piece that brings a bit of vintage glam to your holiday decor, catching the lights with every movement.
All it takes is a clear ornament, some faux pearls, and a little bit of patience. The result is a delicate-looking treasure that feels like it belongs in a jewelry box or a dreamy winter wedding scene.
Materials Needed:
- 1 clear plastic or shatterproof ornament (2.5-3″)
- 300 mixed-size flat-back pearl beads
- Strong craft glue
- Tweezers (optional)
Step-by-step Guide:
Step 1: Start by unscrewing or removing the top of your ornament and setting it aside.
Step 2: Begin gluing the largest pearls first, spacing them evenly across the surface.
Step 3: Fill in the gaps using medium and small pearls, layering the sizes to create a textured, clustered effect.
#15. Vintage Sheet Music Ornament

If you love all things nostalgic and cozy, this ornament hits the right note. It transforms old sheet music into a delicate Christmas keepsake that feels like a song frozen in time.
Whether you’re honoring a family carol tradition or simply adore vintage decor, this craft brings warmth and melody to your holiday display.
Materials Needed:
- 1 foam or plastic ornament ball (approx. 3″)
- Vintage-style sheet music
- Matte Mod Podge
- Twine or jute string (12-18″)
- Scissors and a small brush
Step-by-step Guide:
Step 1: Start by tearing or cutting your sheet music into small strips as jagged edges give it more charm than clean cuts.
Step 2: Apply Mod Podge to a section of the ornament and begin layering the paper pieces, smoothing each one down with your fingers or brush as you go.
Step 3: Cover the entire ball, then give it a gentle coat of Mod Podge over the top to seal it in place.
Step 4: Wrap twine around the top of the ornament, securing it with glue, and form a loop for hanging.
#16. Pom-Pom Zoo Ornament
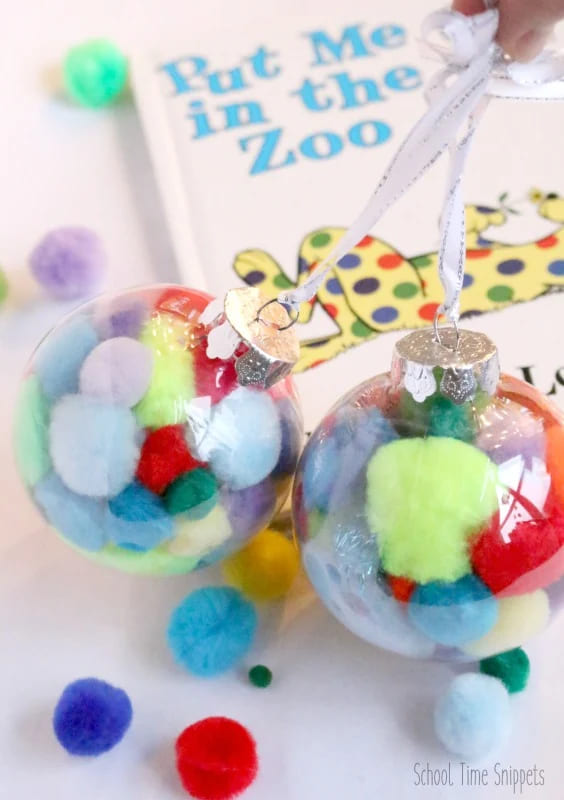
Inspired by playful pages and polka-dotted animals, this ornament is a joyful little craft you can make with kids in just minutes. Every ornament turns out different, like a snow globe full of whimsy.
Materials Needed
- 1 clear plastic ornament ball (preferably 3”)
- Mini craft pom-poms
- Ribbon (12”)
- Optional: glitter or confetti
Step-by-step Guide
Step 1: Start by unscrewing or popping off the top of the ornament.
Step 2: Let your little ones choose their favorite pom-poms and help them gently push each one inside the ornament until it’s filled to your liking.
Step 3: Add a dash of glitter or confetti if you’d like extra sparkle. Then replace the top, tie a festive ribbon through the hook, and you’re done!
#17. Fiesta Ribbon Ball Ornaments
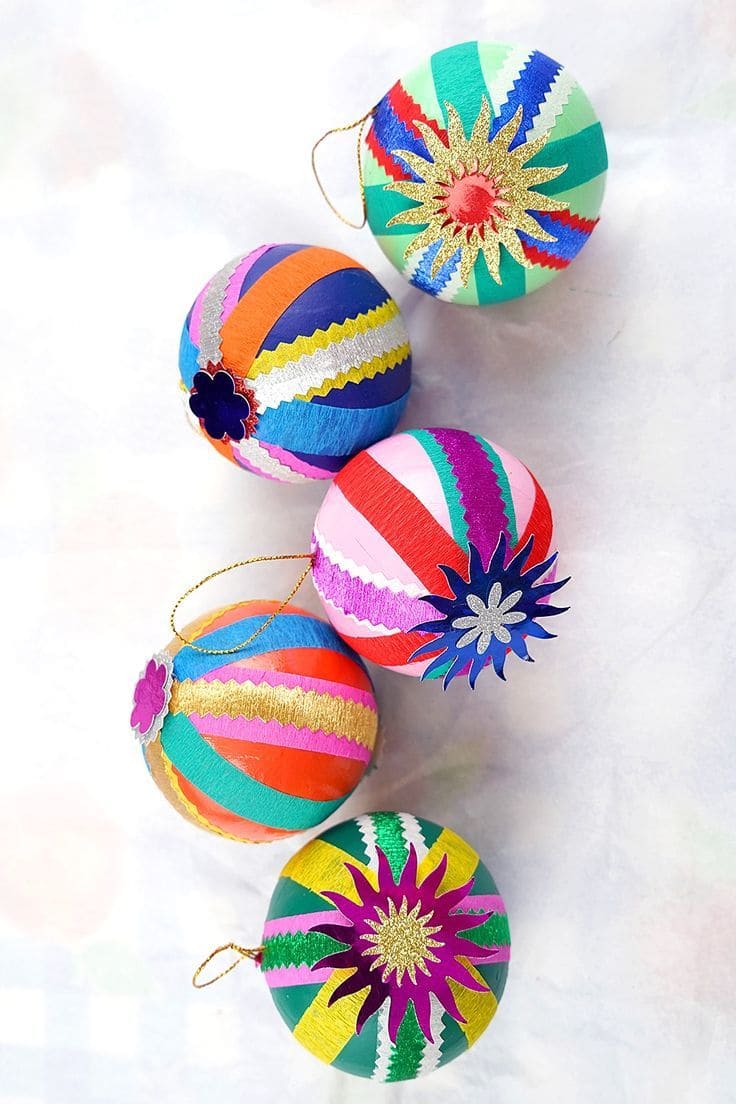
Using crepe paper and metallic trims, each ball becomes a little explosion of joy, perfect for adding playful energy to your tree or any festive space.
Materials Needed
- Styrofoam balls (2.5″-3″ diameter)
- Crepe paper strips cut into ~1/2″ width)
- Decorative ribbon (zigzag, glitter, etc.)
- Craft glue
- Paper flower cutouts
- Gold thread
- Small pin or needle
Step-by-step Guide
Step 1: Start by gluing one end of a crepe paper strip at the top center of the foam ball, then gently stretch and wrap it down around to the bottom. You repeat, alternating colors and slightly overlapping each strip until the whole ball is covered.
Step 2: Add sparkle by layering ribbon trims over the crepe paper seams, securing them with dabs of glue, then let dry for a few minutes.
Step 3: Decorate the top with a paper flower or shiny sticker, placing it where all the strips meet to give a neat, finished look.
Step 4: Finally, push a small pin or glue in a cord loop for hanging.
#18. Pressed Flower Glass Ornament
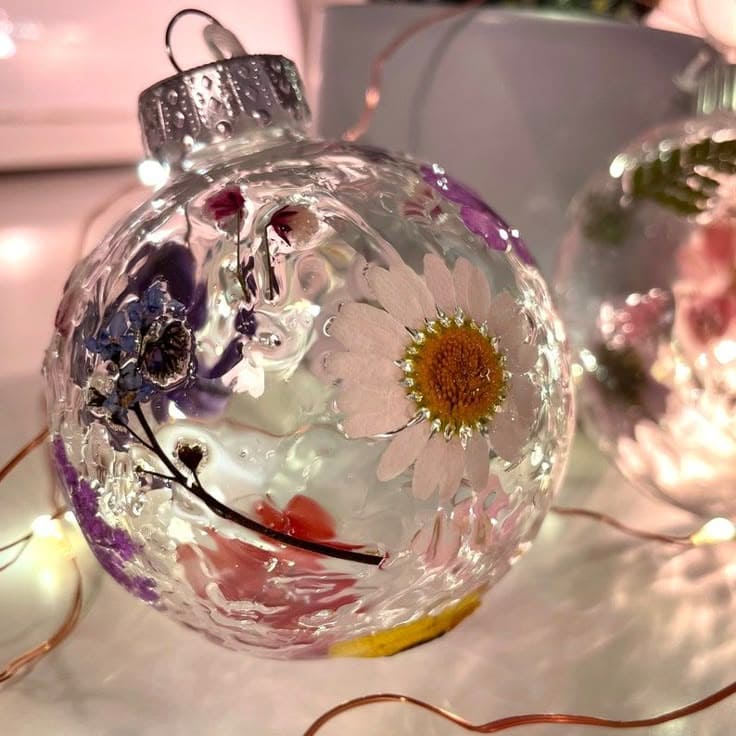
This ornament feels like a little love letter to spring, it’s perfect if you adore nature’s quiet charm and want to bring a touch of floral poetry to your holiday tree.
With its dainty petals and soft glow under twinkle lights, it’s a peaceful way to honor both the season and the garden that got you through it.
Materials Needed:
- 1 clear glass or plastic ornament
- A small collection of dried or pressed flowers (daisies, lavender, pansies, etc.)
- Clear-drying craft glue
- Long tweezers
- Small paintbrush
Step-by-step Guide:
Step 1: Start by unscrewing or removing the top of the ornament.
Step 2: Gently apply a thin layer of clear glue to the back of a pressed flower using a small brush. Then carefully slide the flower into the ornament using tweezers, pressing it gently against the inside surface.
Step 3: Repeat with other small flowers or leaves, rotating the ornament slightly as you go to create a balanced design.
Step 4: Once your arrangement looks just right, let everything dry completely before sealing the top.
#19. Frosted Berry Branch Ornament
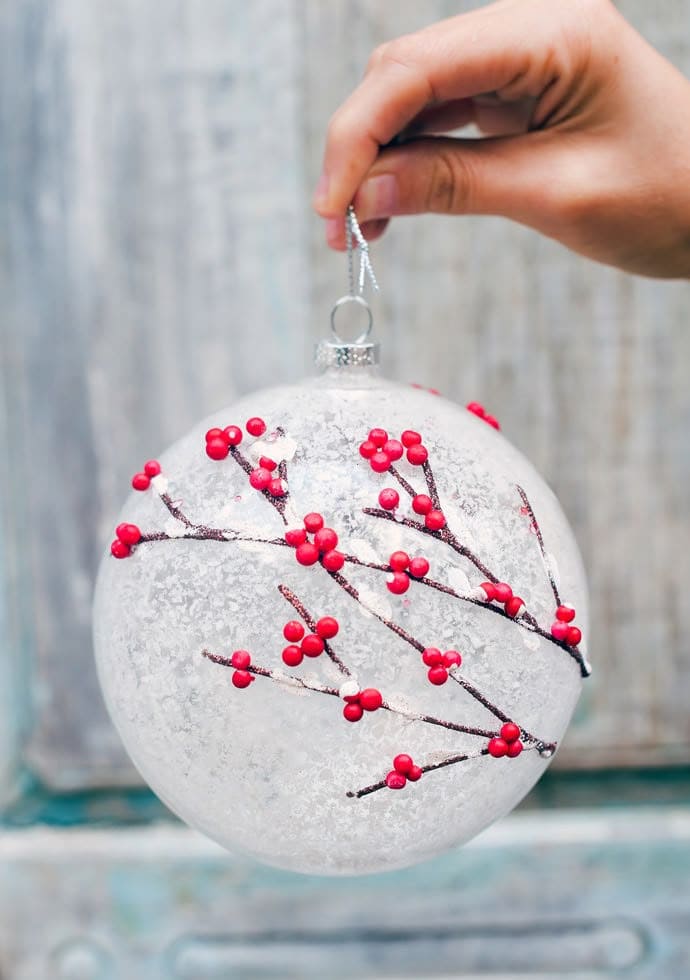
Wow, this frosted ornament captures the quiet beauty of winter like a frozen morning walk where berry-laced branches glisten in the early light.
Specially, the translucent effect, textured ice finish, and crimson berries work together to create something that feels both delicate and timeless.
Materials Needed:
- 1 clear plastic or glass ornament
- White frost spray
- Brown acrylic paint
- Miniature red beads
- Clear-drying craft glue
- Fine paintbrush
Step-by-step Guide:
Step 1: Start by unscrewing or removing the top of the ornament. Then lightly spray the inside with frost spray or roll it around with faux snow glue until the interior looks evenly frosted.
Step 2: Using a thin brush, paint or draw delicate branch lines across the outside of the ornament with brown paint.
Step 3: Add a tiny drop of clear glue to branch tips and gently press red beads or faux berries into place.
Step 4: Once all embellishments are set, replace the ornament top and finish with a silver or twine ribbon for hanging.
#20. Sparkling Starburst Ornament
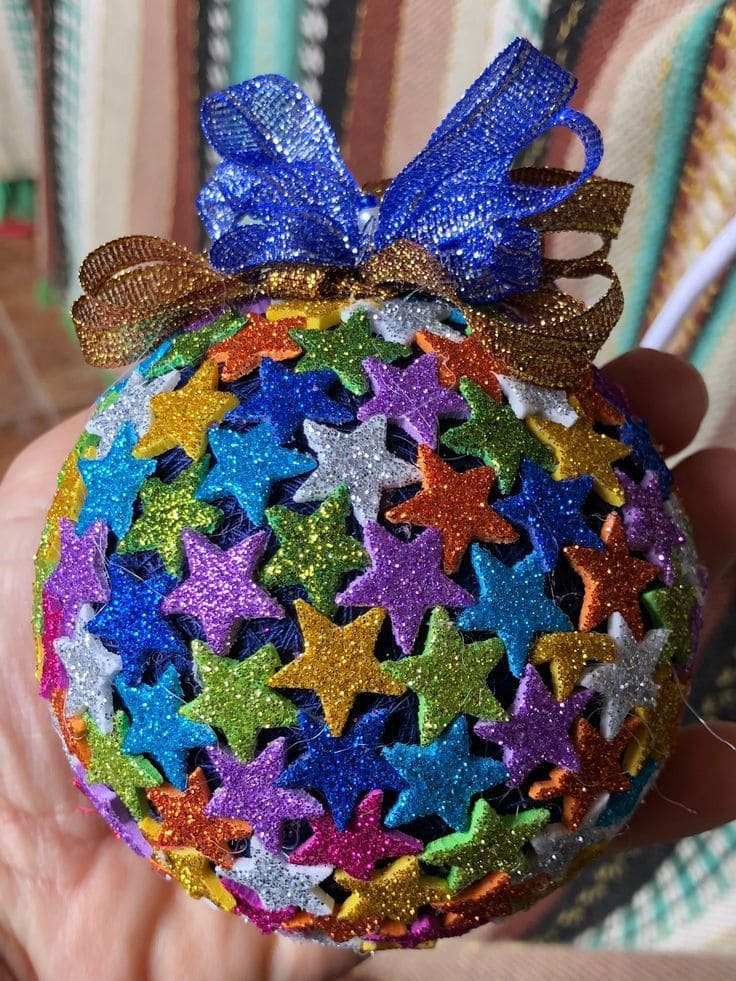
This ornament feels like a celebration in your hand due to every angle catching the light with its rainbow of glittery stars.
Moreover, it’s the kind of piece that says, “Go big, go bright, and let your tree shine like the night sky.” Perfect if you want a bold, cheerful look that kids and your inner child will love.
Materials Needed
- 1 foam ornament ball (3-4 inches)
- 60 glitter foam star stickers
- Hot glue gun and glue sticks
- Ribbon (1 blue, 1 gold, wired preferred)
- Hanging hook
Step-by-step Guide
Step 1: Start by peeling the backing off each star and sticking them snugly around the foam ball, overlapping edges slightly. For extra hold, you can dot a bit of hot glue under each star.
Step 2: Keep working your way around the ornament until it’s fully covered.
Step 3: Make two small bows from the ribbons and glue them to the top of the ornament for a festive finishing touch.
Step 4: Insert a hanger or glue a looped string to the top so it’s ready for the tree. And just like that, you’ve made a party-ready planet of sparkle.
