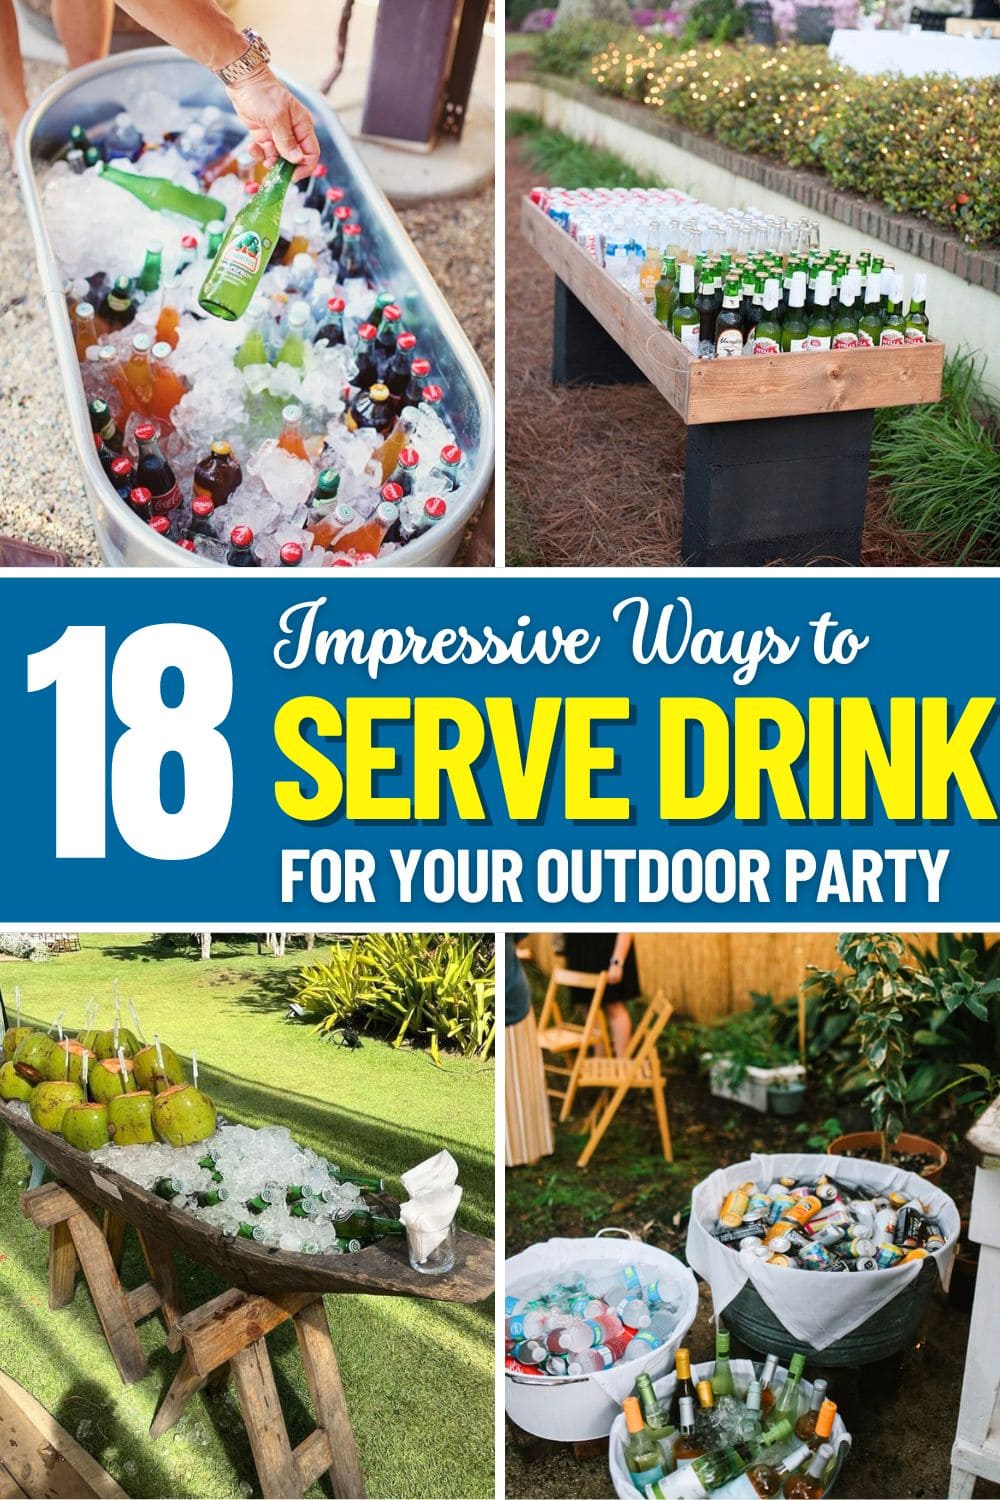
Last summer, I hosted a backyard gathering that was nearly perfect except for the drink situation.
Bottles floated in a too-small cooler, ice melted faster than we could refill it, and guests had to awkwardly ask where to find water or soda. It was chaotic, messy, and honestly, kind of stressful.
This year, I promised myself: no more soggy labels or half-warm beers. So I started collecting creative, low-effort drink serving ideas that not only kept everything ice-cold but also added charm to the party.
From rustic wheelbarrows to stylish bar carts, these 18 outdoor drink stations are the perfect mix of practicality and visual wow.
#1. Tropical Canoe Drink Station
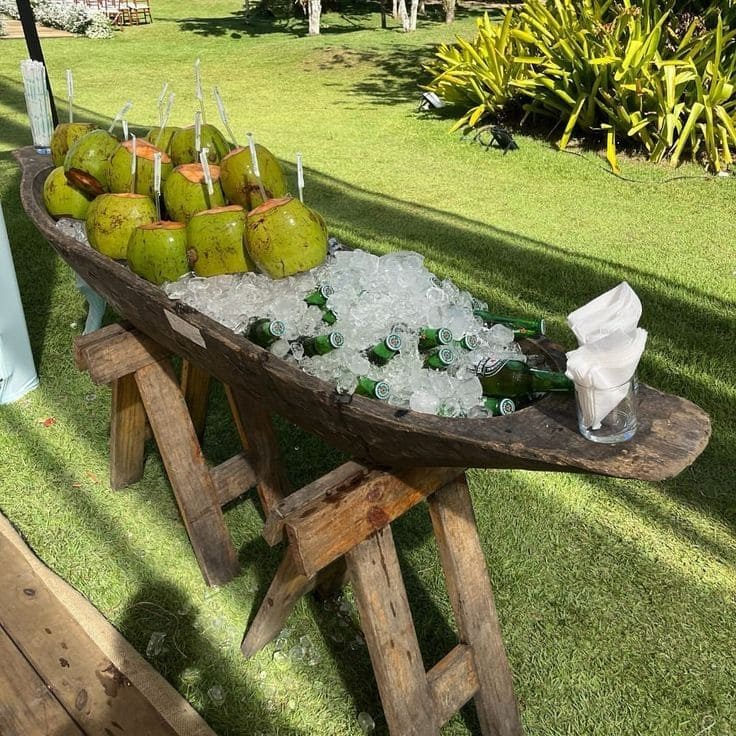
If you’re hosting an outdoor bash and want something both practical and wildly impressive, this drink station will steal the spotlight.
Using a hollowed wooden canoe or dugout on sturdy sawhorses, you can turn a rustic vessel into a functional, frosty refreshment bar. It’s simple, unexpected, and instantly makes your party feel like a holiday.
Materials Needed:
- 1 wooden canoe or dugout (approx. 5–7 ft long)
- 2 wooden sawhorses (standard 30” height)
- Ice (approx. 30–50 lbs)
- 12–18 fresh coconuts
- 12–24 glass or plastic drink bottles
- Optional: waterproof liner or tarp, napkins, straw container
Step-by-Step Guide:
Step 1: Place the canoe securely across two sawhorses. Make sure it balances evenly and is sturdy.
Step 2: If the canoe isn’t sealed, line it with a plastic tarp to prevent leaks before adding ice.
Step 3: Pour in ice to fill half the depth. Tuck in chilled coconuts on one side, then arrange bottles on the other.
Step 4 (Optional): Add rolled napkins in a small glass, toss in extra straws, and let your guests help themselves!
#2. Wheelbarrow Drink Cooler
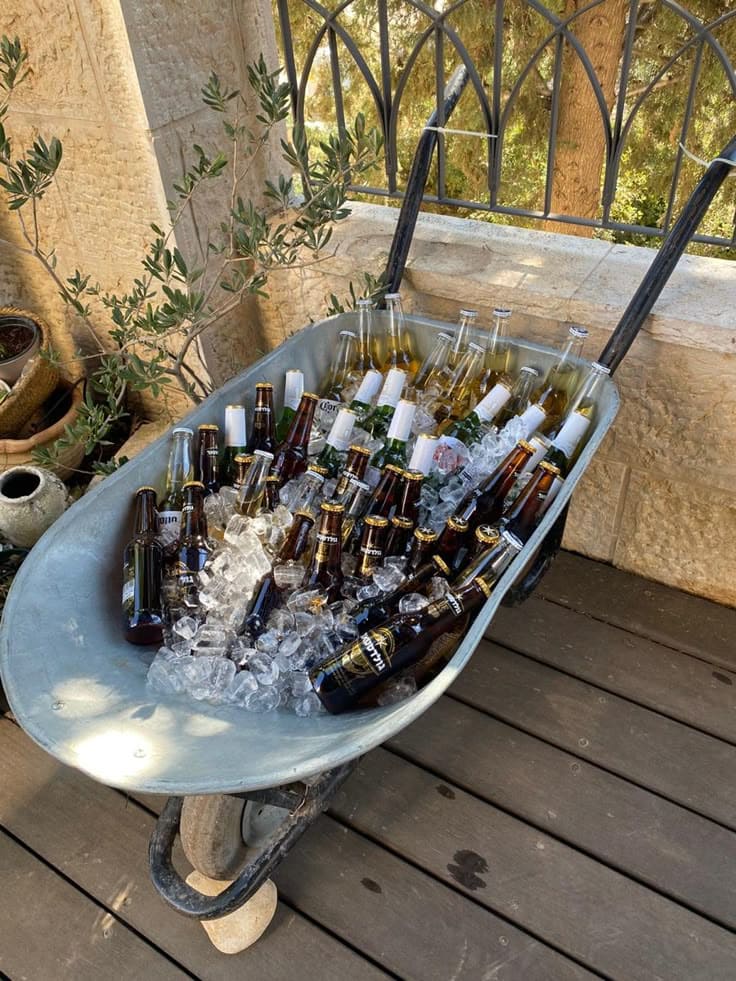
Here’s a clever way to serve drinks that feels effortless. Turning an old wheelbarrow into an ice-packed bar brings a rustic, laid-back vibe to any outdoor party.
It’s nostalgic, practical and surprisingly roomy, perfect for keeping beers and sodas within reach all day. Plus, it’s mobile, which means you can roll it wherever your guests are lounging.
Materials Needed:
- 1 clean wheelbarrow
- 30–40 lbs of ice cubes
- 30–40 bottled drinks (beer, soda, sparkling water)
- Optional: dish towel, tongs, or bottle opener attached nearby
Step-by-Step Guide:
Step 1: Hose down or wipe the wheelbarrow thoroughly to make sure it’s clean and rust-free.
Step 2: Position it in a shaded spot or near your main seating area for easy access.
Step 3: Fill the bottom with ice, layering in bottles as you go so everything stays evenly chilled.
Step 4: Add a towel draped over one handle for guests to dry their hands, and don’t forget to place a bottle opener nearby for convenience.
#3. Terracotta Drink Cooler for Outdoor Charm
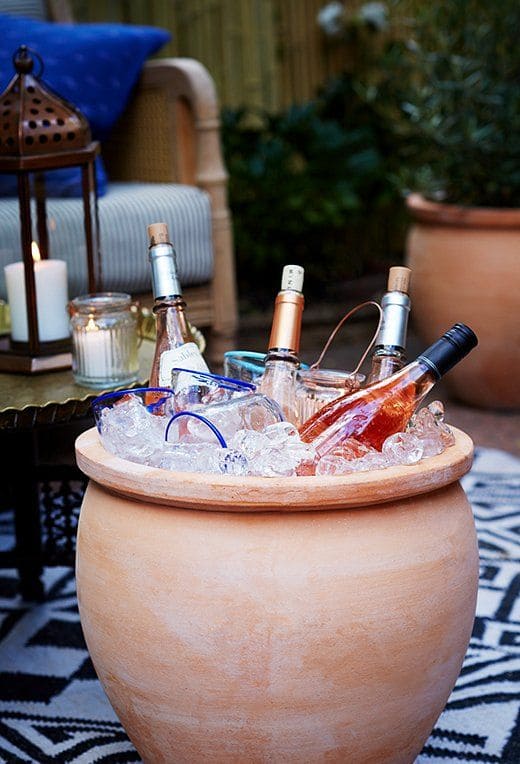
There’s something earthy about using a terracotta planter as your drink cooler. It adds that Mediterranean touch to your patio while keeping your beverages refreshingly chilled.
This setup is perfect for intimate garden gatherings or sunset cocktails. You just need a beautiful pot, plenty of ice and your favorite wine or spritzes.
Materials Needed:
- 1 large terracotta planter (18–24″ diameter)
- 1 plastic liner or bucket
- Ice (about 10–15 lbs)
- Bottled drinks (6–8 bottles of wine, soda, or beer)
- Optional: folded towel or cork pad
Step-by-Step Guide:
Step 1: Place a plastic liner or waterproof bucket inside the terracotta pot to prevent leaks.
Step 2: Add a folded towel or cork pad at the bottom to help cushion the bottles.
Step 3: Fill with ice until it reaches two-thirds full.
Step 4: Nestle your drinks into the ice and let the rustic charm do the rest. Set it beside a lounge chair, light a candle, and enjoy the vibe.
#4. Rustic Wheelbarrow Drink Bar
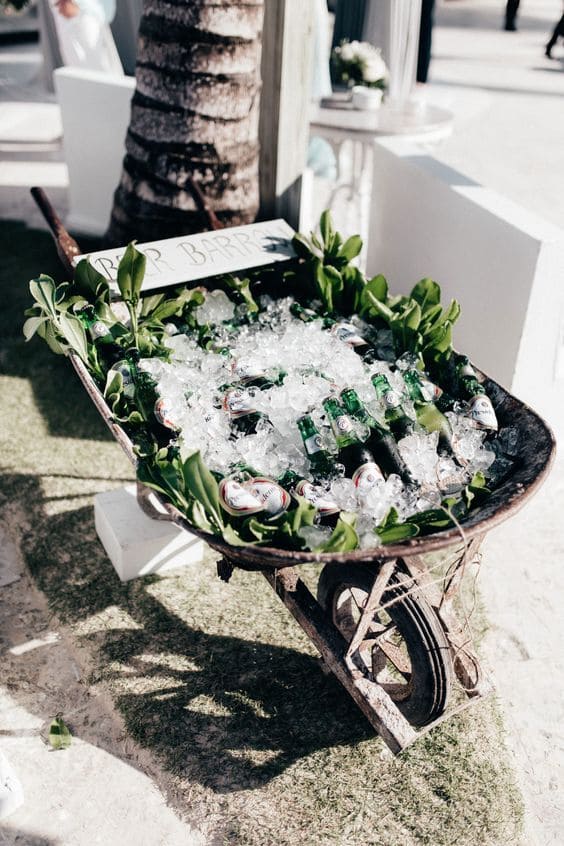
If you’re looking for a refreshingly quirky way to serve drinks outdoors, an old wheelbarrow can become the life of the party.
This rustic bar setup is perfect for beach weddings, backyard BBQs, or tropical brunches. With some greenery tucked along the sides and a heaping scoop of ice, it keeps your beverages cold and your decor charmingly casual.
Materials Needed:
- 1 vintage or unused wheelbarrow
- 1 heavy-duty plastic liner
- Crushed ice (15–20 lbs)
- 20–30 bottled drinks (beer, soda, or sparkling water)
- Fresh tropical leaves or vines
- Optional: wood sign
Step-by-Step Guide:
Step 1: Line the inside of the wheelbarrow with a plastic sheet or trash bag to avoid rust or leaks.
Step 2: Add decorative greenery like monstera, banana leaves, or fresh ivy around the edge for that lush, party-ready look.
Step 3: Pour in the crushed ice and arrange your bottled drinks upright so guests can easily grab them.
Step 4: Place a sign for a fun finishing touch, then park it in the shade and let it impress.
#5. Backyard Party Cooler in a Kiddie Pool
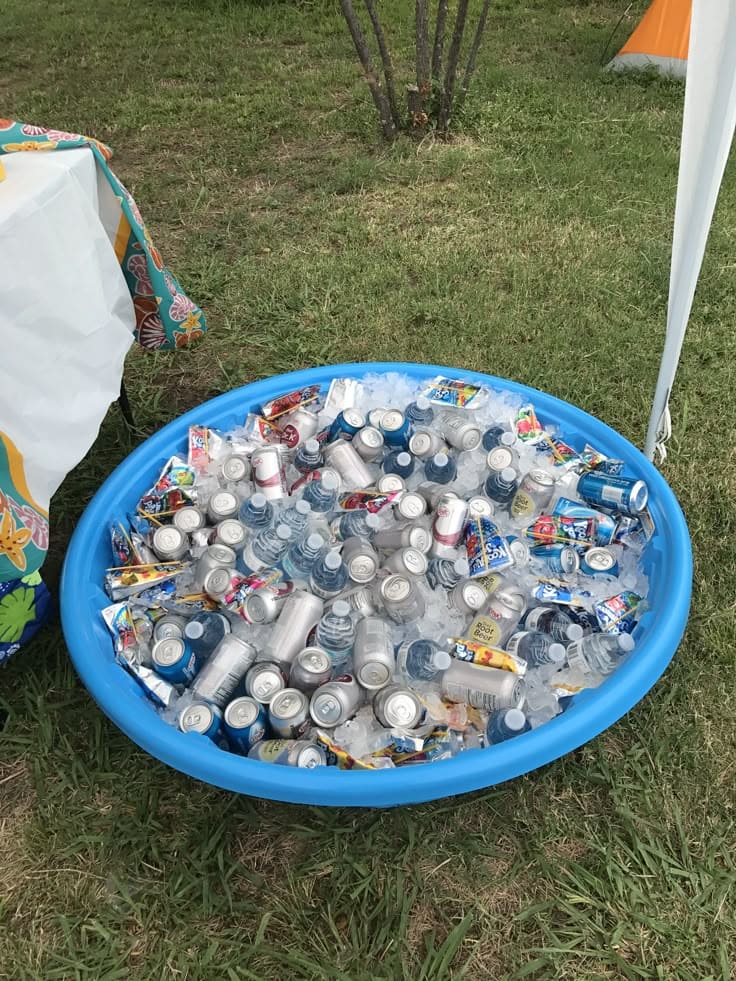
Sometimes the best solutions are hiding in plain sight. A plastic kiddie pool transforms into the ultimate mega drink station, perfect for summer birthdays, BBQs, or casual family reunions.
It’s low-cost, easy to set up, and big enough to hold all the sodas, waters, juice boxes, and adult beverages your guests could want.
Materials Needed:
- 1 plastic kiddie pool (approx. 3–4 feet wide)
- 30–40 lbs of crushed ice or ice bags
- Assorted drinks: soda cans, water bottles, juice pouches, beer, etc.
- Optional: A tarp or liner
Step-by-Step Guide:
Step 1: Place the kiddie pool in a shady, level spot in your backyard or under a tent.
Step 2: If you’re on a lawn, add a liner underneath to prevent soggy grass. Then pour in the ice.
Step 3: Spread your drinks out evenly over the ice, mixing in cans, bottles, and pouches for easy access.
Step 4: Top off with more ice if needed, and watch everyone flock to your laid-back, genius cooler setup.
#6. Simple Galvanized Tub Cooler Stand
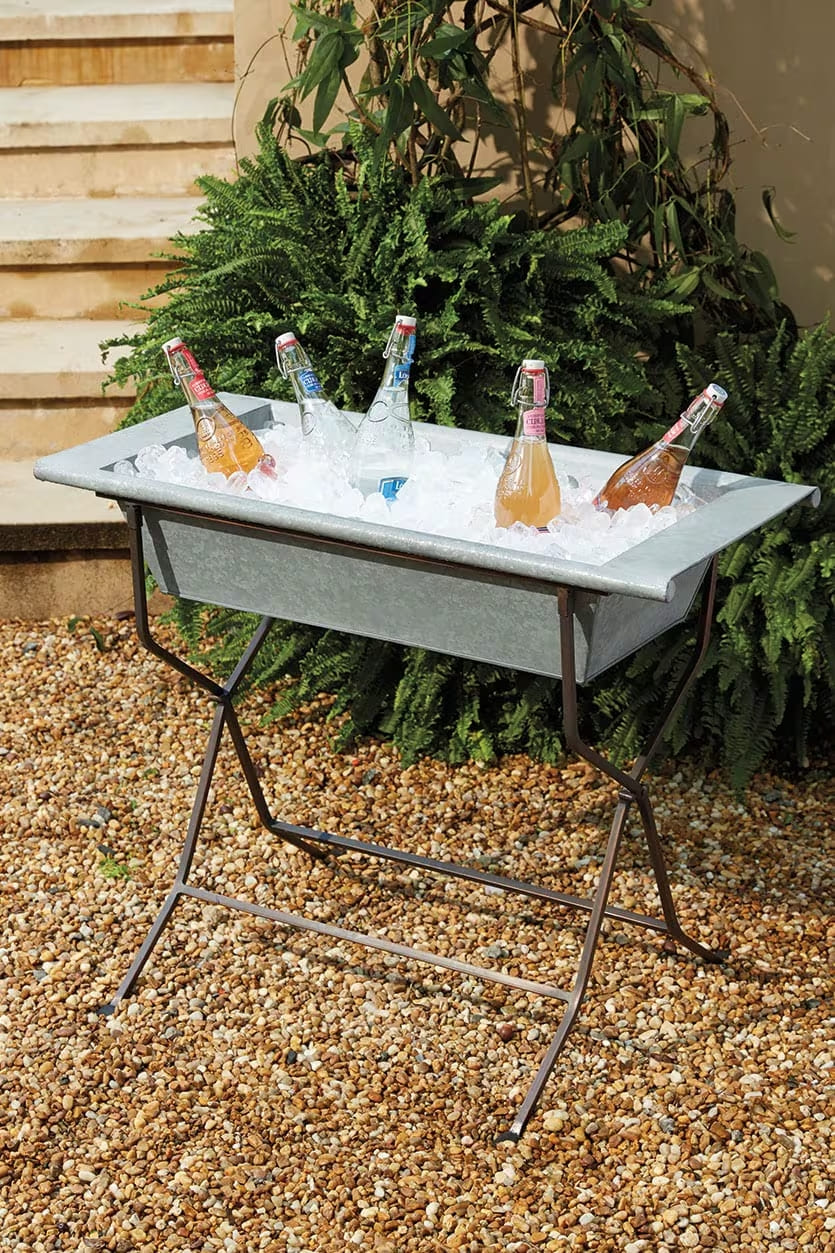
Sometimes, all you need is a clean, simple way to serve drinks that feels effortless but looks polished. This galvanized tub cooler on a stand fits beautifully into outdoor setups.
The industrial-meets-rustic vibe makes it both functional and chic, and it’s surprisingly easy to recreate.
Materials Needed:
- 1 galvanized metal tub (approx. 36″ length x 18″ width x 9″ depth)
- 1 metal folding stand
- Optional: plastic liner
- 15–20 lbs of ice
- 6–12 bottles or drinks
Step-by-Step Guide:
Step 1: Choose a flat surface in your garden or patio where the stand won’t wobble. Make sure the stand matches the size of your tub.
Step 2: Insert the galvanized tub onto the stand. If you’re concerned about leaks or condensation, add a plastic liner or shallow drip tray underneath.
Step 3: Fill the tub halfway with ice, then nestle in your favorite beverages, think fruity bottled sodas, wine spritzers, or craft beer.
Step 4: Add a few garnishes (like citrus slices or herbs) for a decorative touch.
#7. Oil Drum Party Table with Drink Bucket
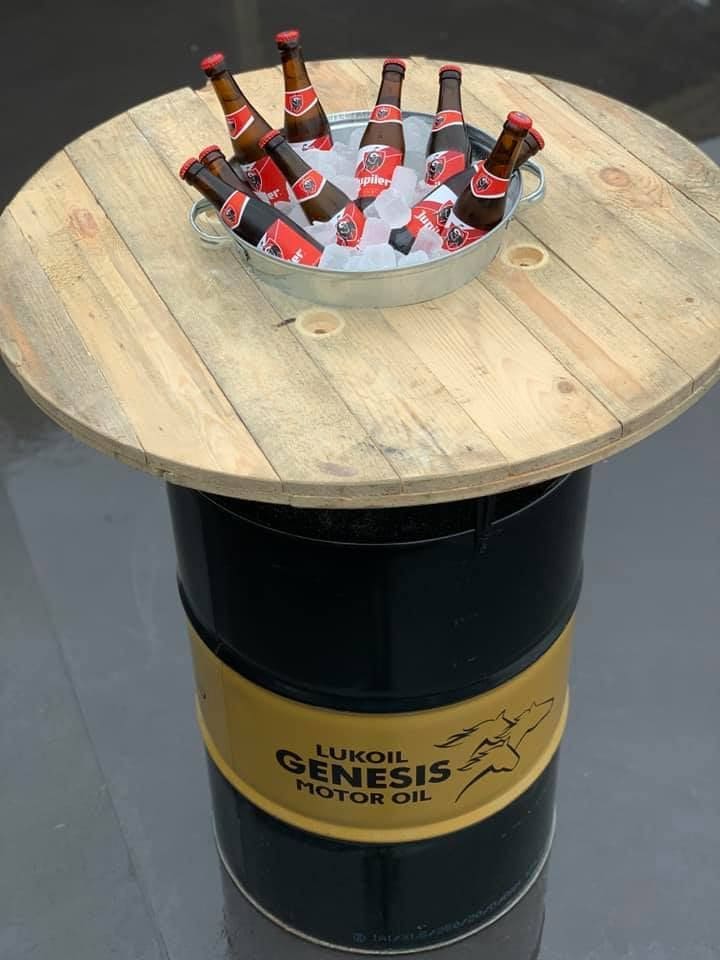
Turning an industrial oil drum into a rustic drink station is one of those upcycle projects that hits the perfect mix of cool and practical.
With a round wooden tabletop and a galvanized ice bucket at its center, this setup serves as both a conversation starter and a functional drinks cooler.
Materials Needed:
- 1 clean, empty oil drum (standard 55-gallon size)
- 1 round wood tabletop (approx. 36–40 inches in diameter)
- Galvanized metal drink tub (about 12–14 inches diameter)
- Screws
- Jigsaw
- Drill
- Sandpaper
- Ice and drinks (beer, soda, juice)
Step-by-Step Guide:
Step 1: Cut a circular hole in the center of your wooden tabletop. It should be slightly smaller than the drink tub’s rim to hold it snugly.
Step 2: Sand the edges of the tabletop, then stain or seal it if you want extra weather resistance or color.
Step 3: Secure the tabletop to the oil drum using screws or strong adhesive. Make sure it’s centered and stable.
Step 4: Place the tub into the cutout, fill it with ice, and load up your favorite beverages.
#8. Wicker Basket Beer Cooler on a Stand
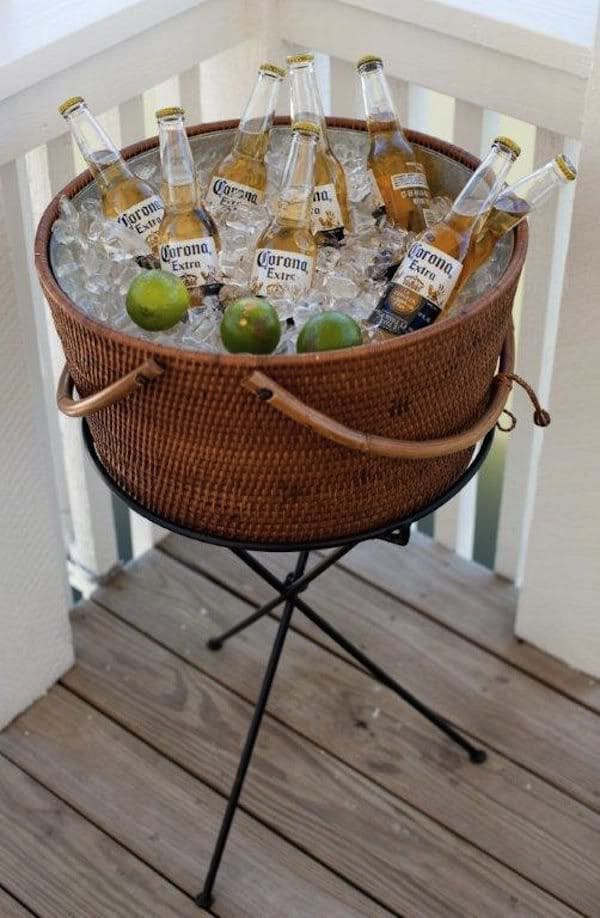
If you’re aiming for a laid-back but classy summer setup, this drink station made from a woven basket and metal stand brings the beach vibes straight to your porch or deck.
Perfect for holding a few bottles of cold beer and some limes on ice, it’s compact, elegant, and super easy to put together. You’ll love how it blends with your natural decor.
Materials Needed:
- 1 medium to large round wicker basket
- Metal folding stand or plant stand
- Plastic liner
- 1–2 bags of crushed ice
- 8–10 bottled drinks (beer, soda, sparkling water)
- 3–4 fresh limes or lemons
Step-by-Step Guide:
Step 1: Make sure your wicker basket is lined with a waterproof container. A plastic mixing bowl works great inside.
Step 2: Place the basket securely on the metal stand. Test for balance and sturdiness.
Step 3: Add crushed ice to fill about two-thirds of the basket.
Step 4: Nestle your drinks into the ice and place halved limes on top for a pop of color and easy access.
#9. Giant Tire Drink Cooler
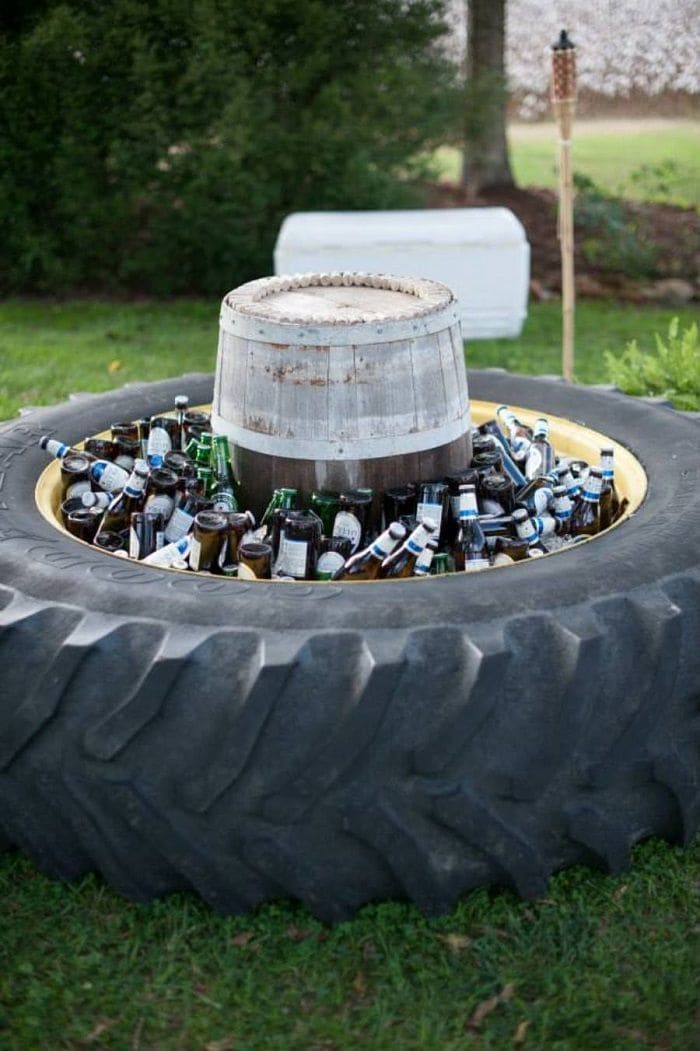
This outdoor drink station is as rugged as it is resourceful. If you’ve got access to a massive tractor tire, you can turn it into a heavy-duty cooler that makes a bold statement at any backyard party.
The center holds heaps of ice and bottles while the barrel in the middle acts as a quirky table or anchor piece.
Materials Needed:
- 1 large tractor tire (approx. 3–4 ft in diameter)
- 1 wine or whiskey barrel (optional)
- Heavy-duty plastic liner
- 30–50 lbs of bagged ice
- 30–40 bottles or cans of drinks
Step-by-Step Guide:
Step 1: Clean out the inside of the tire thoroughly and lay a waterproof liner inside the cavity to prevent leaking.
Step 2: Add a generous amount of ice around the base, filling in the ring around the barrel.
Step 3: Nestle your drinks into the ice, stacking them in layers if needed. Refill ice as the party goes on.
#10. Galvanized Tub Bar
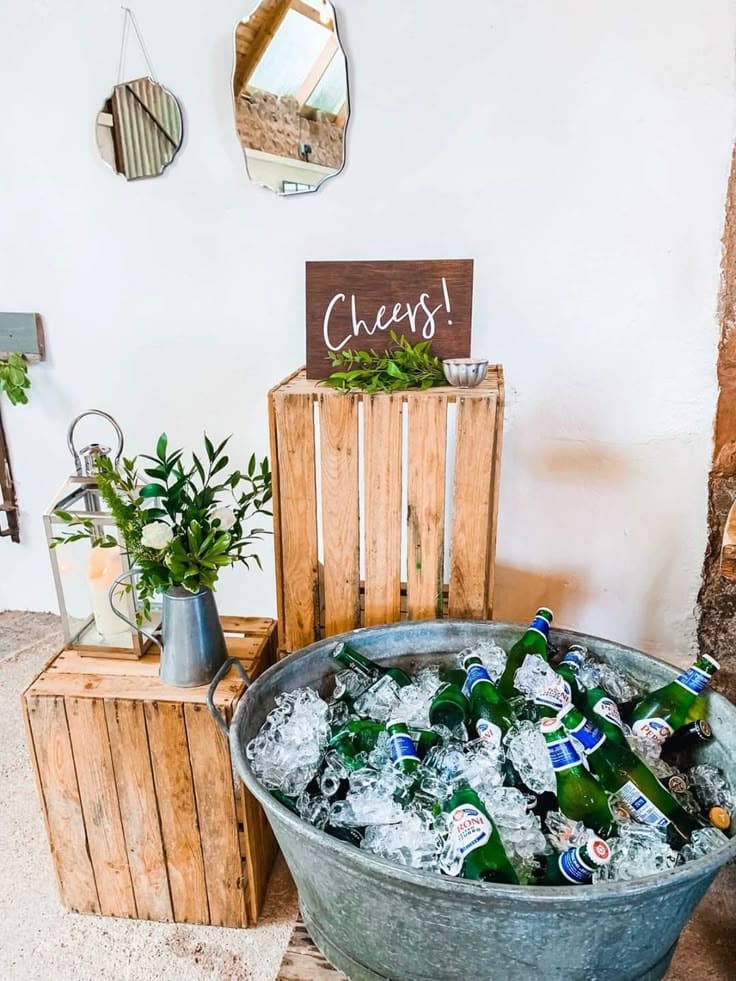
When all you want is a no-fuss, charming way to keep your drinks chilled, this galvanized tub trick works wonders.
Just add a sweet little sign and a few sprigs of greenery and suddenly you’ve turned a metal tub into the heart of your beverage station.
Materials Needed:
- 1 large galvanized tub (20–25 gallons recommended)
- Crushed or cubed ice (20–30 lbs)
- 20-30 assorted bottled drinks (beer, soda, water)
- Optional: wooden crates, greenery, signboard, or flowers
Step-by-Step Guide:
Step 1: Rinse the tub and place it on a sturdy, flat surface as wooden crates underneath can elevate it for easier access and better presentation.
Step 2: Fill about halfway with ice, then add bottles. Continue layering ice and bottles until the tub is full and chilled evenly.
Step 3: Add simple décor like a small chalkboard sign, a flower jug, or even a few fresh herbs to make it look more curated.
#11. Chic Farmhouse Beverage Station with Galvanized Tubs
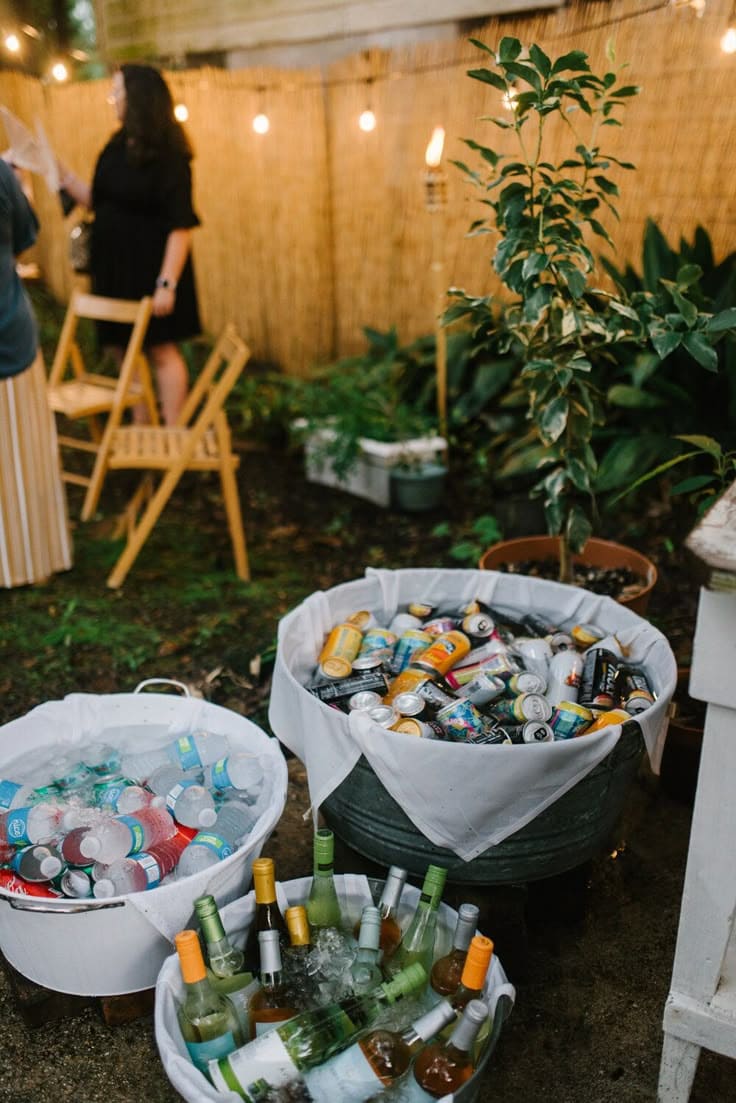
There’s something undeniably charming about keeping your drinks cold in vintage-style galvanized tubs.
Add a crisp linen liner, and suddenly your backyard beverage setup feels like it came straight from a rustic wedding or a Pinterest-perfect picnic.
Materials Needed:
- 3 galvanized tubs
- 3 white or neutral linen/cotton cloths (approx. 3 ft. x 3 ft.)
- 40–50 lbs of ice
- Variety of drinks: beer, soda cans, bottled water, white wine
Step-by-Step Guide:
Step 1: Place each tub on a stable surface like a wooden crate or the ground. Drape a linen cloth inside each tub, letting it spill gently over the rim.
Step 2: Add a generous layer of ice in each tub, keeping the cloth snug around the sides.
Step 3: Group your drinks by type including wine, soda, and water to make it easier for guests to find what they want.
#12. Rustic Log Drink Trough
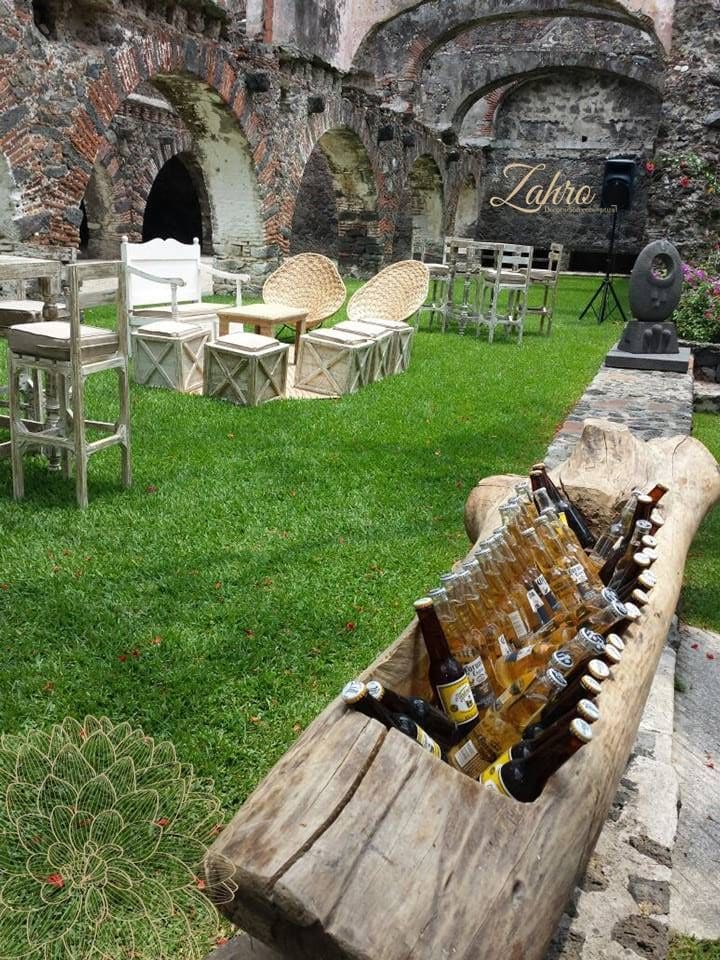
Carved from a single hollowed-out tree trunk, this log cooler is a natural showstopper that looks like it belongs in a countryside celebration.
Also, the wood keeps the drinks cool longer, especially when packed with ice and the aesthetic can’t be beat as it’s like bringing the forest to your backyard.
Materials Needed:
- 1 hollowed-out log (approx. 4–6 ft long, 12–18 inches deep)
- Optional: food-safe sealant
- Crushed ice (15–25 lbs)
- 20–30 bottled beverages (beer, soda, etc.)
Step-by-Step Guide:
Step 1: Clean out the log thoroughly, and if desired, seal the inside with a food-safe waterproof coating to help preserve the wood.
Step 2: Position the log securely on bricks, wood blocks, or directly on flat ground for stability.
Step 3: Fill the log with a thick layer of crushed ice, making sure it reaches all corners.
#13. Rustic Raised Drink Trough Table
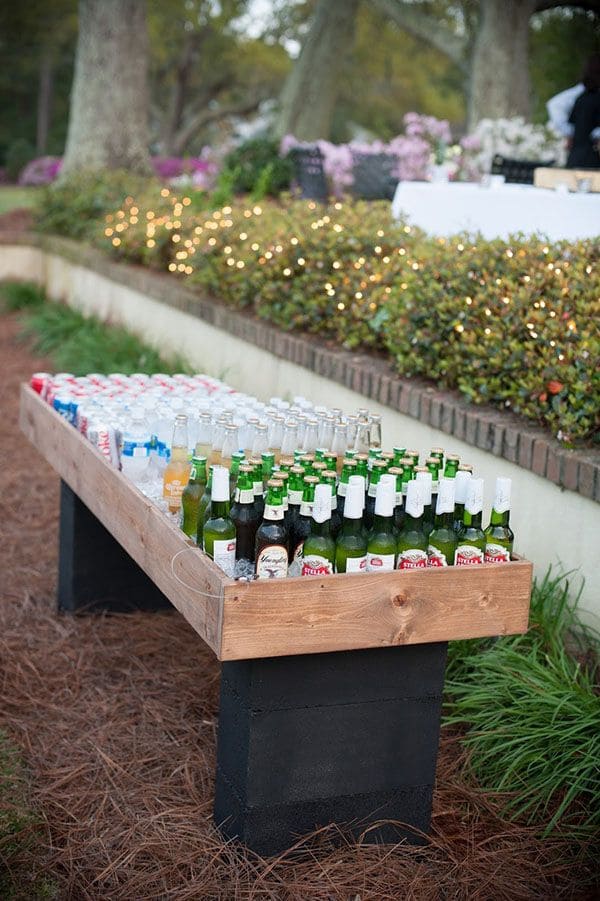
Built like a long, rustic bench with a trough carved right in, this setup keeps your drinks chilled and accessible while looking polished and handmade.
It’s perfect for weddings, garden parties or even casual outdoor dinners when you want guests to feel relaxed but wowed.
Materials Needed:
- 1 wooden trough or build with: 2 side panels: 6′ long x 8″ high, 2 end panels: 18″ wide x 8″ high and 1 bottom panel: 6′ x 18″
- Waterproof liner
- Ice – approx. 80–100 lbs
- Cinder blocks (height: 18–24″)
- Wood screws, drill, and sealant
Step-by-Step Guide:
Step 1: Cut and assemble your wooden trough frame using wood screws. Make sure the bottom fits snugly and is well-supported.
Step 2: Line the inside with a waterproof barrier to prevent leaks. Use a staple gun to secure the liner, then fold neatly along the corners.
Step 3: Attach the cinder blocks or sturdy wooden legs at both ends for elevation. Ensure stability and levelness.
Step 4: Add ice and arrange drinks by type. Use clear signage or markers to help guests navigate.
#14. DIY Pallet Coffee Table with Built-In Drink Cooler
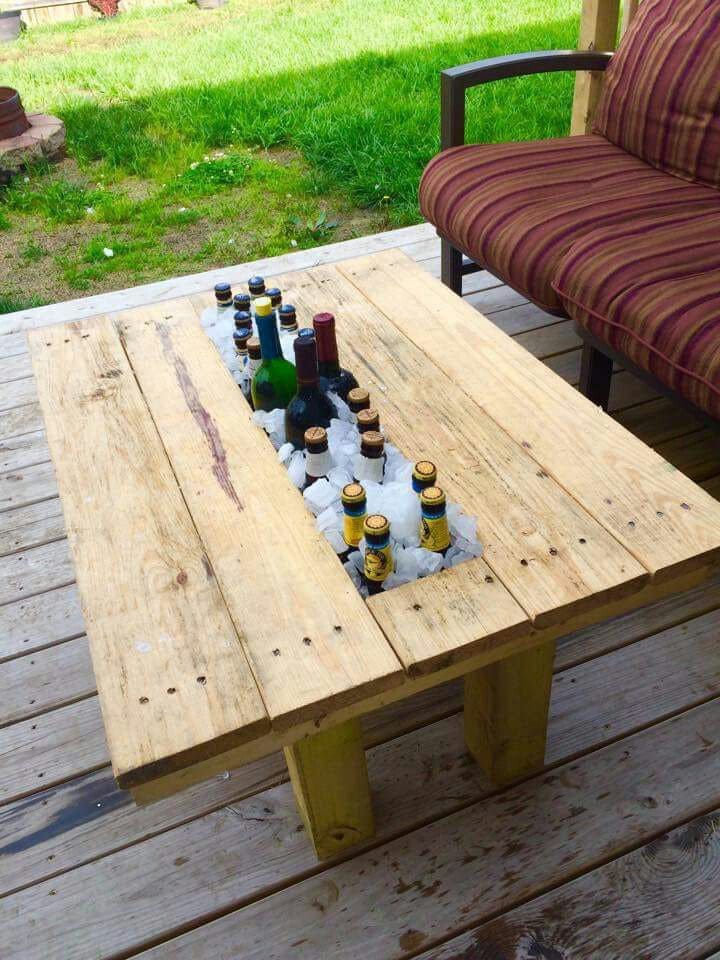
This rustic pallet coffee table doubles as a clever built-in cooler, making your outdoor hangout spot a whole lot cooler.
The center trough lined with ice is perfect for chilling bottles of beer, wine, or soda. It’s an ideal way to keep drinks close without needing to run back and forth to the kitchen.
Materials Needed:
- 1 wooden pallet
- 4 wooden legs (4×4 posts)
- 1 narrow metal or plastic trough (approx. 3′ long x 6″ wide x 6″ deep)
- Screws and wood glue
- Power drill
- Sandpaper
- Wood stain (optional)
- 2 bags of ice
- 12–15 bottles of drinks
Step-by-Step Guide:
Step 1: Build the tabletop using planks or a repurposed pallet. Leave an open gap in the center, sized to fit your trough.
Step 2: Sand the wood thoroughly to remove splinters and rough edges. Apply stain or sealer if desired for a polished look and extra durability.
Step 3: Attach sturdy legs to each corner of the table using screws and wood glue.
Step 4: Insert the trough snugly into the center gap. Make sure it’s level and well-supported underneath.
#15. Vintage Wagon Drink Station
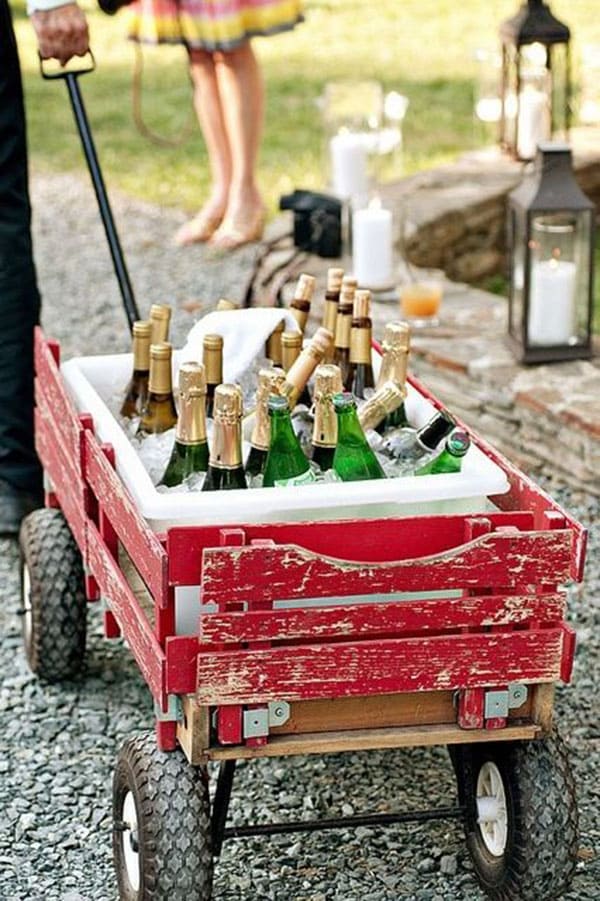
If you’ve got an old red wagon gathering dust in the garage, give it new life as a charming drink cooler.
This idea brings a nostalgic flair to your backyard party while being super practical, you can roll it wherever the action is.
Materials Needed:
- 1 vintage-style wagon (around 30–36″ long)
- 1 plastic tub (approx. 20″ x 14″)
- 20–30 lbs of ice
- 12–24 bottles of your favorite drinks
- Clean towel or bar napkins
Step-by-Step Guide:
Step 1: Clean the wagon thoroughly. If you like the rustic look, keep the aged paint; otherwise, a quick coat of spray paint can refresh the style.
Step 2: Place a plastic tub inside the wagon to catch any melting ice and avoid leaks. Make sure it fits snugly.
Step 3: Fill the tub with bottles and layer in ice until everything’s perfectly chilled and nestled.
#16. Classic Country Drink Station
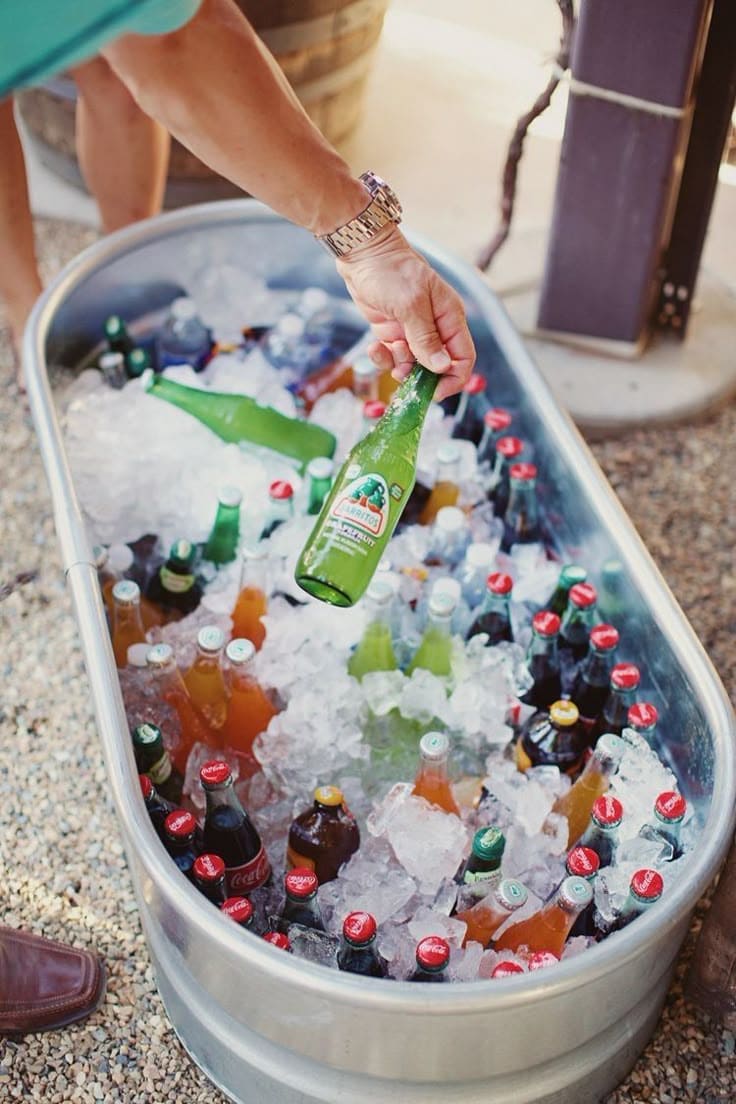
If you want to serve drinks in a way that feels effortless but still makes a big impression, this galvanized trough setup hits the mark.
It has that timeless country charm and is incredibly functional, holding dozens of bottles and keeping them ice-cold all afternoon.
Materials Needed:
- 1 galvanized metal trough (approx. 36–48 inches long, 12–18 inches deep)
- 60–80 lbs of crushed ice
- 30–40 assorted bottled drinks (sodas, juices, beer)
- Optional: a small scoop
Step-by-Step Guide:
Step 1: Set the trough on a flat surface, preferably in a shaded area. If needed, elevate it on crates or a bench to make it more accessible.
Step 2: Fill the bottom with a layer of ice, then start adding your drinks in organized rows.
Step 3: Pour the remaining ice on top, tucking it around the bottles to keep everything chilled evenly.
#17. Mr. and Mrs. Drink Bar Cooler

When you’re throwing a celebration with character, this Mr. & Mrs. dual-bin drink station is a charming and practical way to serve chilled beverages.
Whether it’s wine for the grown-ups or sodas for the crew, this setup makes it easy to keep things organized and stylish.
Materials Needed:
- 1 dual-bin metal cooler cart
- Vinyl decals or hand-painted “Mr.” and “Mrs.” labels
- 2–3 large bags of ice
- 12–14 wine bottles and/or soda cans
- Optional: bottle opener, small towel, or drink tags
Step-by-Step Guide:
Step 1: Clean both bins thoroughly and dry them before use.
Step 2: Apply the “Mr.” and “Mrs.” labels to each bin. You can paint them by hand, use stencils, or stick on decals.
Step 3: Fill each side with ice, and sort drinks accordingly, alcoholic on one side, non-alcoholic on the other, or by couple’s preference.
#18. Rustic Barrel Beverage Cooler
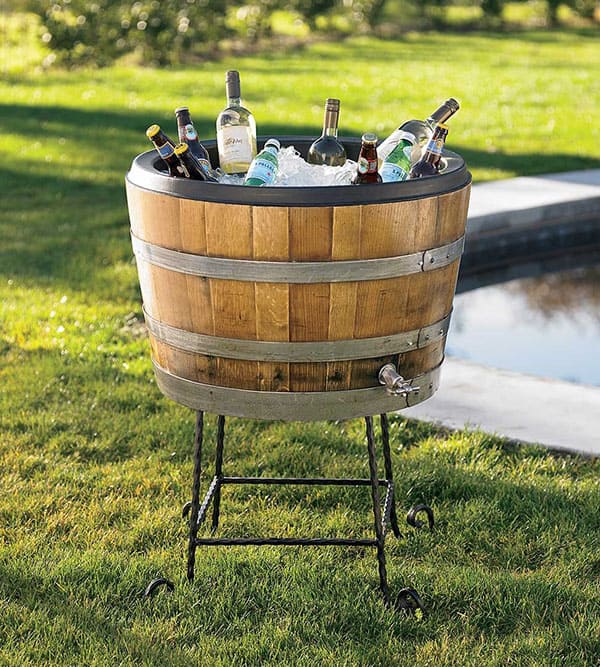
There’s just something undeniably charming about a wooden barrel, especially when it’s brimming with chilled drinks and nestled in the middle of a sun-drenched lawn.
This DIY barrel cooler not only adds vintage vibes to your gathering but also keeps drinks refreshingly cold for hours.
Materials Needed:
- 1 half wine or whiskey barrel (approx. 26” diameter, 18–22” height)
- 1 heavy-duty plastic liner
- Metal or wrought iron stand
- Optional: spigot and drill bit (1 inch)
- 20–30 lbs of ice
- 12–20 bottles or cans of beverages
Step-by-Step Guide:
Step 1: Line the inside of the barrel with a plastic insert to prevent leaks. You can buy a fitted liner or repurpose a large round tub.
Step 2: If you want drainage, install a spigot near the bottom of the barrel. Drill a hole using a 1” bit and fit the spigot securely, sealing it with waterproof caulk.
Step 3: Place the barrel securely on a sturdy stand so it’s easy to access and adds height to your setup.
Step 4: Fill it with drinks and ice just before guests arrive. The wooden barrel will naturally insulate and keep everything crisp and cold for hours.
