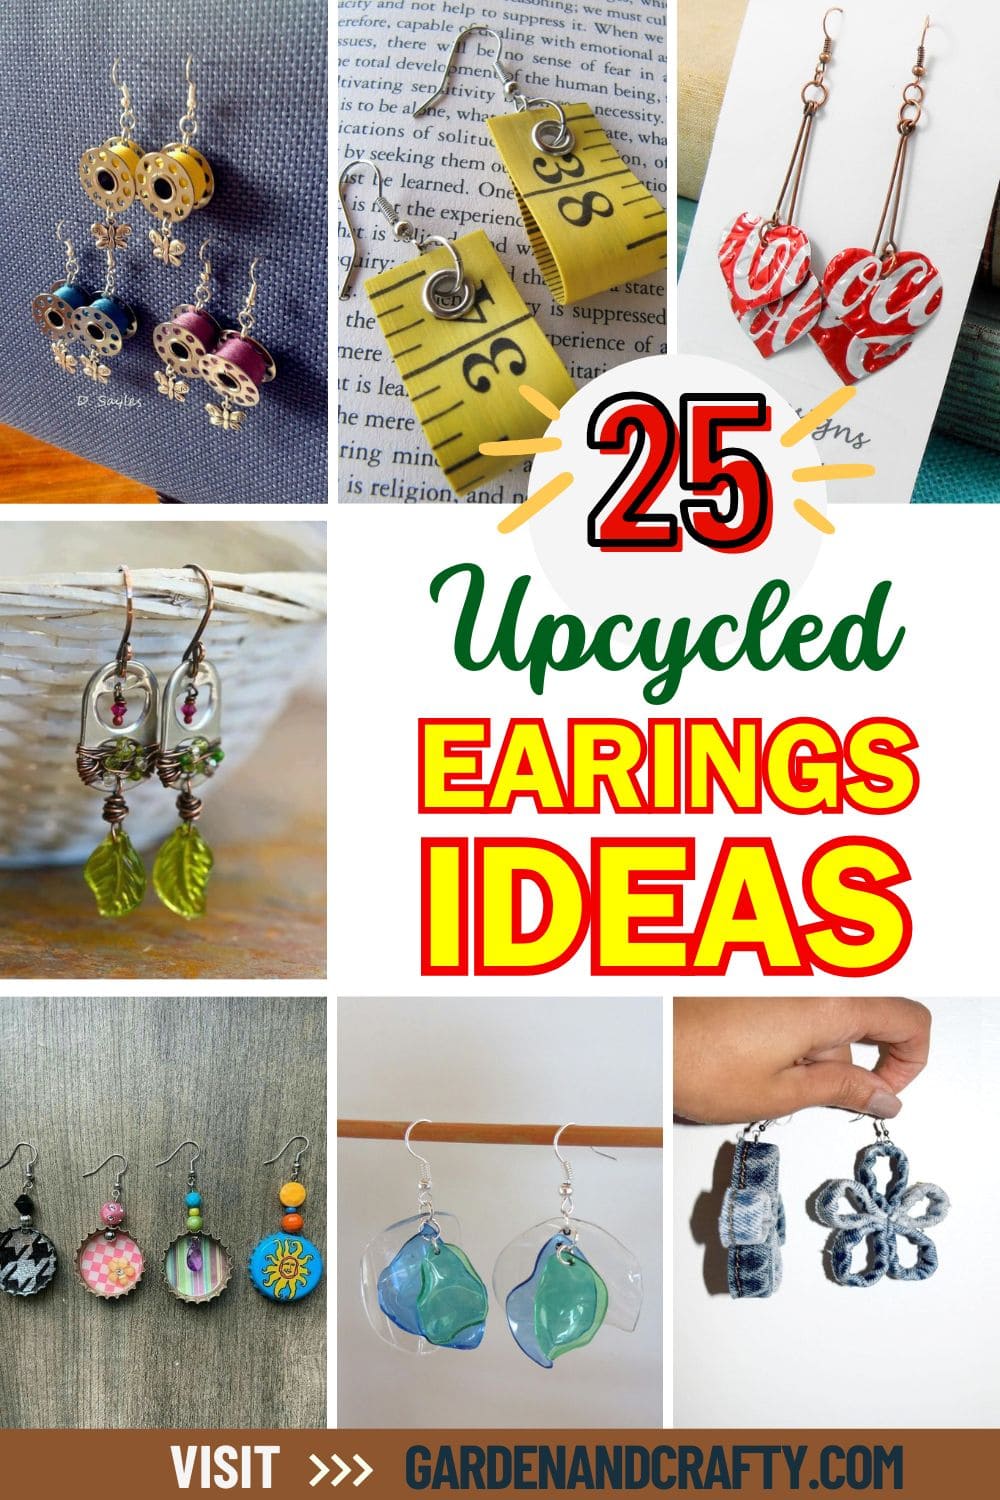
There’s something deeply satisfying about turning trash into treasure, especially when that treasure dangles from your ears and earns compliments all day long.
I still remember the first time I made earrings out of soda tabs; I didn’t expect anyone to notice, but strangers asked where I bought them. That moment sparked a quiet obsession.
With just a few discarded bits like buttons, bottle caps, keys, or even broken watches, you can create earrings that are stylish, meaningful, and earth-conscious.
Whether you’re crafting for fun, for gifts, or to teach sustainability in a creative way, these upcycled earring ideas are proof that beauty can bloom from the bin. Let’s get those hands moving.
#1. Repurposed Bobbin Earrings with Whimsical Charm
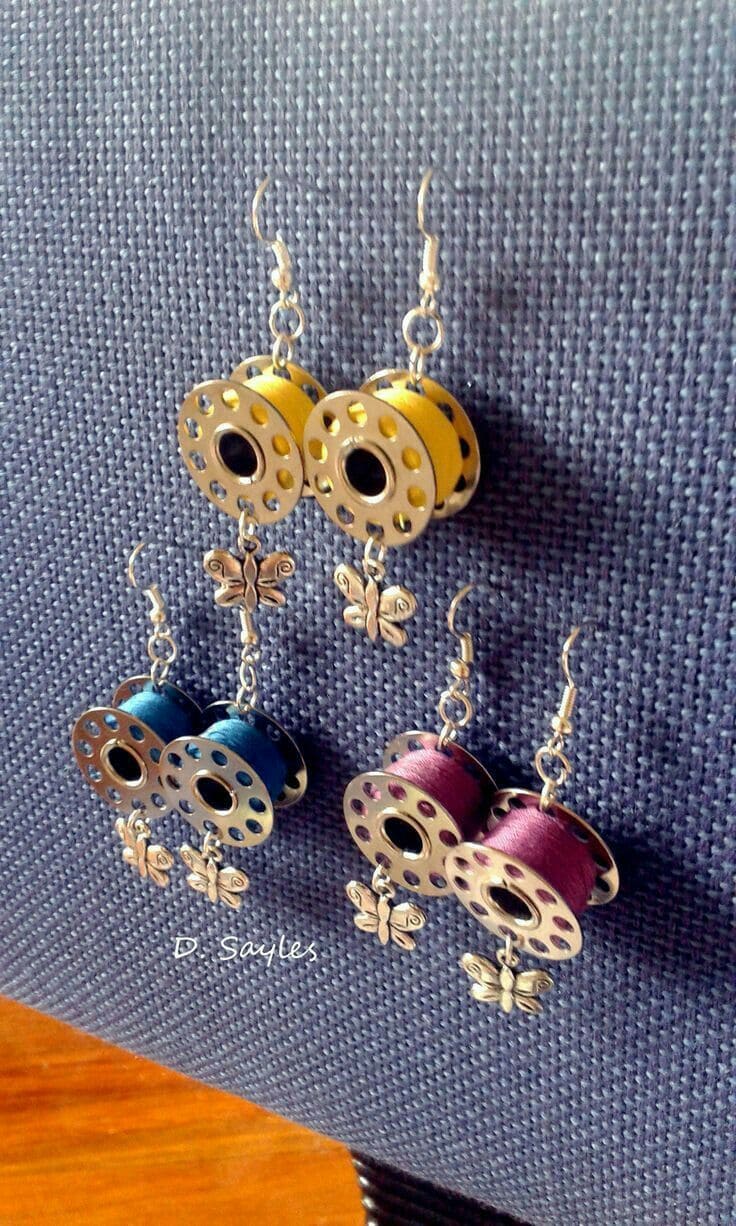
There’s something utterly nostalgic about a sewing bobbin, its tiny shape, those punctuated holes, the soft swirls of thread. So why not turn that vintage charm into wearable art?
Materials Needed:
- 2 empty metal sewing bobbins (standard size, approx. 3/4″ diameter)
- Colored thread (a few feet of each shade you love)
- 2 fish hook earring wires
- 4 jump rings (6–8 mm)
- 2 small butterfly or other shaped charms
- Round nose pliers
- Jewelry pliers
Step-by-step Guide:
Step 1: Wind the thread evenly around the center of each bobbin until it’s pleasantly full, but not bulky. Tie the ends securely and trim the excess.
Step 2: Attach a jump ring through one hole in the bobbin. Connect it to your earring hook using another jump ring.
Step 3: Use another jump ring at the bottom hole to dangle your butterfly charm or another trinket of your choice.
Step 4: Check balance and spacing, then tighten all connections gently with pliers.
#2. Upcycled Tab Earrings with Glass Leaf Charms
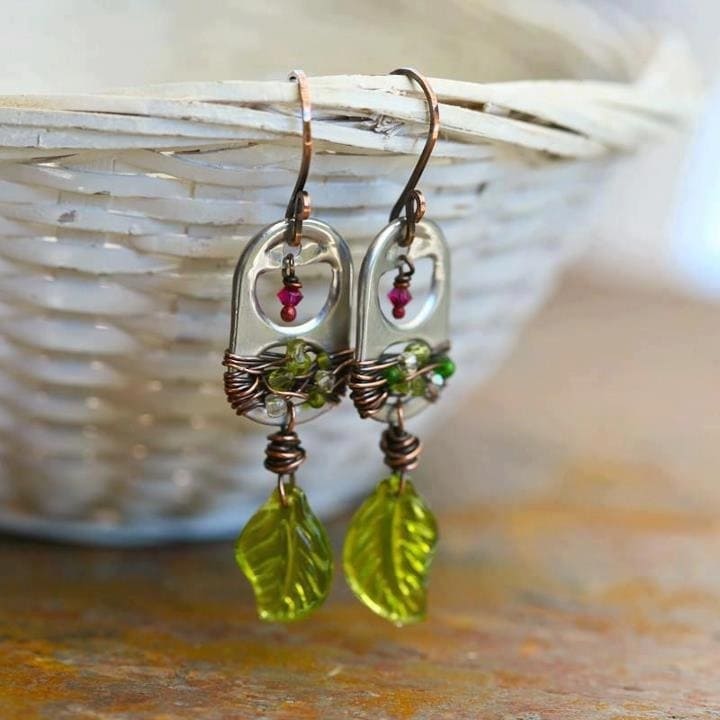
Wrapped in warm copper wire, adorned with beads, and finished with a delicate glass leaf, these earrings feel like something plucked from an enchanted forest.
You get charm, eco-friendliness, and a splash of color, all without spending more than a few dollars.
Materials Needed:
- 2 aluminum can pull tabs (cleaned and smooth edges)
- 2 glass leaf beads (approx. 1″ long)
- 4 small accent beads (2 green, 2 pink/red, about 4 mm)
- 18-20 gauge copper craft wire (approx. 12–14 inches total)
- 2 earring hooks
- Round-nose and needle-nose pliers
- Wire cutters
Step-by-step Guide:
Step 1: Cut about 6 inches of copper wire for each tab. Wrap it snugly around the lower half of the tab, leaving enough slack to attach the beads.
Step 2: Slide in one green bead in the center, then twist the wire once or twice to secure it.
Step 3: Use a short wire length to attach the leaf charm through the bottom hole of the tab, wrapping tightly.
Step 4: For the upper hole, thread two small accent beads and twist wire securely to keep them dangling.
Step 5: Add the earring hook to the top loop and give everything a little gentle press with pliers to finish.
#3. Queen of Hearts Recycled Earrings
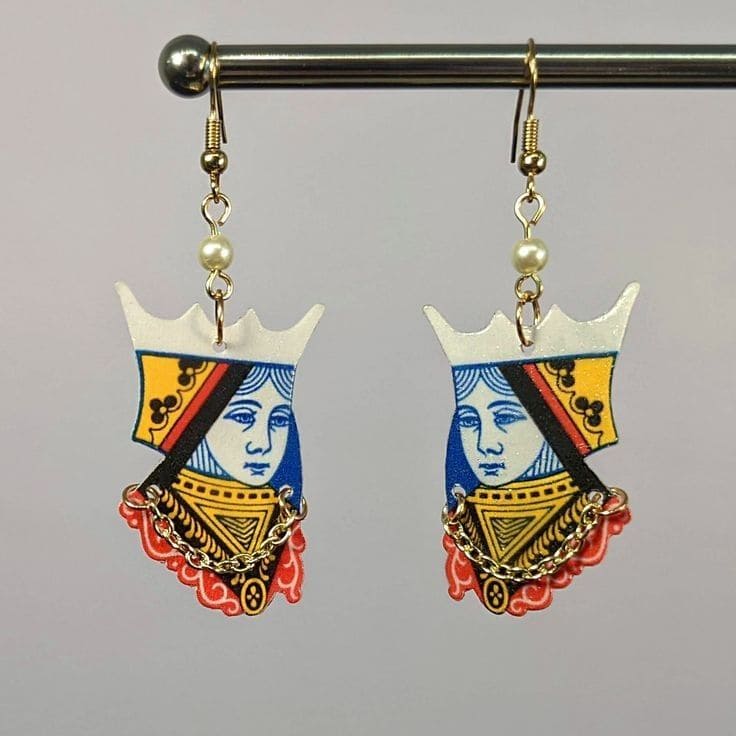
If you’ve ever felt like royalty in your own quirky way, this playful earring idea might be your perfect crown.
These dramatic yet whimsical accessories are made from upcycled playing cards, yes, actual Queens!
Materials Needed:
- 1 old playing card (preferably Queen of Clubs or Hearts)
- 2 earring hooks
- 2 head pins or eye pins
- 2 small faux pearls (6 mm)
- Small gold chain (approx. 3″ total, cut into 2 equal parts)
- Jump rings (4–6 total)
- Scissors, hole punch (1/16″ size), pliers, and glue/sealant (optional)
Step-by-step Guide:
Step 1: Cut the Queen’s upper torso from the card using scissors. Mirror the cut if you want symmetry between earrings.
Step 2: Use a mini hole punch to create a top hole for hanging and two tiny holes at the bottom edge for the chain.
Step 3: Thread a faux pearl onto a head pin and loop it to attach between the card and the hook.
Step 4: Attach jump rings and drape the gold chain across the lower part of the Queen card cutout.
Step 5: Connect everything with your pliers, ensuring all rings and hooks are secure.
#4. Punk Chic Safety Pin Earrings
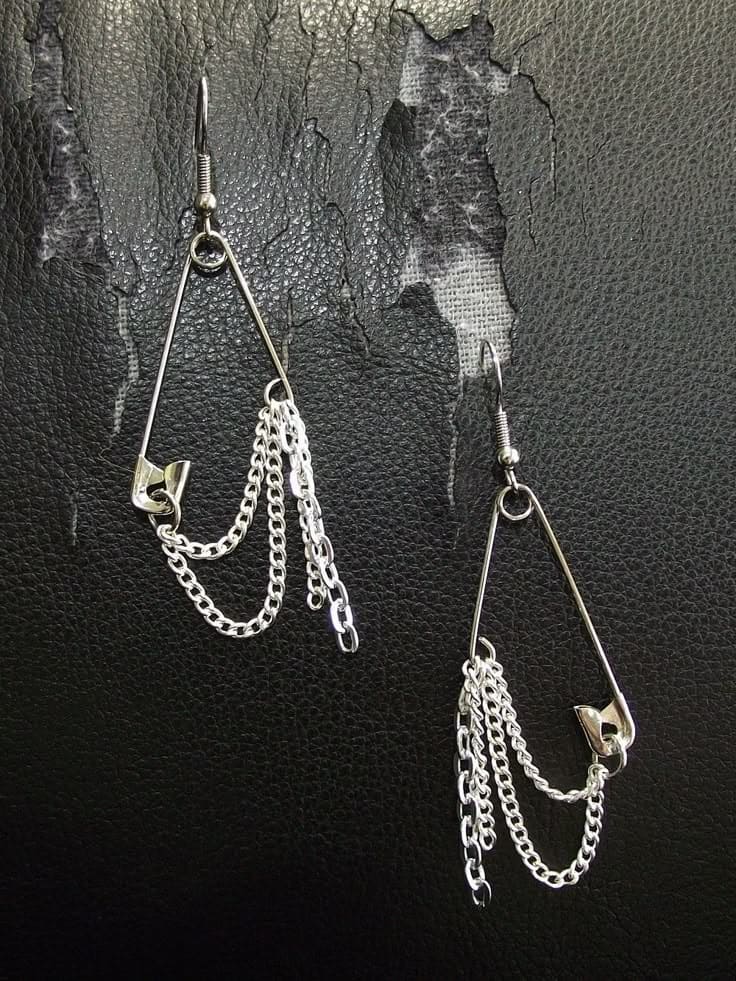
These edgy earrings pull that off with effortless cool, using simple safety pins and scrap chain to make something that looks straight out of a designer’s sketchbook.
Materials Needed:
- 2 large silver safety pins (2” or longer)
- 2 earring hooks
- 2–4 jump rings
- 6″ of lightweight silver chain, divided into 3 strands of varying lengths
- Round-nose pliers or jewelry pliers
Step-by-step Guide:
Step 1: Open each safety pin and slide on one end of each chain strand. Vary the length for a layered effect.
Step 2: Use a jump ring to close the pin securely and attach the top to the earring hook.
Step 3: Adjust the chain positioning so it drapes naturally from the pin and doesn’t tangle.
Step 4: Repeat for the second earring and don’t worry if they’re not identical. Asymmetry only adds to the punk vibe.
#5. Bottle Cap Earrings
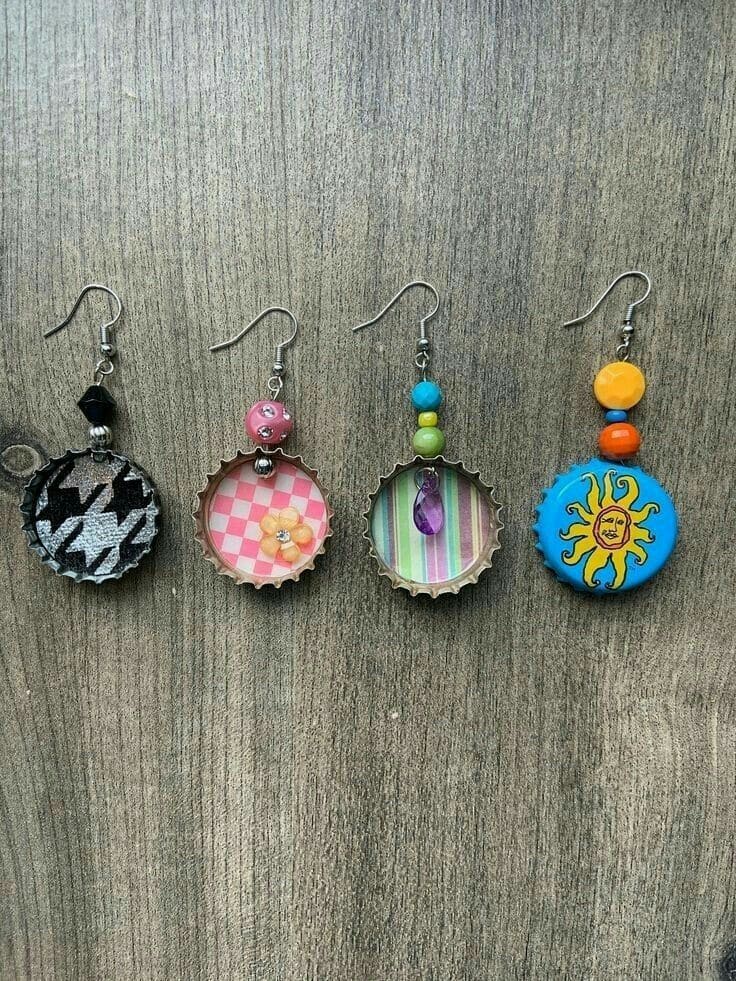
If you’ve ever popped open a soda or beer and admired the cap before tossing it, this project’s for you. These upcycled bottle cap earrings are full of personality, just like you.
Materials Needed:
- 2 clean metal bottle caps
- 2 earring hooks
- 2 headpins or jump rings
- 2–4 small beads (mixed colors/shapes)
- Small decorative paper scraps, stickers, or fabric
- Clear-drying glue
- Drill or thumbtack
- Optional: resin or dimensional glaze
Step-by-step Guide:
Step 1: Pierce a small hole at the top of each cap using a drill or thumbtack.
Step 2: Cut paper or fabric to fit inside the caps and glue them in. Let dry completely.
Step 3: Add embellishments like charms, rhinestones, or beads. Seal with resin or glaze if desired.
Step 4: Attach a jump ring through the hole and connect it to an earring hook, then you can add a bead or two for extra flair.
#6. DIY DNA Earrings Made From Beads
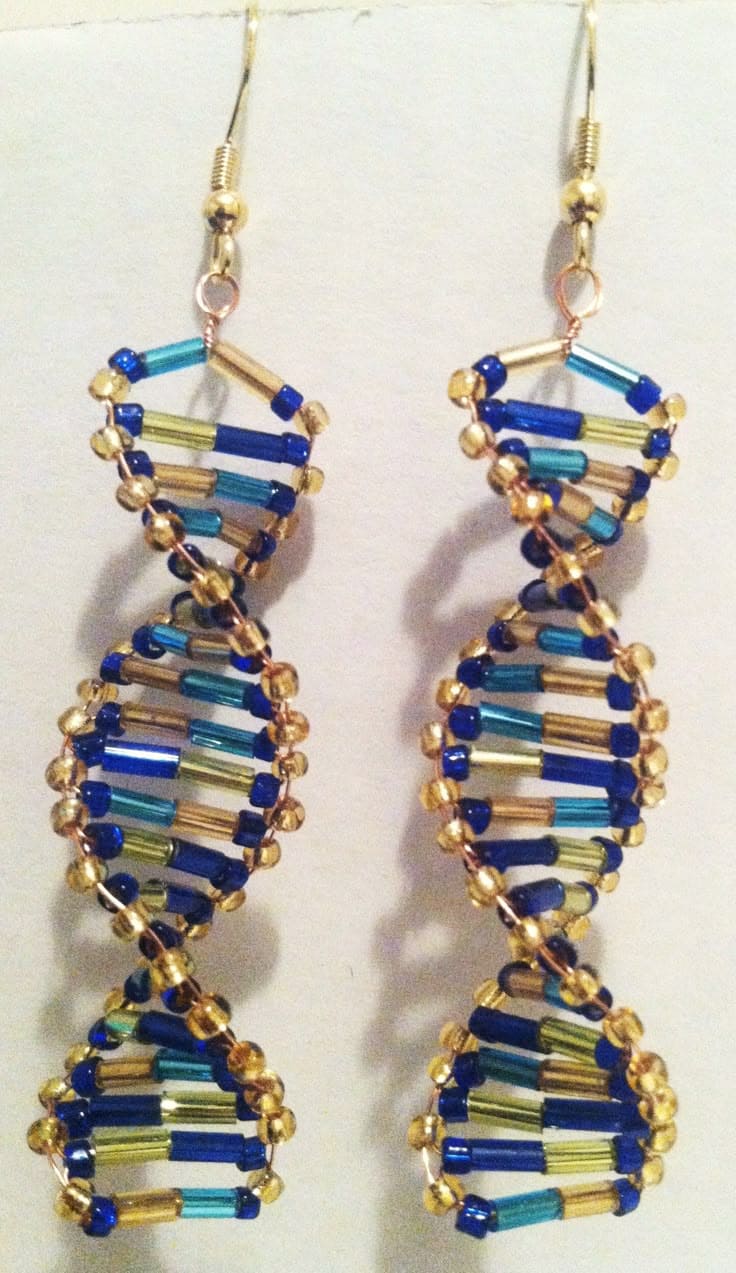
Science meets style in this dazzling little project! These DNA helix earrings aren’t just geek-chic, they’re surprisingly easy to make, and totally mesmerizing once they’re done.
Each twist of glass seed beads brings the iconic double helix to life and the subtle shimmer makes them pop without trying too hard.
Materials Needed:
- 2 earring hooks
- 2 headpins or eye pins
- 24 small bugle beads (various colors; ~6mm long)
- 48 seed beads (size 11/0 or 10/0, gold or contrasting)
- 24-gauge craft wire (approx. 24 inches total)
- Round-nose pliers and wire cutters
Step-by-step Guide:
Step 1: Cut a 12-inch length of wire and add alternating seed and bugle beads in a repeating DNA ladder pattern.
Step 2: Once you have the desired length, carefully twist the wire into a gentle double helix shape, wrapping slightly as you go.
Step 3: Secure both ends of the helix by wrapping the wire around itself neatly.
Step 4: Use pliers to attach the top of your helix to an earring hook. Repeat for the second earring.
#7. Upcycled Keyboard Key Earrings
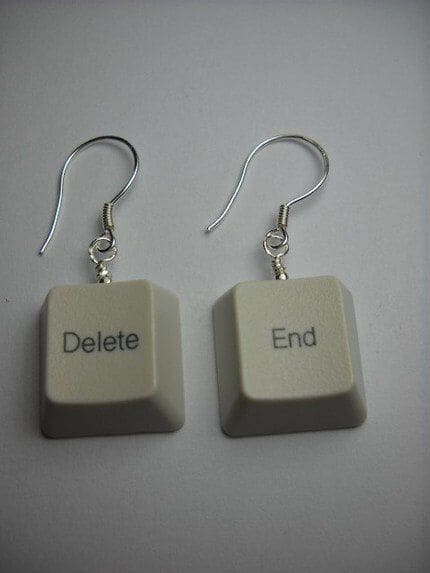
These quirky little earrings say what we’re all thinking: “Delete. End.” but with charm. Perfect for tech lovers, writers, or anyone fluent in sarcasm, this pair turns broken keyboards into bold statements.
Whether you want to spark a giggle or a conversation, you can’t go wrong with this zero-cost, high-impact DIY.
Materials Needed:
- 2 old keyboard keys (flat, clean, and preferably witty like “Delete” and “End”)
- 2 earring hooks
- 2 jump rings (6–8mm)
- Small drill or pin vise
- Jewelry pliers
Step-by-step Guide:
Step 1: Clean your keyboard keys thoroughly with a damp cloth and let them dry.
Step 2: Use a pin vise to drill a small hole at the top edge of each key.
Step 3: Insert a jump ring through each hole and attach it to the earring hook.
Step 4: Tighten the jump ring with pliers and give your earrings a shake test.
#8. DIY USB Port Earrings
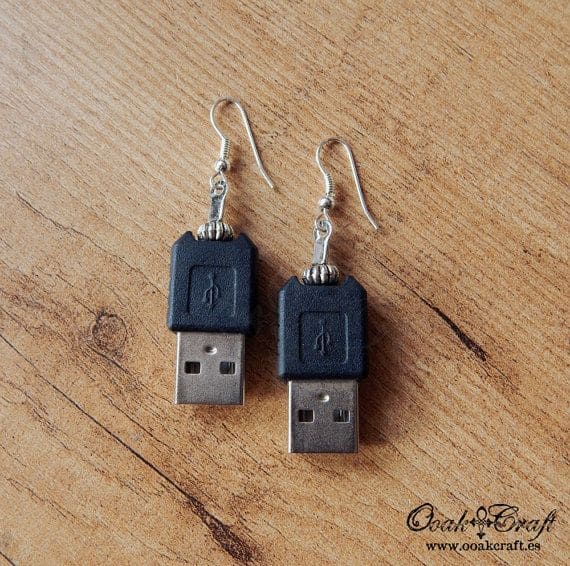
Who knew outdated tech could make such a fashion-forward statement? These USB earrings are a witty blend of geek pride and upcycled brilliance.
Every time someone does a double take, you’ll remember how fun it was to bring these little tech relics back to life.
Materials Needed:
- 2 old USB plugs
- 2 earring hooks
- 2 jump rings
- Decorative beads (optional, 6–8mm size)
- Jewelry pliers and hot glue
Step-by-step Guide:
Step 1: Carefully cut off the USB ends from an old cable using strong scissors or wire cutters.
Step 2: Clean the plugs and sand any sharp plastic edges.
Step 3: If the USB plug doesn’t have a hole, use a small drill or heated needle to create one.
Step 4: Add a jump ring through the hole and link it to your earring hook. You can also thread a decorative bead between them for flair.
Step 5: Tighten everything with pliers and give it a gentle tug to make sure it holds.
#9. DIY Watch Face Earrings
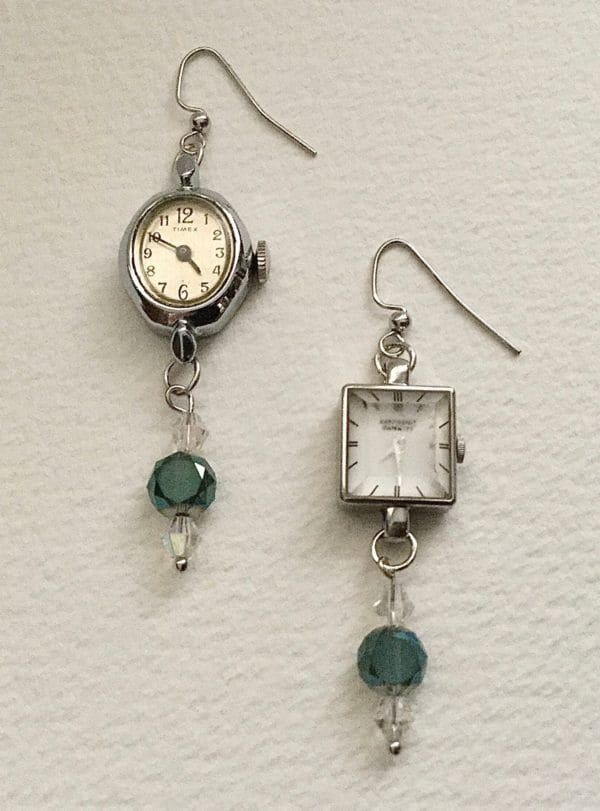
These mismatched watch face earrings aren’t just quirky and eye-catching; they’re soulful little reminders that beauty doesn’t tick on anyone else’s clock.
If you’ve got a broken wristwatch tucked away, now’s the moment to transform it into wearable art.
Materials Needed:
- 2 small watch faces (non-working is fine)
- 2 earring hooks
- 2–4 jump rings
- Decorative beads (8mm crystal and glass rounds work beautifully)
- Jewelry pliers, wire cutters
Step-by-step Guide:
Step 1: Detach the watch faces from the bands. Use pliers or small screwdrivers if needed.
Step 2: Thread a jump ring through the watch’s lug or create a wire loop if it has none.
Step 3: Add a decorative bead dangle using wire or headpins. Play with symmetry or go bold with mismatched elements.
Step 4: Attach everything to the earring hooks and press jump rings closed tightly.
#10. DIY Safety Pin Message Earrings

These DIY message earrings pack punch and personality using just plastic alphabet beads and a pair of candy-colored safety pins.
They’re playful, edgy, and endlessly customizable whether you want to spell something sassy, sweet, or snarky.
Materials Needed:
- 2 large colored safety pins (approx. 2″)
- 8–10 alphabet cube beads (10mm size, mix of colors)
- 2 earring hooks
- 2 jump rings
- Round-nose pliers
Step-by-step Guide:
Step 1: Open each safety pin and slide on your chosen beads in the order you want the word to read.
Step 2: Close the pin carefully so it locks securely without forcing the beads.
Step 3: Use a jump ring to connect the loop of the safety pin to an earring hook.
Step 4: Repeat for the second earring, either matching or making a playful mismatch.
#11. DIY Button and Bead Earrings
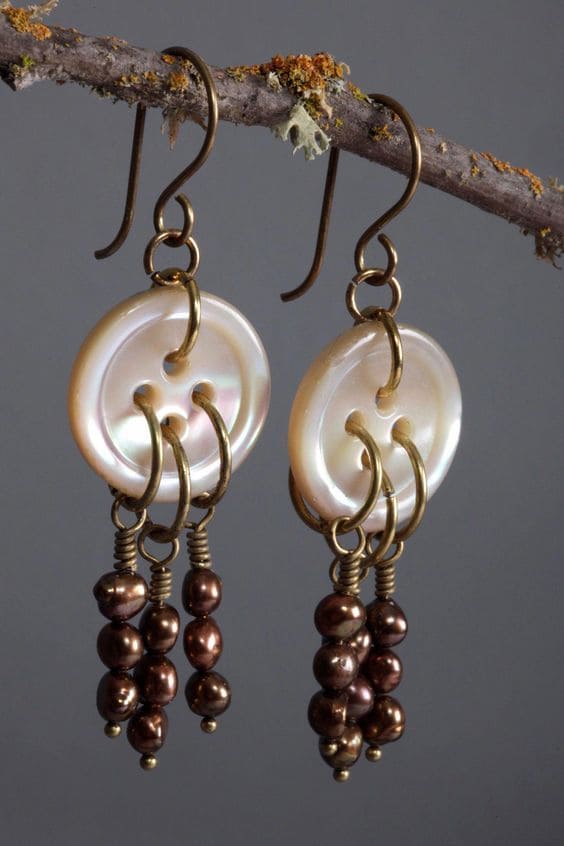
These dreamy, dangle-style earrings take something simple like mother-of-pearl buttons and turn them into wearable nostalgia.
If you’ve ever rummaged through your grandma’s sewing tin, you’ve probably held these exact buttons in your hand. Now, you’re giving them a second life, one that dances with every step.
Materials Needed:
- 2 round shell or vintage buttons (about 1″ wide, 4 holes each)
- 6 small headpins (1 inch)
- 12 small pearl or glass beads (brown, bronze, or any tone you love)
- 6 jump rings
- 2 earring hooks
- Round-nose pliers, wire cutters
Step-by-step Guide:
Step 1: Thread 2–3 beads onto each headpin and twist into a closed loop using round-nose pliers.
Step 2: Attach each beaded loop to a jump ring. Connect the jump ring through one of the buttonholes. Repeat for all three dangles per earring.
Step 3: Use a final jump ring to attach the top of the button to an earring hook. Then, adjust spacing so everything hangs freely and evenly.
#12. DIY Measuring Tape Earrings
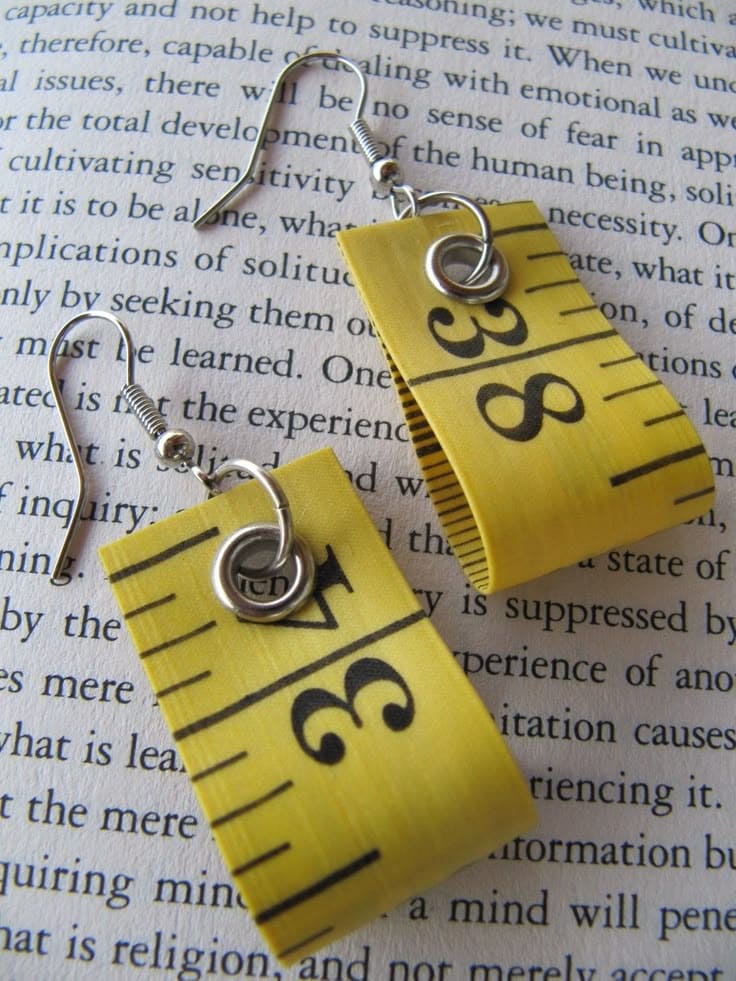
Who says your love for crafting can’t be part of your outfit? These quirky earrings repurpose bright yellow measuring tape scraps into fun, lightweight accessories.
They’re a conversation starter, especially for anyone who loves to sew, quilt, or simply appreciates clever reuse.
Materials Needed:
- Old or damaged measuring tape (cut into 2 strips, each approx. 2.5″ long)
- 2 jump rings (large enough to pierce through the tape ends)
- 2 earring hooks
- Hole punch or leather punch tool
- Scissors
Step-by-step Guide:
Step 1: Cut two identical strips from your measuring tape, around 2.5″ or however long you want them to dangle.
Step 2: Fold each strip in half loosely and punch a hole through both layers near the top.
Step 3: Slide a jump ring through the hole to hold the fold in place.
Step 4: Attach an earring hook to the jump ring and repeat for the second earring.
#13. DIY Statement Earrings With Attitude
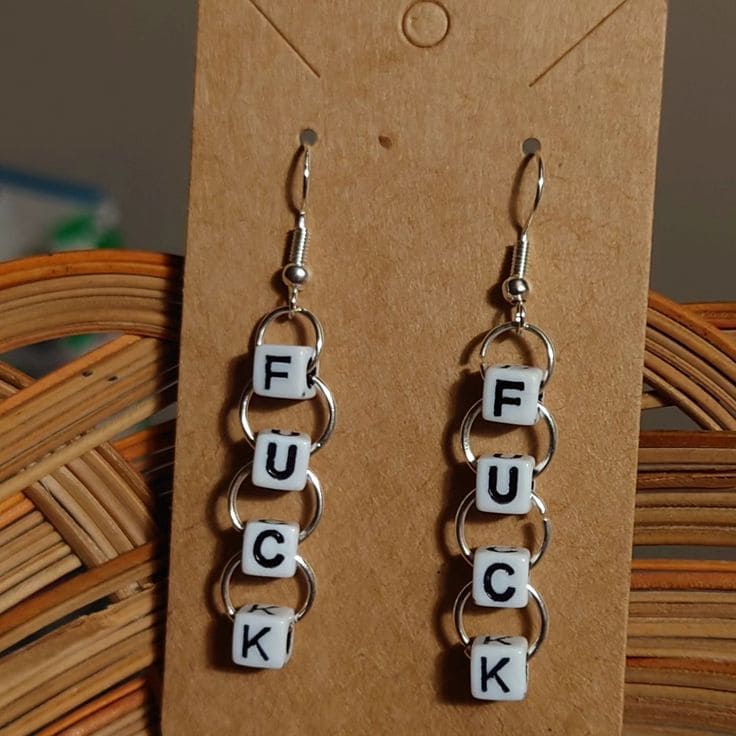
Sometimes you just need to say it loud without saying a word. These DIY statement earrings use cube alphabet beads and circular jump rings to spell out a feeling, a vibe, or a bold little middle finger to the day.
Materials Needed:
- 8 alphabet beads (4 per earring; standard cube beads around 6mm)
- 8 medium jump rings
- 2 earring hooks
- 2 head pins or eye pins
- Small pliers
Step-by-step Guide:
Step 1: String one alphabet bead onto each jump ring and close it securely.
Step 2: Connect the jump rings together vertically like chain link, making sure the letters stay in order.
Step 3: Attach the top jump ring to an earring hook. Then you repeat the process for the second earring.
#14. Romantic DIY Earrings Using Zipper Pulls
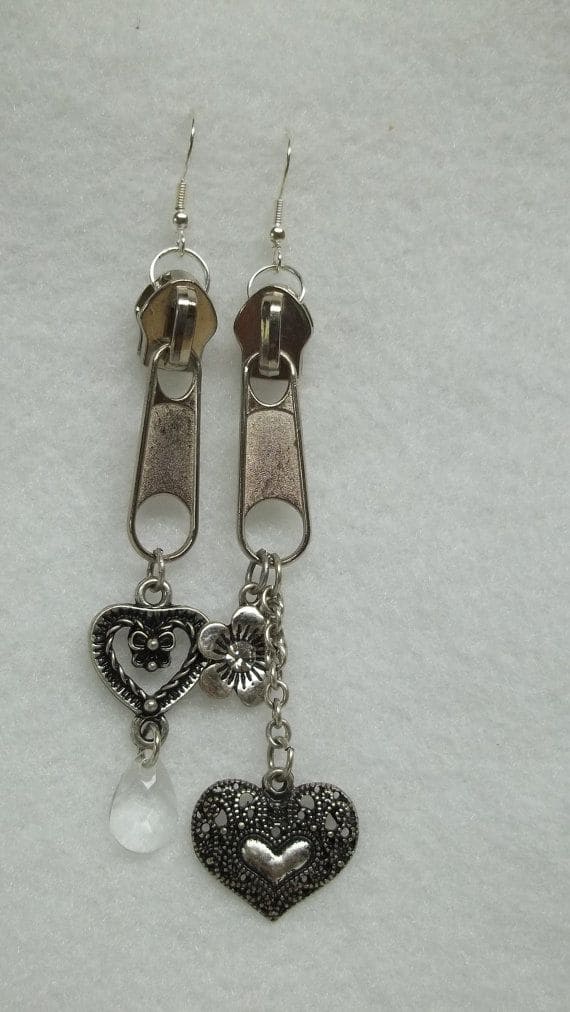
These charming earrings pair industrial edge with delicate heart charms, creating a look that’s both tough and tender.
If you’ve got old jackets or broken bags lying around, those zippers are about to get a second chance, dangling stylishly from your ears.
Materials Needed:
- 2 large zipper pulls
- 2 earring hooks
- 2 jump rings
- 2–4 metal charms (hearts, flowers, or beads; approx. 1″ each)
- Small pliers
Step-by-step Guide:
Step 1: Use a jump ring to attach an earring hook to each zipper pull.
Step 2: Add charms to the base of the zipper pull, mix textures and shapes for visual interest.
Step 3: Secure everything with pliers, making sure charms hang freely and hooks are firmly attached.
#15. Recycled Pencil Earrings
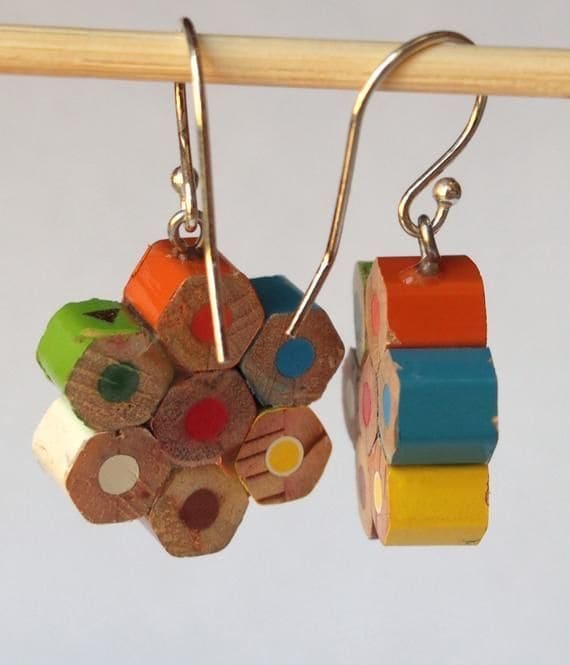
If you’ve got a soft spot for art supplies and a love for quirky fashion, these earrings are your match made in rainbow heaven. Crafted from chopped colored pencils, they feel like wearable doodles, fun, unexpected, and a little nostalgic.
Materials Needed:
- 6–8 short colored pencils (about 1” long)
- Fine saw or sharp craft knife
- Super glue or strong adhesive
- Drill with small bit
- 2 screw eye pins + 2 earring hooks
- Sandpaper
Step-by-step Guide:
Step 1: Trim your pencils into even short sections and sand the edges smooth.
Step 2: Arrange the pencil segments into a honeycomb shape and glue together, let dry thoroughly.
Step 3: Drill a tiny hole at the top center and insert a screw eye pin.
Step 4: Attach an earring hook to the pin and you’re ready to color the world with your ears!
#16. Puzzle Piece Pop Earrings

With vivid graphics and a dangling bead, these artsy earrings celebrate the beauty of imperfection and the charm of finding your own shape in the world.
Every piece is different, making your earrings wonderfully mismatched in the best possible way.
Materials Needed:
- 2 colorful jigsaw puzzle pieces (preferably from a graphic or cartoon set)
- 2 small black or colored beads
- 2 eye pins or head pins
- 2 earring hooks
- Drill or pushpin
- Jump rings
- Clear sealer or Mod Podge (optional)
Step-by-step Guide:
Step 1: Choose two puzzle pieces with vibrant, fun patterns.
Step 2: Seal them with Mod Podge to make them durable and glossy, then you should let it dry completely.
Step 3: Drill a small hole at the top and bottom of each puzzle piece, then attach a jump ring and earring hook to the top hole.
Step 4: Thread a bead onto a head pin, bend a loop, and attach it to the bottom hole.
#17. Bread Tag Cascade Earrings
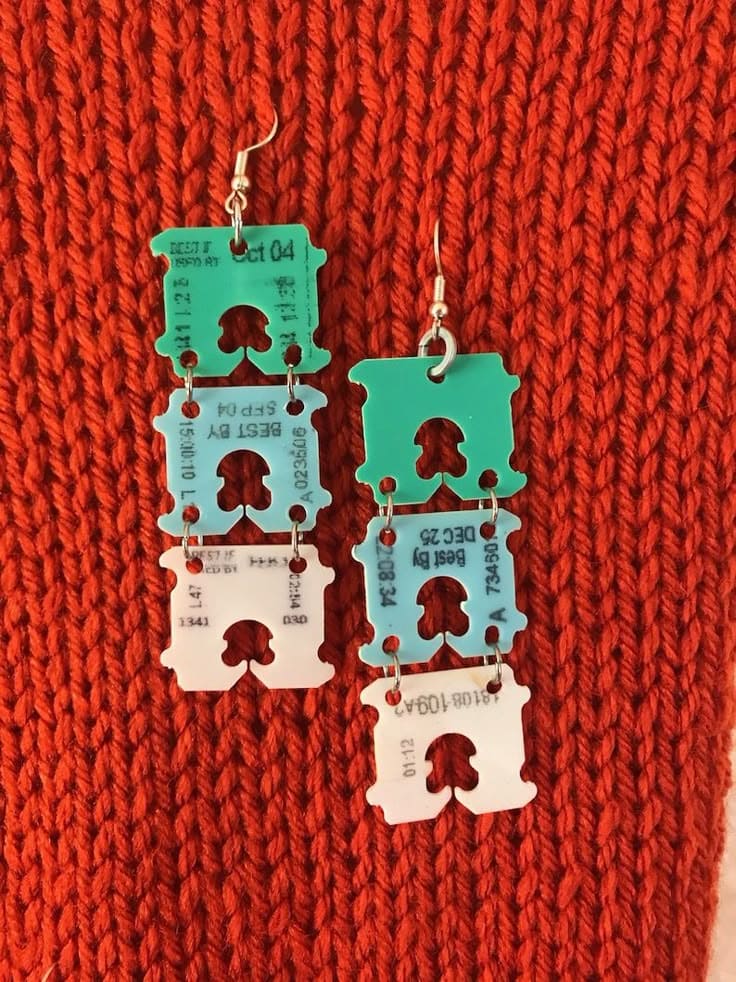
You know those little plastic bread tags that seem to multiply in kitchen drawers? Now imagine turning them into a conversation-starting, color-popping pair of earrings.
These are nostalgic, a bit quirky, and wildly eco-friendly, perfect for you if you love surprising materials and second chances.
Materials Needed:
- 6 plastic bread tags in different colors (preferably soft plastic types)
- 6 small jump rings (6–8mm)
- 2 earring hooks
- Small pliers
- Needle or sharp tool (if tags aren’t pre-holed)
Step-by-step Guide:
Step 1: Select three bread tags per earring, stacking them from top to bottom by shade or print.
Step 2: Use a needle to make tiny holes at the top and bottom center of each tag (except the bottom one, just top).
Step 3: Link the tags together with jump rings to form a dangling column.
Step 4: Attach the top tag to the earring hook and give it a little wiggle, your upcycled masterpiece is ready to wear.
#18. Melted Bottle Petal Earrings
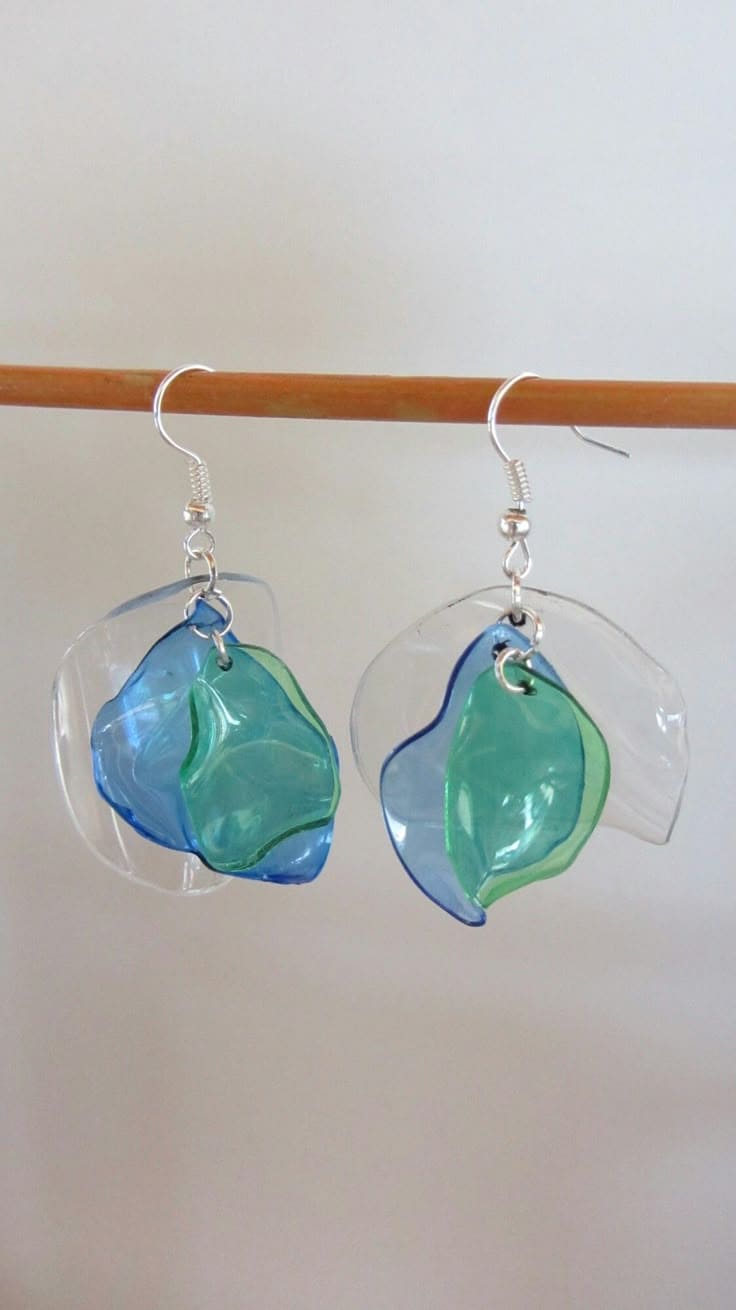
These dreamy, translucent earrings look like ocean waves frozen mid-sway. They’re actually crafted from upcycled plastic bottles, yes, those everyday recyclables you probably toss without a second thought.
By carefully melting and shaping them, you create delicate “petals” that catch the light like sea glass.
Materials Needed:
- 1 clear plastic bottle (soda or water bottle)
- 1 green plastic bottle
- 1 blue plastic bottle
- Scissors
- Hole punch or heated needle
- 2 earring hooks
- 4-6 jump rings
- Lighter or candle
Step-by-step Guide:
Step 1: Cut small petal-like shapes from the plastic bottles, one of each color per earring.
Step 2: Use a lighter or candle (carefully!) to soften the edges and give the plastic gentle curves. Let them cool.
Step 3: Punch a small hole at the top of each piece.
Step 4: Layer the petals from smallest to largest, attach them together with a jump ring, and finish by adding the earring hook.
#19. Recycled Denim Flower Earrings
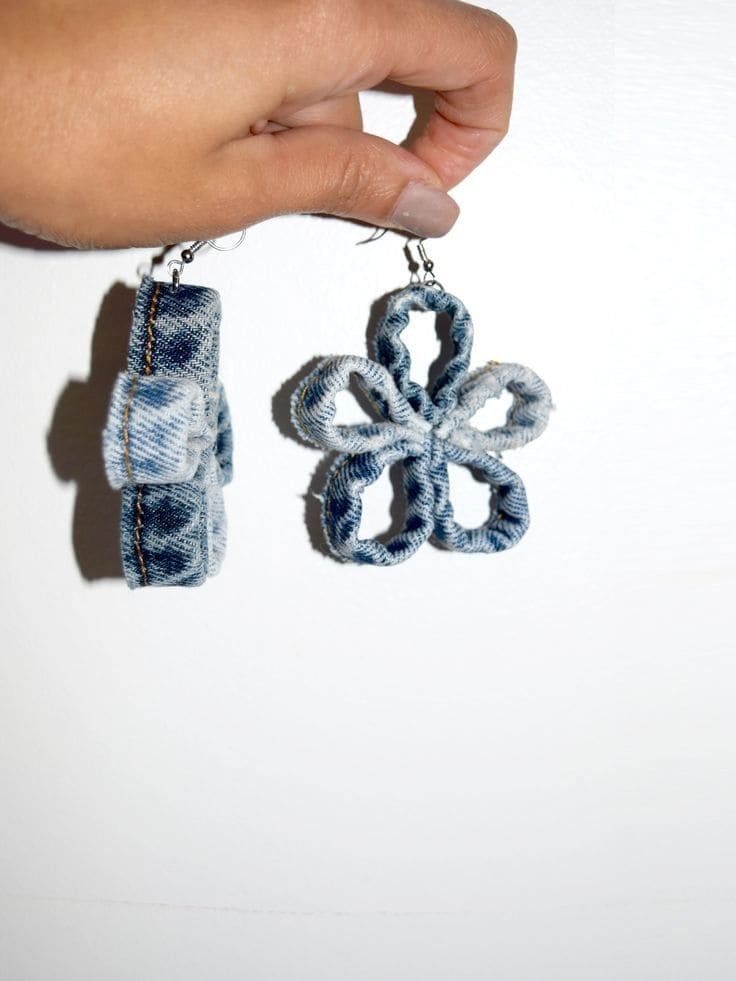
These earrings are like little denim blooms that never wilt, crafted from your well-loved, worn-out jeans. They carry a whisper of stories: every fold once wrapped a knee, a pocket, or a memory. T
he soft blue edges fray just enough to say “I’ve lived,” while still keeping their shape and charm. This is your chance to wear a flower that speaks of creativity, comfort, and sustainability.
Materials Needed:
- A strip of old denim (approx. 1.5″ x 10″)
- Scissors
- Needle and thread (preferably denim or heavy-duty thread)
- 2 earring hooks
- 2 jump rings
- Optional: hot glue gun
Step-by-step Guide:
Step 1: Cut your denim into 5 strips (each around 2 inches long and 0.3 inches wide).
Step 2: Fold each strip into a teardrop shape and sew or glue the ends together.
Step 3: Stitch or glue all five loops into a flower formation. Let it dry or secure it tightly with thread.
Step 4: Attach a jump ring to the top loop, then add the earring hook.
#20. Mini Pencil Earrings
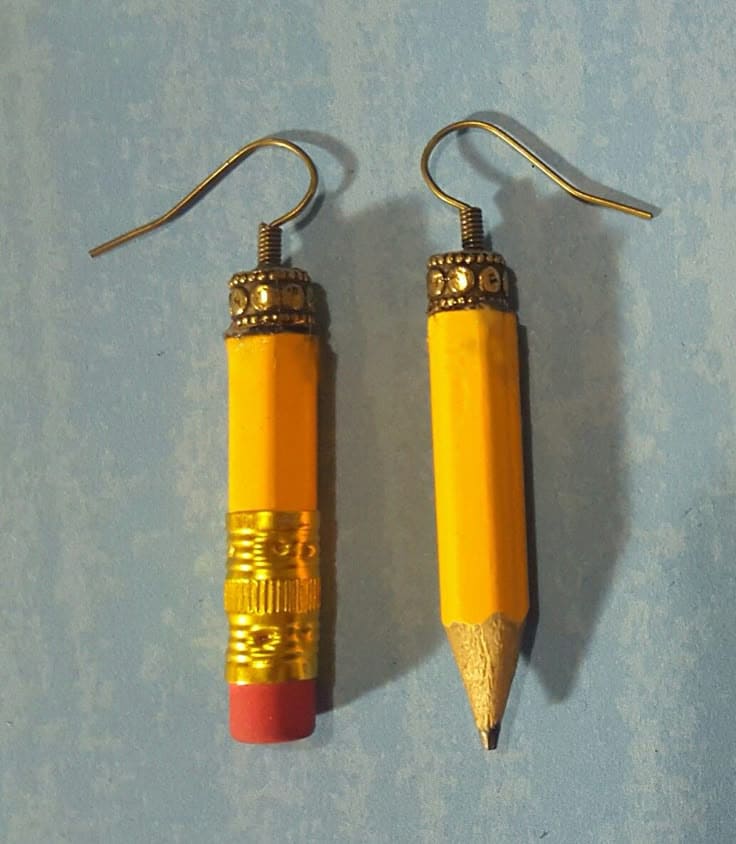
These DIY pencil earrings capture all that and more, transforming an everyday object into a wearable statement. They’re surprisingly easy to make and a fun way to reuse stubby pencils that might’ve otherwise been tossed.
One side sharp and ready for ideas, the other soft with an eraser, like a metaphor for balance between boldness and grace, action and revision.
Materials Needed:
- 1 standard wooden pencil (cut into two equal 1.5–2 inch segments)
- Pencil sharpener
- Fine-grit sandpaper or emery board
- 2 decorative bead caps
- 2 small screw eye hooks
- 2 earring hooks (fishhook style)
- Super glue or strong craft glue
Step-by-step Guide:
Step 1: Start by cutting your pencil into two short segments. One should feature the eraser; the other will be sharpened to a point. Aim for lengths between 1.5–2 inches.
Step 2: Sand down the cut ends to remove any roughness and splinters. Clean off the dust.
Step 3: Glue a bead cap onto the flat ends of each pencil piece. This adds a finished, decorative touch.
Step 4: Carefully screw in a small eye hook into the top center of each bead cap. Let glue dry fully if any was used to secure the caps.
Step 5: Attach earring hooks to the eye hooks. You can double-check that they hang evenly.
#21. Reel Cool Earrings
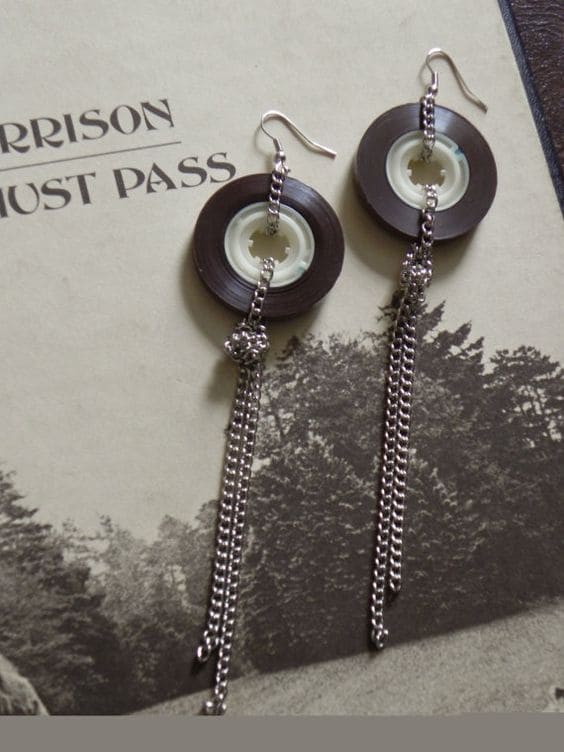
If you’re the kind of soul who still remembers rewinding mixtapes with a pencil, this project is going to tug at your heartstrings.
What makes them special is that they tell a story. Of music once loved, of hours spent lost in lyrics. And now, they’re turning heads in a whole new way.
Materials Needed:
- 2 cassette tape reels (standard size, approx. 1 inch diameter)
- 2 small eye pins or jewelry headpins
- 2 decorative chain strands (each approx. 3–4 inches long)
- 2 bead spacers or metal accents (optional)
- 2 earring hooks (silver or gunmetal works beautifully)
- Jewelry pliers
- Super glue or hot glue gun
Step-by-step Guide:
Step 1: Open an old cassette (use a screwdriver if needed) and gently remove the two plastic reels. Clean off any dust or tape residue.
Step 2: Thread a chain through each reel’s center hole, adding a decorative bead in the middle for flair if desired.
Step 3: Use an eye pin to secure the reel and chain assembly together. Bend and twist the top of the pin into a loop using jewelry pliers.
Step 4: Attach your looped pin to an earring hook and tighten all connections securely. Repeat for the second earring.
#22. Upcycled Soda Can Sweethearts Earrings
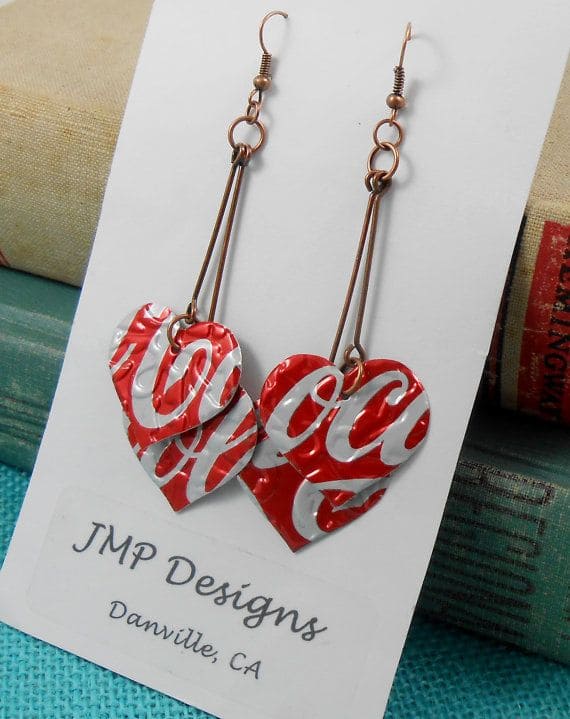
Made from the iconic red-and-white aluminum of soda cans, these earings are the definition of edgy meets adorable.
The best part is you’re not just recycling, you’re telling a story. You’re turning trash into treasure, mass production into personal flair. And each pair is one of a kind.
Materials Needed:
- 1 aluminum soda can (preferably red-and-white print like Coca-Cola)
- Strong scissors or tin snips
- Metal hole punch or nail + hammer
- 2 earring hooks
- 2 long head pins or eye pins (2–3 inches)
- 2 jump rings
- Sandpaper or a metal file
Step-by-step Guide:
Step 1: Wash and dry your can thoroughly. Use scissors to carefully cut out a flat panel, about 3×4 inches.
Step 2: Trace and cut two small heart shapes from the aluminum. Use a nail file or sandpaper to smooth any sharp edges.
Step 3: Use a metal punch to make a small hole at the top of each heart. Insert a jump ring.
Step 4: Slide the jump ring onto your head pin, then attach that pin to the earring hook. You can twist the pin into a small loop or coil for extra character.
#23. Bread Tag Earrings With a Quirky Soul
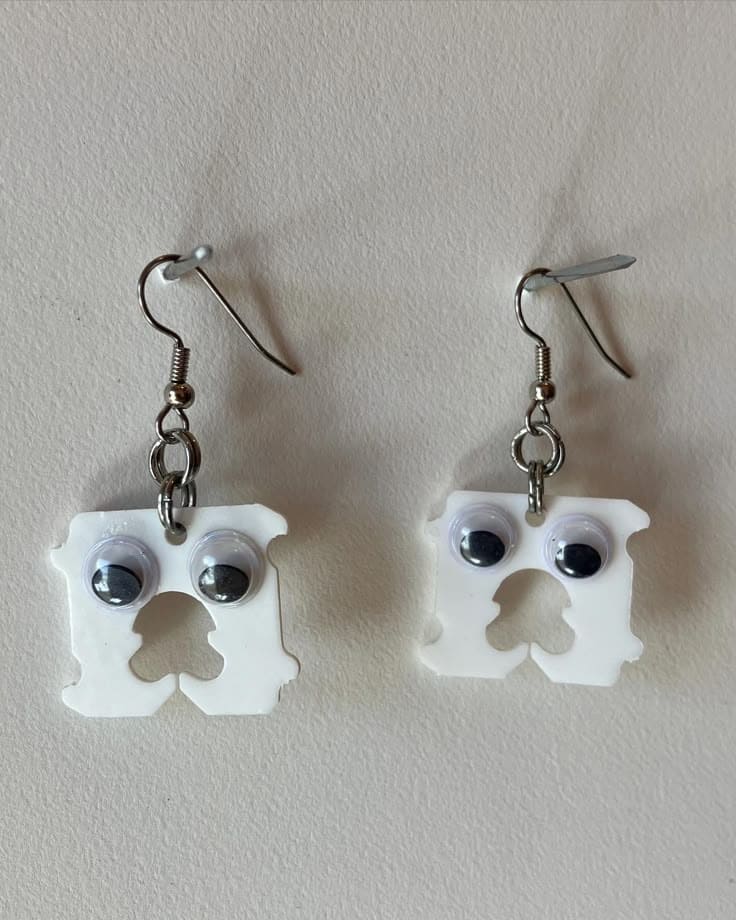
Who knew something as mundane as a bread tag could be this cute? These googly-eyed little goofs are here to add a pop of humor and a pinch of “what-on-earth-is-that?” to your outfit.
They’re perfect for anyone who sees joy in the everyday and isn’t afraid to wear their whimsy loud and proud.
Materials Needed:
- 2 clean bread tags (preferably white)
- 4 small googly eyes (self-adhesive or glue-on, about 6–8mm)
- Super glue or hot glue gun
- 2 earring hooks
- 2 jump rings
- Small hole punch or nail
Step-by-step Guide:
Step 1: Clean the bread tags thoroughly and dry them completely.
Step 2: Use a small nail or punch to make a hole near the top of each tag (centered).
Step 3: Stick or glue two googly eyes onto each tag, get creative with the placement!
Step 4: Attach a jump ring through the hole and link it to an earring hook.
#24. Upcycled Book Paper Fan Earrings
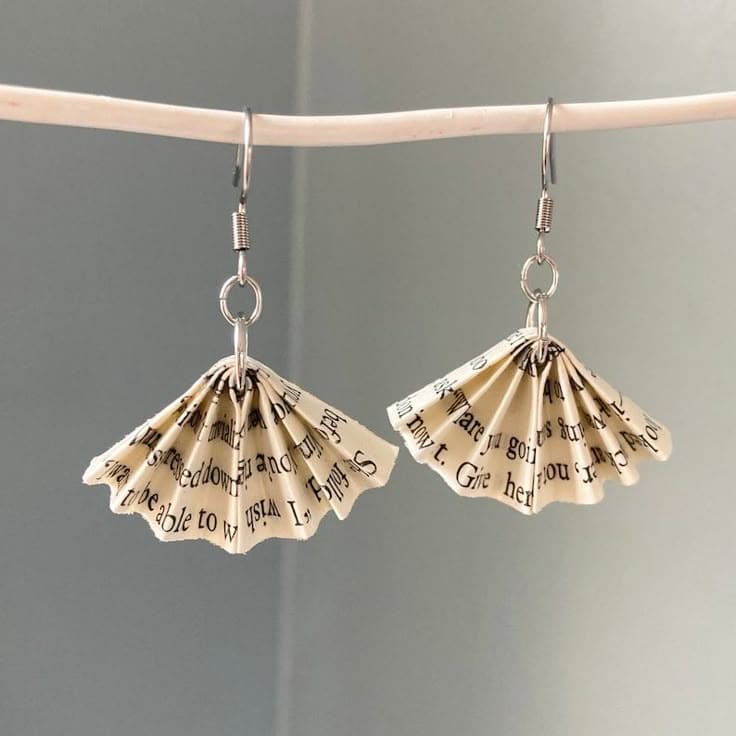
There’s something romantic about wearing words. Especially when those words once fluttered through your favorite novel or whispered secrets between the lines of a forgotten paperback.
Perfect for bookworms, teachers, writers, or anyone who feels most alive surrounded by stories. They’re lightweight, whimsical, and whisper nostalgia with every turn of the head.
Materials Needed:
- 2 strips of old book paper (approx. 1.5″ wide × 6″ long)
- Mod Podge or diluted white glue
- 2 earring hooks
- 2 jump rings
- Needle or tiny hole punch
- Toothpick or fine brush
Step-by-step Guide:
Step 1: Fold each paper strip accordion-style just like you’d make a tiny fan as a kid.
Step 2: Apply a thin coat of Mod Podge to both sides to strengthen and protect the paper; let dry fully.
Step 3: Carefully pinch the top of the folded strip and secure it with a jump ring through a small punched hole.
Step 4: Attach each jump ring to an earring hook and adjust the folds to fan out gracefully.
#25. Sun and Moon Wire Earrings
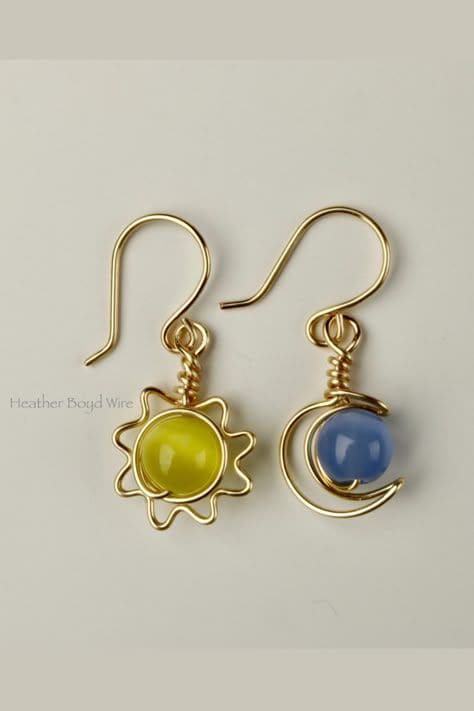
Some days you’re the radiant sun, bold and warm. Other days, you’re a quiet moon, calm and glowing in your own light.
These celestial wire earrings celebrate that duality, light and dark, day and night, energy and rest. Made with simple wire wrapping and vibrant beads, they’re surprisingly easy to create and deeply symbolic to wear.
Materials Needed:
- Gold or copper jewelry wire (20–22 gauge)
- 1 round yellow bead (8–10 mm)
- 1 round blue bead (8–10 mm)
- Round-nose and flat-nose pliers
- Wire cutters
- 2 earring hooks
Step-by-step Guide:
Step 1: Start with about 6 inches of wire for each earring. Use your round-nose pliers to shape a sun around the yellow bead by creating loops radiating outward.
Step 2: For the moon, gently curve the wire into a crescent shape around the blue bead. Use pliers to adjust and tighten the shape.
Step 3: Wrap the remaining wire above each bead to create a secure loop, then attach to the earring hooks.
Step 4: Double-check for sharp ends and tuck them in with pliers to make them comfy and safe to wear.
