Don’t toss those old jeans just yet, there’s a world of creative potential stitched into every worn-out seam.
In this collection of 25+ genius DIY denim ideas, we’re turning faded fabric into functional, stylish, and sometimes downright adorable creations. From rustic home decor to one-of-a-kind accessories, these projects prove that denim never really goes out of style.
Whether you’re after a quick craft or a bold upcycle, there’s something here for every skill level and scrap pile. All it takes is a pair of scissors, a little imagination, and some blue jean magic.
#1. DIY Denim Dragonfly Charms
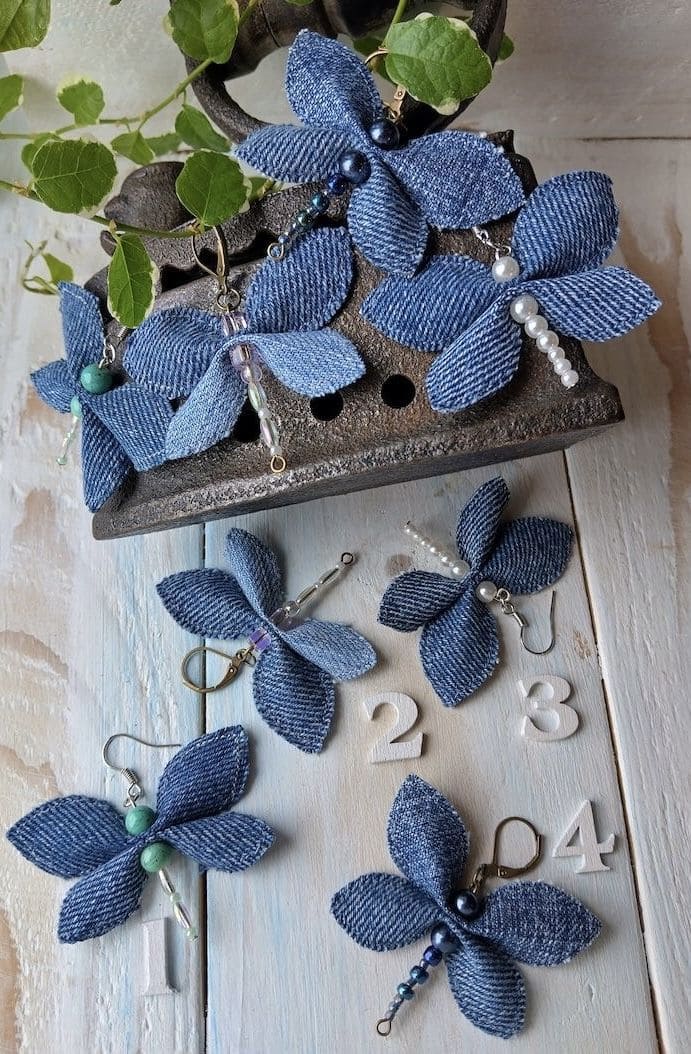
These denim dragonflies might just be the prettiest use of scraps I’ve ever created. Each one feels like a tiny celebration of creativity.
Materials Needed:
- Small denim scraps (lightweight denim preferred)
- Scissors
- Needle and thread
- Assorted beads (3–5 per charm)
- Jewelry wire (6 inches per charm)
- Jump rings and lobster clasps
- Round-nose pliers
Step-by-step Guide:
Step 1: Cut four teardrop-shaped pieces of denim for the wings (about 1.5–2 inches long each).
Step 2: Fold and stitch or glue each wing at the base, pairing them in an “X” shape.
Step 3: Thread beads onto wire to create the body. Attach the wings to the top of the beaded section.
Step 4: Use pliers to twist the wire end into a loop. Attach a keyring, hook, or clasp.
Step 5: Customize each dragonfly with different beads or denim shades for variety.
#2. DIY Denim Angel Ornament
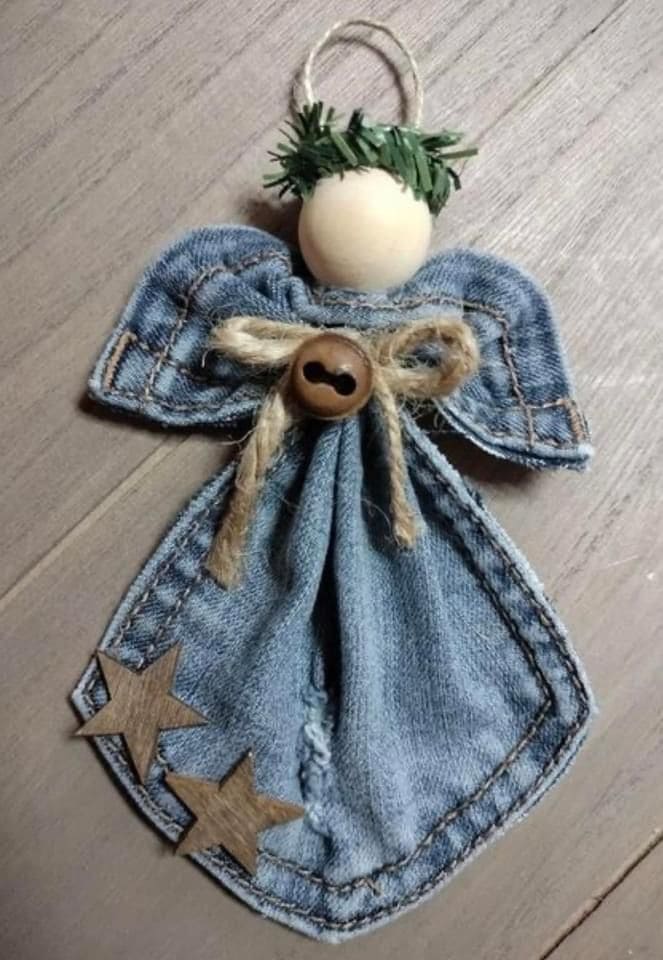
Whether you hang it on a tree, tie it to a gift, or use it as wall décor, it brings a rustic, heartfelt touch to any space.
Materials Needed:
- Denim scraps (1 for the body, 1 for the wings – around 5×5 inches each)
- Wooden bead (1 inch, for the head)
- Small jingle bell or wooden button
- Twine or jute string (for bow and hanging loop)
- Faux greenery or tiny wreath (for the halo)
- Two wooden stars or embellishments
- Scissors
- Hot glue gun or strong fabric glue
Step-by-step Guide:
Step 1: Cut a teardrop or skirt shape from denim for the angel’s body. For wings, use a curved or butterfly-like denim piece (use a pocket flap if possible!).
Step 2: Gather the top of the skirt shape and glue or tie it under the wooden bead (head).
Step 3: Glue the wings behind the bead and attach a bow and bell at the neck.
Step 4: Add a tiny greenery halo and attach a hanging loop with twine.
Step 5: Glue stars or embellishments to the skirt as a final decorative touch.
#3. DIY Denim Tassel Keychains

Who knew leftover denim threads and yarn bits could turn into such eye-catching keychains? I had so many tiny scraps that felt useless—until they came together like this.
Materials Needed:
- Denim strips (½ inch wide, 6–8 inches long)
- Yarn and thread scraps (variety of colors and thicknesses, 20–25 strands per tassel)
- Small beads, sequins, charms (10–15 per tassel)
- Keyring or lobster clasp
- Thin wire or strong thread (for binding)
- Scissors
- Fabric glue or hot glue gun (optional)
Step-by-step Guide:
Step 1: Cut yarn and denim threads into equal lengths (around 6 inches). Gather them into a bundle.
Step 2: Wrap the top section with denim strip and secure with glue or tight thread/wire wrap.
Step 3: Slip the top through a keyring, then tighten the wrap again to hold it in place.
Step 4: Thread beads or charms randomly through the tassel strands for a playful, eclectic look.
Step 5: Trim the ends evenly and fluff the strands for fullness.
#4. DIY Coiled Denim Basket
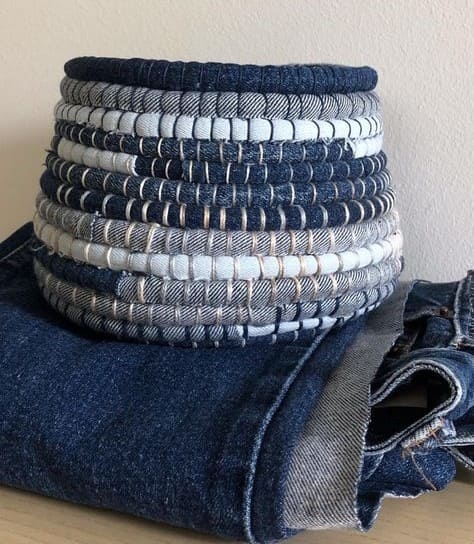
This coiled basket was one of the most satisfying projects I’ve done. It’s sturdy, surprisingly flexible, and turns denim scraps into something both functional and artistic.
Materials Needed:
- Long strips of old denim (½–1 inch wide, 10–15 feet total)
- Thick cord or rope (about 15–20 feet, depending on basket size)
- Needle and heavy-duty thread
- Scissors or rotary cutter
- Optional: clothespins or clips
Step-by-step Guide:
Step 1: Cut denim into long, even strips. Wrap each strip tightly around the cord, securing with glue or stitches as you go.
Step 2: Begin coiling the wrapped cord into a flat spiral, stitching layers together to hold the shape.
Step 3: Once the base is as wide as you want, start stacking coils upward to form the basket walls.
Step 4: Keep wrapping and stitching until you reach the desired height. Tuck in the end neatly and secure with extra stitches.
#5. DIY Upcycled Denim Bear Plushies
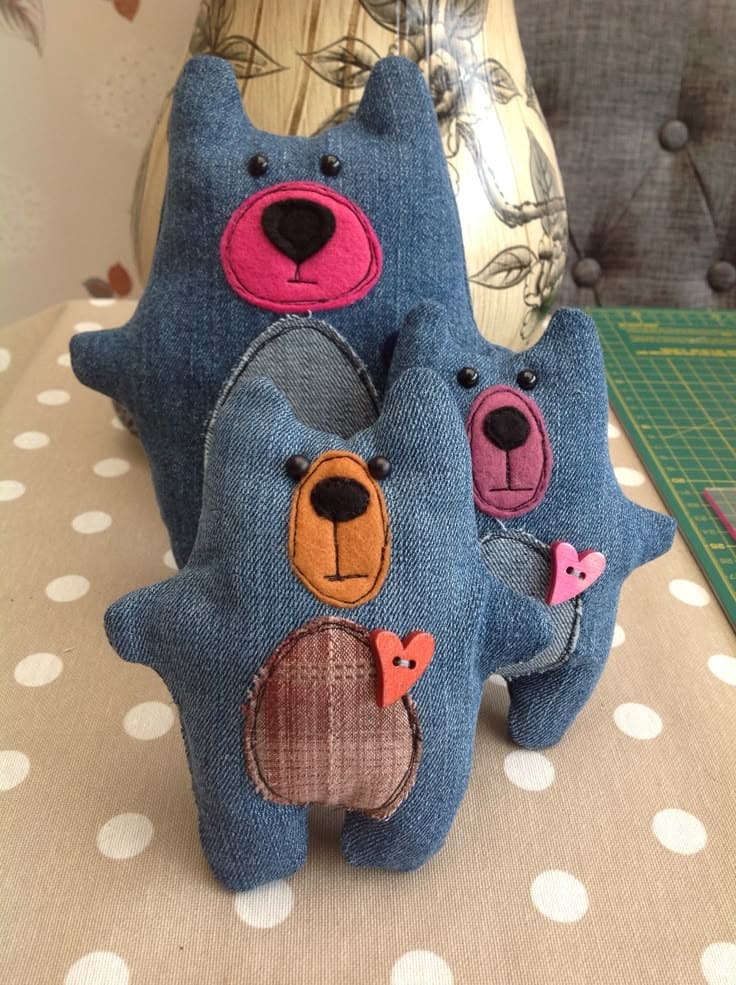
These denim bear plushies stole my heart the moment I stitched on their tiny button eyes. They’re cuddly, expressive, and full of handmade personality.
Materials Needed:
- Old jeans (enough for bear bodies)
- Small fabric scraps in brown, pink, orange, or plaid (for bellies, noses, hearts)
- Thread (matching and black)
- Polyfill or cotton stuffing (approx. 1–1.5 cups per bear)
- Small buttons or black beads (for eyes and nose)
- Scissors
- Needle or sewing machine
- Fabric glue (optional, for attaching small hearts)
Step-by-step Guide:
Step 1: Cut out two identical bear shapes from denim. You can sketch your own or use a printable template.
Step 2: Cut small oval patches for the belly and face. Stitch or glue them onto one of the denim bear pieces.
Step 3: Sew on button eyes, and attach a felt nose and a tiny heart to each bear.
Step 4: Place both denim pieces together (right sides in), sew around the edges, leaving a small gap. Turn right-side out.
#6. DIY Upcycled Denim Oven Mitts
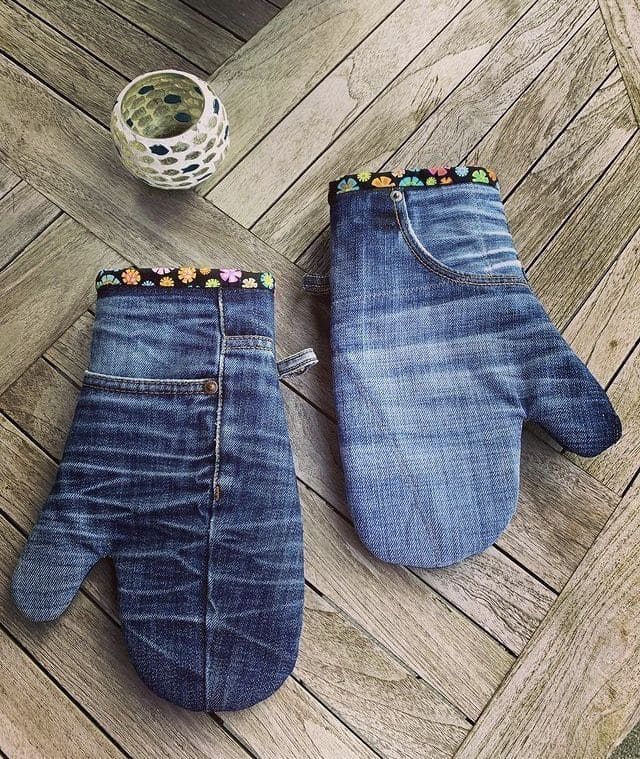
These oven mitts are proof that old jeans still have some fire in them. I made this pair from the legs of worn-out denim, and they’re now my go-to kitchen sidekicks.
Materials Needed:
- Old jeans (1 leg per mitt, preferably thicker denim)
- Heat-resistant batting or quilted fabric (2 layers per mitt)
- Cotton lining fabric (optional, 2 pieces per mitt)
- Pattern/template for oven mitt shape
- Scissors or rotary cutter
- Sewing machine or strong needle & thread
- Pins or clips
- Decorative bias tape or trim (approx. 12 inches per mitt)
Step-by-step Guide:
Step 1: Cut out 2 pieces of denim, 2 pieces of batting, and 2 lining pieces using an oven mitt pattern.
Step 2: Layer each set: denim (outside), batting (middle), lining (inside). Pin together.
Step 3: Sew around the mitt shape, leaving the wrist opening. Turn right side out.
Step 4: Add decorative bias tape or ribbon around the cuff and stitch in place.
#7. DIY Upcycled Denim Cactus Decoration
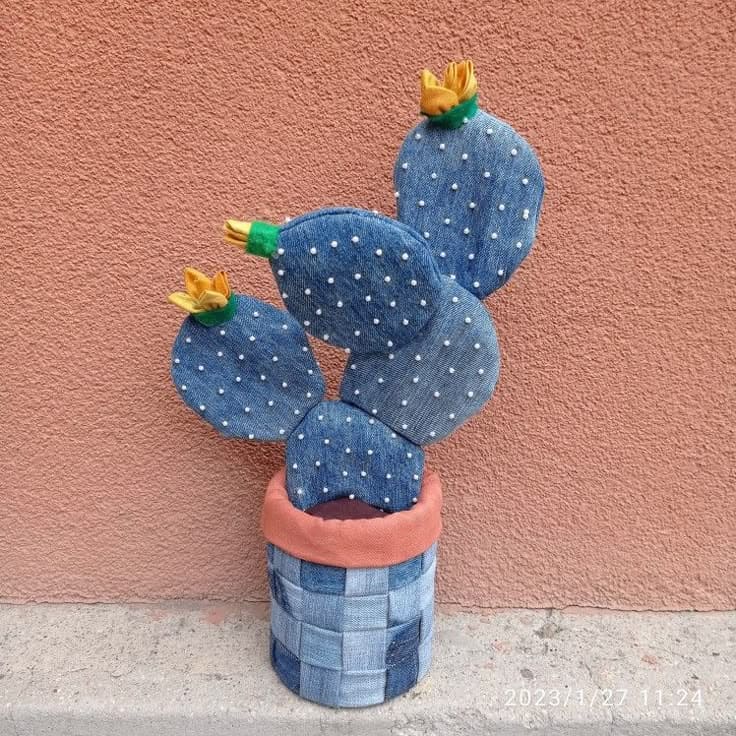
I couldn’t help but smile when I finished this quirky cactus made from old jeans. It’s soft, completely safe for curious kids or clumsy elbows, and surprisingly charming.
Materials Needed:
- Old denim jeans (at least 3 different shades or textures)
- Scrap fabric for flowers (yellow, green, and orange pieces, about 4×4 inches each)
- White fabric paint or correction pen (for polka dots)
- Soft stuffing (cotton, old pillow filling, or polyfill – around 2 cups)
- Needle and thread or glue gun
- Cardboard (for cactus structure support)
- Scissors
- Small basket or old container (for the pot)
- Hot glue or fabric glue
Step-by-step Guide:
Step 1: Cut 5–6 cactus shapes from your denim, making pairs for front and back.
Step 2: Sew or glue each pair, leaving a small opening. Stuff them, then close the gap.
Step 3: Add white dots with paint or pen and let them dry.
Step 4: Glue or stitch the cactus parts together, attach to cardboard, and secure inside the pot.
Step 5: Fold colorful scraps into tiny flowers and glue to the tops. Wrap the pot in denim strips for a finished look.
#8. DIY Denim Strip Pouf
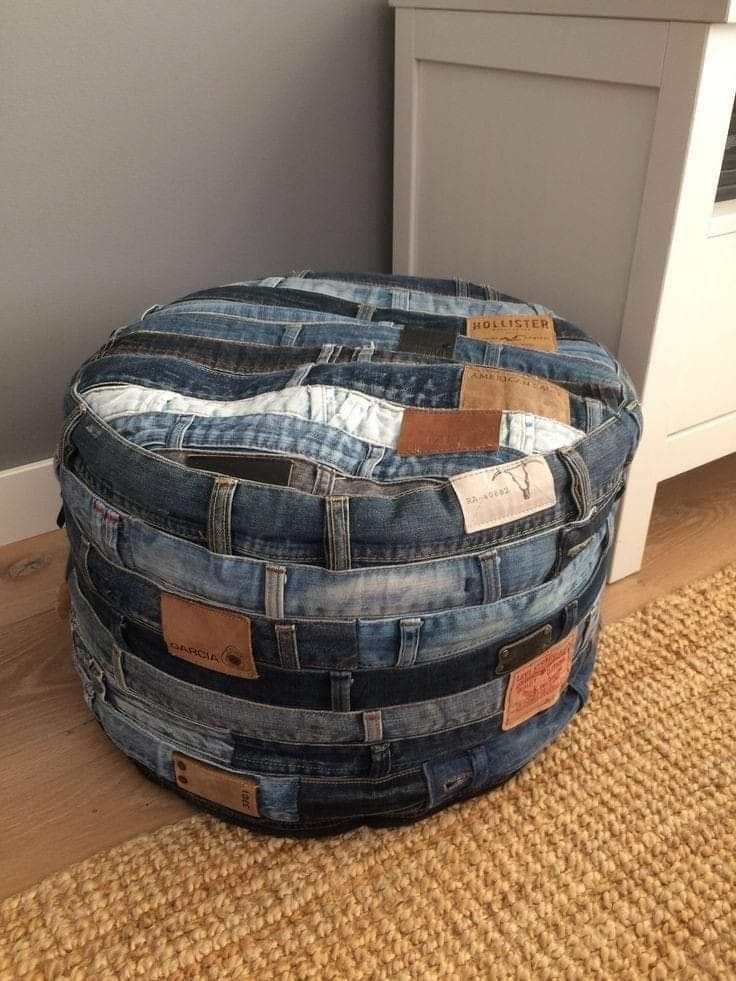
This pouf is a patchwork dream made entirely from old waistbands and jean strips.
Materials Needed:
- 15–20 denim waistbands (cut from old jeans)
- Heavy-duty fabric for the top and bottom circles (about 18–20 inches in diameter)
- Inner lining fabric (optional, to hold stuffing)
- Thick stuffing (polyfill, foam, or fabric scraps – approx. 5–7 lbs)
- Sewing machine or heavy-duty thread and hand needle
- Scissors
- Zipper or velcro strip (optional, for removable cover)
Step-by-step Guide:
Step 1: Cut out waistbands from old jeans and trim them to even lengths. Stitch end-to-end to form long horizontal strips.
Step 2: Stack and sew these strips vertically to form the side wall of the pouf.
Step 3: Cut out two circles from strong fabric, one for the top, one for the base and sew them to the top and bottom edges of the side panel.
Step 4: Turn inside out, stuff tightly, then sew closed or add a zipper for access.
#9. DIY Denim Charging Station Pocket
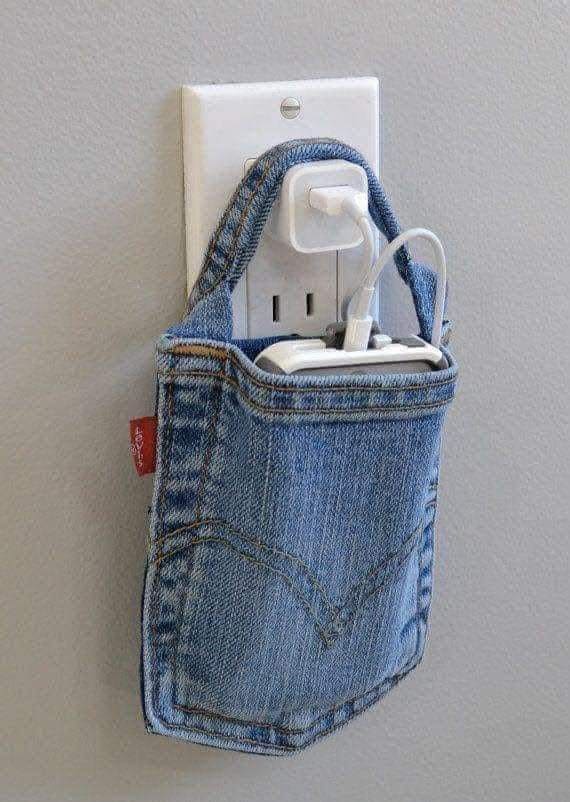
This genius little hack was born from pure necessity, too many chargers, not enough counter space.
Materials Needed:
- One back pocket from an old pair of jeans
- Extra denim strip (approx. 6–8 inches long, for the hanging loop)
- Needle and thread or hot glue gun
- Scissors
Step-by-step Guide:
Step 1: Cut out a denim back pocket with about half an inch of fabric around the edges for sewing.
Step 2: Cut a denim strip and fold it into a loop. Stitch or glue the ends to the back of the pocket to form the hanger.
Step 3: Reinforce the loop with extra stitching or glue for durability.
Step 4: Hang the loop between the wall charger and the outlet cover, then place your phone inside while charging.
#10. DIY Denim Pocket Apron
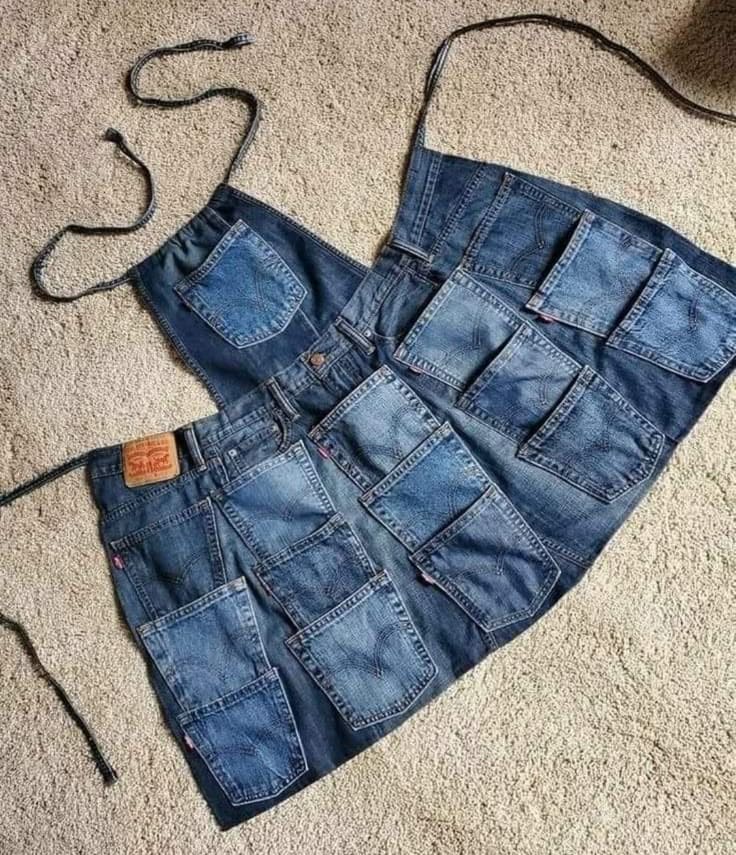
I made this from old jeans that were too worn to wear but too sturdy to toss. Now it’s got all the pockets I need for tools, seeds, brushes, or snacks (no judgment).
Materials Needed:
- 3–4 pairs of old jeans (with pockets intact)
- Scissors or rotary cutter
- Sewing machine or needle and strong thread
- Iron (optional, for flattening seams)
- Pins or clips
- Durable cord or ribbon for neck and waist ties (about 60–70 inches total)
Step-by-step Guide:
Step 1: Cut out large rectangular panels from the legs or back of jeans to form the apron base.
Step 2: Arrange and pin pockets on the front panels in rows or staggered formation.
Step 3: Stitch the pockets down securely, reinforcing corners for extra durability.
Step 4: Fold and hem the outer edges of the apron base for a clean finish.
Step 5: Attach cord or ribbon to the top and sides to create adjustable neck and waist ties.
#11. DIY Denim Rag Wreath
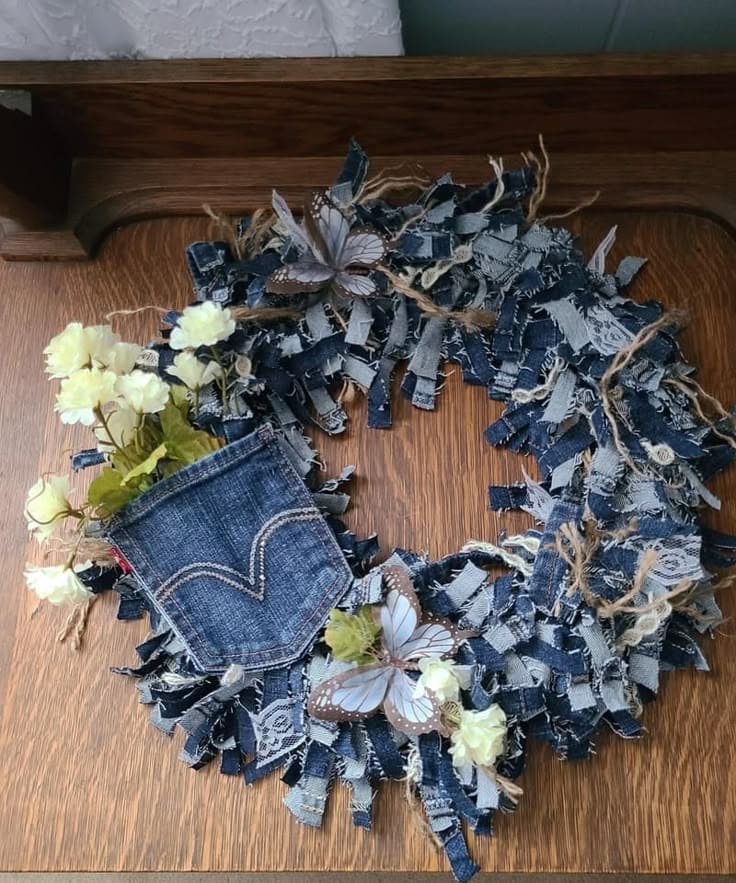
I made it using nothing but denim scraps, a wire frame, and a lone pocket I couldn’t part with. The textures, frays, and tied jute twine add a beautifully raw, earthy touch.
Materials Needed:
- Denim scraps (cut into strips approx. 1×6 inches – 60 to 100 pieces)
- Wire wreath frame (12–16 inch diameter)
- 1 back pocket from old jeans
- Artificial flowers
- Jute twine
- Butterfly embellishments
- Hot glue gun
Step-by-step Guide:
Step 1: Cut denim into strips and tie them one by one onto the wire frame until it looks full and fluffy.
Step 2: Glue or stitch the denim pocket onto one side of the wreath as a decorative feature.
Step 3: Add jute bows or extra fabric for texture. Tuck faux flowers into the pocket.
Step 4: Attach butterflies or seasonal accents as desired, then add a twine loop for hanging.
#12. DIY Upcycled Denim Floor Cushion
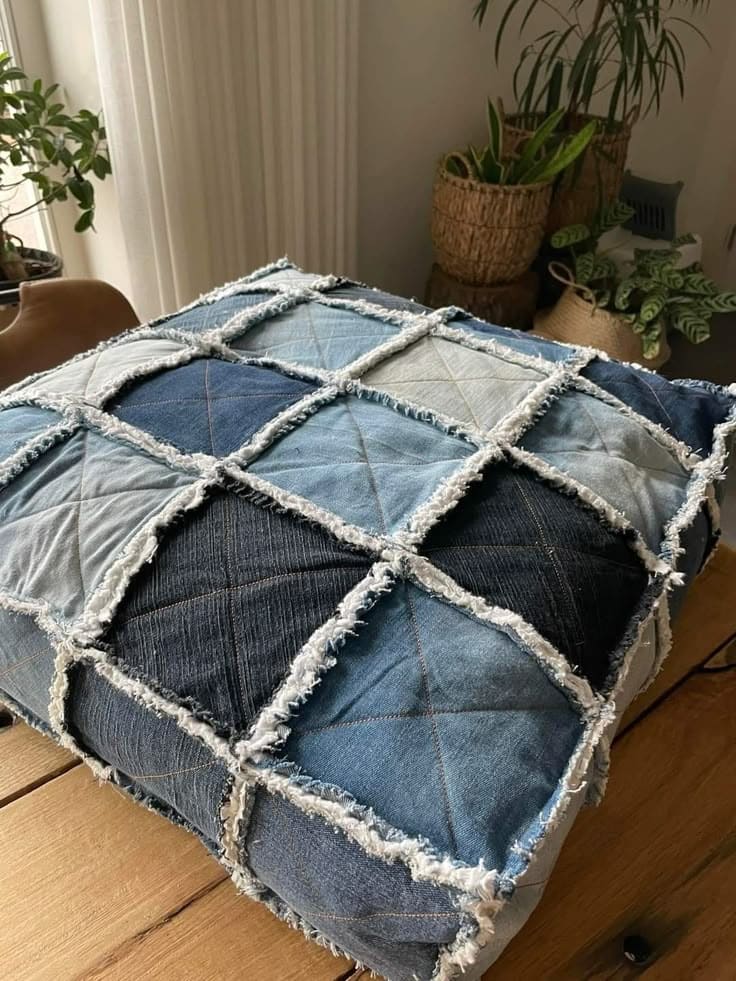
The exposed seams and frayed edges give it a rugged charm, while the size and softness make it perfect for lounging, meditation, or casual seating.
Materials Needed:
- 16–20 denim squares (each 6×6 or 8×8 inches depending on cushion size)
- Cotton or heavy-duty fabric for backing and base
- Thick stuffing (fiberfill, foam pieces, or old pillows)
- Sewing machine or strong thread and needle
- Scissors
- Ruler and chalk
Step-by-step Guide:
Step 1: Cut out uniform denim squares. Mix light, dark, and mid-wash pieces for contrast.
Step 2: Arrange your squares in a grid. Sew them together with seams facing outward for a rag-style look.
Step 3: Once the front and sides are pieced, sew them to a sturdy bottom panel, leaving one edge open.
Step 4: Stuff the cushion generously, then stitch the opening closed securely.
#13. DIY Denim Pocket Organizer
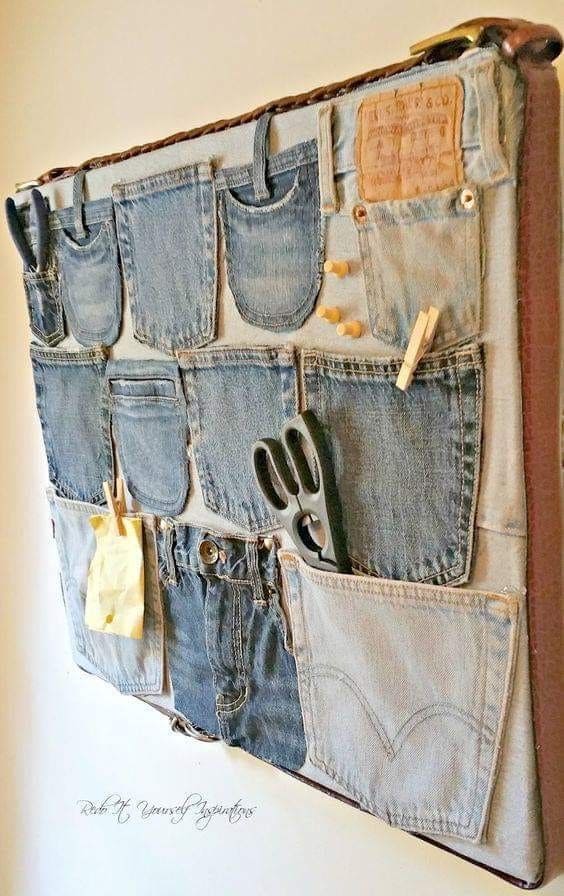
I made this wall organizer out of jean pockets because I was tired of losing scissors, pens, and that one elusive roll of tape.
Materials Needed:
- 8–12 pockets from old jeans
- A large canvas, corkboard, or firm cardboard base (approx. 18×24 inches)
- Fabric or denim scrap
- Staple gun, glue, or tacks (for attaching base cover)
- Needle and thread
- Hanging hardware (command strips or hooks)
Step-by-step Guide:
Step 1: Cover your canvas or board with denim or neutral fabric and secure it tightly around the back.
Step 2: Arrange jean pockets in rows or a creative layout. Mix washes and shapes for visual interest.
Step 3: Sew or hot glue each pocket onto the board, make sure to leave the top open!
Step 4: Add small clips, buttons, or labels for function and flair.
#14. DIY Denim Pocket Zipper Pouches
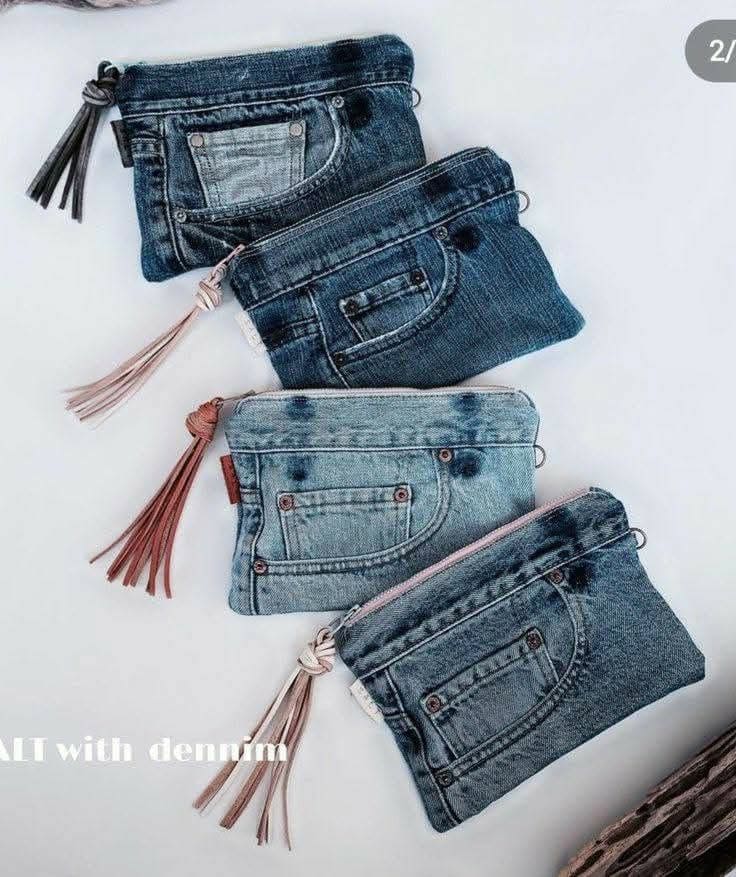
These mini pouches are sturdy, practical, and full of denim attitude. Each one keeps its own character from the original jeans and that makes every piece one of a kind.
Materials Needed:
- Old denim jeans (1 back pocket per pouch)
- Zippers (7–9 inches long, 1 per pouch)
- Matching fabric for inner lining (optional, 8×6 inches)
- Sewing machine or needle and strong thread
- Scissors
- Leather or cord (6–8 inches)
- Keyring or D-ring (optional)
Step-by-step Guide:
Step 1: Cut around the back pocket of the jeans, leaving a margin (about 1 inch) for seam allowance.
Step 2: Cut a matching denim or lining fabric piece for the back side of the pouch.
Step 3: Sew the zipper to the top edges of both the pocket piece and back fabric.
Step 4: Stitch around the remaining three sides, right sides facing. Turn the pouch right-side out.
Step 5: Attach a tassel to the zipper pull using a keyring or knot for a finishing touch.
#15. DIY Denim Plant Pot Cover
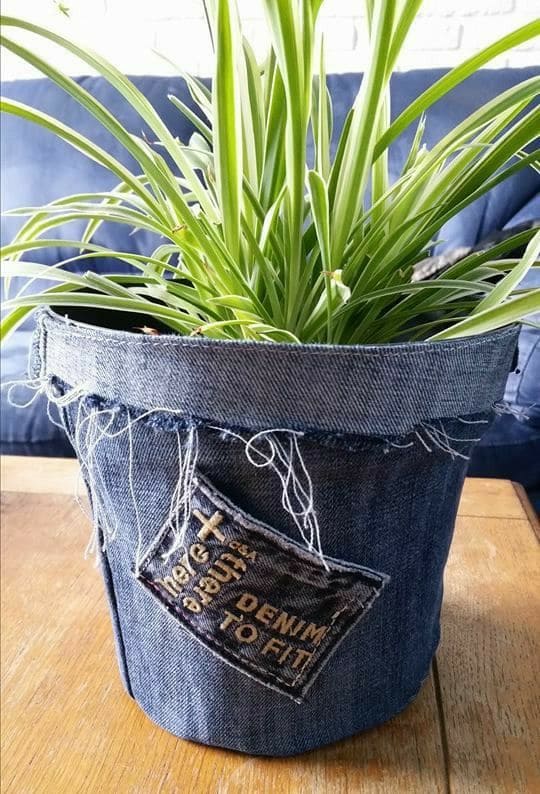
This little makeover was done in five minutes flat, and suddenly my plain plastic planter turned into something with personality.
Materials Needed:
- Old jeans (one leg section, approx. 8–12 inches tall depending on your pot)
- Empty planter
- Fabric glue
- Decorative denim label (optional)
- Scissors
Step-by-step Guide:
Step 1: Cut a denim tube from the leg of the jeans that fits snugly around your pot.
Step 2: Slide it over the pot. Fold the top edge outward to create a cuff.
Step 3: Glue any patches or labels onto the front for added detail.
Step 4: Tug and fray the edges slightly for that rugged, lived-in look.
#16. DIY Upcycled Denim Handbag
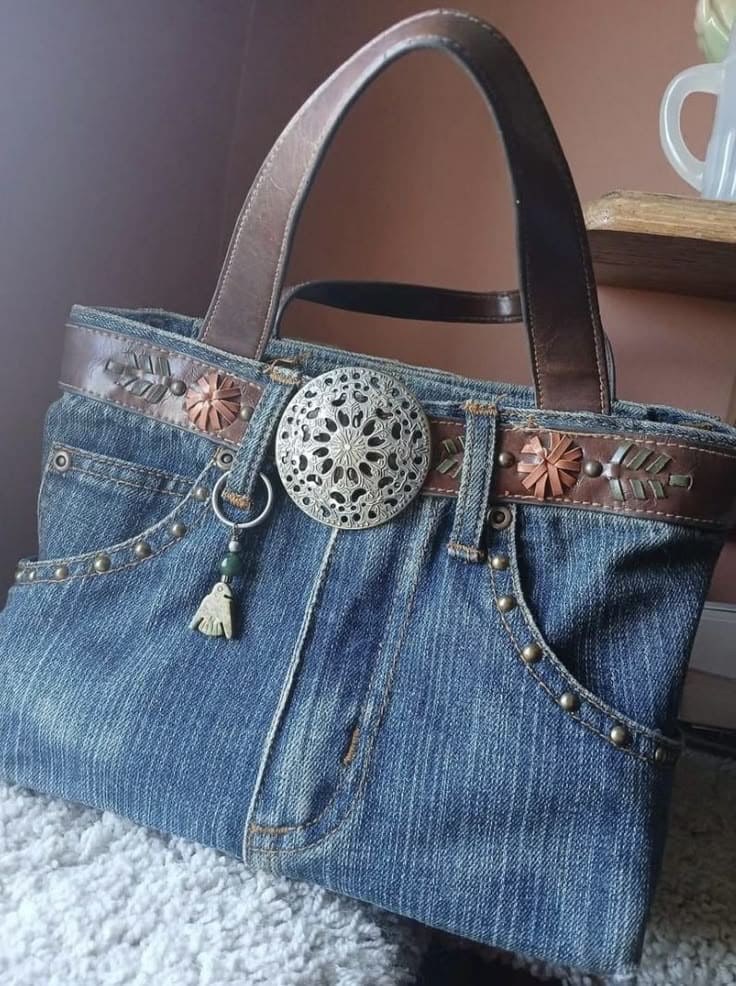
This bag is hands-down one of my proudest upcycles. I transformed a pair of jeans into a sturdy handbag with character, texture, and a touch of Western flair.
Materials Needed:
- Top half of old jeans (including front pocket and waistband)
- Sturdy fabric (approx. 16×12 inches)
- Leather belt
- Two leather straps
- Decorative buckle (optional)
- Scissors
- Sewing machine
- Fabric glue
Step-by-step Guide:
Step 1: Cut the jean section to your desired bag size, keeping front pockets for extra storage.
Step 2: Stitch closed the bottom edge and add a lining inside for a clean interior finish.
Step 3: Attach the leather belt as trim near the top edge. Sew or glue it in place securely.
Step 4: Add handles to each side using strong stitching or rivets. Decorate with a central buckle or charm for flair.
#17. DIY Patchwork Denim Table Runner
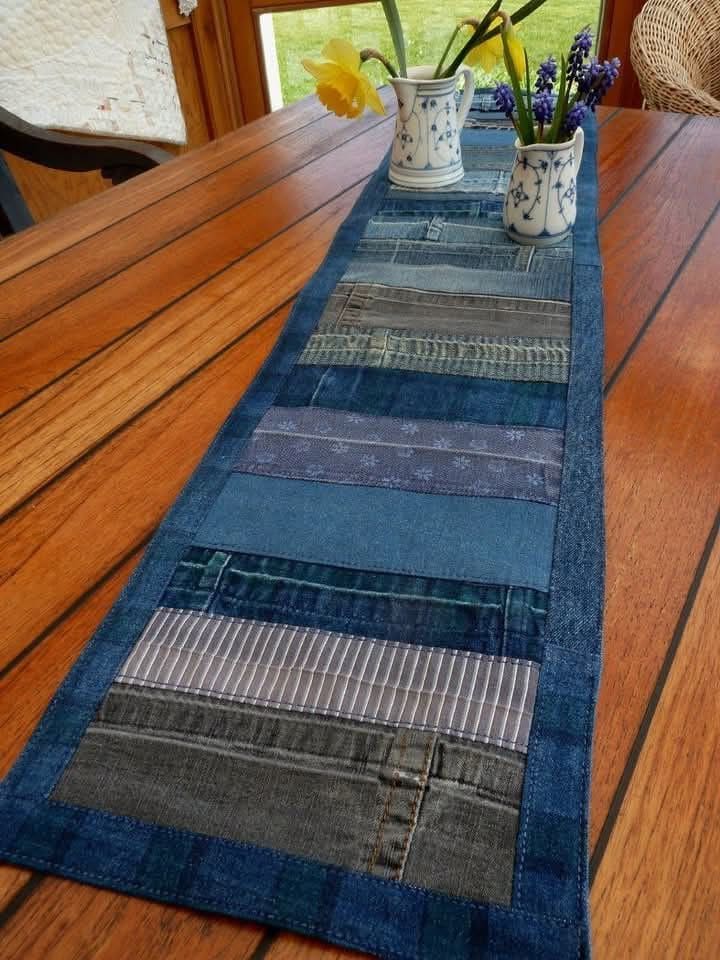
This table runner turned out way cozier than I expected. Each denim strip carries a little history, an old hemline, a pocket edge, even a faded knee.
Materials Needed:
- Assorted denim scraps (cut into 2–4 inch wide strips)
- Backing fabric (cotton or denim, approx. 15×40 inches depending on desired size)
- Border denim strips (approx. 2 inches wide)
- Scissors
- Sewing machine
- Pins
- Iron
Step-by-step Guide:
Step 1: Cut denim scraps into rectangles or strips of various shades and widths.
Step 2: Arrange the strips side by side until you reach the desired length of your runner.
Step 3: Sew the strips together lengthwise, pressing the seams flat as you go.
Step 4: Add a denim border around the entire piece, then stitch it to a backing fabric.
Step 5: Press the final runner well and topstitch along the borders for a clean finish.
#18. DIY Denim Cactus Garden
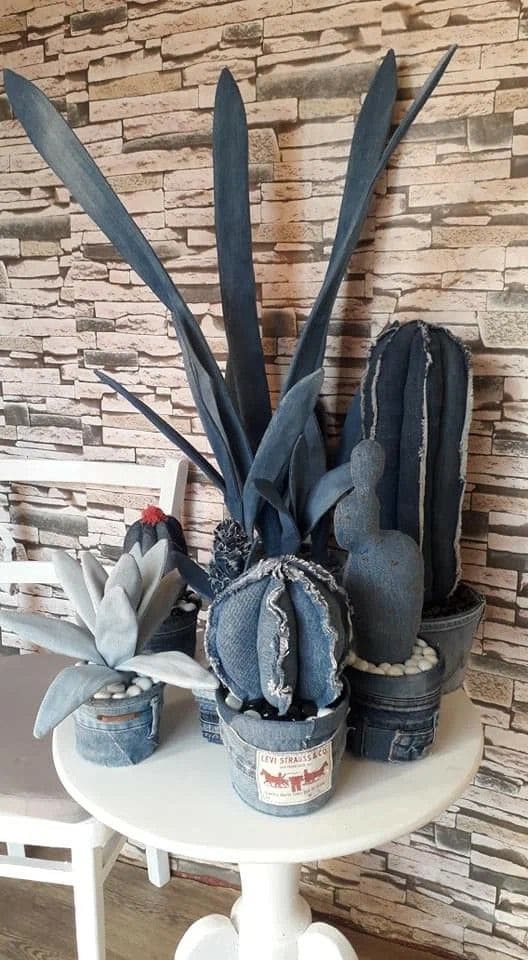
This denim cactus garden is proof that creativity has no limits, just old jeans and a little imagination.
Materials Needed:
- Assorted old jeans (light to dark washes for contrast)
- Small to medium containers or recycled cans (5–6 total)
- Cotton or pillow stuffing (approx. 3–4 cups)
- Cardboard
- Small white pebbles or beads (optional)
- Scissors
- Needle & thread
- Chalk or fabric pen
Step-by-step Guide:
Step 1: Cut out various cactus shapes, long blades for agave, vertical tubes for saguaro, round paddles or melon segments for barrel cacti.
Step 2: Sew or glue each shape into 3D forms. Stuff lightly to keep them firm but not too bulky.
Step 3: Layer and stitch contrasting denim for texture. Use visible seams, frayed edges, or topstitching for added dimension.
Step 4: Glue each cactus into a small pot or can, and add cardboard inside for taller ones to stay upright.
Step 5: Add white pebbles around the base for a clean, finished look.
#19. DIY Denim Table Decor Set
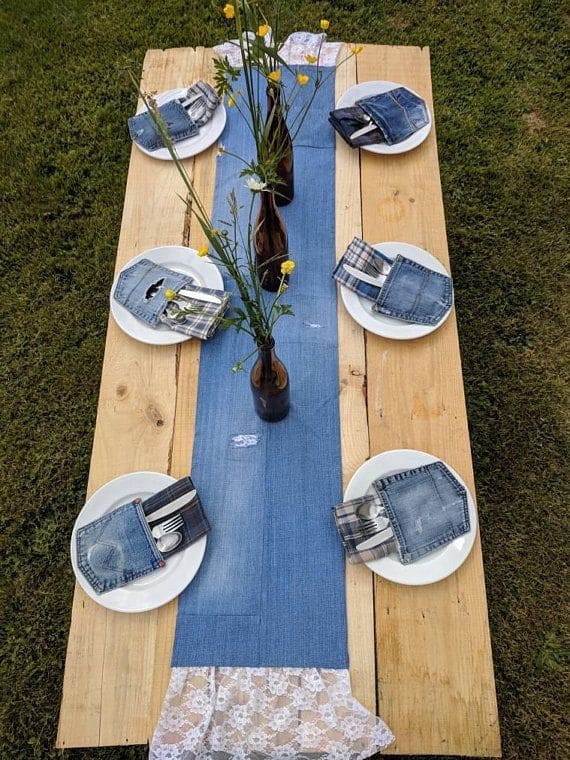
This table setup blends laid-back denim with natural wood, lace, and fresh flowers—and it’s a backyard party dream.
Materials Needed:
- 2–3 pant legs from old jeans
- Lace trim (2 strips, approx. 6–8 inches wide)
- Sewing machine or needle & thread
- Scissors, pins, iron
- 6–8 back jean pockets
- Optional: plaid or cotton fabric scraps
Step-by-step Guide:
Step 1: For the runner, stitch the jean leg pieces end to end. Hem the sides and sew lace trim to both ends.
Step 2: For each cutlery holder, cut out a pocket with some surrounding denim. Fold under and sew the raw edge if needed.
Step 3: Layer with a plaid square for extra flair and place on each plate.
Step 4: Fill with utensils and napkins, and finish the look with wildflowers in recycled glass bottles.
#20. DIY Denim Star Garland
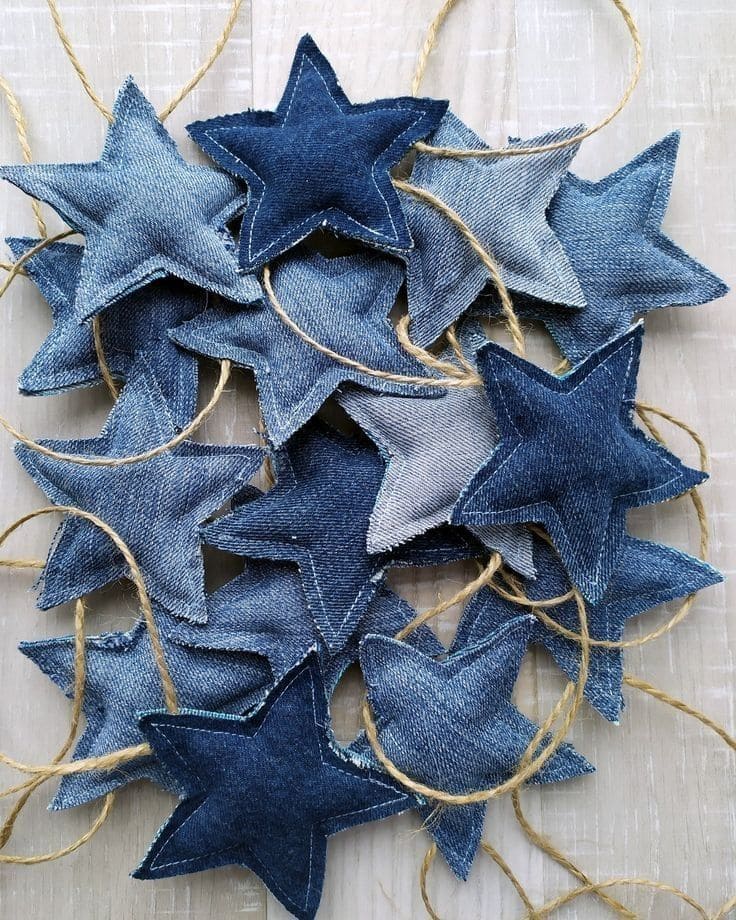
Whether strung along a mantel, across a window, or wrapped around a tree, this garland adds a touch of charm that feels both nostalgic and fresh.
Materials Needed:
- Old denim scraps (enough for double-layer stars)
- Star template (about 3–4 inches wide)
- Scissors
- Needle and thread
- Polyfill stuffing
- Twine
- Hot glue gun (optional)
Step-by-step Guide:
Step 1: Use the template to cut out pairs of stars from your denim scraps.
Step 2: Stitch each pair together along the edges, leaving a small gap. Lightly stuff, then close the seam.
Step 3: Attach each star to the twine using stitches, glue, or by threading the twine through a corner.
#21. DIY Upcycled Denim Neckties
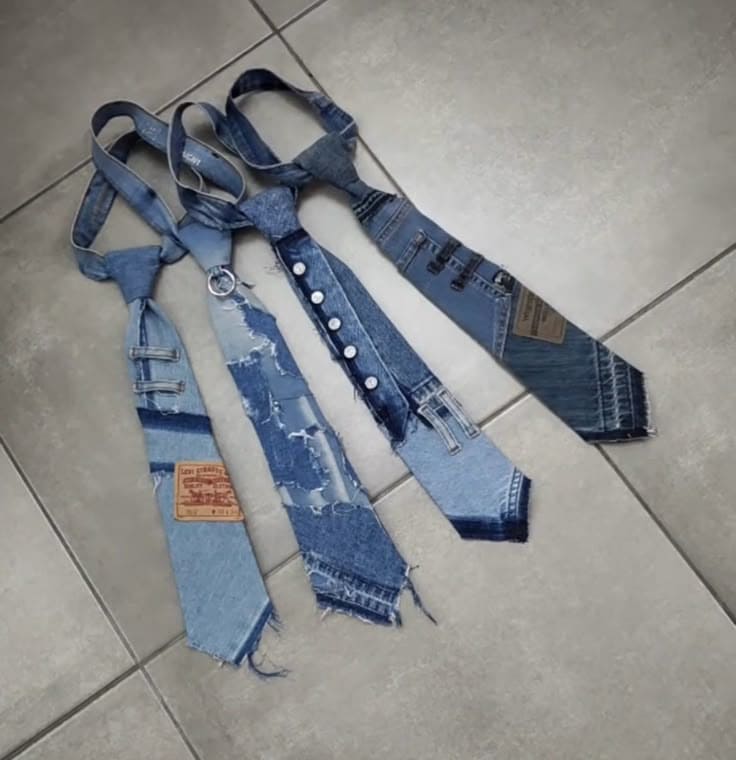
These denim ties are edgy, unconventional, and a bit rebellious, basically everything a standard tie isn’t.
Materials Needed:
- Denim scraps (at least 20″ long and 4–5″ wide)
- Fabric for lining (optional)
- Decorative elements: buttons, zippers, labels, buckles
- Scissors
- Sewing machin
- Iron
- Printable tie pattern (optional)
Step-by-step Guide:
Step 1: Cut out a tie shape using a pattern or trace from an existing tie. Cut 2 pieces—one for the front, one for lining or backing.
Step 2: Add decorative denim elements like patches, buttons, or distressing before assembly.
Step 3: Place pieces right sides together, sew around edges, then turn inside out and press flat.
Step 4: Topstitch along the edges for reinforcement. Add belt loops or metal hardware for flair.
#22. DIY Denim Flower Earrings
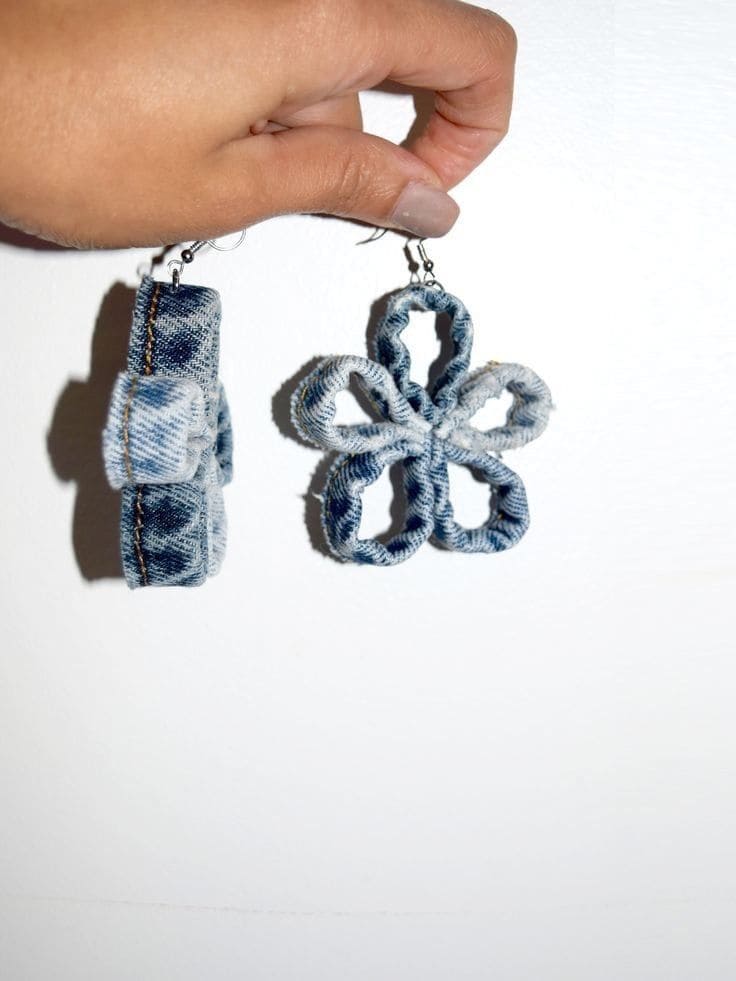
These flower earrings give off that artsy, boho vibe while being 100% upcycled.
Materials Needed:
- Denim strips (½ inch wide, 5–6 inches long, at least 5 pieces per earring)
- Needle and thread
- Earring hooks and jump rings
- Jewelry pliers
- Optional: clear nail polish
Step-by-step Guide:
Step 1: Loop each denim strip into a petal shape and secure the ends with glue or a few stitches.
Step 2: Arrange five petals in a flower shape. Stitch or glue them together at the center.
Step 3: Attach a jump ring through the center top petal.
Step 4: Use pliers to connect the jump ring to an earring hook.
#23. DIY Denim Pin Cushion
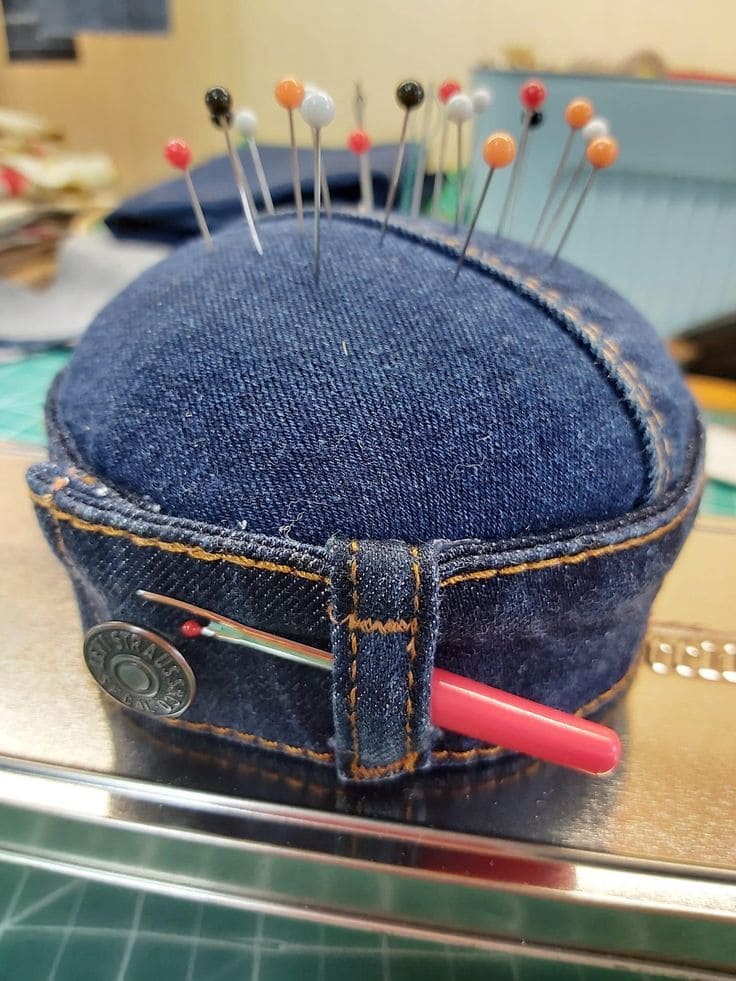
The waistband loop makes a perfect slot for small tools like a seam ripper, and the tough fabric holds up beautifully over time.
Materials Needed:
- Sturdy denim scrap (approx. 6×6 inches)
- Stuffing (polyfill, fabric scraps, or wool roving)
- Needle and thread
- Extra denim belt loop
- Optional: jean label or button
- Scissors
Step-by-step Guide:
Step 1: Cut two circles or a dome and base shape from denim.
Step 2: Sew them together around the edge, leaving a small gap. Turn inside out.
Step 3: Stuff tightly until the cushion is firm. Stitch the opening closed.
Step 4: Attach a belt loop or label around the side using a strong stitch or glue.
Step 5: Add pins, a seam ripper, or small scissors and place it by your machine for instant reach.
#24. DIY Denim Feather Keychain
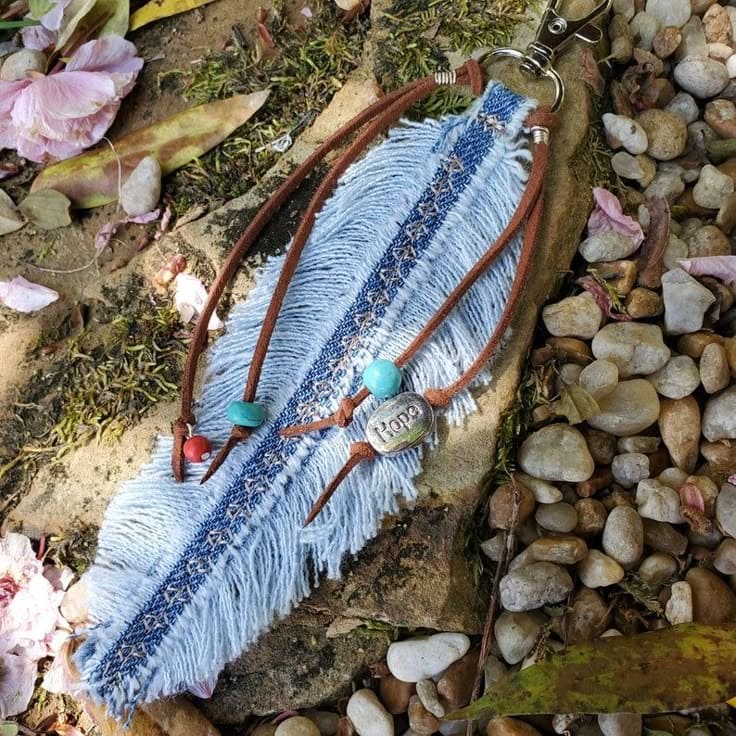
I love how the frayed threads mimic the softness of a real feather, and the addition of leather cords and meaningful beads gives it a boho charm.
Materials Needed:
- Strip of denim (approx. 1.5 x 6 inches)
- Small piece of leather cord (2–3 strands, 6–8 inches long)
- Decorative beads
- Keyring
- Hot glue gun
- Fine-tooth comb
- Scissors
Step-by-step Guide:
Step 1: Cut the denim into a long oval or feather shape. Leave the center seam as the “spine” of the feather.
Step 2: Use a pin or comb to fray both sides of the denim, pulling horizontal threads to create texture.
Step 3: Attach the top of the denim feather to a keyring using glue or by wrapping with leather cord.
Step 4: Tie on extra leather cords and add beads or charms as accents.
#25. DIY Denim Flower People
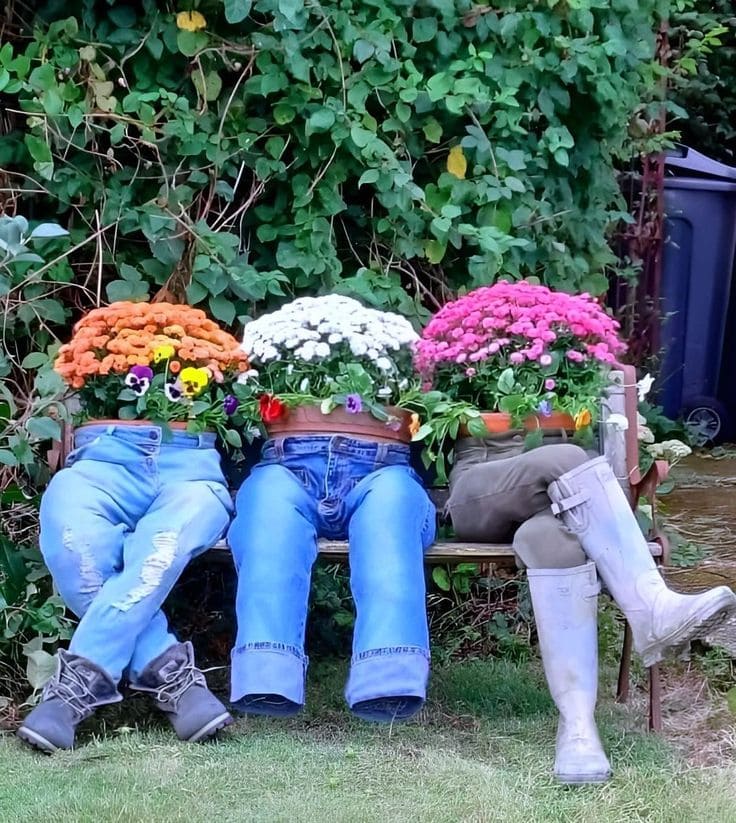
With potted flowers as heads and pants stuffed to look like legs, they bring serious personality to any outdoor space.
Materials Needed:
- 3 pairs of old jeans (denim or any pants will do)
- 3 large potted flowers (mum, pansy, or anything full and bushy)
- Newspaper, straw, or plastic bags
- 3 pairs of old boots
- Bench or sturdy seating area
- Optional: suspenders, gloves, or other accessories
Step-by-step Guide:
Step 1: Stuff the legs of each pair of jeans with newspaper or plastic bags until firm. Leave the waist open for the planter.
Step 2: Sit each pair of pants on a bench and place a potted plant inside the waistband—this becomes the “head.”
Step 3: Tuck the pot down snugly so it stays upright. Add shoes or boots to the feet for personality.
Step 4: Adjust leg position so they look relaxed, crossing one leg or leaning sideways adds charm.
Step 5: Optional: Add gloves, garden tools, or hats for extra whimsy.
#26. DIY Rag-Style Denim Quilt
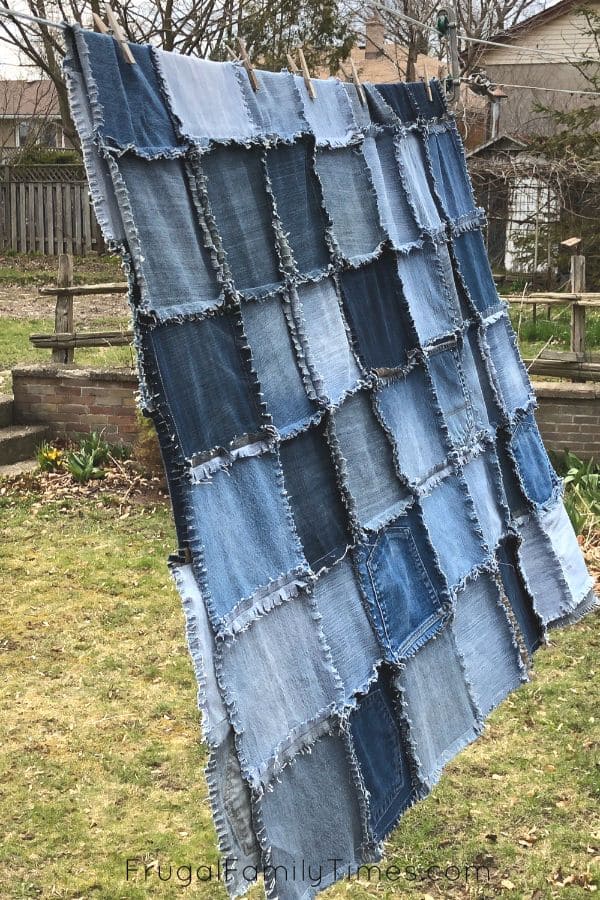
Made entirely from squares of old jeans, it’s not only budget-friendly but built to last.
Materials Needed:
- 49 denim squares (7×7 inches each for a 7×7 quilt, adjust as needed)
- Optional: batting squares (slightly smaller) and soft cotton backing
- Sewing machine
- Fabric scissors
- Ruler
- Pins
Step-by-step Guide:
Step 1: Cut denim from old jeans into uniform squares. Vary the washes for a patchwork effect.
Step 2: Optional – layer each denim square with batting and backing to create a mini quilt sandwich before sewing.
Step 3: Stitch squares together with ½” seams exposed outward for the rag-style look. Assemble row by row, then sew rows together.
Step 4: Clip or fringe all seam allowances to encourage fraying, then toss in the washer and dryer to fluff.


