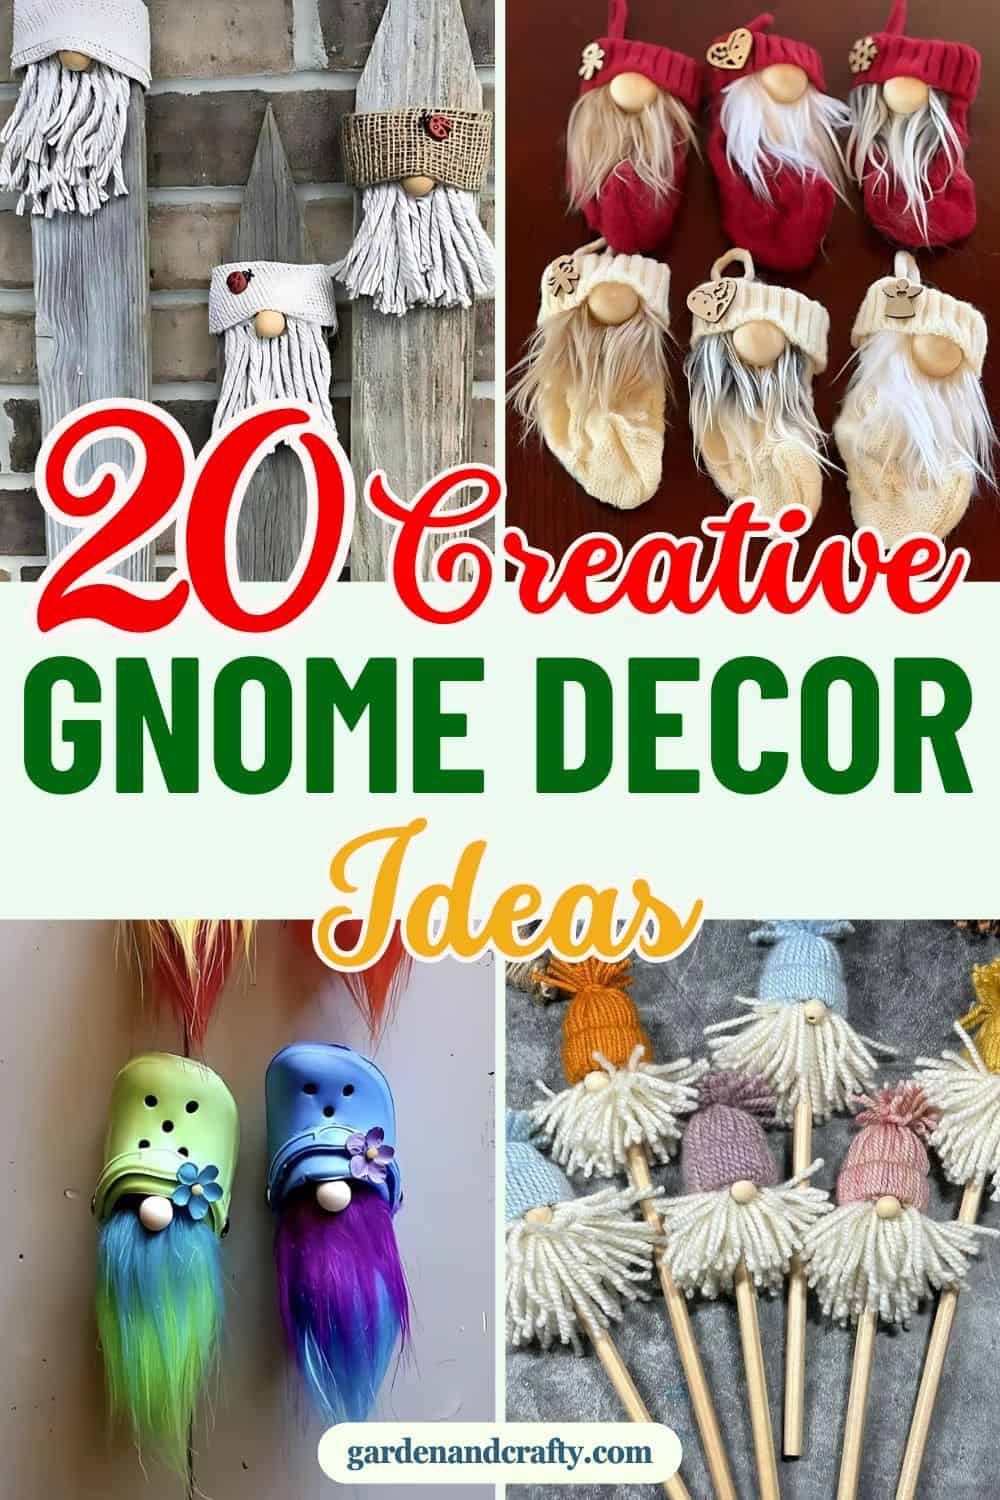
Gnomes have become cherished symbols in festive decor, adding whimsy and charm to celebrations.
From Christmas to seasonal gatherings, these little figures bring joy to any setting.
Even better, you can craft your own gnomes using recycled materials, making your decor both creative and eco-friendly.
#1. Charming Recycled Denim Gnomes
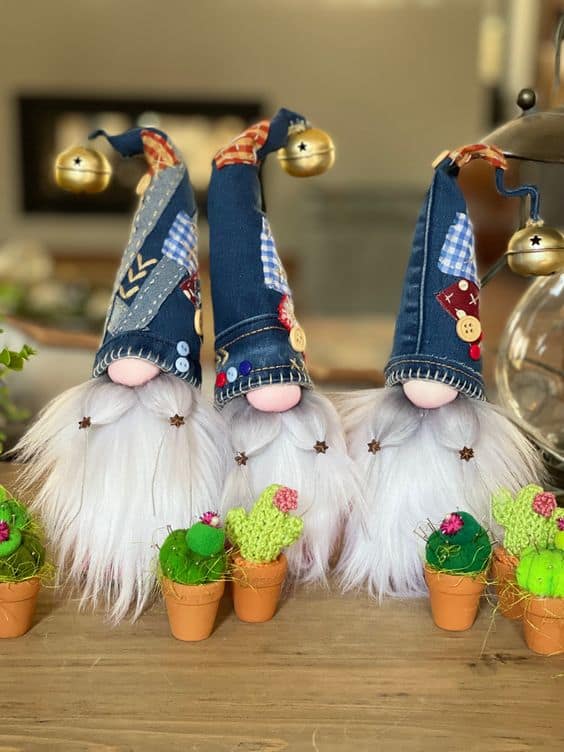
You won’t believe how adorable these gnomes are, made from recycled denim and old buttons! Each one is uniquely decorated with patchwork hats and rustic embellishments.
Supplies
- old denim fabric
- assorted buttons
- small fabric patches
- jingle bells
- wooden beads or felt balls
- fake fur or yarn in white or gray
- polyfill stuffing or cotton balls
- hot glue gun or sticky glue dots
Instructions
- Cut triangular pieces of denim to form cone-shaped hats.
- Glue or stitch along the edges, then stuff lightly with polyfill for structure., then attach a jingle bell to the tip of each hat.
- Decorate the hats by gluing buttons and small fabric patches for a fun, whimsical look.
- Cut a piece of fake fur or yarn for the beard and glue it inside the hat’s edge, then add a wooden bead or felt ball as the nose, placing it just above the beard.
#2. Festive Wine Bottle Gnome Toppers

This delightful trio of wine bottle gnomes is lovely, each gnome sports a quirky hat and fluffy beard, transforming a simple wine bottle into a cheerful decoration.
Supplies
- felt fabric in green, red, and brown (or other desired colors for hats)
- white faux fur or wool roving
- wooden beads
- scissors
- hot glue gun or fabric glue
- wine bottles
Instructions
- Cut a triangle shape, then roll the felt into a cone and secure the edge with glue, then twist the tip slightly for a whimsical look.
- Trim a small piece of faux fur or wool roving into a beard shape, making it wide enough to cover the front of the wine bottle. Glue the beard onto the bottle, positioning it so the top edge will sit just under the hat.
- Attach a wooden bead just above the beard as the nose, nestling it right at the base of the hat.
- Finally, place the hat over the top of the wine bottle, positioning it so it covers part of the nose for that classic gnome style.
#3. Cozy Sock Gnome Creations
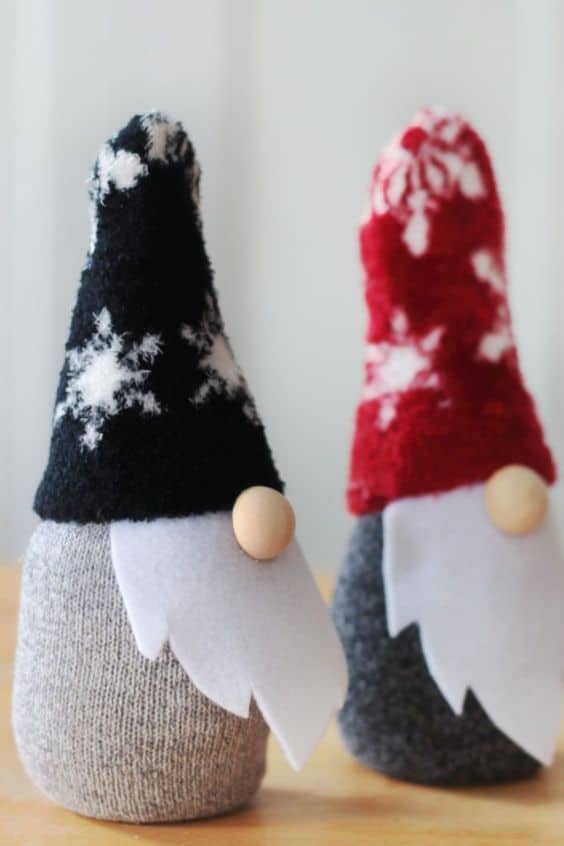
With their soft, snuggly hats and simple wooden noses, these DIY gnomes are a fun, sustainable project perfect for upcycling.
Supplies
- old socks
- rice or dried beans
- rubber bands
- felt or fleece fabric for the beard
- wooden beads for the noses
- scissors
- hot glue gun or fabric glue
Instructions
- Fill the base of a plain sock with rice or beans until it feels sturdy and rounded. Secure the top of the sock with a rubber band to hold the filling in place.
- Trim a patterned sock and shape it into a cone to make a hat, then slide it over the top of the filled sock.
- Cut a piece of white felt into a beard shape and glue it onto the front of the gnome, just under the hat’s edge.
- Finally, attach a wooden bead at the top of the beard to create the nose.
#4. Bottle Cap Gnome Magic
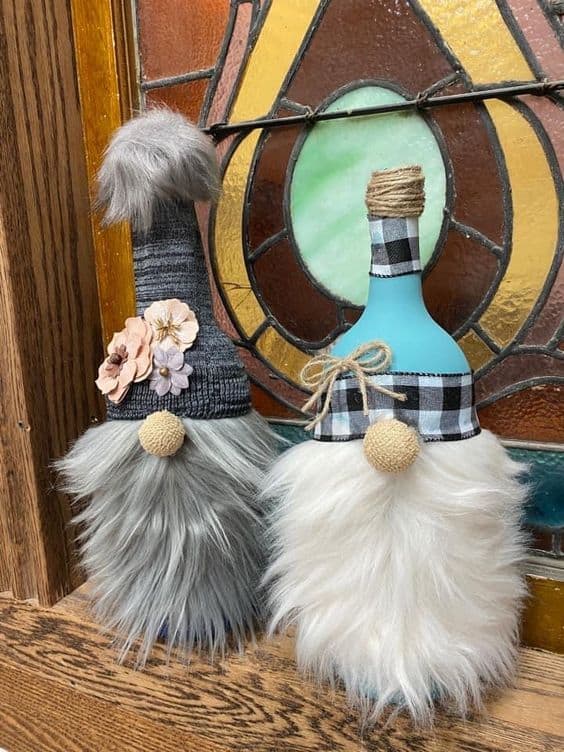
Who can resist these charming bottle cap gnomes? Made from upcycled bottles and fluffy faux fur, these delightful creations bring a rustic vibe to your decor.
Supplies
- empty wine bottles or any glass bottles
- paint
- faux fur fabric for the beards
- small fabric scraps or ribbon
- wooden beads or buttons
- decorative elements (flowers, twine, etc.)
- hot glue gun or strong adhesive
Instructions
- Paint the bottles in your desired colors and let them dry completely.
- Cut a piece of faux fur into a beard shape and glue it to the front of the bottle, allowing it to cover the lower part.
- Attach a wooden bead or button just above the beard for the nose.
- Wrap fabric scraps, ribbon, or a small sock around the bottle neck to create a hat or scarf. Add decorative elements like flowers, bows, or twine to personalize each gnome.
#5. Candy Jar Gnome Delight
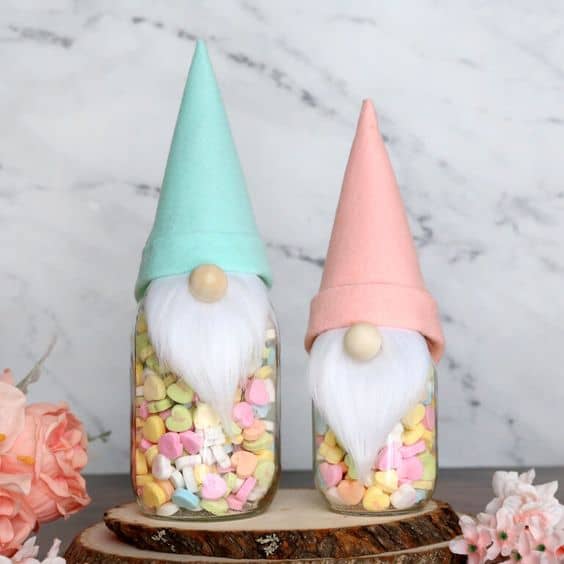
I am sure these candy jar gnomes will melt your heart! Crafted from recycled glass jars and filled with colorful candy, they sport adorable felt hats and charming wooden noses.
Supplies
- empty glass jars
- small candies
- felt in pastel colors
- faux fur
- wooden beads
- scissors
- hot glue gun or fabric glue
Instructions
- Fill the glass jars with colorful candies up to the top.
- Cut a triangle shape from the felt and wrap it into a cone to form a gnome hat. Glue the edges to secure it, then place it on top of the jar lid.
- Trim a small piece of faux fur into a beard shape and glue it to the front of the jar, just below the hat.
- Attach a wooden bead at the top of the beard for the nose, tucking it slightly under the hat’s brim.
#6. Rustic Wood Gnome Magic
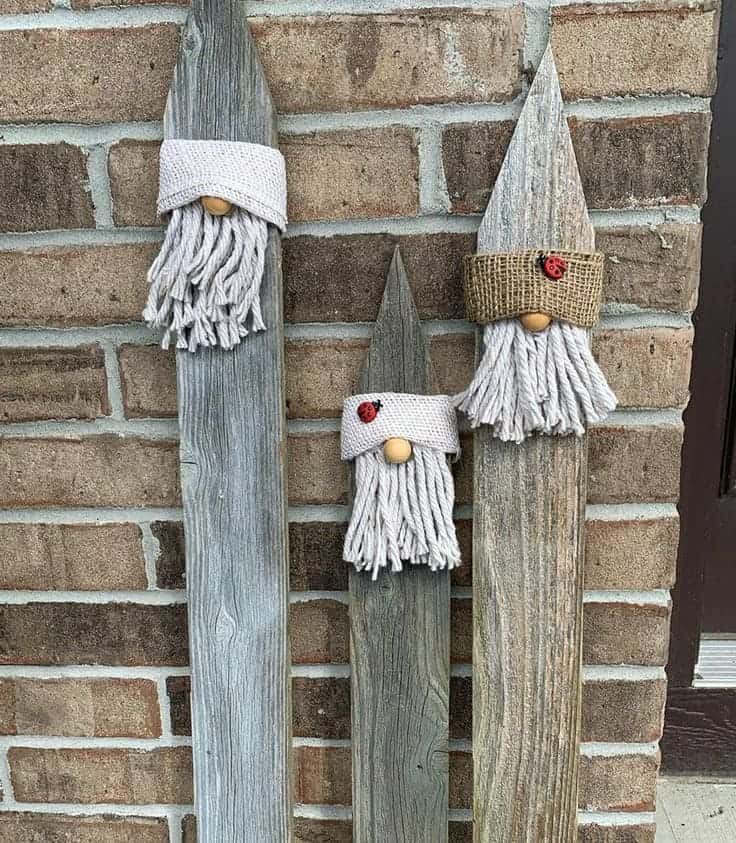
Crafted from old fence planks, twine, and burlap, these recycled beauties feature cozy beards and delightful ladybug accents.
Supplies
- reclaimed wooden boards
- thick yarn or rope
- burlap, fabric, or knitted material
- wooden beads
- small decorative elements (like ladybug embellishments, optional)
- hot glue gun or strong adhesive
Instructions
- Start by cutting the wooden boards to size, making sure each has a pointed top to resemble a hat peak.
- Cut thick yarn or rope into equal-length strands and glue them onto the board just below the pointed top to form the beard.
- Wrap a strip of fabric, burlap, or knitted material around the top of the board to create a hat band, securing it in place with glue.
- Attach a wooden bead at the top of the beard, just under the hat band, to act as the nose.
- Add any additional embellishments, like a small ladybug decoration, for extra charm.
#7. Cozy Yarn and Felt Gnome
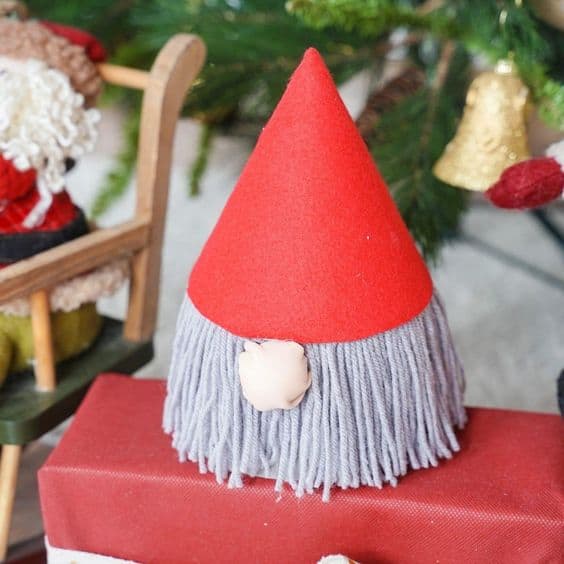
With its red felt hat and soft, yarn beard, this little gnome is perfect for adding a touch of festive, handcrafted warmth to your home decor!
Supplies
- cardboard cone or recycled paper
- red felt
- gray yarn
- wooden bead or small ball
- scissors
- hot glue gun or craft glue
Instructions
- Wrap red felt around the cardboard cone, cutting it to fit, and glue it securely to form the gnome’s hat.
- Cut strands of gray yarn to the desired beard length. Attach each strand around the bottom edge of the cone, layering them to create a full beard.
- Glue a wooden bead at the top of the beard, centered just below the hat, to serve as the nose.
#8. Rustic Wood Gnome
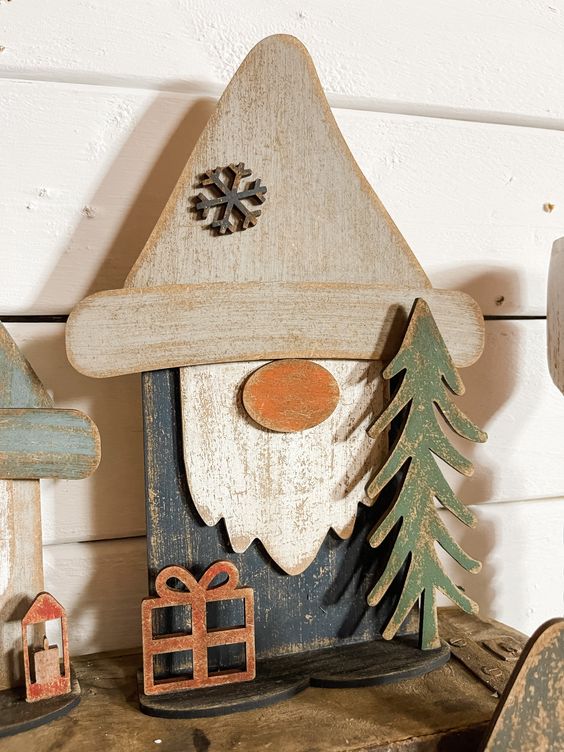
Crafted from recycled wooden pieces, this rustic gnome exudes holiday spirit with its charming hand-painted details. Its weathered texture gives it a timeless feel, perfect for handmade touch.
Supplies
- reclaimed wood pieces
- sandpaper
- acrylic paint (white, black, green, orange, etc.)
- small embellishments (e.g., snowflake or star)
- wood glue or hot glue gun
- paintbrush
Instructions
- Sand down the wood pieces to smooth the surfaces.
- Paint each piece: use white or beige for the beard, black or navy for the body, orange for the nose, and green for the tree.
- Glue the pieces together, starting with the body as the base. Attach the beard, hat, and nose, then add the tree and any embellishments, like a small snowflake or present.
#9. Recycled Egg Carton Gnomes
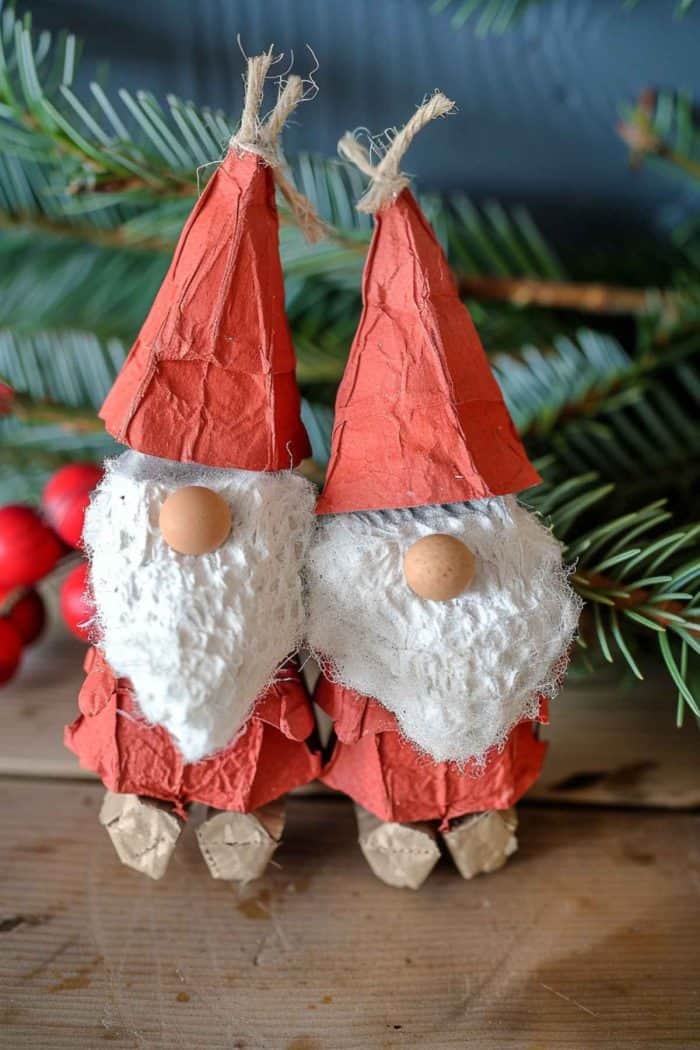
These adorable little gnomes feature textured beards and whimsical hats made from simple materials, making them a delightful addition to your holiday decor.
Supplies
- empty egg cartons
- red and white paint
- paintbrush
- small wooden beads
- pieces of white lace or yarn
- hot glue gun or strong adhesive
- scissors
Instructions
- Cut sections of the egg carton to create the gnome body, hat, and feet. Paint the body and hat red, and leave the feet natural or paint them as desired.
- Glue the feet to the bottom of the body section. Attach the hat to the top of the body, letting it angle slightly for a whimsical look.
- Cut lace or yarn into beard shapes and glue them under the hat edge. Then, attach a small wooden bead on top of the beard to serve as the nose.
#10. Festive Pinecone Gnome
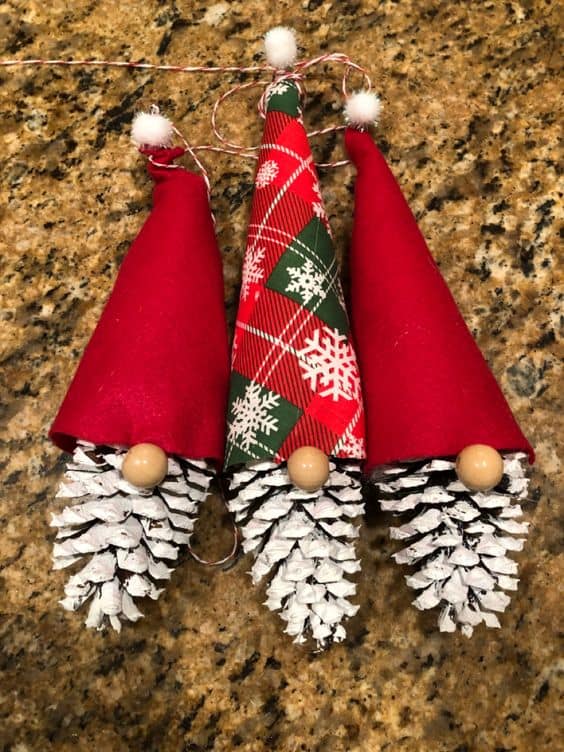
These charming little gnomes combine painted pinecones, soft felt hats, and wooden bead noses, creating a rustic yet playful decoration. They are perfect for your Christmas tree or mantel.
Supplies
- pinecones
- red and patterned fabric or felt
- small wooden beads
- white paint (optional)
- small white pom-poms
- twine or string
- scissors
- hot glue gun or fabric glue
Instructions
- Paint the tips of the pinecones white, then allow them to dry completely.
- Cut fabric or felt into triangles and roll each into a cone shape to form the hats. Glue the edges to secure, then attach a white pom-pom at the tip of each hat.
- Glue the hats onto the top of each pinecone, positioning them so they tilt slightly forward. Attach a wooden bead just under the hat for the nose.
- Finally, attach a loop of twine or string to the back of the hat for hanging.
#11. Charming Clay Pot Gnome
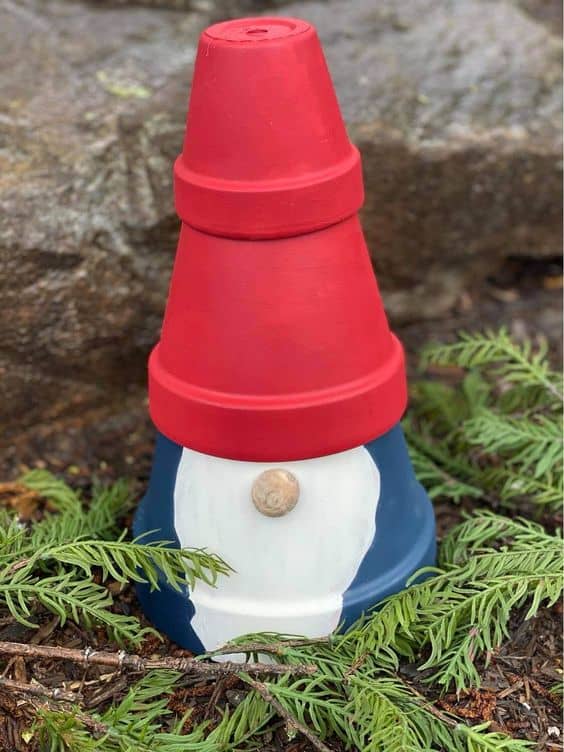
You can transform ordinary clay pots into this charming and creative gnome!
Supplies
- 3 small terracotta pots
- acrylic paint (red, blue, and white)
- paintbrush
- small wooden bead or button
- hot glue gun or strong adhesive
Instructions
- Paint one pot blue for the gnome’s body and two pots red for the hat, then let the paint dry completely.
- Stack the red pots on top of the blue one, gluing them securely to form the gnome’s body and hat.
- Paint a white beard shape on the blue pot, covering the front center.
- Attach a small wooden bead or button above the beard for the nose.
#12. Creative Brush Gnome
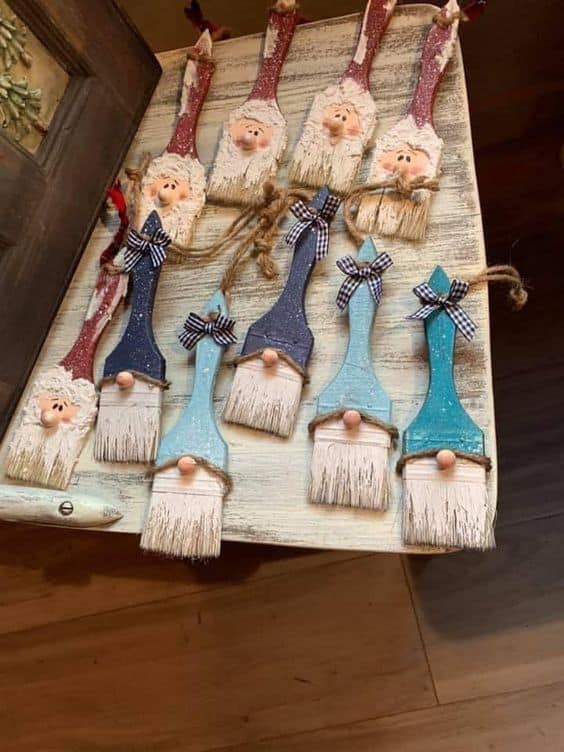
Wao! These delightful brush gnomes with colorful hats and rustic bows bring charm to any corner of your home.
Supplies
- old or unused paintbrushes (various sizes)
- acrylic paint (in assorted colors)
- small wooden beads
- twine
- hot glue gun or strong adhesive
- paintbrush for painting
Instructions
- Paint the handle of each paintbrush in your desired colors, leaving the bristles unpainted to resemble the gnome’s beard.
- Glue a wooden bead near the top of the bristles to act as the gnome’s nose.
- Attach a mini bow or tie a small ribbon around the handle just above the bristles for added decoration.
- Finally, tie a piece of twine around the handle or glue it to the back for hanging.
#13. Charming Teacup Gnomes
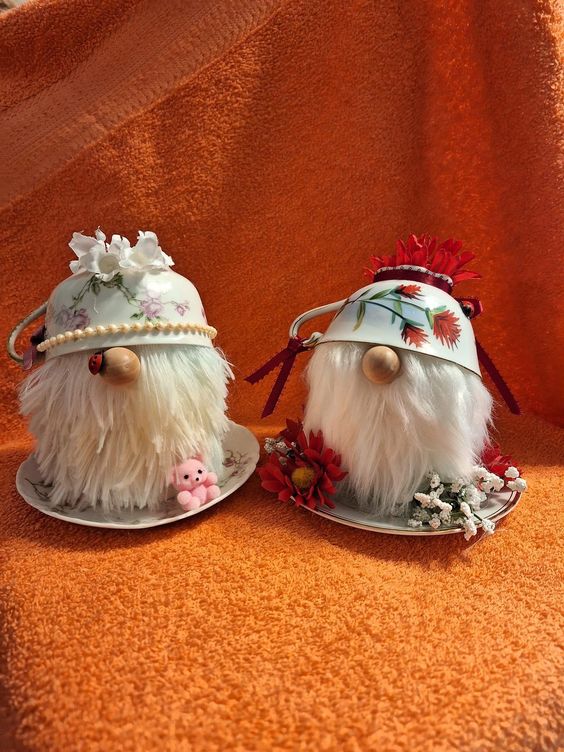
I love how these charming teacup gnomes add a whimsical touch to any space!
Supplies
- vintage teacups and saucers
- faux fur or yarn
- small wooden beads
- decorative elements (small flowers, pearls, ribbons)
- hot glue gun or strong adhesive
- scissors
Instructions
- Glue the teacup upside down onto the saucer to create the base for the gnome.
- Cut a piece of faux fur into a beard shape and attach it to the front of the teacup, just below the rim.
- Glue a wooden bead at the top center of the beard to serve as the nose.
- Decorate the teacup with small flowers, ribbons, or pearls to give each gnome a unique look.
#14. Upcycled Lightbulb Gnome Charm
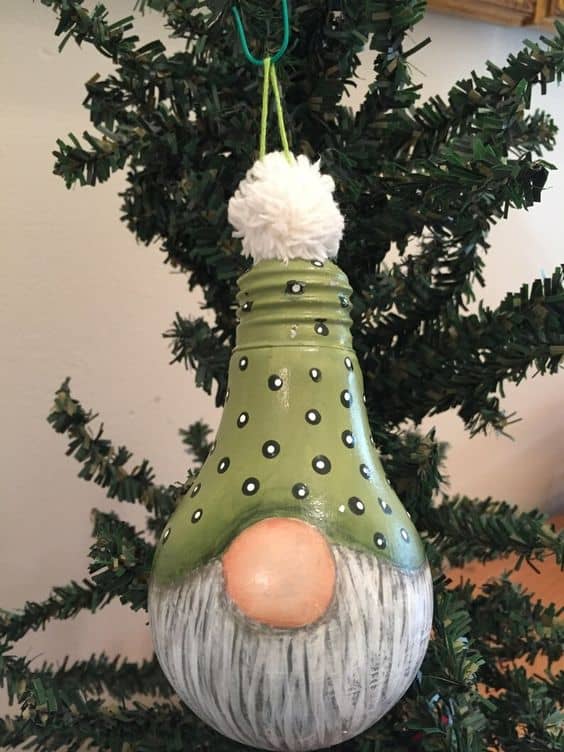
You can transform old lightbulbs into adorable gnomes with a touch of paint and creativity!
This delightful ornament showcases a charming beard, a dotted green hat, and a playful pom-pom, making it perfect for holiday décor.
Supplies
- old light bulb
- acrylic paint (green, white, black, and skin tone)
- small wooden bead or paint for the nose
- small white pom-pom
- paintbrush
- hot glue gun or strong adhesive
- string or ribbon
Instructions
- Paint the top half of the light bulb green for the gnome’s hat, adding white dots or other designs as desired.
- Use skin-tone paint to create a circle on the bulb for the nose area and white paint below it for the beard, adding brushstrokes to give it texture.
- Attach a small wooden bead for the nose over the painted skin-tone area.
- Glue a small white pom-pom at the top of the bulb to finish the hat.
- Tie a piece of string or ribbon around the base of the bulb for hanging, and your adorable light bulb gnome is ready to decorate the tree.
#15. Adorable Yarn Gnome Pencil Toppers
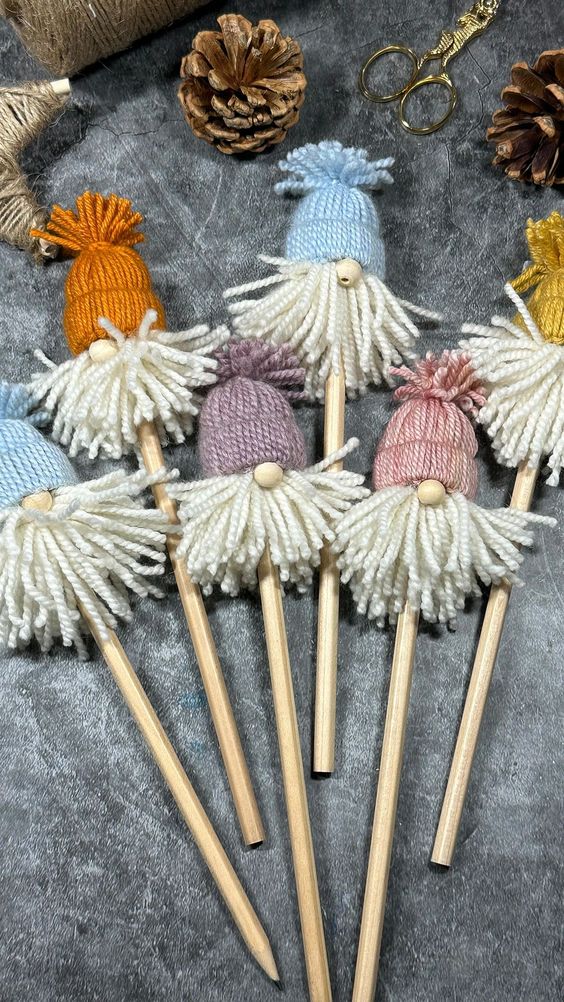
Do you love adding whimsical touches to your workspace? These charming gnome pencil toppers made from recycled yarn are the perfect way to add fun to your stationery!
Supplies
- wooden sticks or pencils
- yarn in assorted colors
- small wooden beads
- scissors
- hot glue gun or craft glue
Instructions
- Wrap colored yarn around your fingers multiple times to create a small bundle. Slide it off and tie one end to form a pom-pom for the hat’s top, trimming the other end.
- For the beard, cut several strands of white yarn to equal lengths. Glue the strands around the top of the pencil or stick, spreading them out evenly.
- Glue the pom-pom hat on top of the beard, covering the end of the strands. Attach a small wooden bead just under the hat as the nose.
#16. Rustic Rope Gnome Charm
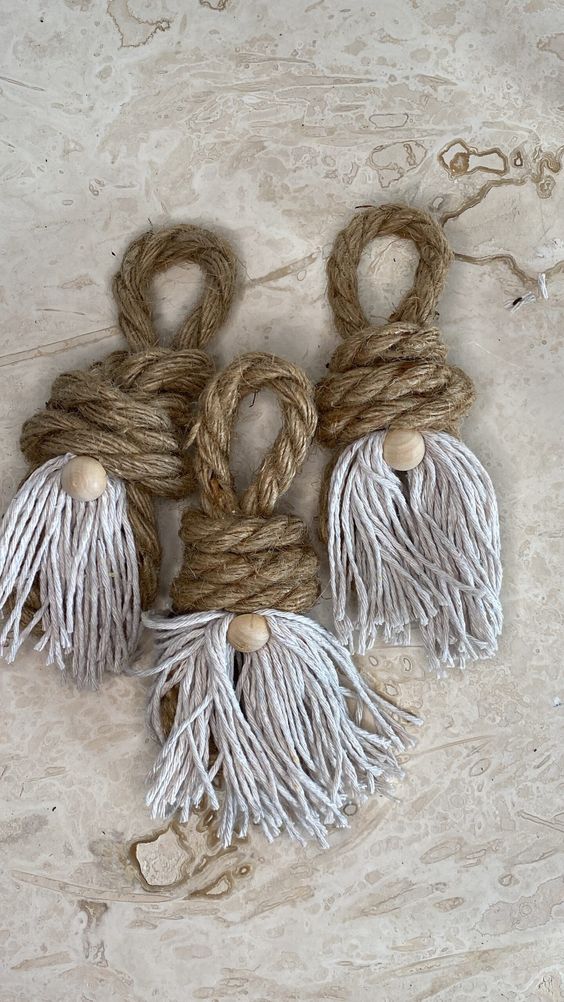
I once believed that simplicity held a quiet beauty, and these rustic rope gnomes prove it.
Made from recycled rope and soft yarn, these earthy designs bring a touch of handmade charm to your home.
Supplies
- thick jute or natural rope
- white yarn
- small wooden beads
- scissors
- hot glue gun or strong adhesive
Instructions
- Cut a piece of jute rope and loop it at the top to form the hanging loop. Secure the loop with a dab of glue, then wrap additional rope around the middle part, building up a “hat” shape, and glue in place.
- Cut multiple strands of white yarn for the beard and glue them under the “hat” section, letting them dangle freely.
- Attach a wooden bead at the top of the beard as the nose.
#17. Colorful Croc Gnome Creations

This quirky and vibrant gnome idea turns old Crocs into fun-filled gnomes. With bold colors, flowing beards, and a touch of floral charm, these recycled gnomes brighten any space.
Supplies
- old Crocs or similar clog-style shoes
- colorful faux fur
- small wooden beads
- small decorative flowers or embellishments
- hot glue gun or strong adhesive
- scissors
Instructions
- Cut a piece of faux fur for the beard, making it long enough to dangle below the shoe. Glue the top edge of the fur under the front rim of the Croc.
- Attach a wooden bead just above the beard, positioning it under the shoe’s strap to serve as the nose.
- Glue a small decorative flower or other embellishment to the Croc for a cute touch.
#18. Whimsical Paper Hat Gnome

If you’re a fan of crafting adorable, eco-friendly decor, these whimsical paper hat gnomes are your perfect project!
Supplies
- cardboard or cardstock
- colored or patterned paper/fabric
- faux fur
- small wooden beads
- small embellishments (bows, flowers, etc.)
- scissors
- hot glue gun or strong adhesive
Instructions
- Cut hat shapes out of cardboard or cardstock, then cover each hat with colored or patterned paper or fabric. Add any desired embellishments, like bows or flowers, for extra personality.
- Cut faux fur into a semi-circle or beard shape and glue it to the bottom of the hat, making sure it fluffs out to resemble a gnome beard.
- Glue a wooden bead at the top center of the beard, just under the hat, to serve as the nose.
#19. Charming Mitten Gnome

Instead of letting old mittens gather dust, transform them into these charming mitten gnomes!
Adorned with soft beards and playful wooden buttons, these adorable creations bring festive warmth to your space.
Supplies
- old mittens or baby socks (red, cream, or any color you prefer)
- faux fur
- small wooden beads
- decorative buttons or small embellishments
- hot glue gun or strong adhesive
- scissors
Instructions
- Turn the mitten or sock upside down so the cuff acts as the hat’s brim. Cut a piece of faux fur into a beard shape and glue it onto the mitten just below the cuff.
- Glue a wooden bead at the top of the beard, tucked under the cuff, to create the nose.
- Add decorative buttons or small embellishments to the cuff for a festive touch.
#20. Coffee-Themed Gnome

Crafted from recycled materials, these adorable gnomes sport quirky coffee-themed designs, complete with delightful mugs as bases and whimsical details like coffee bean accents.
Supplies
- empty bottles (glass or plastic)
- patterned paper or fabric (coffee-themed or any style you like)
- thick yarn
- small wooden beads
- large coffee cups or mugs
- artificial flowers or fabric flowers
- thin wire or decorative curly accents
- belt or ribbon scraps
- hot glue gun or strong adhesive
- scissors
Instructions
- Wrap the bottles with patterned paper or fabric, securing it with glue to cover the entire bottle.
- Cut yarn into equal lengths and glue them around the lower part of the bottle to form the beard. Attach a wooden bead at the top center of the beard as the nose.
- Place the bottle in a large coffee cup or mug to act as the gnome’s body base.
- Decorate the hat area with an artificial flower or embellishment, then add a curly wire or similar accent at the top for a whimsical look.
- Finish with small belts or ribbons around the bottle as accessories.
