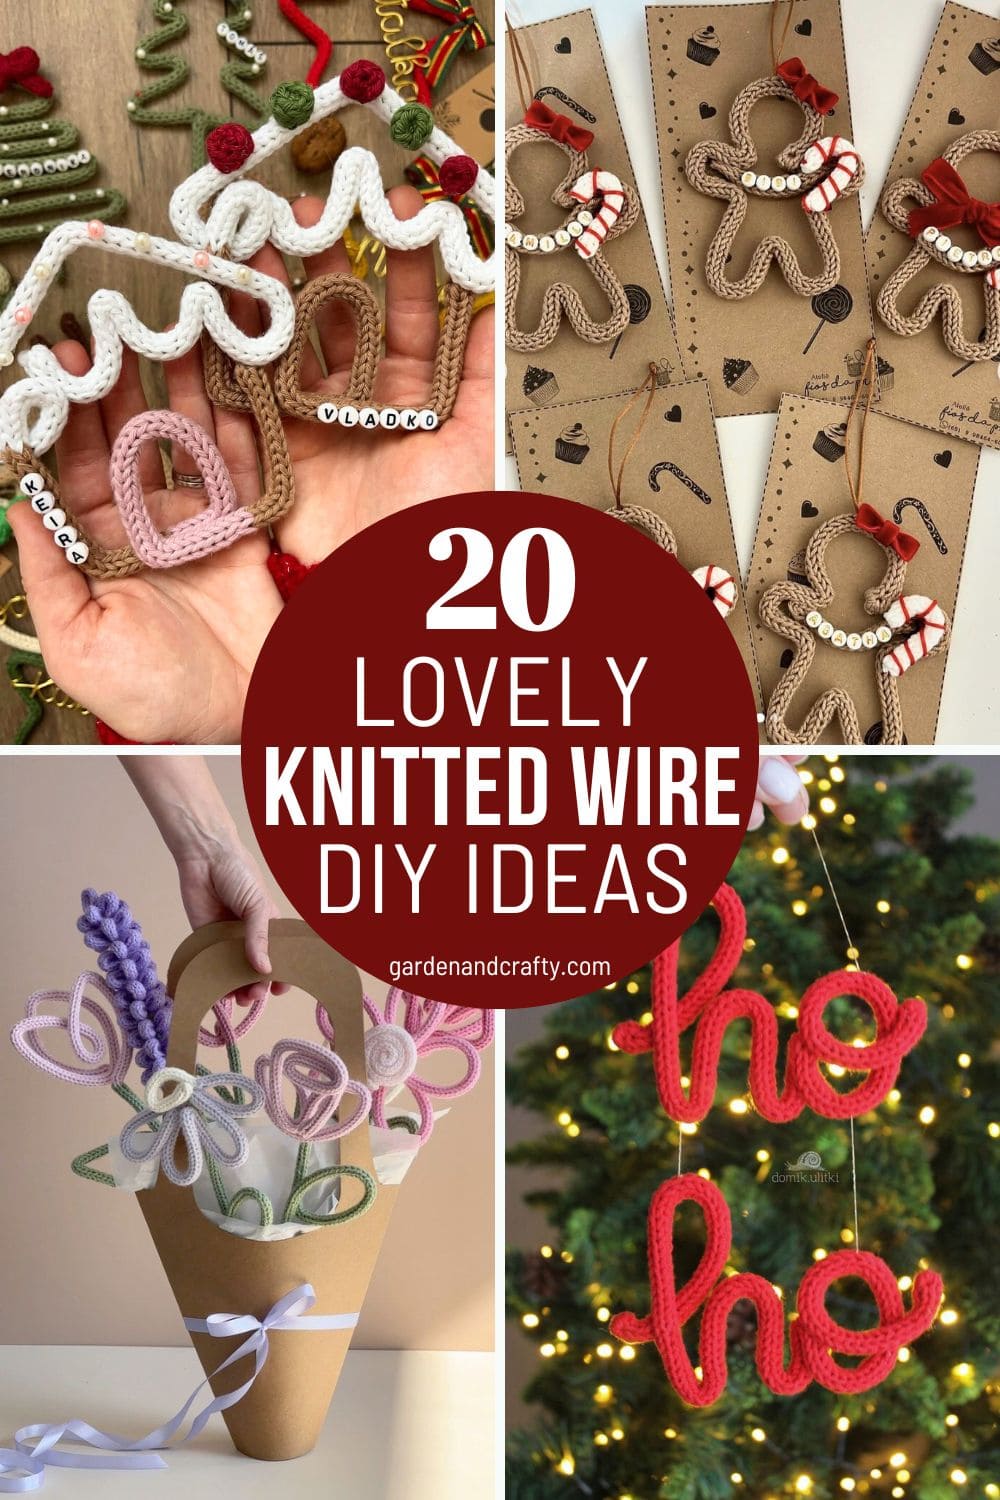
Knitted wire crafts provide an exciting way to create beautiful and durable pieces. The fusion of delicate knitting techniques with the strength of wire allows for a variety of stunning projects.
The versatility of wire makes it easy to craft anything, from delicate patterns to bold, sculptural designs.
This collection of 20 DIY ideas will spark your creativity, giving you the tools to explore the endless possibilities of knitted wire and create pieces that are as unique as they are beautiful.
#1. DIY Knitted Spiral Christmas Trees
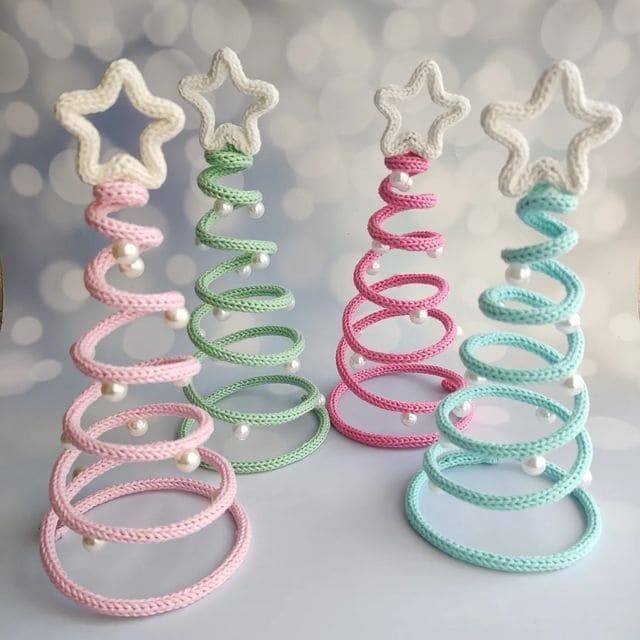
If you’re looking for a charming and whimsical way to decorate your home for the holidays, these knitted spiral Christmas trees are a perfect DIY project.
With their soft pastel colors and delicate pearl embellishments, they bring a light, playful touch to any space.
Plus, the star-topped design makes these trees a cute and modern take on traditional holiday decor.

- Crochet thread in pink, green, blue, and white (approx. 30 yards of each color)
- Thin wire (20-24 gauge) for structure
- Small wooden or plastic stars (for the tree toppers)
- Small pearls (for decorations)
- Hot glue gun
- Scissors
-
Start by cutting a long piece of wire. Shape it into a large spiral by wrapping it around a circular object, making sure it gets smaller as you go up. This will form the base structure of your Christmas tree.
-
Using your crochet thread, wrap it tightly around the wire spiral, starting from the bottom and working your way up. For a clean and even look, make sure the crochet thread is tightly wound around the wire without gaps.
-
Once you've finished wrapping the wire, glue small pearls at random spots along the spiral.
-
Use a small wooden or plastic star to top the tree. Then secure it to the top of the wire frame using hot glue, making sure it stands straight and firmly attached.
-
Once the glue has dried, place your knitted spiral Christmas tree anywhere in your home.
#2. DIY Knitted Crochet Angel Ornaments

These delicate knitted crochet angel ornaments are a beautiful way to add a heavenly touch to your Christmas tree or home decor.
With their graceful wings and sweet golden halos, they make a charming gift or a peaceful decoration that’s perfect for the holidays.
If you’re looking to infuse a bit of handmade elegance into your festive decor, this DIY project is sure to delight.

- White crochet thread (approx. 30 yards)
- Gold foil or paper (for the wings)
- Gold wire or thread (for the halo)
- Pink ribbon (for the waist)
- Thin wire (for structure)
- Hot glue gun
- Scissors
-
Cut the wire into segments and shape them into the body of the angel. You'll need to create an oval base for the body and a smaller loop at the top for the head.
-
Wrap the white crochet thread around the wire body frame, making sure to cover it evenly. You should leave a bit of extra thread at the top to create a neat head shape.
-
Cut two wing shapes from gold foil or paper. The wings can be simple ovals or any shape you prefer. Now, attach them to the back of the angel’s body using hot glue.
-
Cut a small piece of gold wire or thread and shape it into a halo. Then secure it at the top of the angel’s head, gluing it in place.
-
Finally, tie a small pink ribbon around the angel's waist to give it that final decorative touch.
#3. DIY Knitted Gingerbread Garland
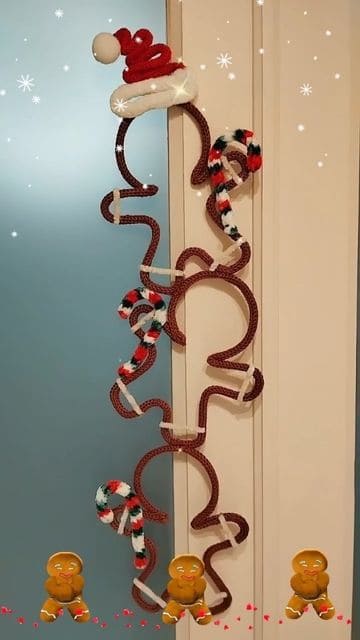
For a sweet, festive touch to your holiday decor, why not try making this adorable knitted gingerbread garland?
Each gingerbread shape is carefully crocheted with red and white yarn to create a vibrant, candy-inspired look.
Topped with little Santa hats, this garland brings playful holiday cheer to any space.

- Crochet thread in red, white, and green (approx. 30 yards of each color)
- Small cotton pom-poms (for the Santa hats)
- Yarn for the scarves
- Thin wire or string (for hanging the garland)
- Scissors
- Hot glue gun (for securing the hats)
-
Start by crocheting simple gingerbread shapes (use a gingerbread man pattern or make a simple loop to form the body and arms). Then use red crochet thread for the outline of the gingerbread man and leave space to add scarf details.
-
Crochet a small red hat for each gingerbread shape. You can add a little white pom-pom at the top of each hat to make it extra festive. Secure the hat to the top of each gingerbread shape using hot glue.
-
Crochet small scarves for each gingerbread shape using white, red, or green yarn. Then attach the scarves securely with glue.
-
Once all the gingerbread figures are ready, use thin wire or string to connect them in a garland fashion.
#4. DIY Knitted Ho Ho Christmas Ornaments
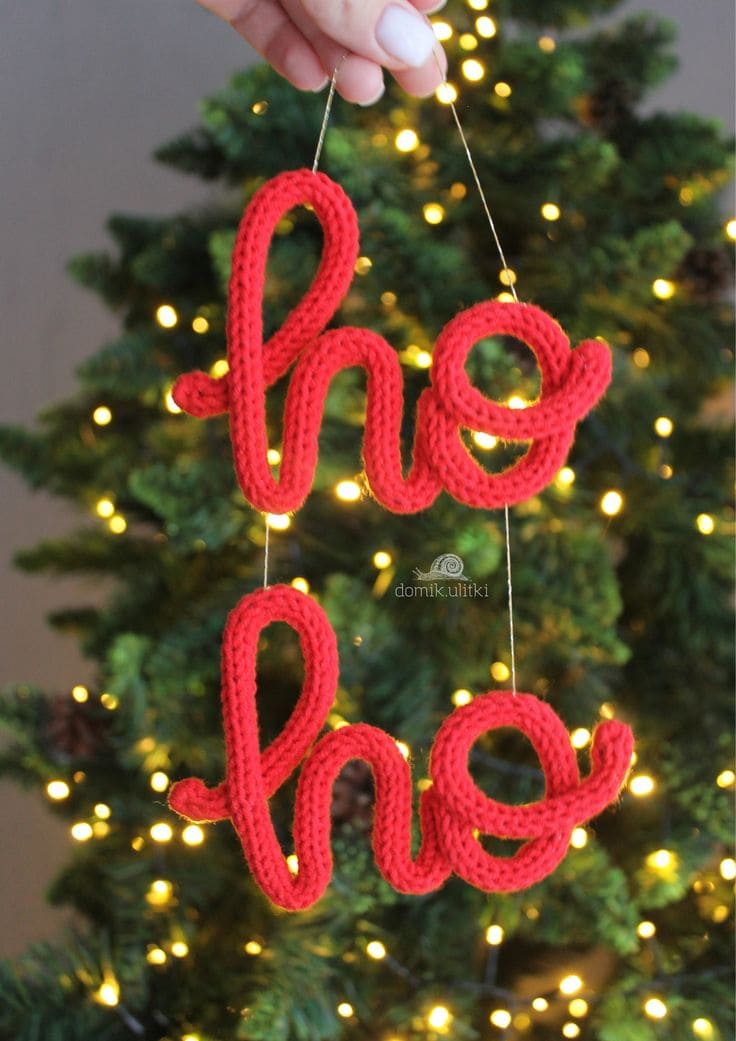
Nothing says Christmas quite like the cheerful spirit of Ho Ho Ho! These adorable knitted Ho Ho ornaments are a simple, fun, and festive way to add a personalized touch to your holiday decorations.
The bold red crochet thread brings vibrant color to your tree, while the playful font gives the ornaments a lighthearted charm.
Whether you hang them on your tree, door, or give them as gifts, they’re sure to spread joy all season long.

- Red crochet thread (approx. 30 yards)
- Thin wire (for shaping the letters)
- String or thread (for hanging the ornaments)
- Scissors)
- Hot glue gun (for securing the ends
-
Cut thin wire into pieces long enough to form the letters H and O twice. Shape each wire segment into the letters, ensuring they are large and sturdy enough to hold their shape.
-
Wrap the red crochet thread tightly around each wire letter. Be sure to crochet the thread evenly along the entire length of the letter, ensuring no wire is exposed.
-
Once the letters are crocheted, attach them together to form the phrase Ho Ho. You can either tie them together using a piece of crochet thread or glue them at the base to connect the letters securely.
-
Use a piece of thread or string to create a loop for hanging the ornaments. Then attach the string to the top of the Ho Ho shape with a dab of hot glue or tie it securely around the base.
-
Once the glue is dry and the ornaments are securely attached to the string, hang them on your Christmas tree, mantel, or any place that needs a touch of holiday cheer.
#5. DIY Knitted Christmas Ornaments Set

What better way to spread holiday cheer than by creating your own festive ornaments?
This DIY knitted Christmas ornament set includes all the beloved symbols of the season: a Christmas tree, snowman, bell, gingerbread man, reindeer, stocking, present, and candle.
Crafted from crochet thread and shaped with care, these ornaments are perfect for adding a personal touch to your tree or for gifting to loved ones.

- Crochet thread in red, green, white, yellow, brown, and orange (approx. 30 yards of each color)
- Thin wire (20-24 gauge) for structure
- Beads (for the Christmas tree, snowman buttons, etc.)
- Scissors
- Hot glue gun
- Ribbon
-
Cut the wire into segments to form the basic shapes of each ornament. You’ll need to create circles for the snowman, bell, stocking, and candle, and lines for the gingerbread man, reindeer, tree, and gift box.
-
Begin knitting each wire frame with the crochet thread, wrapping it tightly. For the gingerbread man, reindeer, and tree, use brown, red, and green thread, respectively. You can also use white for the snowman, bell, and candle. Then add yellow thread for the bell’s bow and red for the stocking and gift.
-
After finishing the basic knitted shape, add extra decorations to enhance each ornament. For example, glue on beads for the snowman’s buttons, use ribbon for the bell’s bow, and add a small red bead for the reindeer’s nose.
-
Once all ornaments are shaped and decorated, you can glue the pieces together if necessary.
#6. DIY Knitted Gingerbread Man Ornaments

If you’re looking for a fun and festive way to decorate for the holidays, these adorable knitted gingerbread man ornaments are just what you need! They’re sweet, personalized, and packed with charm.
With their cinnamon-colored crochet thread and cute little accessories like candy canes, red bows, and letter beads, these gingerbread men bring holiday cheer to any tree or gift package.

- Crochet thread in beige (for the body), red (for the bow), and white (for the candy cane)
- Small beads with letters (for names or messages)
- Small candy cane-shaped decorations (either crocheted or pre-made)
- Thin wire (for shaping the ornament)
- Ribbon (for hanging)
- Hot glue gun
- Scissors
-
Cut the wire into segments long enough to form the gingerbread man's body and arms. Shape the wire into a gingerbread man figure, making sure the arms and legs are proportional and the body has a rounded shape.
-
Using the beige crochet thread, wrap it tightly around the wire frame, covering the entire body, arms, and legs. Ensure the crochet thread is tightly wound to create a smooth texture that mimics the appearance of a gingerbread cookie.
-
Use white and red crochet thread to make a small candy cane and tie a red bow around the gingerbread man's neck. Then attach these embellishments with hot glue.
-
Add personalized letters to your gingerbread man by stringing letter beads onto the crochet thread or gluing them directly onto the body. You can spell out names or sweet holiday messages.
-
Finally, use a piece of ribbon to create a loop at the top of the gingerbread man for hanging.
#7. Knitted Wire Pumpkin Trio
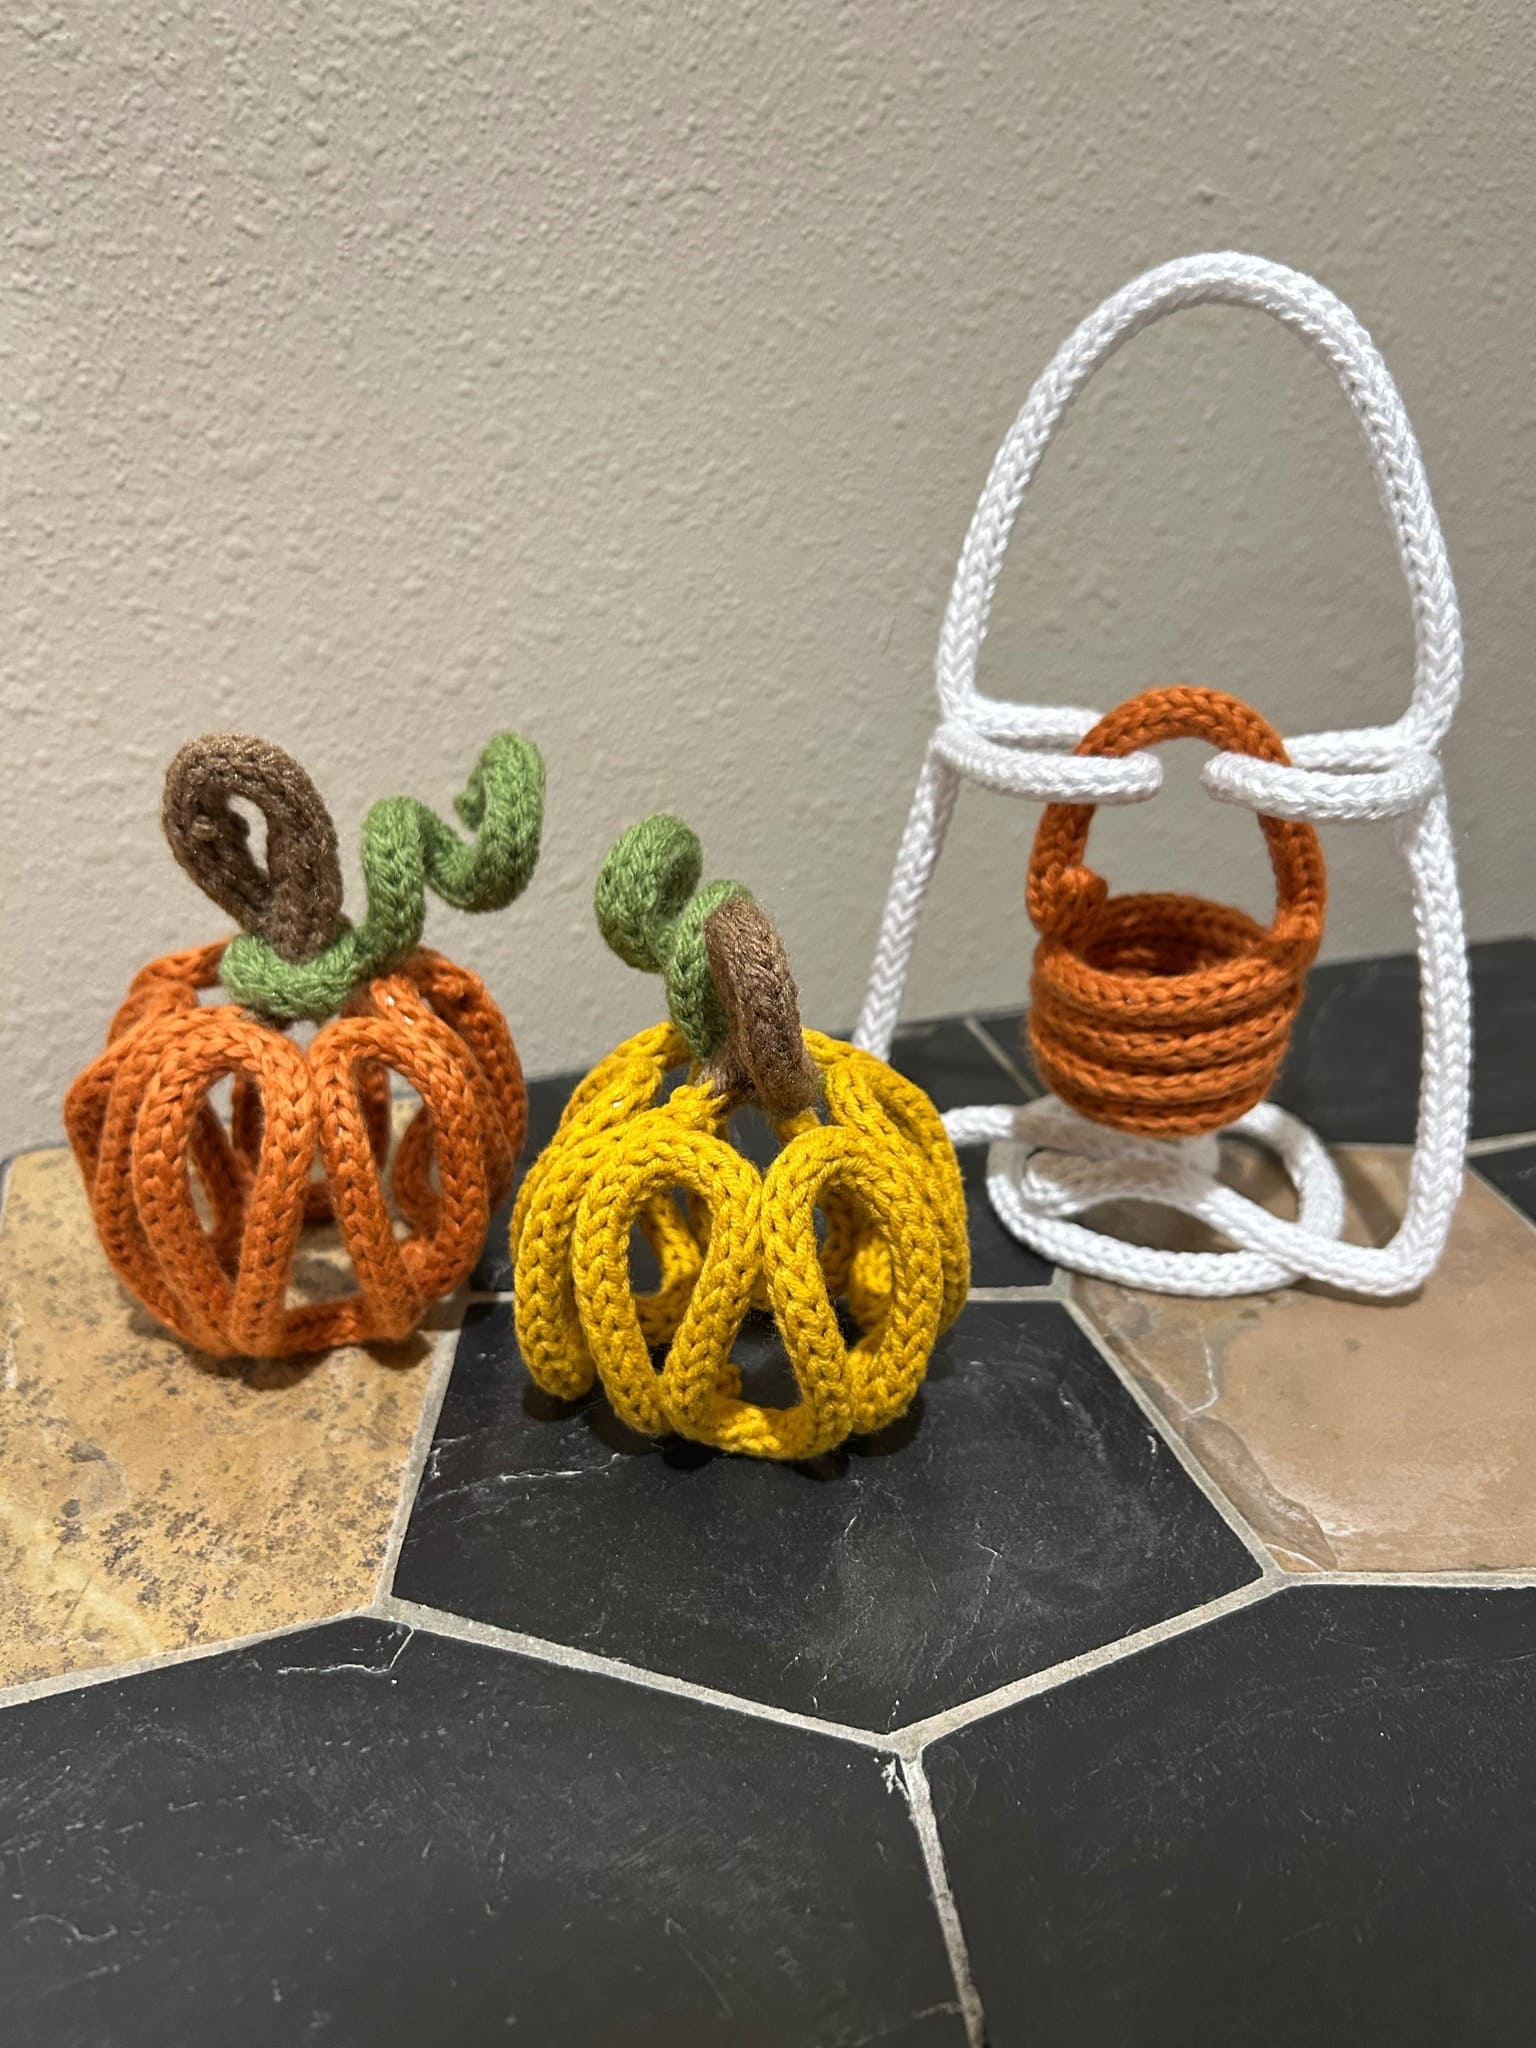
These adorable knitted wire pumpkins are perfect for autumn decor, offering a fun and crafty way to welcome the season.
The mix of vibrant orange and yellow hues brings a playful touch, while the green curly stems add a whimsical feel.
Each pumpkin is carefully knitted to create a fun, structured shape, and paired with a mini basket for extra charm.

- Orange, yellow, and green crochet thread (approx. 30 yards of each color)
- Thin wire (about 20-24 gauge) for structure
- Mini basket or small crochet hoop (optional, for the white pumpkin)
- Hot glue gun (for securing stems)
- Scissors for cutting wire and thread
-
Start by cutting your wire into segments long enough to form the circular base of your pumpkin. You’ll need 6-8 pieces depending on how large you want your pumpkin to be.
-
Begin knitting with the crochet thread around the wire segments. For each pumpkin, alternate between orange and yellow to form the spiral loops that will create the pumpkin’s signature shape.
-
Once you've finished knitting the wire, twist the ends to secure the threads in place, making sure to shape the pumpkin as you go to ensure it holds a nice round shape.
-
To add the stems, use the green crochet thread and create a small spiral or coiled stem, securing it to the top of your pumpkin with hot glue.
-
For the mini white pumpkin, crochet a small basket and secure the knitted wire around it to form the pumpkin shape. Then add the same green curly stem to complete the look.
#8. DIY Knitted Bear Holding Flowers

Wow, look at this adorable DIY knitted bear holding flowers! This sweet, whimsical creation brings a cozy, handmade charm to any space.
Perfect for showcasing your crafting skills or gifting to someone special, this bear is sure to steal hearts.
The combination of soft crochet thread for the bear and delicate flowers adds warmth and joy to any room. It’s an ideal decorative piece for a nursery, living room, or even as a thoughtful gift for a friend.

- Crochet thread in brown (for the bear’s body) and pastel colors (for the flowers) (approx. 30 yards)
- Small beads or black thread for the bear's eyes and nose
- Fake or crocheted flowers (pink, white, or any color you prefer)
- Hot glue gun
- Scissors
- Thin wire (for shaping the bear)
- Small crochet hook
-
Start by cutting a piece of wire to create the body structure of the bear. You need to form the body, head, arms, and legs with the wire, and be sure to bend the wire to create a sitting posture. Then secure the wire ends to keep the shape.
-
Wrap the crochet thread around the wire frame, starting from the feet and working up to the head. Make sure to crochet each part of the bear’s body, such as the arms, legs, and head, so the bear takes on a soft, three-dimensional appearance.
-
Use black thread or small beads to create the bear’s eyes and nose. You can embroider the eyes or glue tiny beads in place to add charm to the face.
-
For the tail, crochet a small piece of brown yarn and attach it to the back of the bear, creating a cute little tail.
-
Crochet a small bouquet of flowers using pastel-colored crochet thread. You can either create a cluster of small flowers or one large bloom. Attach the flowers to the bear's hands with hot glue.
-
Once your bear is complete, it’s ready for display! You can place it on a shelf, in a nursery, or as a part of your seasonal decor.
#9. DIY Knitted Flower Wreath
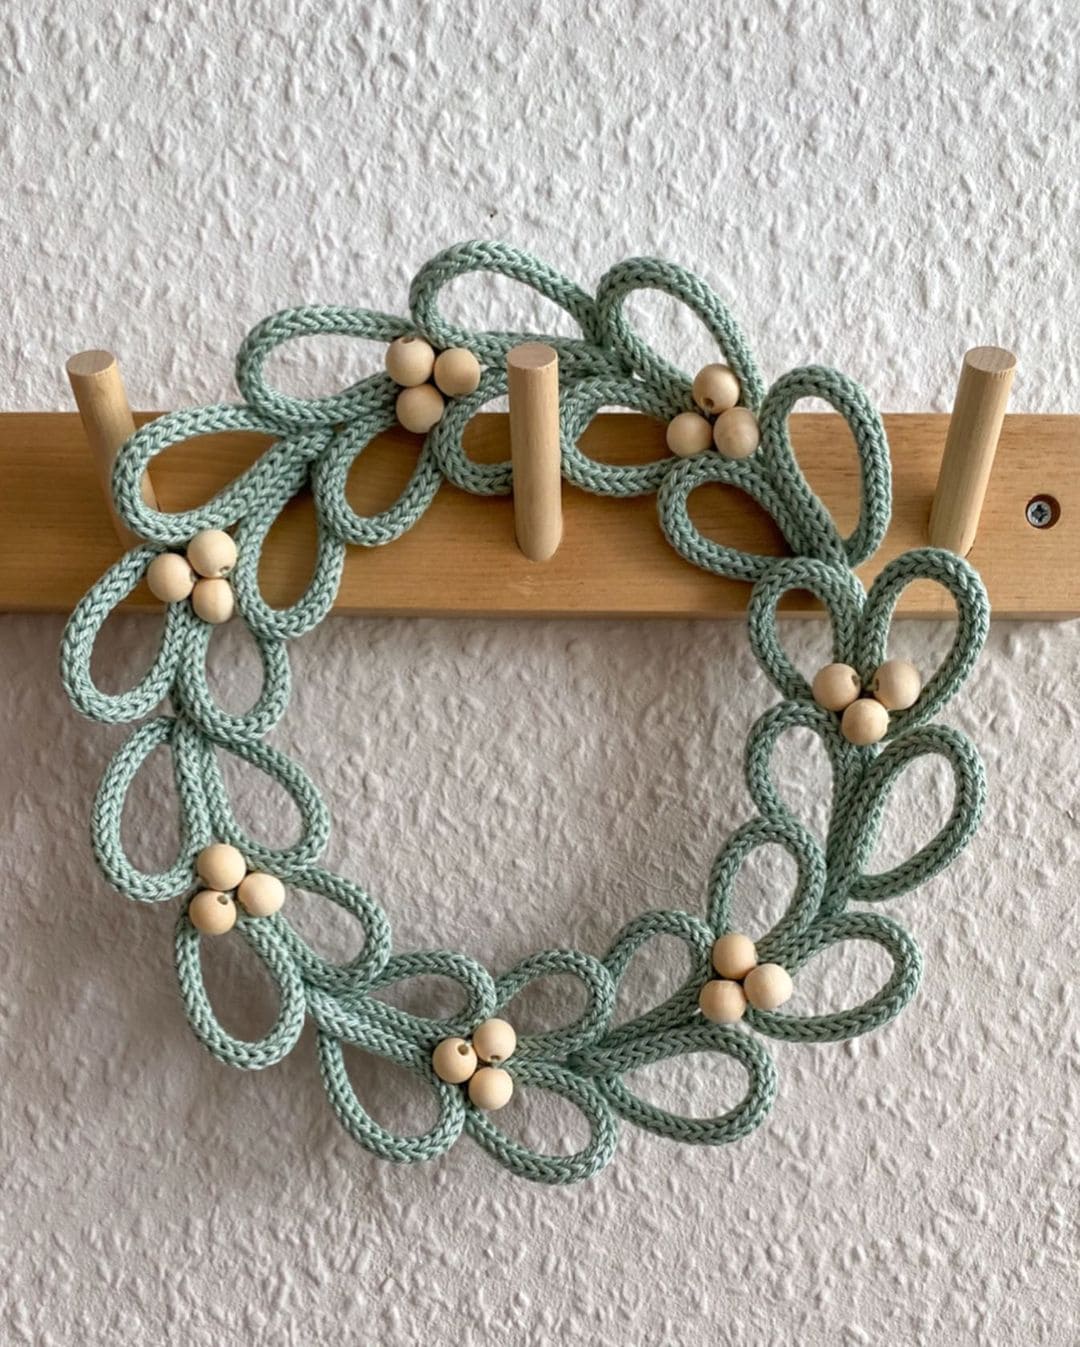
If you’re looking for a charming way to welcome the seasons into your home, this knitted flower wreath is the perfect DIY project.
Soft, pastel-colored crochet thread is transformed into elegant flower loops, while wooden beads add a touch of rustic charm.
It’s a simple yet striking piece that brings warmth and a handmade touch to any wall or door.

- Soft pastel-colored crochet thread (approx. 30 yards)
- Wooden beads (small size, 15-20 pieces)
- Hot glue gun
- Thin wire (20-24 gauge) for structure
- Scissors
-
Begin by cutting the wire into a circular shape to form the base of your wreath. Make sure the wire is flexible enough to create a nice round shape.
-
Cut several lengths of crochet thread, about 12-14 inches long. Fold each piece in half to form a loop, and then twist the ends to secure. Then attach the loops around the wire frame, spacing them evenly to create a flower shape.
-
Place three small wooden beads in the center of each flower loop. Secure them with a bit of hot glue to keep them in place.
-
Once all the flowers are attached, trim any excess thread to ensure the wreath looks neat. If desired, you can add a small ribbon at the top for hanging.
#10. DIY Knitted Name Wall Art
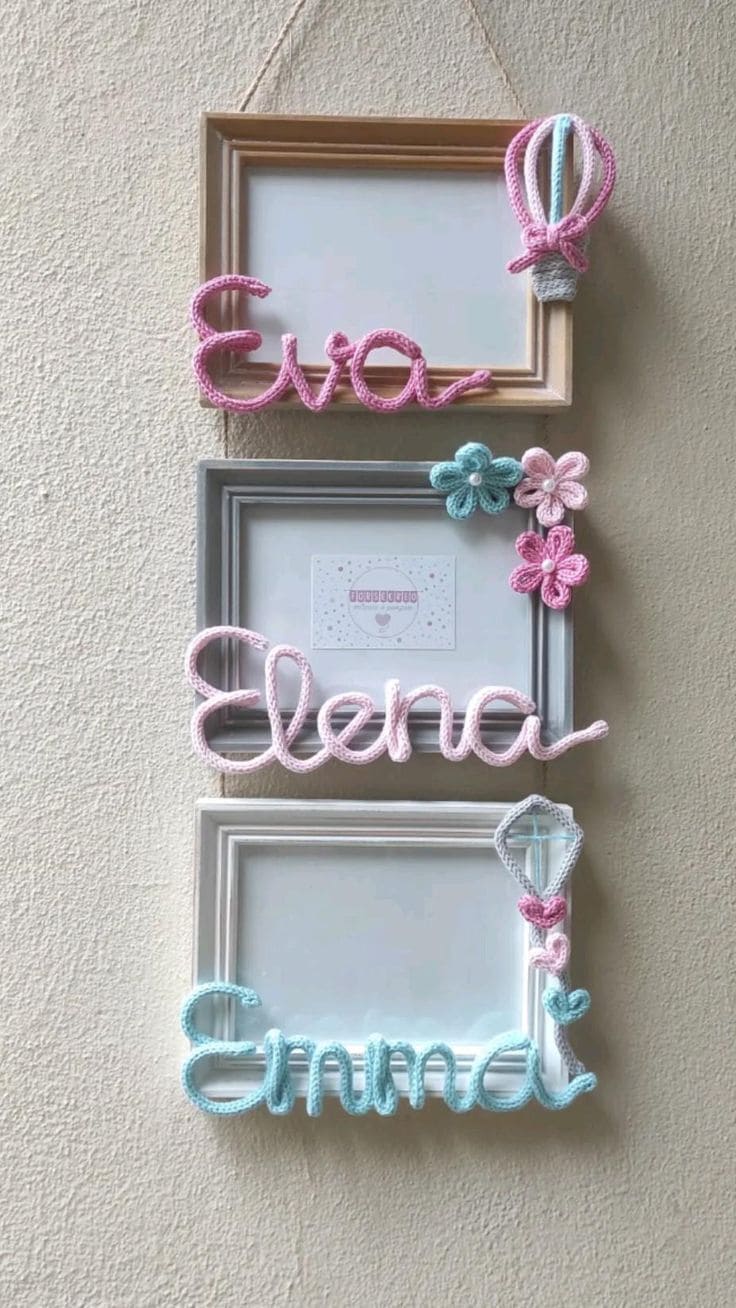
These knitted name wall art pieces are a perfect way to showcase your loved ones’ names in a creative and colorful way.
Each name is delicately crocheted with vibrant threads and decorated with playful accents like flowers and balloons.
It’s a beautiful, handmade way to bring life to any room, whether it’s a child’s nursery, a living room, or even a gift for a friend or family member!

- Crochet thread in pink, blue, and other accent colors (approx. 30 yards of each)
- Thin wire (about 20-24 gauge) for structure
- Beads for flower centers (optional)
- Small crochet hooks for making the decorative elements (balloon, flowers, hearts, etc.)
- Hot glue gun
- Scissors
-
Cut the wire into segments long enough to form the letters of each name. Shape the wire into the letters, ensuring they are sturdy enough to hold their form.
-
Using crochet thread, wrap it tightly around the wire frame. For the names, choose colors that fit your aesthetic like pink, blue, or even multi-colored combinations.
-
Once the names are formed, begin adding decorative elements such as crocheted flowers, a hot air balloon, or little hearts. For the flowers, crochet small petals and attach them with hot glue or stitch them into place. For the balloon, create a simple round shape and attach it to the top of the name.
-
Attach each finished name to its frame. If you’re making multiple names, arrange them in a visually pleasing way, ensuring they are balanced and complement one another.
#11. DIY Knitted Wire Pumpkin Decor
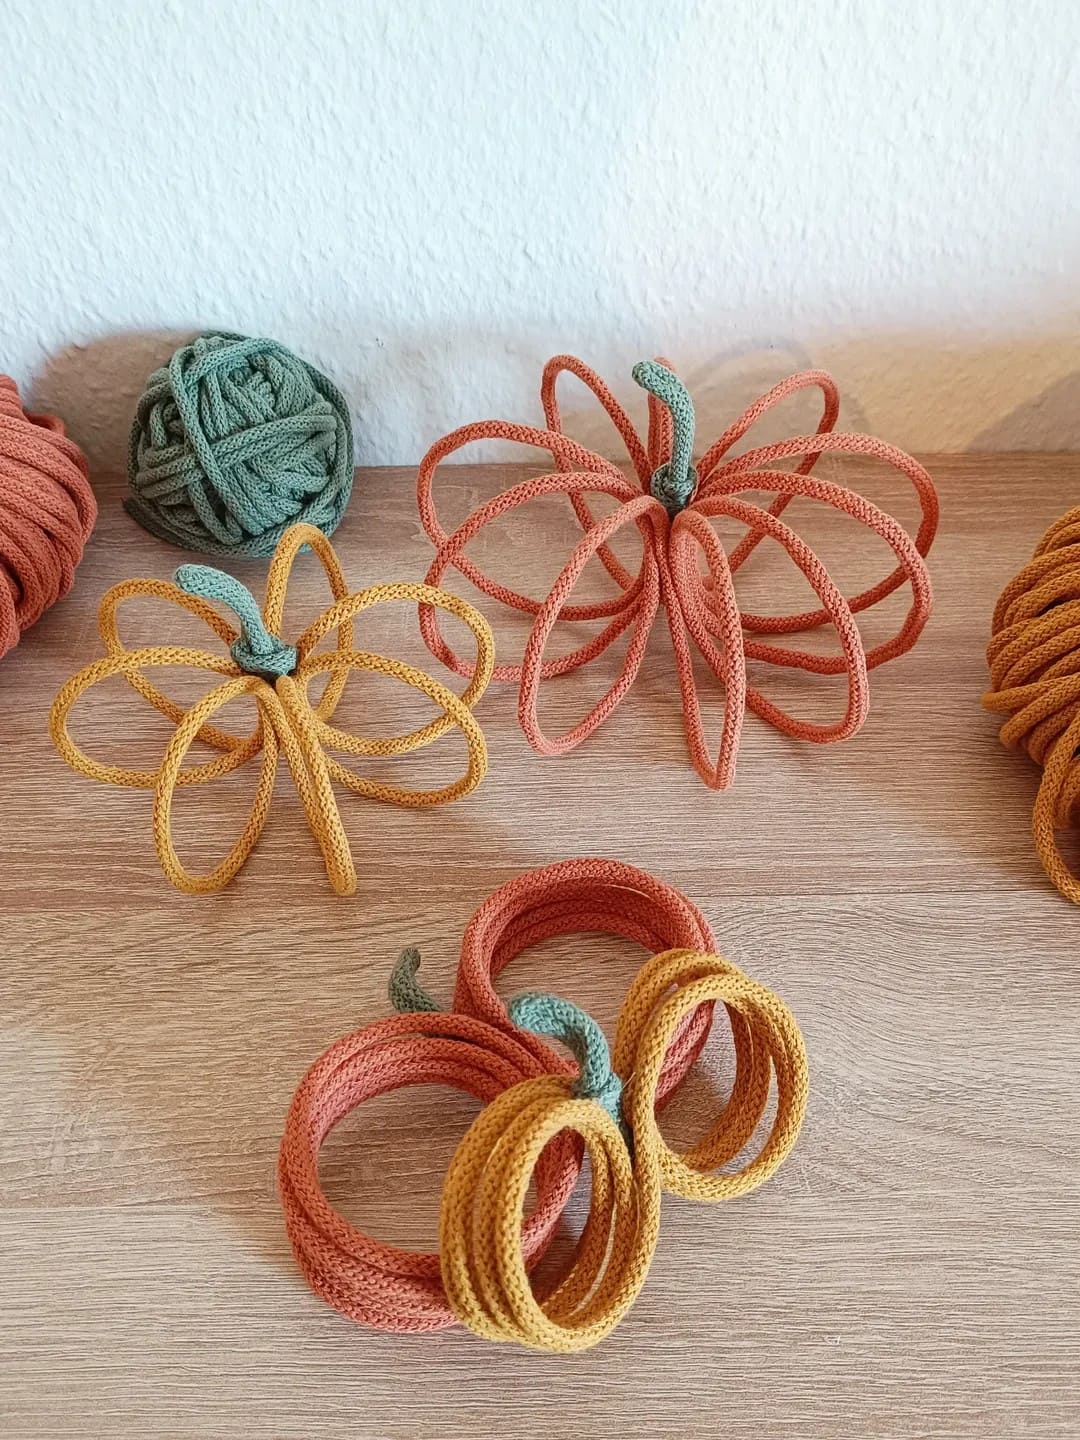
The vibrant orange and yellow crochet thread intertwined with green stems create playful, whimsical pumpkins that can brighten up any space.
Whether placed on a mantel or incorporated into your seasonal decor, these little pumpkins are an easy and delightful way to embrace autumn’s cozy vibes.

- Crochet thread in orange, yellow, and green (approx. 30 yards of each color)
- Thin wire (20-24 gauge) for structure
- Scissors
- Hot glue gun
-
Start by cutting several wire segments for each pumpkin’s shape. You’ll need 6-8 pieces of wire, depending on how large you want your pumpkin to be.
-
Begin knitting the orange and yellow crochet thread around the wire loops. Alternate between the two colors for a fun, contrasting look.
-
Once the loops are completely wrapped with crochet thread, twist the ends together to form a pumpkin shape. Keep the wire flexible, so you can adjust the shape as you go.
-
For the pumpkin stems, use the green crochet thread. You can create small spirals or coiled shapes and secure them at the top of each pumpkin using hot glue.
-
Arrange the pumpkins in a cluster for a more striking display, or scatter them throughout your home for a touch of fall cheer.
#12. DIY Personalized Knitted Keychains
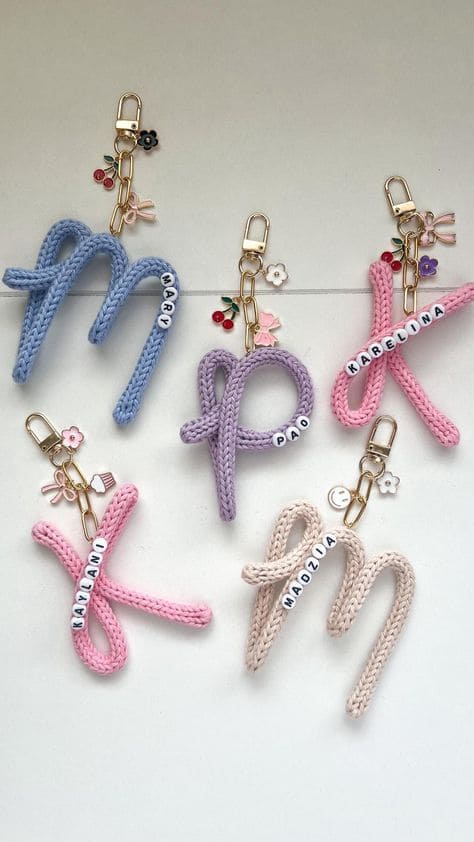
What about creating a fun and personalized keychain for your friends or loved ones?
These adorable knitted letter keychains, adorned with flowers and colorful beads, are a perfect way to add a personal touch to your accessories.
Whether you’re crafting them for yourself or as a special gift, these keychains will add a pop of color and charm to any bag or set of keys.

- Crochet thread in various colors (blue, pink, purple, beige, etc.)
- Small plastic or wooden beads (for initials or names)
- Flower embellishments (optional)
- Small metal clips or keychain rings
- Hot glue gun
- Scissors
-
Start by crocheting the letters you want for your keychain. You can use any letter, and it’s best to crochet each letter individually, making sure the stitch is tight enough to hold its shape.
-
Once you've crocheted each letter, shape them into the desired form, ensuring they stand upright and maintain their shape. You can make the letters simple or add curves for a more playful look.
-
For a fun, personalized touch, add beads to the letters. You can spell out names or initials using the beads and add small flower embellishments for extra charm.
-
Use a small metal clip or keychain ring to attach your crochet letter to a keyring. You can secure it using a piece of thread or hot glue.
-
Once your personalized keychains are complete, they make perfect gifts or can be used to decorate your own set of keys, bags, or even hang them as decorations in your home.
#13. DIY Knitted Nativity Scene Decoration
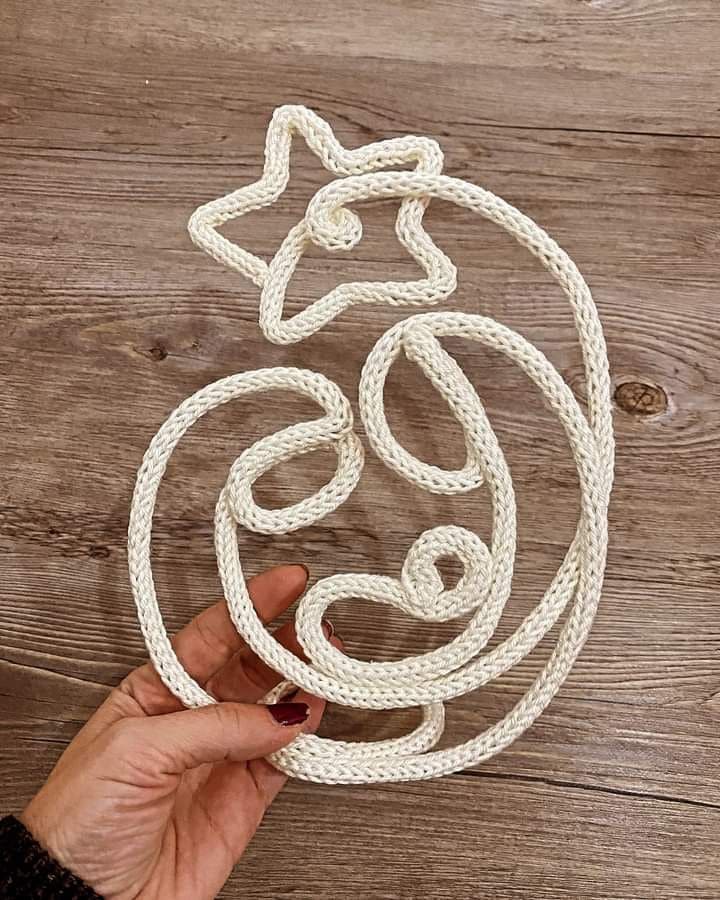
If you’re looking for a meaningful and heartfelt DIY project this holiday season, this knitted nativity scene is perfect for adding a personal touch to your Christmas decor.
The gentle swirl of crochet thread forms the figure of the nativity, complete with a star at the top, symbolizing the Christmas story.
This project combines simplicity with beauty, making it a lovely centerpiece for your holiday decorations or a thoughtful homemade gift.

- Crochet thread in white or cream (approx. 30 yards)
- Thin wire (20-24 gauge) for shaping
- Hot glue gun
- String or thread (for hanging or securing the shape)
- Small decorative star (optional, for the top)
- Scissors
-
Begin by shaping the wire into the outline of a nativity scene, this could include a simple curve or swirl to form the base and a star at the top. You can also form small figures like Mary, Joseph, and the baby, keeping the shapes simple yet recognizable.
-
Once the wire shapes are ready, crochet the thread around the wire to create a soft texture. Carefully wrap the crochet thread, ensuring it is even and snug to keep the shapes intact.
-
Once your nativity scene is fully covered, use hot glue to secure the ends of the crochet thread and ensure everything stays in place.
-
For a festive touch, crochet or glue a small star at the top of the nativity scene to represent the Star of Bethlehem.
-
Add a loop of string or thread at the top for hanging, or simply set the decoration on a flat surface to display.
#14. DIY Knitted Name Ornaments

These DIY knitted name ornaments are a perfect way to celebrate the season with custom, handmade pieces that add warmth and character to your Christmas tree.
Each ornament features a unique name or word, carefully crocheted onto a festive ball, making them an ideal gift for friends or family or a charming way to decorate your tree.

- Crochet thread in various colors (red, green, white, etc.) (approx. 30 yards of each color)
- Foam or Styrofoam balls (about 4-5 inches in diameter)
- Thin wire (for shaping the names)
- Hot glue gun
- Scissors
- Ribbon (for the ornament loop)
-
Begin by selecting foam balls as the base for your ornaments. Choose colors that complement your crochet thread and the words or names you’ll be writing.
-
Starting with your white crochet thread, wrap it around the foam ball tightly, covering the entire surface.
-
Use the crochet thread in contrasting colors (such as red, green, or any color that matches the holiday theme) to crochet the letters of the name or word. Then shape the wire into the desired letters, making sure they fit properly on the ball.
-
Carefully glue each letter onto the wrapped foam ball, positioning them in a neat and readable way.
-
Once the letters are glued in place, create a small loop at the top of the ornament using a piece of ribbon.
#15. DIY Knitted Gingerbread House Ornaments
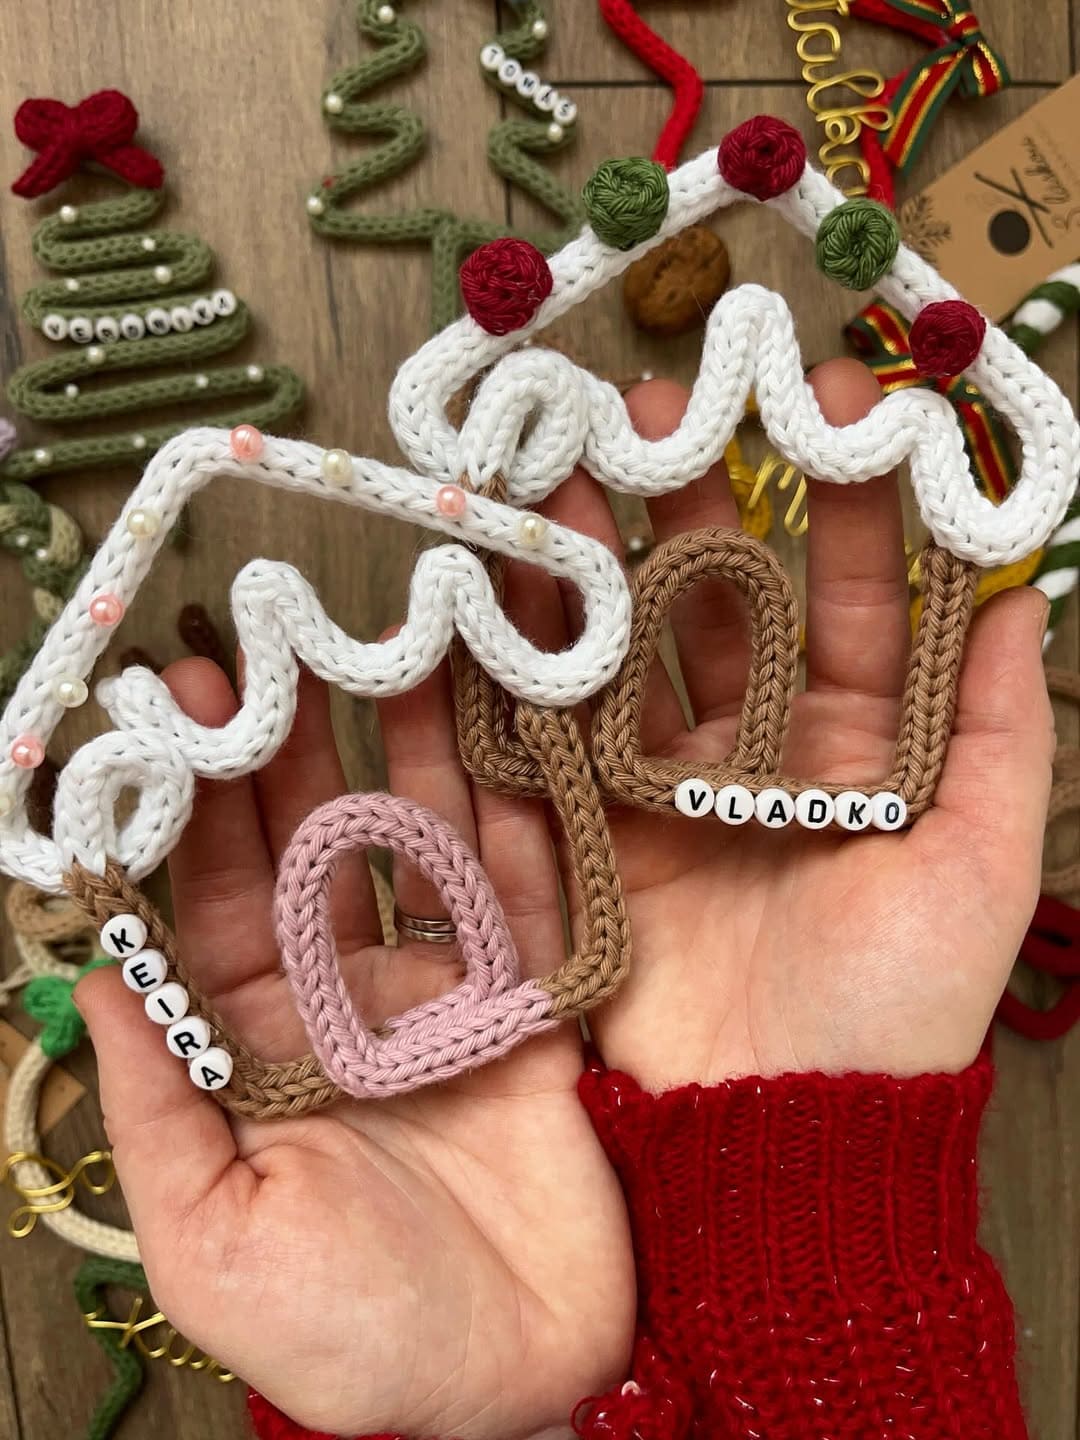
Have you ever wanted to create something sweet and festive for the holidays? These knitted gingerbread house ornaments are the perfect project!
Combining the cozy feel of crochet with the nostalgic charm of gingerbread houses, these ornaments are customizable, fun to make, and ideal for decorating your Christmas tree.

- White, brown, and pink crochet thread (approx. 30 yards of each color)
- Thin wire (20-24 gauge) for structure
- Beads for decoration (optional)
- Letter beads (for names, optional)
- Scissors
- Hot glue gun
-
Start by cutting several pieces of wire to create the frame of your gingerbread house. You’ll need a square or triangular shape for the base and roof. Then shape the wire into the outline of the house, bending it to form the walls and roof.
-
Knit the crochet thread around the wire frame. Use brown for the walls and pink for the door. To create the snow-capped roof, use white crochet thread and knit it around the top of the frame.
-
For the final touch, glue beads around the house for decoration. You can use small white beads as snow, and add colorful beads for candy decorations.
-
Attach a loop of crochet thread or string at the top of the house to create a hanger. This way, you can easily hang the ornament on your Christmas tree.
#16. DIY Knitted Photo Frame Holders
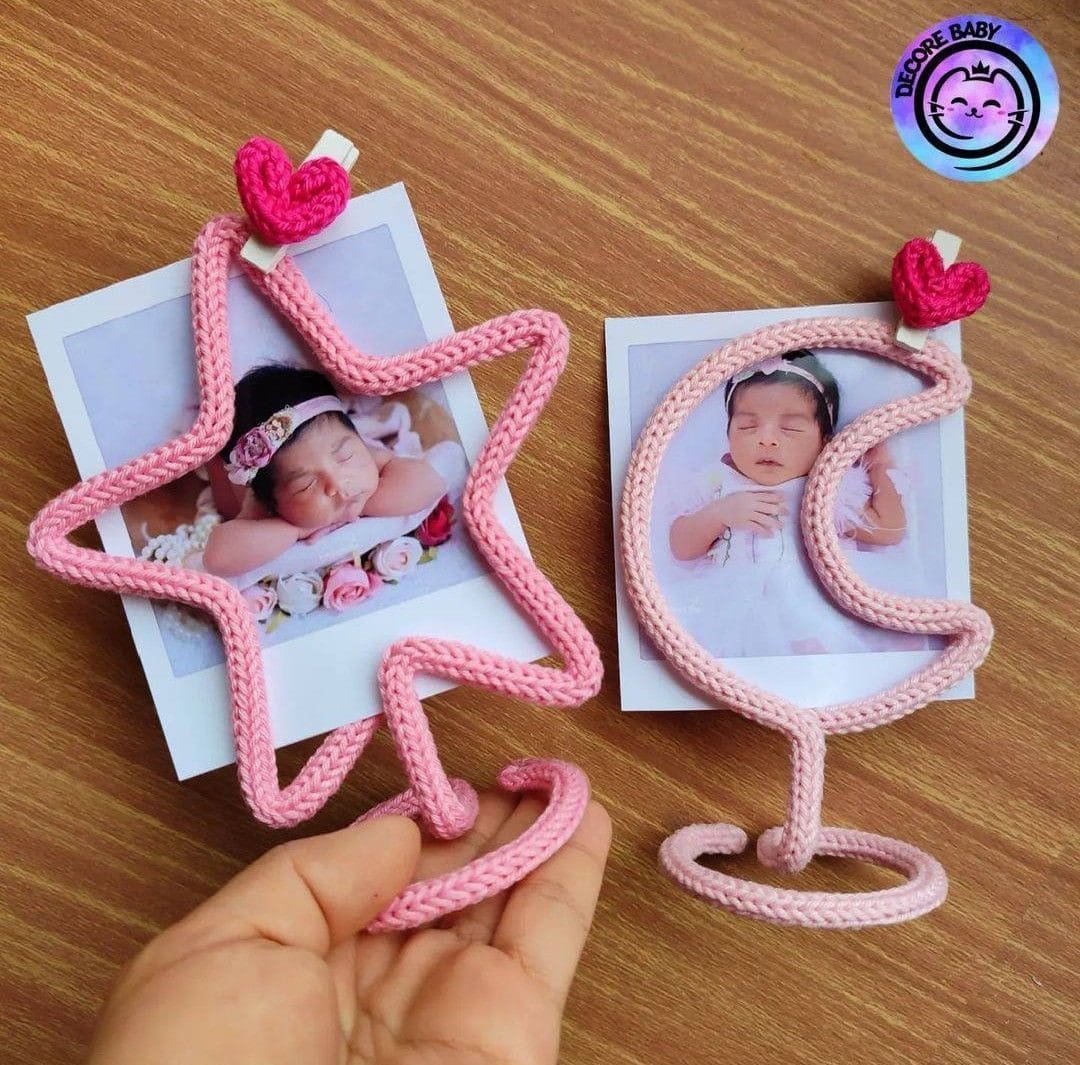
By creating these adorable knitted photo frame holders, you can add a sweet and personalized touch to your photo displays.
These simple yet charming creations feature soft crochet threads twisted into star and crescent moon shapes, topped with cute hearts.
Perfect for showcasing baby pictures, family memories, or any special moment, these knitted frames bring a handmade warmth to your home decor.

- Crochet thread in pink and other pastel colors (approx. 30 yards)
- Small crochet heart shapes (or beads) for the topper
- Thin wire (20-24 gauge) for shaping
- Craft glue or hot glue gun
- Scissors
-
Start by cutting wire into the shape of your desired frame. For the star, bend the wire into a five-point star shape, and for the crescent moon, form a round shape with an inner curve.
-
Begin wrapping your crochet thread around the wire frame, covering it evenly. Make sure the crochet thread is wrapped tightly to create a smooth, solid look for both the star and crescent shapes.
-
Once your frames are complete, create a small crochet heart or use a bead to add a cute topper to each frame. Then attach the heart at the top of the frame with glue.
-
To hold your photo, glue the bottom of the frame to the back of the picture or place a small hook to hang the frame.
#17. DIY Knitted Flower Bouquet
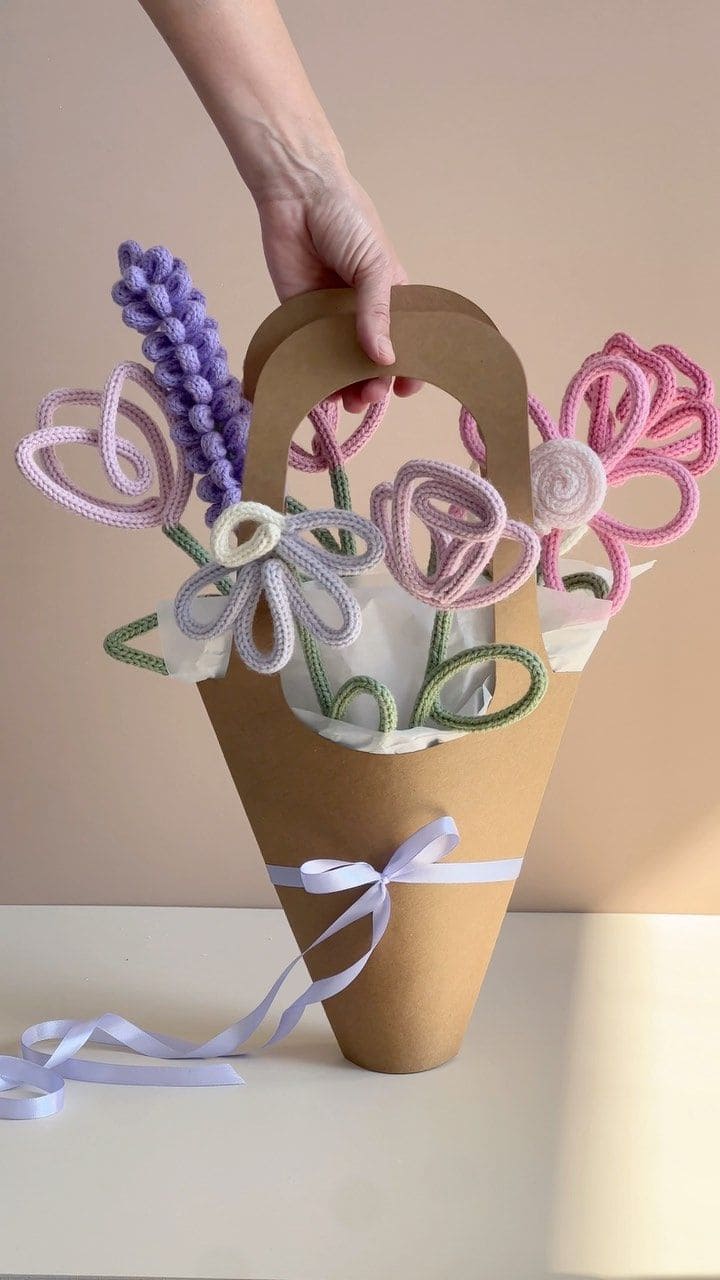
If you’re looking for a charming, long-lasting gift or a creative way to brighten up your home, this DIY knitted flower bouquet is the perfect project!
Made from soft pastel crochet threads, the flowers in this bouquet add a delightful, whimsical touch to any space.
The mix of lavender, pink, and green creates a calming, natural aesthetic, while the paper cone wrapped with a ribbon adds a sweet, rustic charm.

- Crochet thread in lavender, pink, white, and green (approx. 30 yards of each color)
- Thin wire (20-24 gauge) for structure
- Paper cone (or create a cone from sturdy craft paper)
- Ribbon for tying the bouquet
- Hot glue gun
- Scissors
-
Start by cutting wire into segments long enough to form the stems of your flowers. Shape the wire into straight lines to create sturdy stems for each flower.
-
Using your crochet thread, create flower shapes by wrapping the thread around the wire. For each flower, alternate colors for the petals, and ensure the thread is evenly wrapped around the wire. You can make round, spiral, or multi-petal flowers depending on your preference.
-
Once you’ve knitted several flowers, arrange them in a bouquet style. Secure the flowers together at the base with a ribbon or hot glue.
-
To hold your flowers, use a paper cone or create one from sturdy craft paper. Simply roll the paper into a cone shape and secure it with glue or tape.
-
Add a ribbon around the top or bottom of the cone to tie the bouquet together. You can choose a matching color or something that contrasts for a more playful look.
#18. DIY Knitted Animal Brooches
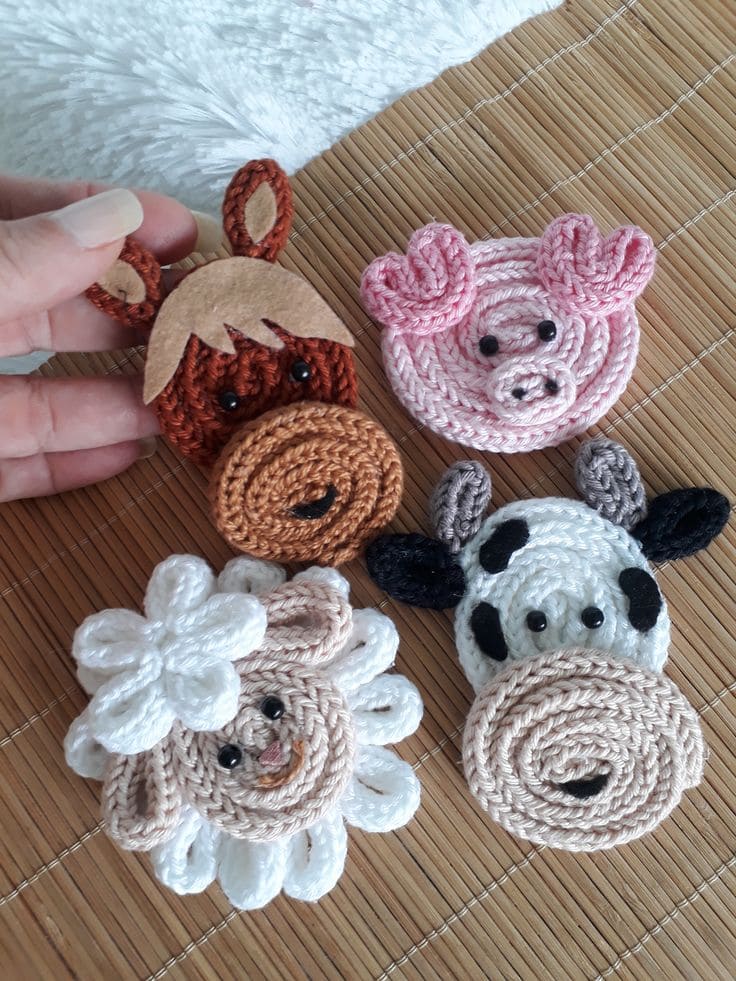
If you’re looking to add some quirky, handmade flair to your outfits, these knitted animal brooches are a perfect DIY project!
With their adorable faces and fun designs, these animal brooches are sure to be a conversation starter.
From the horse to the pig, cow, and lamb, each piece is made with love and crochet thread, bringing a little whimsy to any clothing or accessory. They make excellent gifts too!

- Crochet thread in brown, pink, white, black, and beige (approx. 30 yards of each)
- Small black beads for eyes
- Thin black thread or yarn for outlining and details (such as ears and noses)
- Needle and scissors
- Brooch backings (for pinning)
- Hot glue gun (for securing pieces)
-
Start by crocheting a small spiral circle using beige or pink thread, depending on the animal’s body color (pig, cow, horse, or lamb).
-
Crochet small shapes for the eyes, nose, and other features. For example, use black thread to crochet small ovals for the eyes and attach them with hot glue. Then add a small, rounded piece of thread for the nose and glue it in place.
-
For the horse and cow, crochet ears using the brown and black thread, respectively. Then attach them to the sides of the face. For the lamb, crochet white thread to form the flowers that will frame the face.
-
Use black thread to outline the animal’s face and add additional details like whiskers for the pig or a small mane for the horse.
-
Once all the facial features and decorations are securely glued, attach the brooch backing to the back of the animal’s face using hot glue.
#19. Knitted Wire Name Wall Art
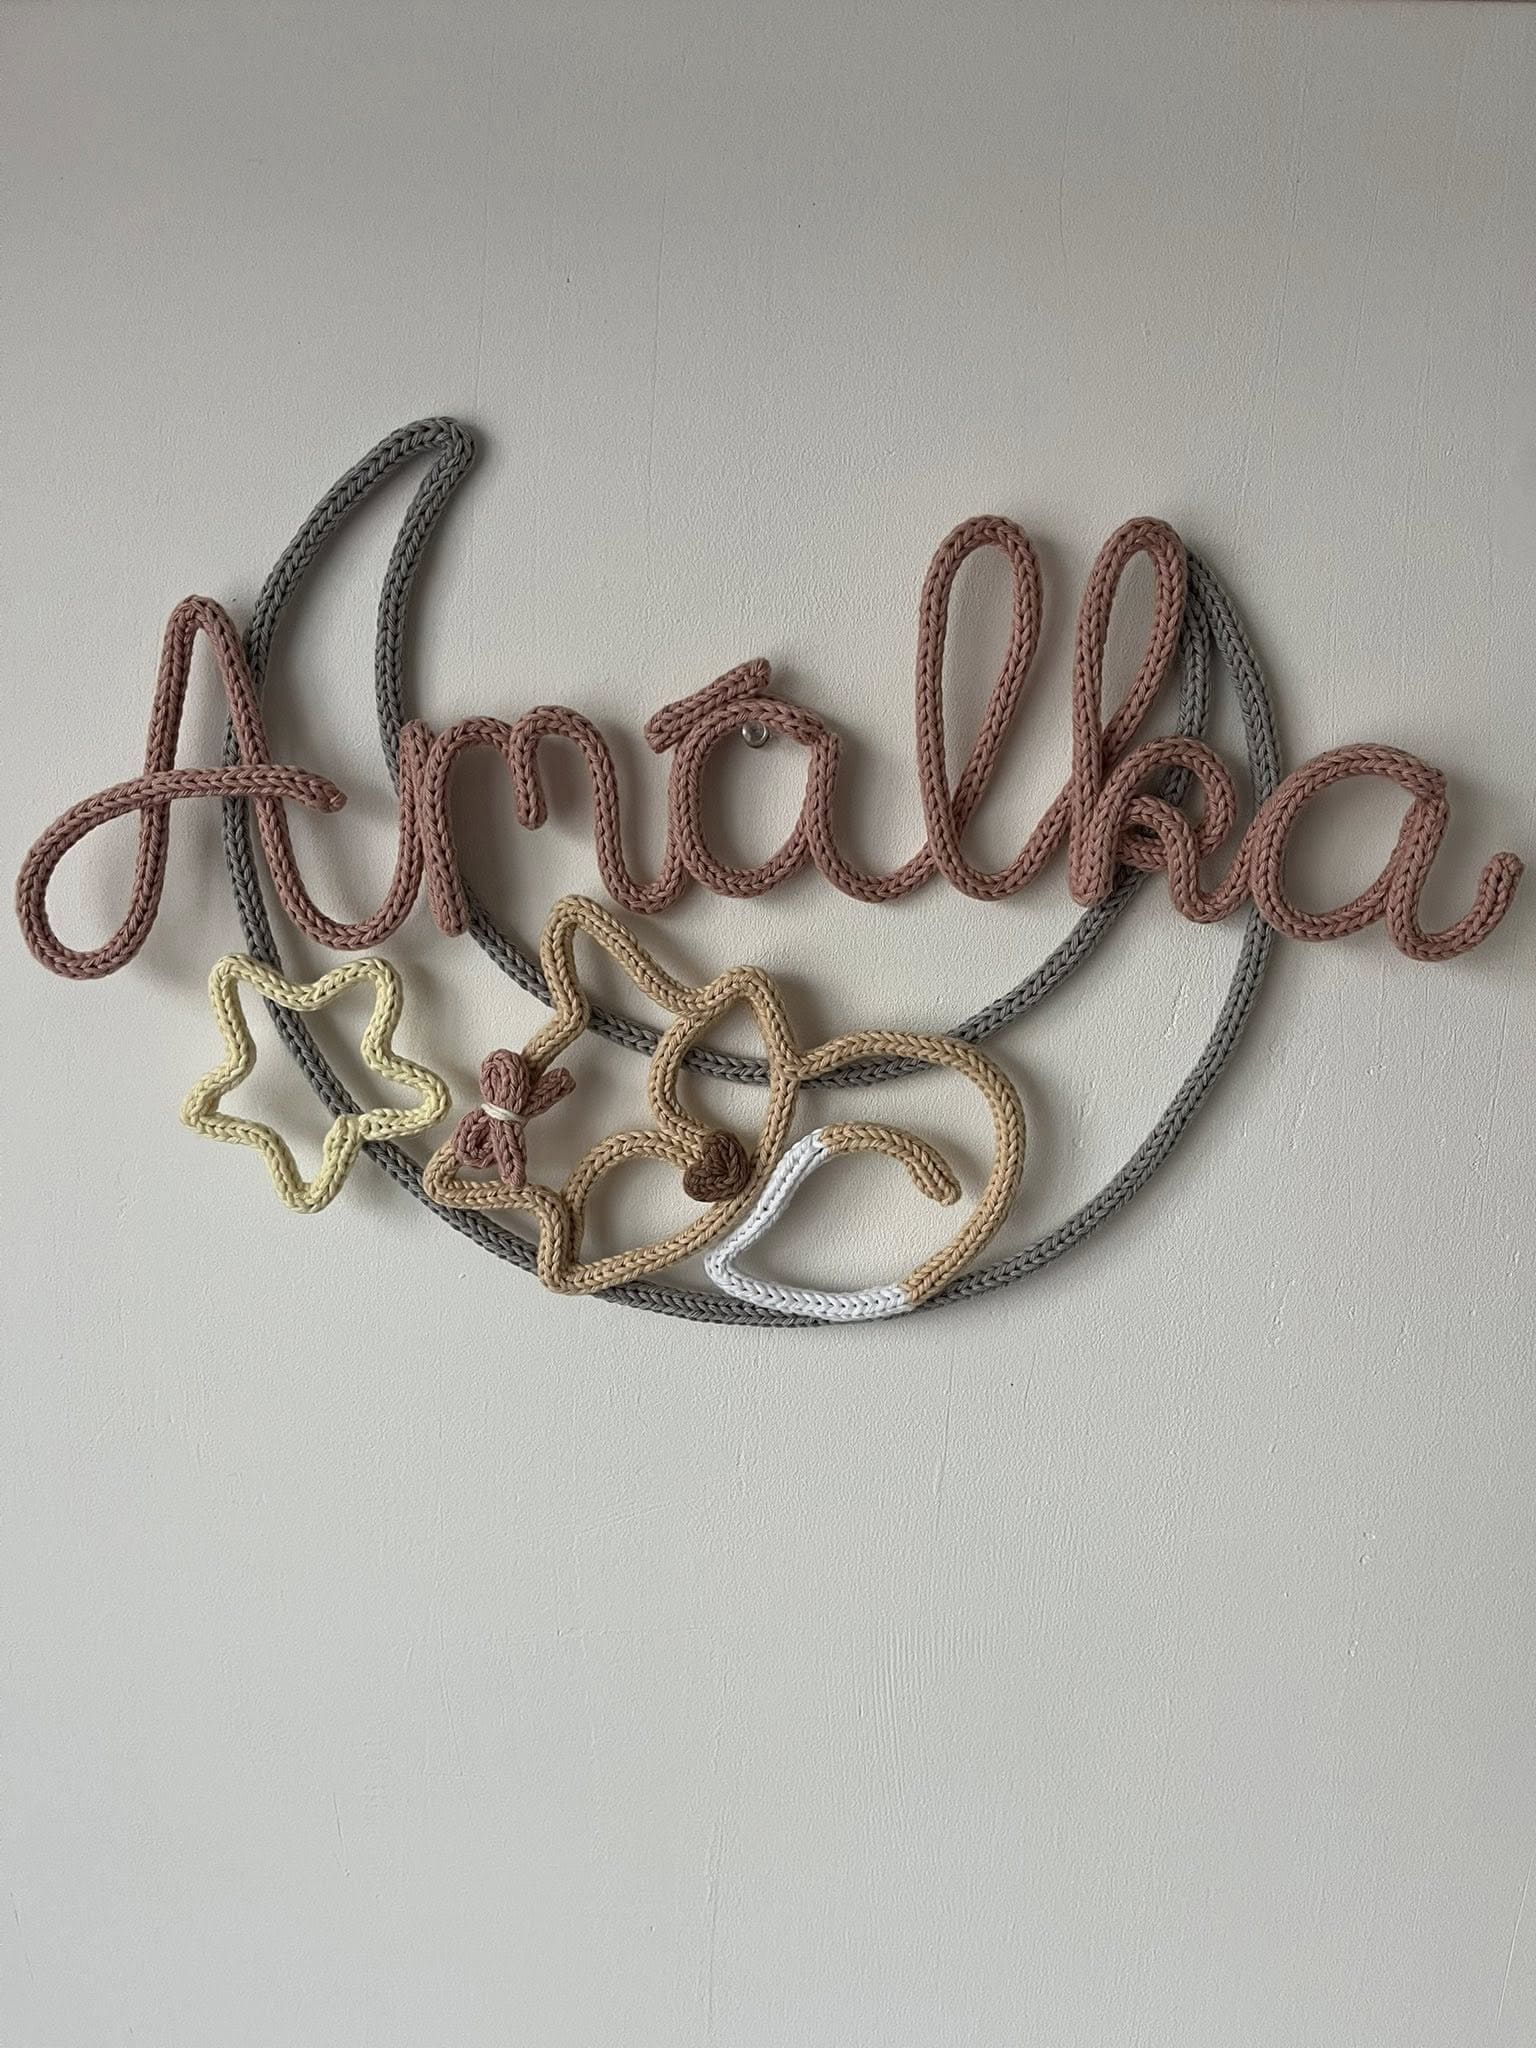
This beautifully knitted wire name wall art adds a personalized touch to any space.
The delicate threads form the name in soft, muted colors that flow seamlessly into playful shapes like stars and flowers, giving the piece a soft, whimsical feel.
It’s a unique way to add a touch of handmade charm to a nursery, bedroom, or any cozy corner in your home.

- Crochet thread in soft pink, beige, gray, and white (approx. 30 yards of each color)
- Thin wire (about 20-24 gauge) for structure
- Hot glue gun
- Scissors
- Needle for sewing any loose ends
-
Start by cutting wire segments for each letter in the name. You’ll need to create a frame for each letter, so ensure the wire is long enough to form the full shape of the letters.
-
Carefully knit the crochet thread around the wire. Each letter should be formed slowly, making sure the thread is evenly spread out, and the wire is tightly wrapped.
-
Once the letters are completed, join them together, ensuring they connect neatly to form the desired word or name.
-
Use the same technique to knit the small decorative stars and flowers in complementary colors. These elements can be added as whimsical accents to the overall piece.
-
Once all elements are connected and shaped, use a hot glue gun to secure any loose ends and reinforce the structure.
#20. DIY Christmas Tree Pen Craft
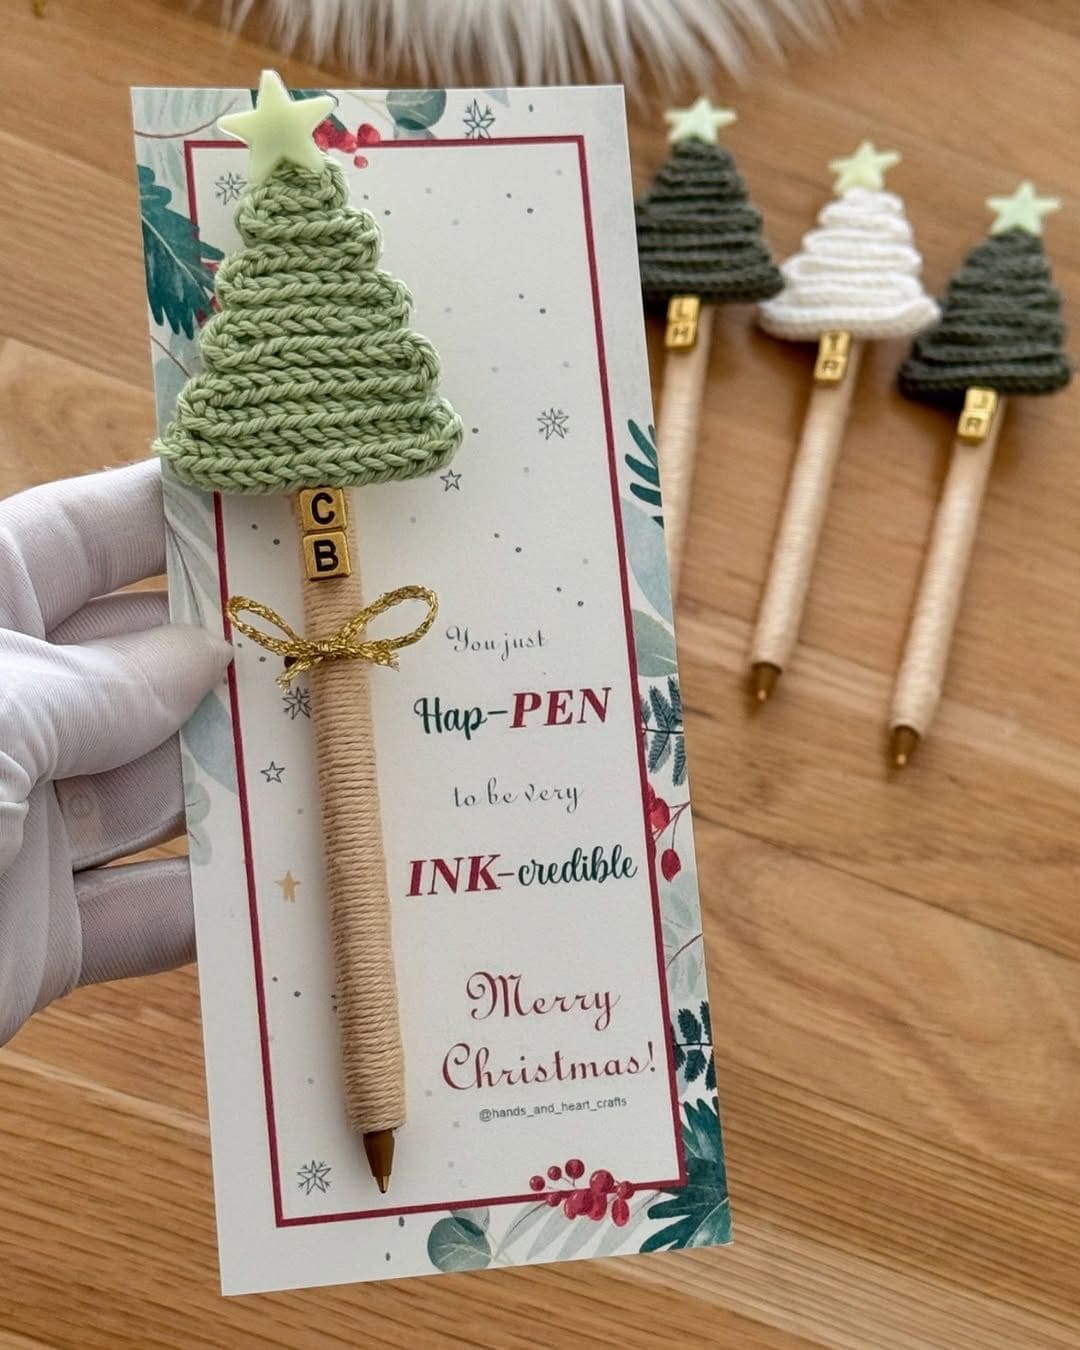
You can easily make these adorable Christmas tree pens that double as fun, festive stationery and a thoughtful holiday gift!
This DIY project combines simple crochet techniques with a bit of creativity to transform a plain pen into something special.
With cute crochet Christmas trees, little golden star toppers, and a clever pen pun, these pens are the perfect addition to any holiday card or gift box.

- Crochet thread in green, white, and other colors for decoration (approx. 30 yards)
- Golden-colored beads or small buttons for decoration
- Craft glue or hot glue gun
- A set of plain pens (preferably wooden or beige)
- Ribbon for the bow
- Scissors
- Small wooden or plastic stars for the tree topper
-
Start by crocheting small triangles that will form the body of your Christmas tree. You can use green crochet thread for the main tree and alternate with white for a snow-covered effect.
-
Once you've finished the tree, carefully glue it to the top of your pen, making sure the crochet tree fits snugly. You can use craft glue or hot glue to secure it in place.
-
Glue a small star at the top of the tree, creating a charming and festive topper for the pen.
-
Attach small golden beads or buttons to the tree to mimic ornaments. You can place them in a random pattern to give it a natural, whimsical look.
-
Wrap a piece of ribbon around the base of the pen and tie it in a small bow to complete the festive look.
See more: 20 Cute Halloween Crochet Ideas with Tutorials You’ll Want to Make Right Away
