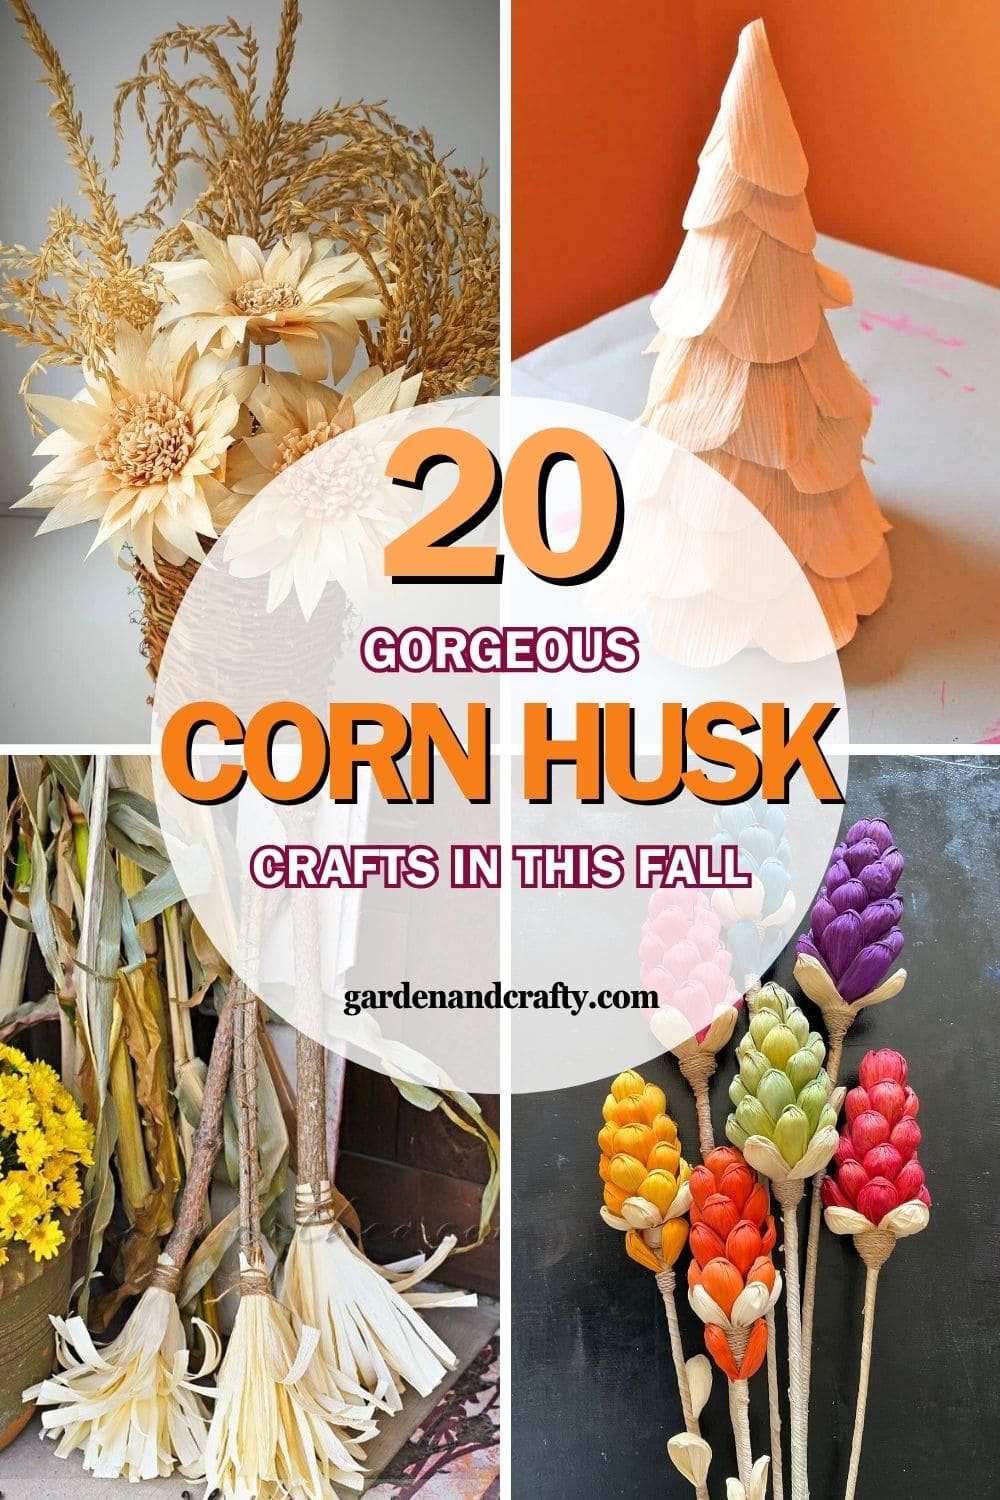
Have you ever looked at a simple corn husk and imagined all the beautiful things it could become? This often-overlooked material is surprisingly versatile, perfect for adding handmade charm to your fall decor.
As the leaves change and the air turns crisp, there’s something comforting about crafting with natural elements that feel close to the harvest season.
In this collection, you’ll find 20 inspiring corn husk crafts that are creative, heartwarming, and easy to make at home. Each idea brings a bit of rustic magic to your space, reminding you how cozy and creative autumn can be.
#1. Rustic Corn Husk Pumpkin Wall Hanging
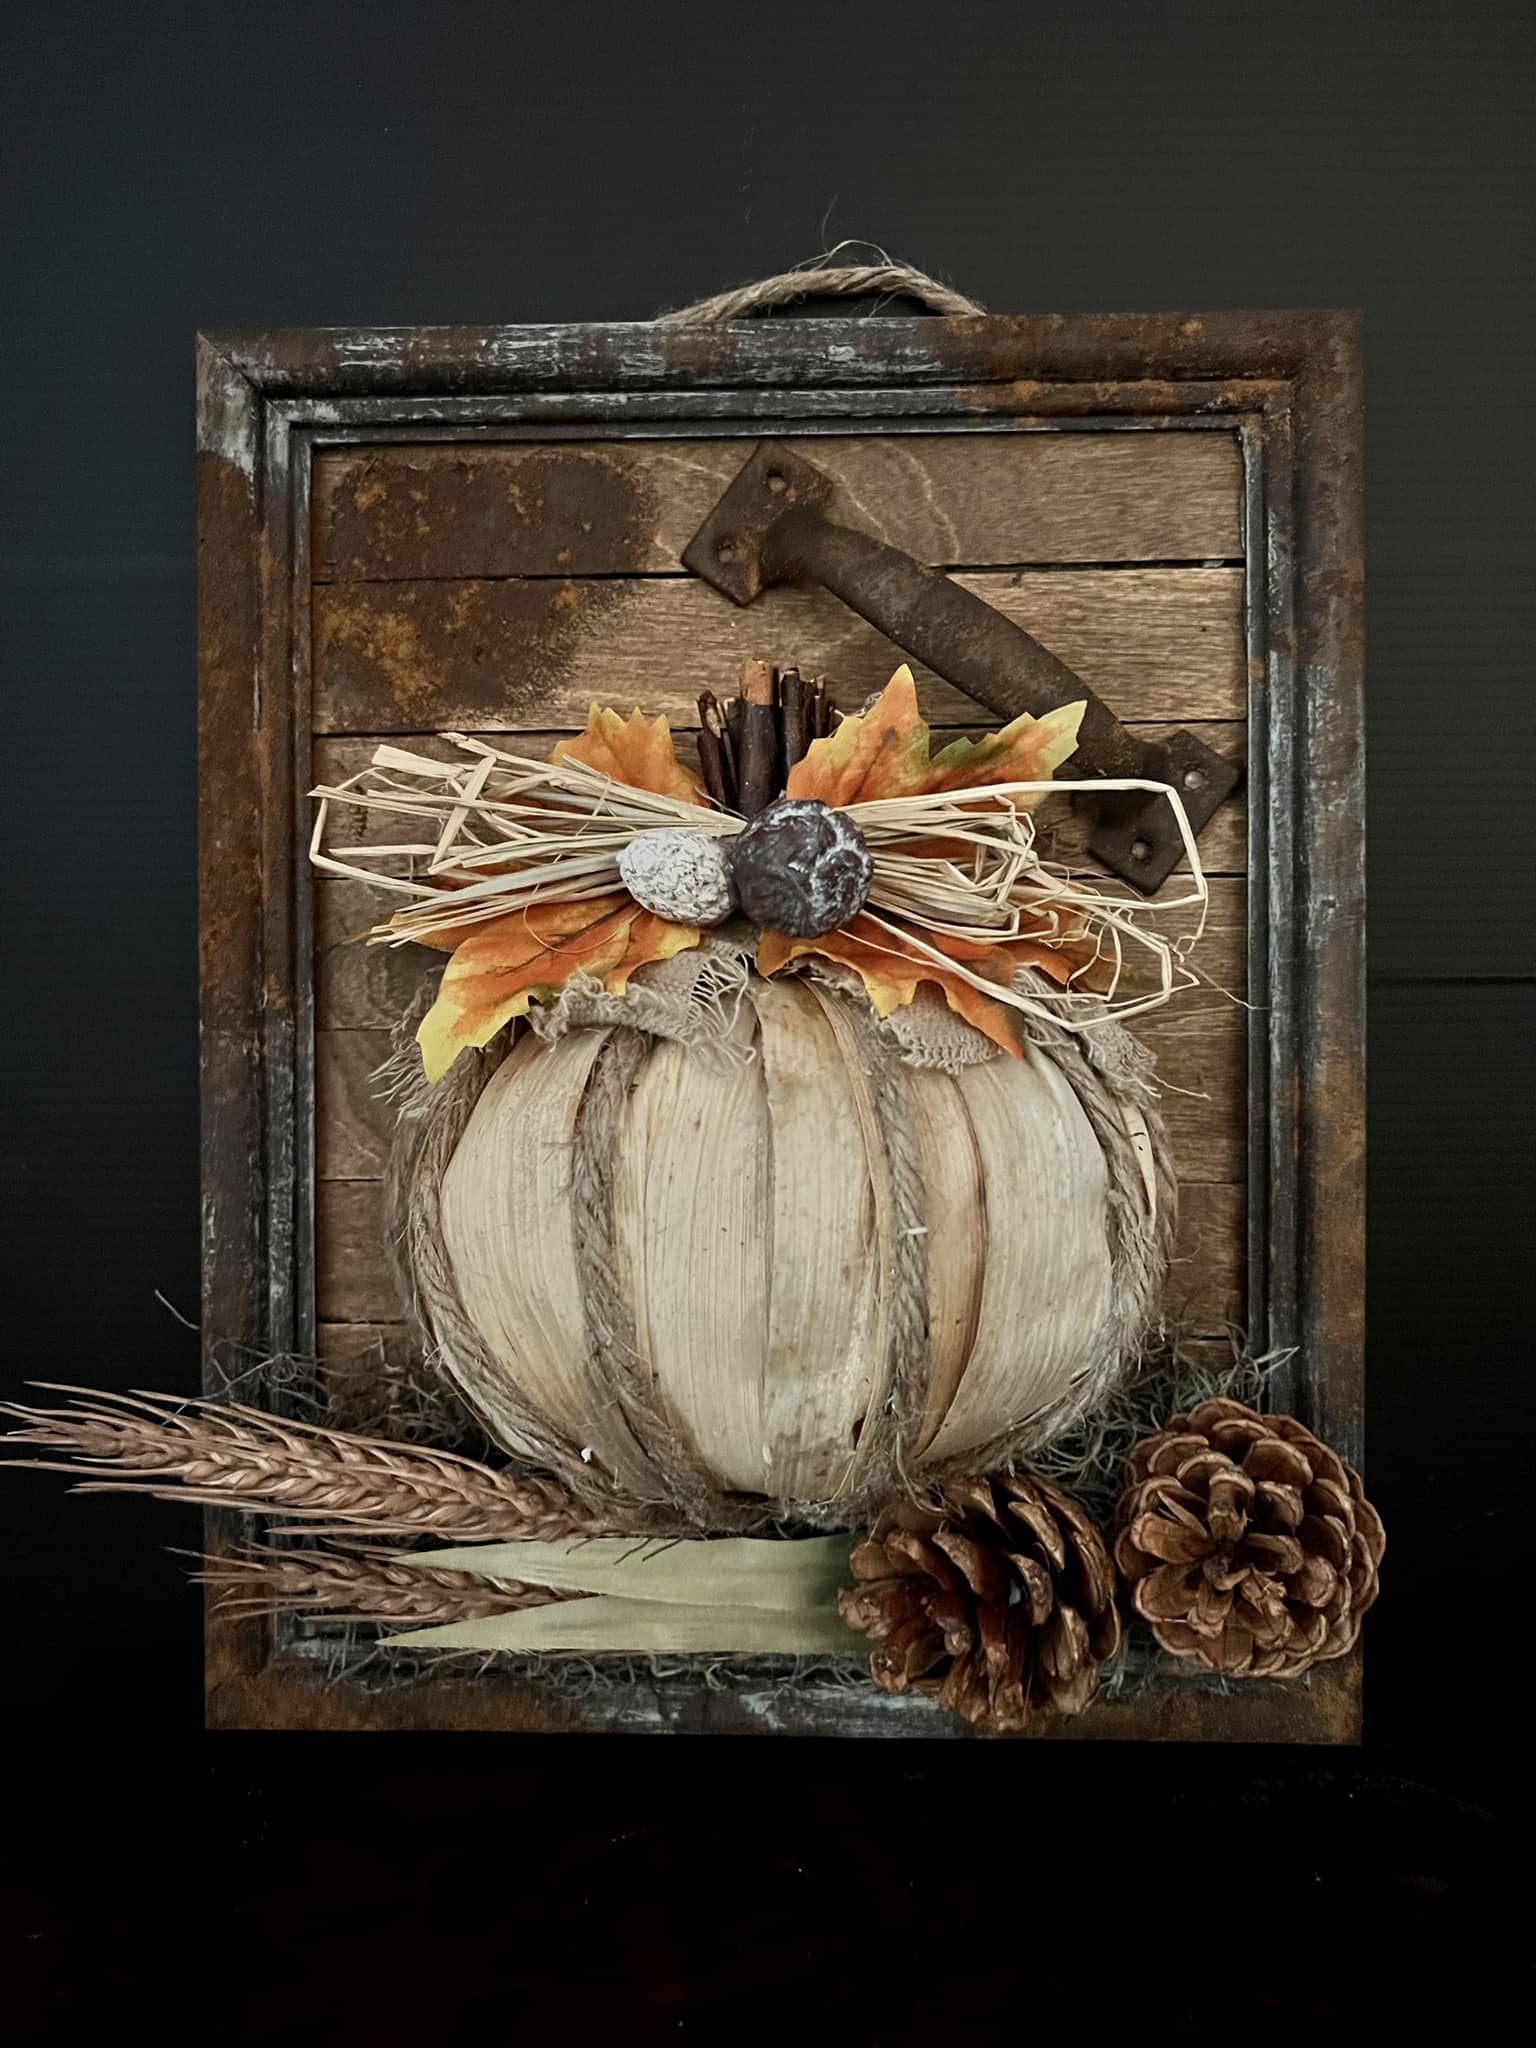
Look at this rustic wall hanging! It captures the heart of autumn with a handcrafted corn husk pumpkin framed in wood and accented with pinecones, raffia, and fall leaves.
The texture of the husks against the aged wood backdrop gives it a farmhouse-style charm that fits perfectly with cozy seasonal decor. It’s a statement piece you can hang on your front door, entryway, or mantel.
Materials Needed
- Dried corn husks (8-10 pieces)
- Cardboard or foam pumpkin base
- Rustic wooden frame
- Jute rope or twine
- Hot glue gun
- Decorative elements: faux leaves, cinnamon sticks, pinecones, raffia
- Optional: chalk paint
Step-by-step Guide
Step 1: Cut the pumpkin shape out of cardboard or use a pre-formed foam shape.
Step 2: Glue strips of corn husk vertically around the pumpkin base, slightly overlapping for full coverage.
Step 3: Wrap the pumpkin with twine or jute rope to create ridges and add texture. Then mount the pumpkin onto the wooden frame using hot glue.
Step 4: Decorate the top with raffia, faux fall leaves, acorns, or mini pinecones.
Step 5: Finish by adding a hanging loop or using the frame’s built-in hardware.
#2. Layered Corn Husk Christmas Tree
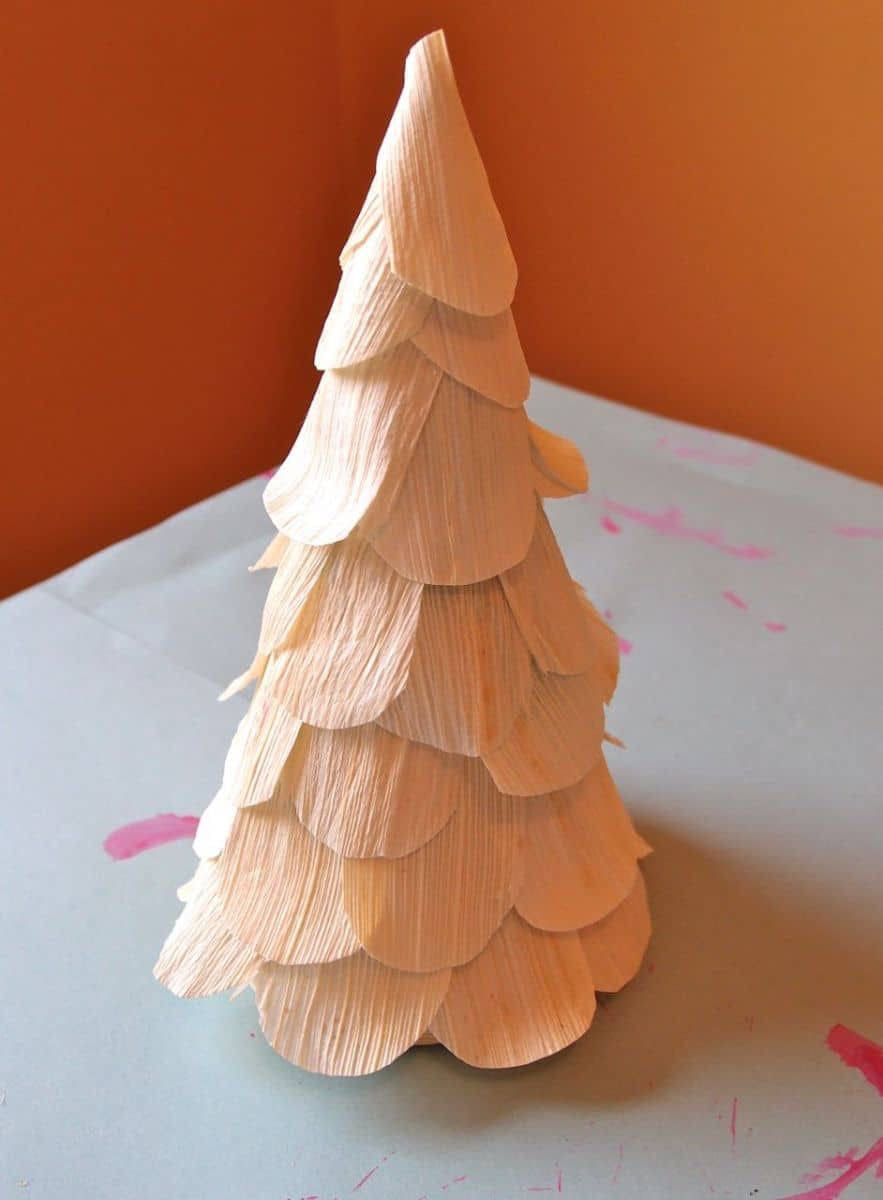
This little corn husk tree has no glitter, no lights, just the gentle flow of natural texture and time. Each layer is carefully cut and shaped, creating soft scalloped tiers that mimic snowy evergreen boughs.
This project invites you to slow down and create with intention. And once finished, it will add a warm, handmade charm to your winter space.
Materials Needed
- 1 foam or cardboard cone (8″-12″ tall)
- 15-20 dried corn husks (softened in warm water)
- Hot glue gun & glue sticks
- Scissors
- Optional: white paint, glitter, or star topper
Step-by-step Guide
Step 1: Soak corn husks until soft and pliable. Pat them dry, then cut into scalloped shapes about 2″-3″ wide.
Step 2: Starting at the bottom of your cone, glue a row of husk pieces around the base, overlapping slightly to create a layered look.
Step 3: Continue working upward in rows, layering each new row slightly above the last and trimming smaller pieces as you reach the top.
Step 4: At the very top, finish with a tightly curled husk or a small cone-shaped piece to cover the tip.
Step 5: You should leave the tree natural or decorate with a light wash of white paint or a touch of glitter for a snowy effect.
#3. Corn Husk Sunburst Flowers in a Rustic Basket
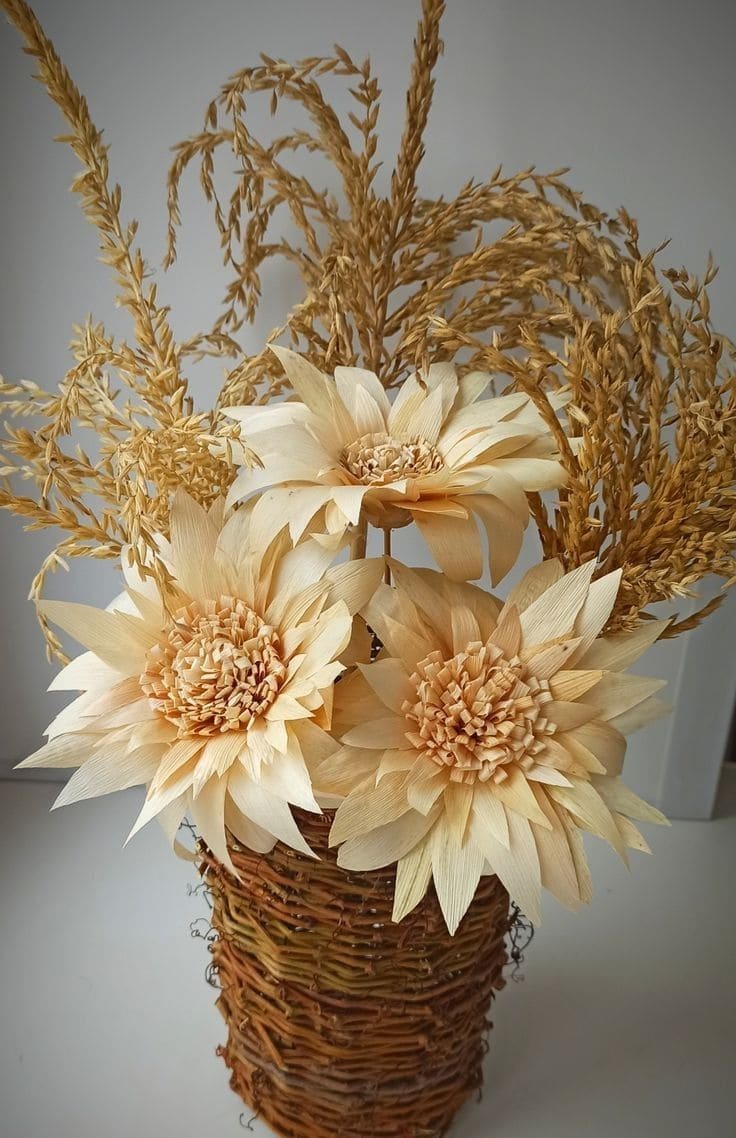
There’s something deeply grounding about crafting with natural materials, especially when you can turn something humble, like corn husks, into a radiant arrangement.
These sunburst-style flowers bloom with texture and warmth, each petal cut and shaped by hand. When nestled into a woven basket with dried grass or wheat, they create a harvest-inspired centerpiece that feels like it came straight from the countryside.
This project is slow, mindful crafting at its best. You’ll find joy in layering, folding, and fluffing.
Materials Needed
- 15-20 dried corn husks (soaked and softened)
- Hot glue gun & glue sticks
- Scissors
- Floral wire or wooden skewers
- Small basket or rustic vase (approx. 6″-8″ tall)
- Dried grasses, wheat, or millet
- Optional: brown or tan acrylic paint
Step-by-step Guide
Step 1: Soak your corn husks in warm water for 10-15 minutes until soft and pliable. Pat them dry gently with a towel.
Step 2: Cut the husks into petal shapes of varying lengths (about 2″-4″). For the center, cut thinner strips and fringe them for texture.
Step 3: Begin building the flower by tightly rolling the fringed center and gluing it around a skewer. Then layer the larger petals outward, gluing each one at the base.
Step 4: Once your flower head is complete, add more petals behind for fullness, then wrap the base with a strip of husk to cover glue marks.
Step 5: Arrange 3-5 finished flowers in your basket along with dried grasses for a wild, organic look.
#4. Colorful Corn Husk Flowers on Long Stems
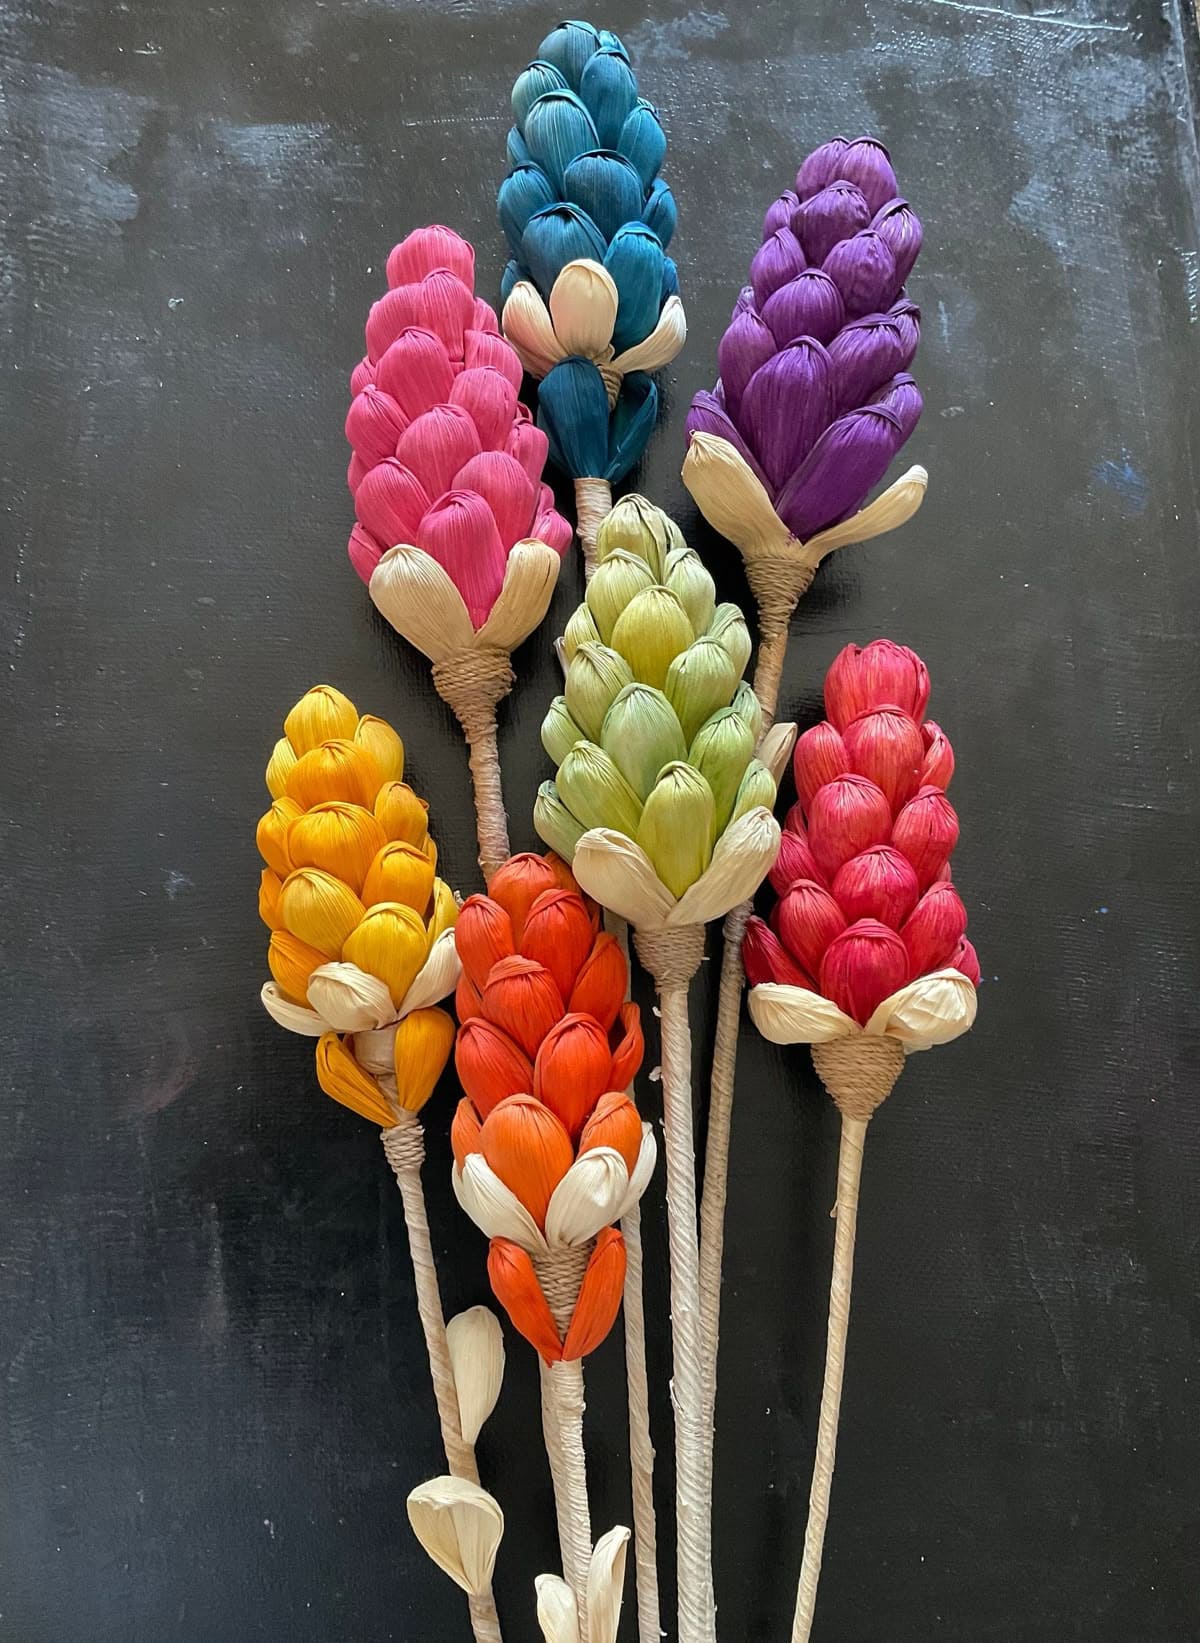
These blossoms are like fireworks made from fiber. Each one is hand-shaped from dyed corn husks, layered into a cone-shaped bloom that stands tall and proud.
They’re eye-catching enough to brighten a whole room and gentle enough to remind you of the handmade charm behind every petal.
These flowers make beautiful gifts, wall hangings, or additions to seasonal arrangements, especially when grouped in a rainbow bouquet.
Materials Needed
- 15-20 corn husk pieces (per flower)
- Fabric dye or watered-down acrylic paint
- Hot glue gun & glue sticks
- Wooden skewers or floral wire (12″ or longer)
- Natural jute or twine
- Rubber gloves
- Bowl or plastic container
- Scissors
Step-by-step Guide
Step 1: Dye your corn husks in separate bowls of diluted paint or fabric dye. Let them soak for 10-20 minutes, then lay them out to dry completely.
Step 2: Once dry, cut the husks into rounded petal shapes of various sizes, about 2″-4″ long.
Step 3: Start gluing the smallest petals around the top of your skewer or floral wire. You should work downward, overlapping each layer to create a cone shape.
Step 4: When the bloom is complete, wrap the base and stem tightly with twine or jute to secure everything and give a finished look.
Step 5: Arrange several flowers in a tall vase, hang them in a bundle, or display individually in bottles or jars.
Tip: For more variation, you can curl the edges of the petals slightly while damp, or mix dyed and natural husks for a soft, two-tone effect.
#5. Handwoven Corn Husk Trinket Basket
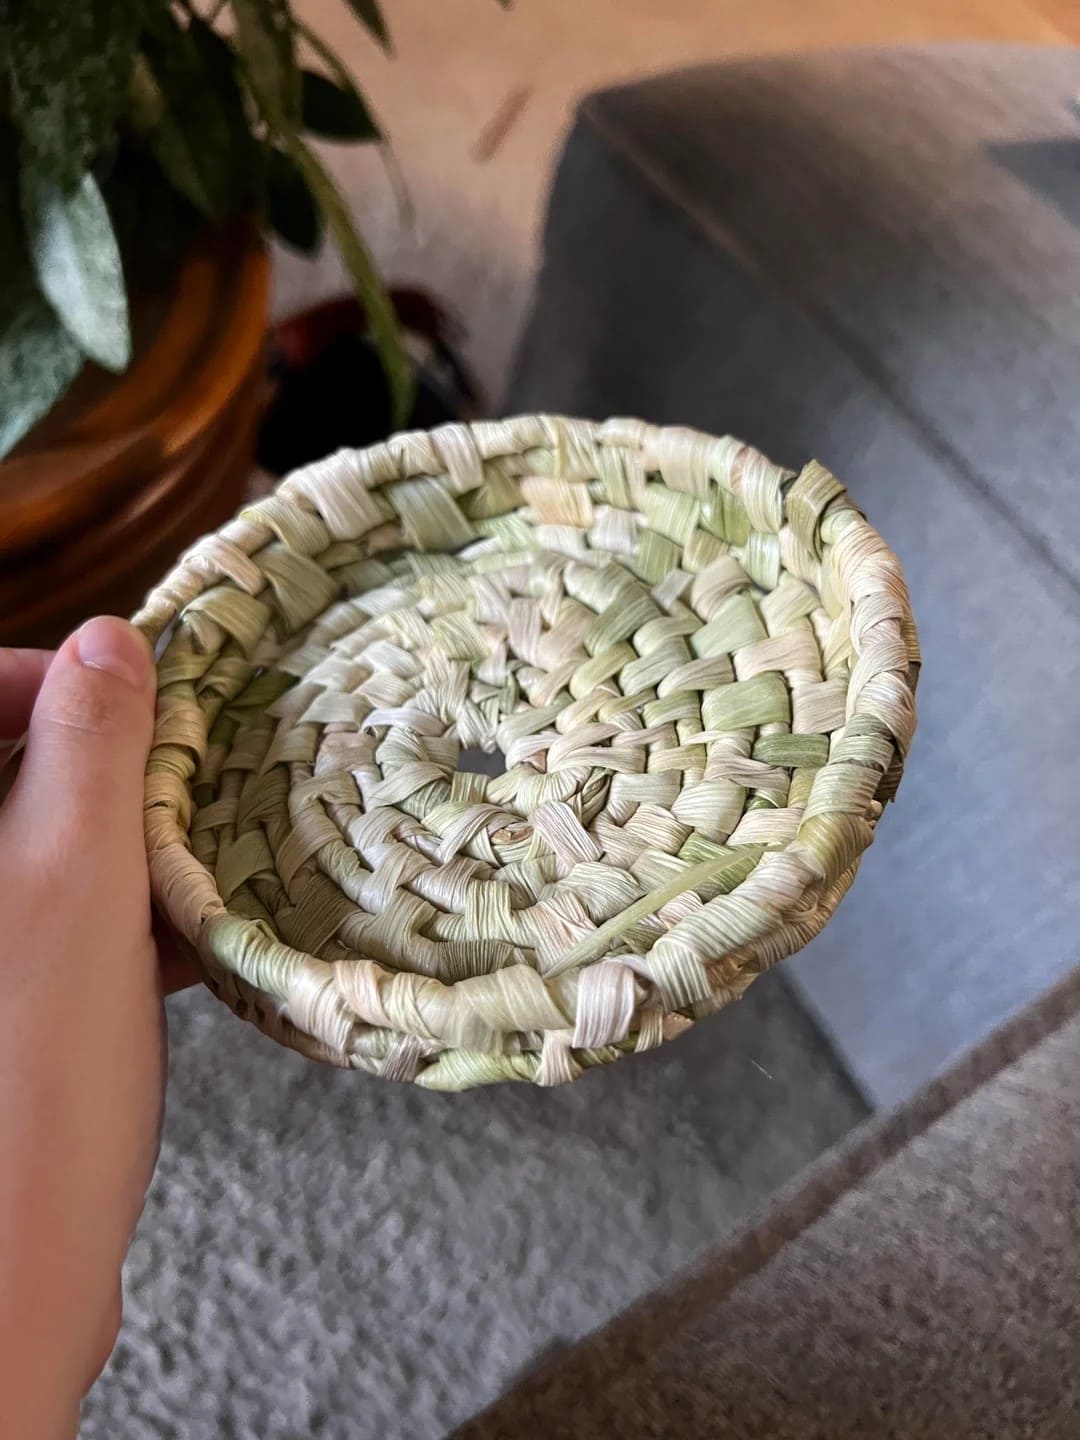
Using softened corn husks, you can coil and stitch your way into a piece that’s perfect for holding rings, keys, dried herbs, or tiny treasures.
Bonus, the natural tones of the husk give it a soft, calming beauty and the rhythm of weaving is both meditative and rewarding.
This project’s a wonderful way to slow down, work with your hands, and create something lasting from materials that might otherwise be tossed aside.
Materials Needed
- 15-20 long corn husk strips (soaked and softened)
- Natural raffia or strong thread
- Large-eye blunt needle
- Scissors
- Clothespins or clips (optional)
Step-by-step Guide
Step 1: Soak your corn husks in warm water for about 15 minutes until they’re pliable.
Step 2: Twist or roll several husk strips together to form a rope-like coil. You need to secure the end with raffia or thread.
Step 3: Begin coiling the husk rope in a spiral to form the base of your basket. Then use a needle and raffia to stitch each new round into place.
Step 4: Once the base is the size you want (about 4″ across works well), begin layering coils upward to build the walls. Continue stitching as you go.
Step 5: Finish by tucking in the end neatly and securing with a final stitch. Let it air-dry fully to hold its shape.
#6. Mixed Media Corn Husk Sunflower Wall Art
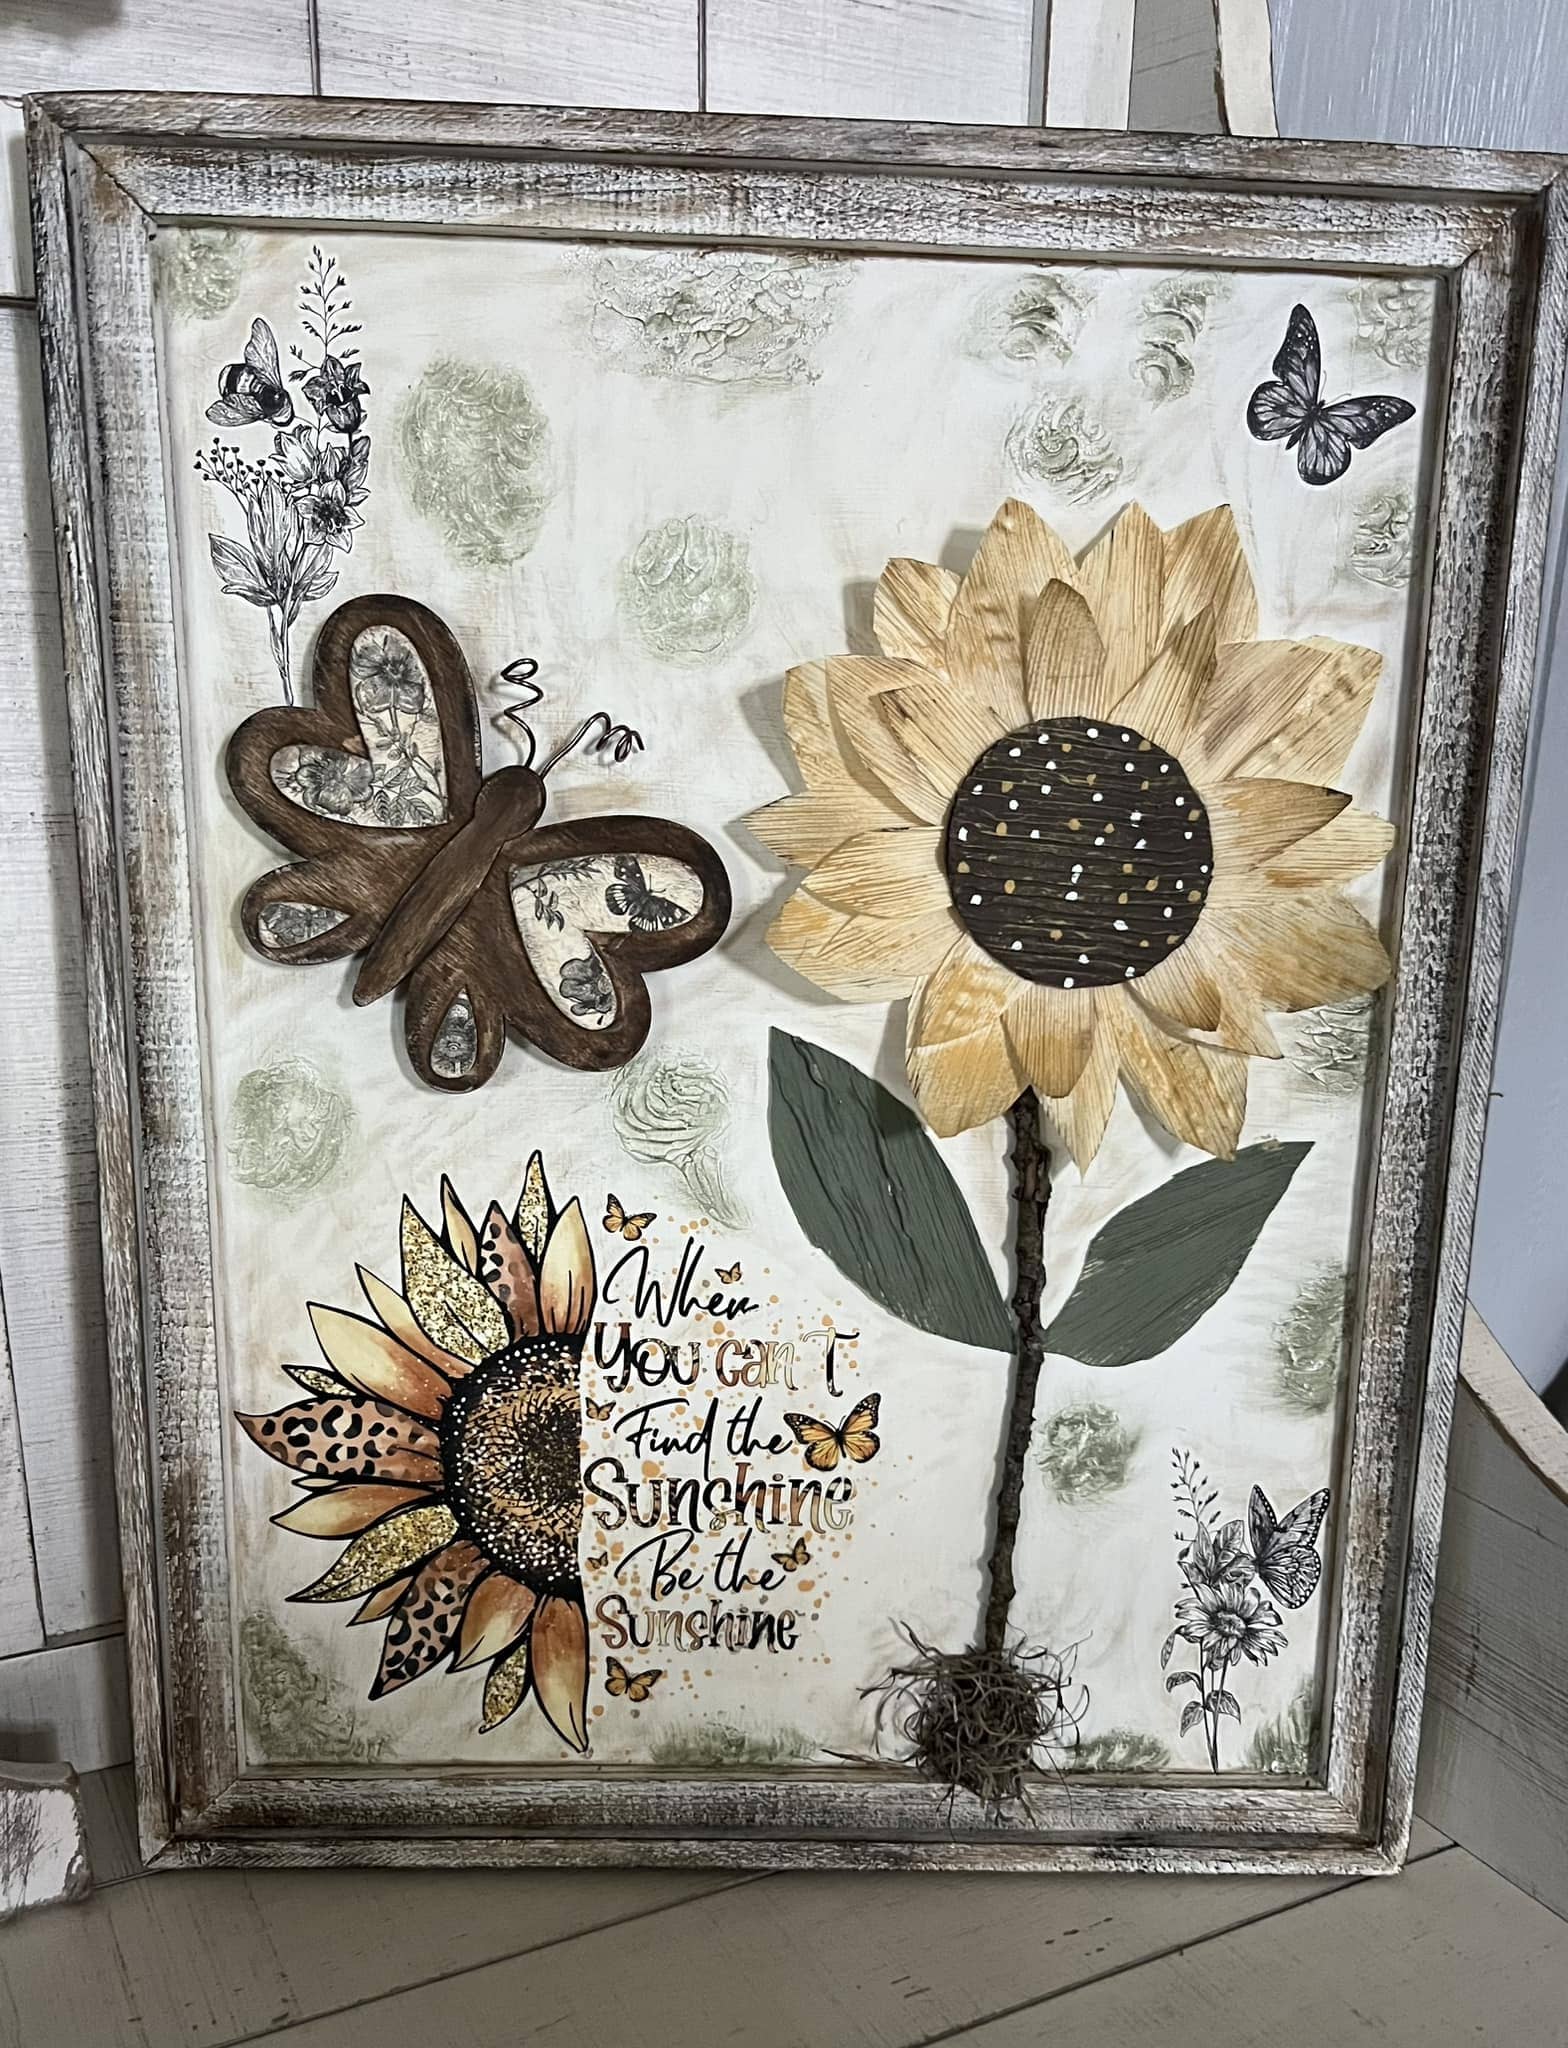
Interestingly, this framed sunflower piece is a reminder to grow, shine, and bring warmth wherever you go.
Made with real corn husk petals, painted accents, and a whimsical combination of textures, this project turns simple materials into an uplifting visual story.
With a natural stem, bold butterfly, and hand-lettered quote, it brings together rustic charm and creative freedom in one beautiful frame.
Materials Needed
- 1 shadow box or deep photo frame (11″×14″ or larger)
- 8-12 corn husks (trimmed into petal shapes)
- Brown or black cardstock
- Twine, yarn, or moss
- Green paper or painted cardstock
- Wood or metal butterfly cutout (optional)
- Printed or hand-lettered quote
- Craft glue or hot glue gun
- Paint, pens, and embellishments (as desired)
Step-by-step Guide
Step 1: Arrange your corn husks into a sunflower shape, trimming and overlapping petals as needed. Then glue them onto your background starting from the outer circle.
Step 2: Cut a circle from cardstock and dot it with white or gold paint for the center. You glue this over the base of your petals.
Step 3: Use twine or a wrapped cord to form the sunflower’s stem. Next, attach green leaves made from paper, painted husks, or felt.
Step 4: Add a quote or message beneath the flower using a sticker, transfer, or hand lettering.
Step 5: Embellish with printed butterflies, dried flowers, or a rustic butterfly cutout to complete the look.
#7. Elegant Corn Husk Flowers with Wooden Stems
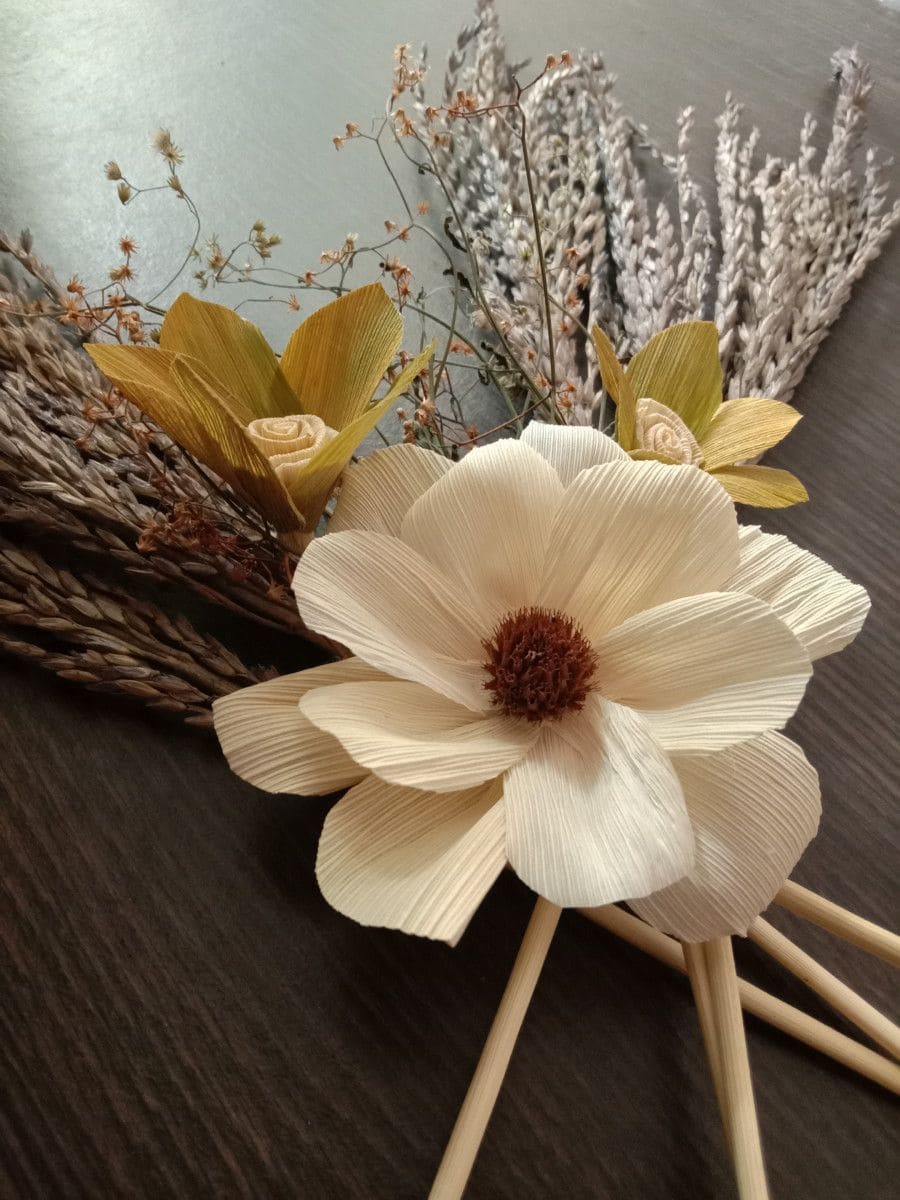
There’s a quiet poetry in these handmade flowers, layers of soft, curved corn husk petals that bloom with timeless charm.
No matter how it’s the gentle cream tone or the way they blend seamlessly into dried grass arrangements, this craft celebrates nature’s textures in a refined, delicate form. The roses tucked beside the fuller blossom add even more depth and character.
Perfect for year-round home decor, weddings, or handmade bouquets, these flowers make a thoughtful gift and a beautiful way to honor traditional craft with a modern touch.
Materials Needed
- 12-15 corn husk strips (softened and dried flat)
- Wooden skewers or floral sticks (10″-12″)
- Hot glue gun & glue sticks
- Scissors
- Brown raffia or dyed corn silk
- Dried filler grasses or baby’s breath (optional)
Step-by-step Guide
Step 1: Soak and dry your corn husks until they’re pliable. Then cut out petal shapes, some wide and rounded, some smaller for layering.
Step 2: Begin by forming the center using tightly curled husk strips or a small bunch of brown raffia glued in place.
Step 3: Start layering petals outward from the center, slightly overlapping as you go to create a full, open bloom.
Step 4: Glue the flower head onto the end of a wooden skewer. Wrap the base with an extra husk strip for a clean finish.
Step 5: Create smaller buds or roses using rolled husks, and mix them in with dried grasses or greenery for a lush, mixed bouquet.
#8. Hanging Corn Husk Bats
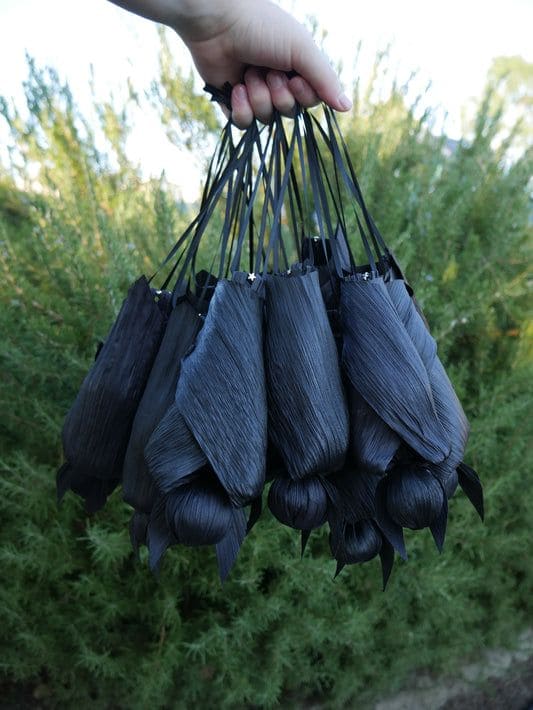
Ready to add a little handmade spookiness to your Halloween? These eerie little bats are made from dyed corn husks and make the cutest hanging decorations for porches, trees, or party garlands.
They sway in the breeze and look like tiny flying creatures, especially when hung in a bunch! This project is simple, budget-friendly, and kid-approved.
Materials Needed
- 3 black-dyed corn husks (approx. 6-8 inches long)
- Small foam or paper balls (1 inch diameter) or rolled-up husk
- Black string or thin ribbon (10-12 inches per bat)
- Hot glue gun
- Scissors
- Optional: mini star stickers or glitter
Step-by-step Guide
Step 1: Soak your corn husks in warm water for a few minutes to soften, then pat dry.
Step 2: Wrap one husk around a small ball or rolled husk to form the head, and tie with string at the base to secure it.
Step 3: Layer two more husks over the sides, angling them slightly to resemble folded bat wings. Then secure with glue.
Step 4: Attach a loop of black string or ribbon to the top so you can hang it.
Step 5: Finally, add small embellishments like stars or glitter if desired.
#9. Corn Husk Bunny with Bow
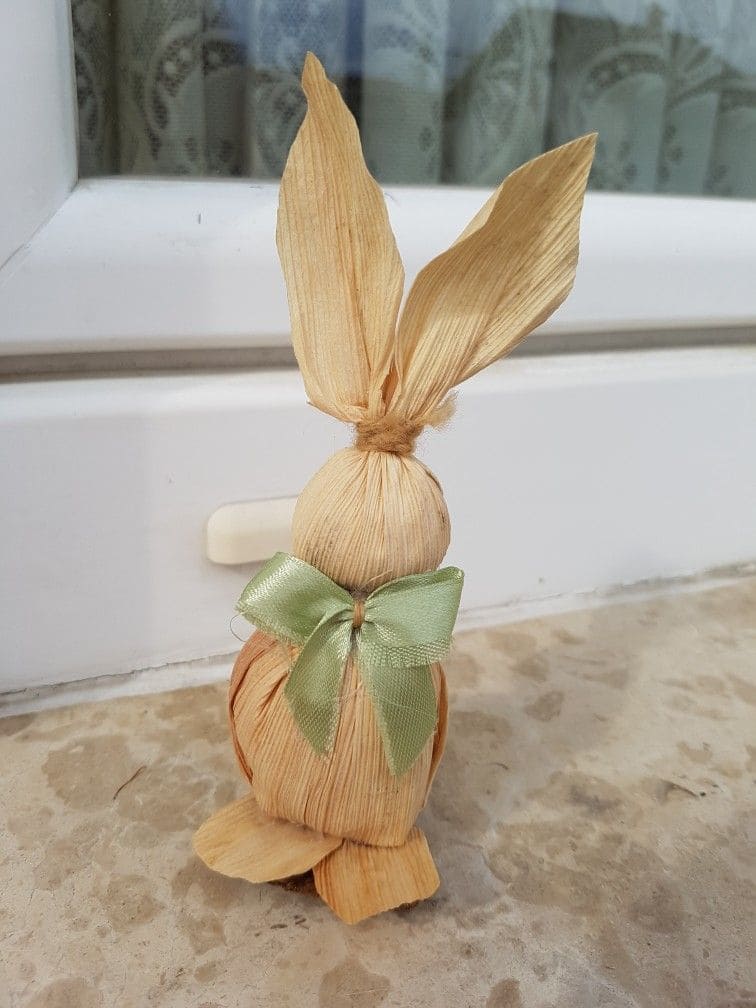
You can see this sweet little corn husk bunny is full of charm and simplicity, perfect for springtime decorating, Easter baskets, or a rustic nursery shelf.
With floppy ears, a soft rounded shape, and a pastel bow tied neatly around its neck, it’s a gentle reminder that handmade joy doesn’t have to be complicated.
Whether you’re making one for fun or a dozen for gifting, this craft brings out the heartwarming side of working with natural materials.
Materials Needed
- 8-10 corn husk strips (softened and dried flat)
- Cotton balls or small stuffing (for shaping)
- Twine or thin jute string
- Green ribbon or bow (approx. ½” wide)
- Hot glue gun & glue sticks
- Scissors
Step-by-step Guide
Step 1: Soak and dry your husks flat. Roll a few around small tufts of cotton or batting to shape the bunny’s head and body. Then secure with twine.
Step 2: Form the ears by folding two long husk pieces into soft points, then tie them at the base. You glue them onto the head.
Step 3: Use flat husk pieces to form feet at the bottom and a small strip for the back. Next, trim and glue everything in place securely.
Step 4: Tie a pastel ribbon into a neat bow and glue it around the neck for a finished, festive touch.
Step 5: Let your bunny dry and firm up completely before displaying or gifting.
Tip: For extra personality, you can add tiny felt eyes, a pom-pom tail, or even turn it into a hanging ornament by attaching a loop.
#10. Giant Corn Husk Sunflower Wall Art
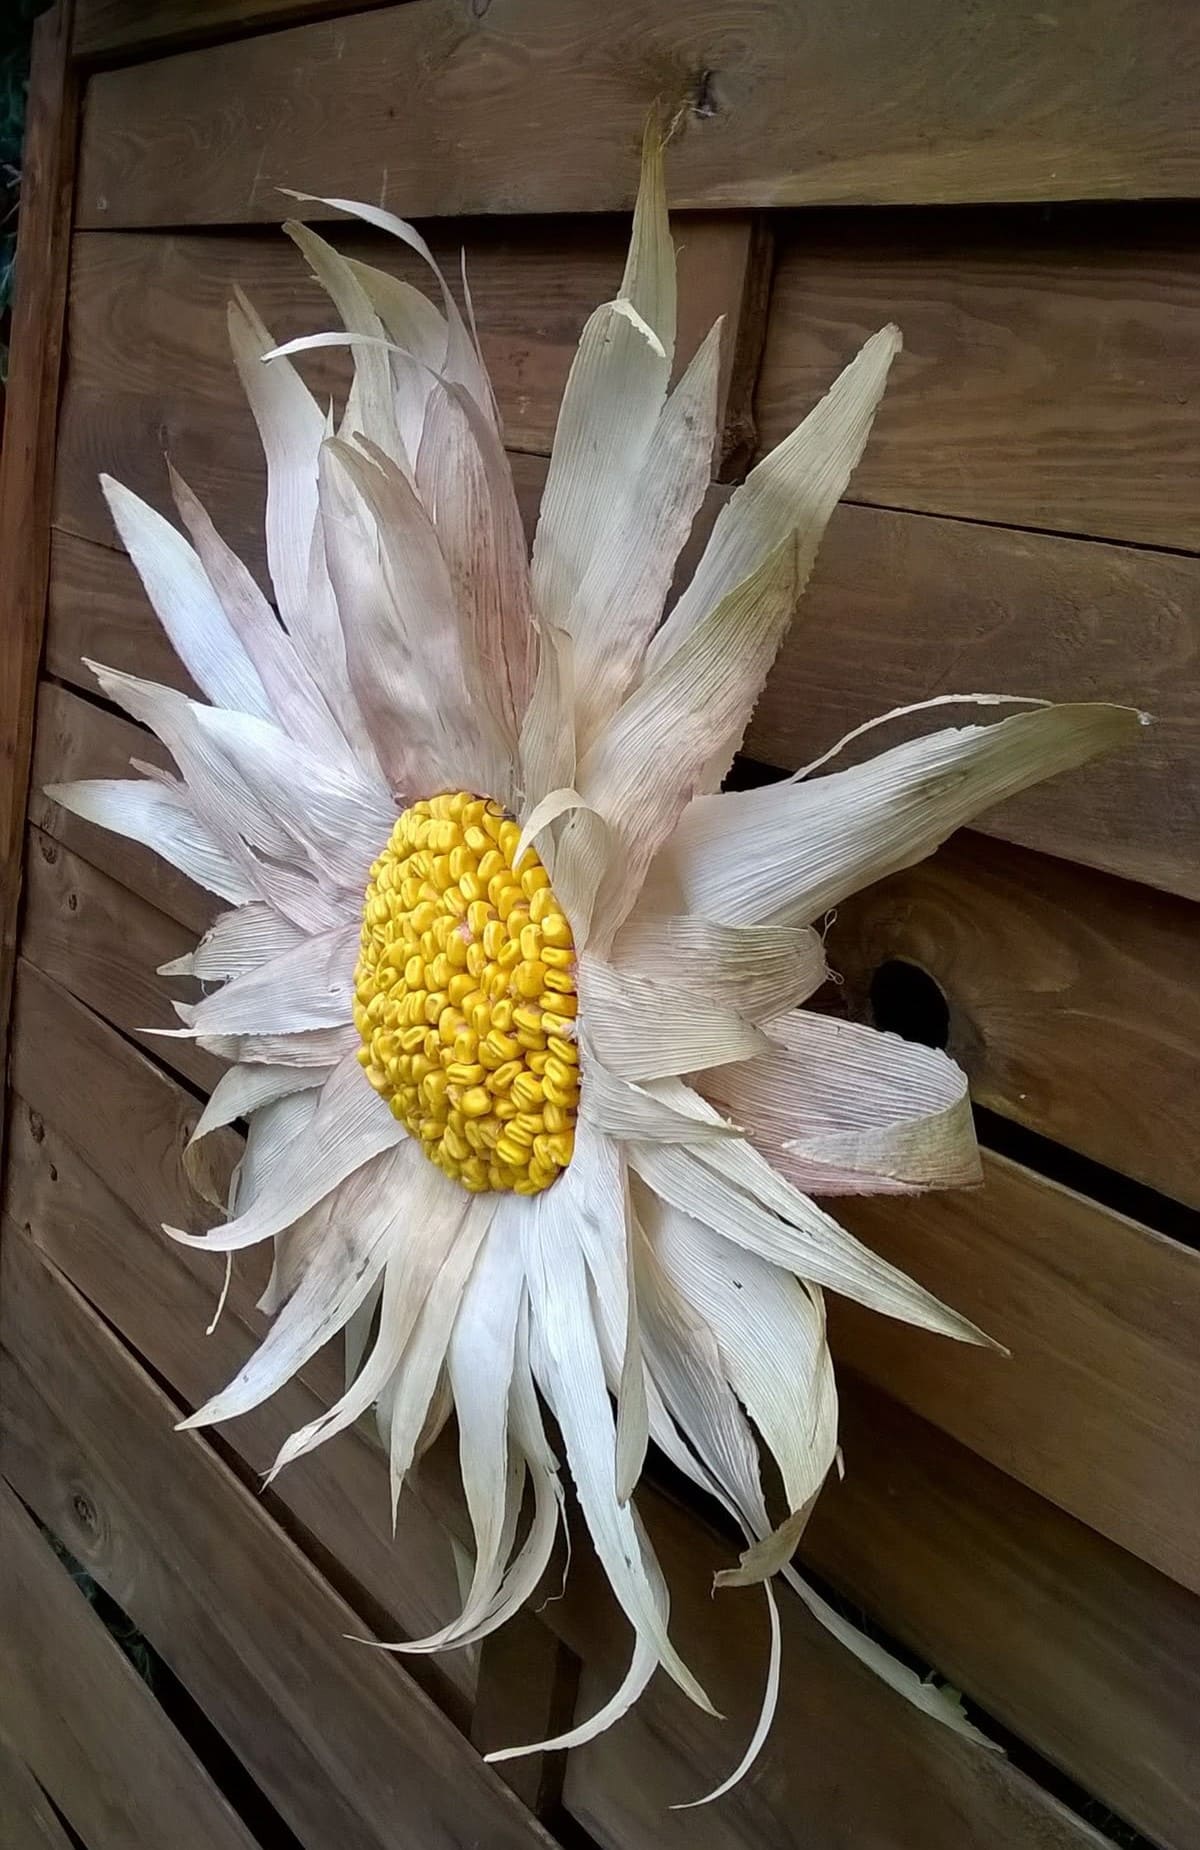
This striking sunflower isn’t just big, it’s bold, earthy, and full of texture. Built from layers of curved corn husks and a vibrant kernel center, it’s the kind of craft that makes your outdoor wall or garden shed feel alive with handmade joy.
The way the petals flare outward in different directions gives it a wild, windswept look like something nature sculpted herself.
Crafting this piece is all about rhythm: soaking, shaping, and layering until it blooms. You’ll get a rustic masterpiece that holds up beautifully throughout the fall season.
Materials Needed
- 30-40 dried corn husks (soaked and softened)
- 2 cups dried yellow corn kernels
- Thick cardboard or wood round base (12″-14″)
- Hot glue gun & glue sticks
- Scissors
- Craft wire or string
- Optional: brown or gold paint
Step-by-step Guide
Step 1: Soak corn husks in warm water for 10 minutes to make them flexible. You pat them dry and trim into long petal shapes.
Step 2: Start at the outer edge of your cardboard base and hot glue the longest husks in a circle, overlapping each slightly for fullness. Then, add a second and third layer, using shorter petals as you move inward.
Step 3: Once the petals are done, fill the center with hot glue and press corn kernels in tightly to form the flower’s core. Work in sections so the glue doesn’t dry too fast.
Step 4: Flip your piece over and attach a wire or string loop for easy hanging.
Step 5: Touch up the tips with a hint of brown or gold paint if desired, then display on a fence, porch, or garden wall.
#11. Corn Husk Ornament Ball for Christmas Trees
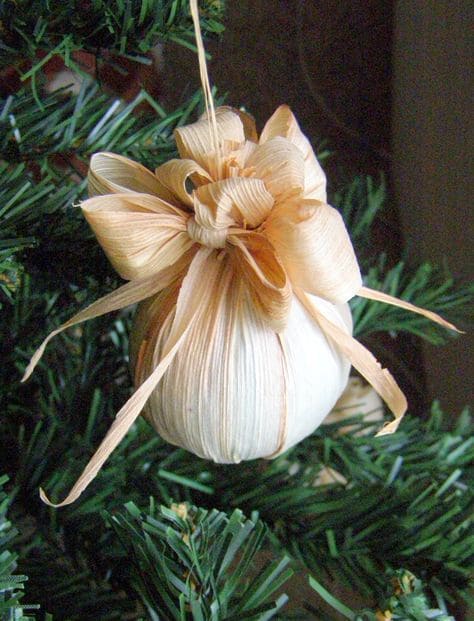
This sweet and simple corn husk ornament brings natural warmth to your Christmas tree. Tied like a gift and full of rustic charm, it’s a lovely way to celebrate the season with handmade touches. The gentle folds of the husk and the bow-like top give it the look of a wrapped present or a blooming flower.
You can hang several of these as a set, or mix them with pinecones and cinnamon sticks for a nature-inspired holiday theme.
Materials Needed
- 4-5 dried corn husks (per ornament)
- Small foam ball or crumpled paper core
- Twine
- Hot glue gun
- Scissors
- Optional: cinnamon stick or small bell
Step-by-step Guide
Step 1: Wrap the foam ball or paper core with corn husk layers, smoothing them around the shape and securing with glue.
Step 2: Gather the top of the husks together like a drawstring and tie tightly with twine or raffia.
Step 3: Trim and curl the husk ends to resemble a decorative bow or loops. Then add a loop of twine to the top for hanging.
Step 4: Optional: Tuck in a cinnamon stick, sprig of greenery, or tiny pinecone for a festive touch.
#12. Corn Husk Scorpion Sculpture
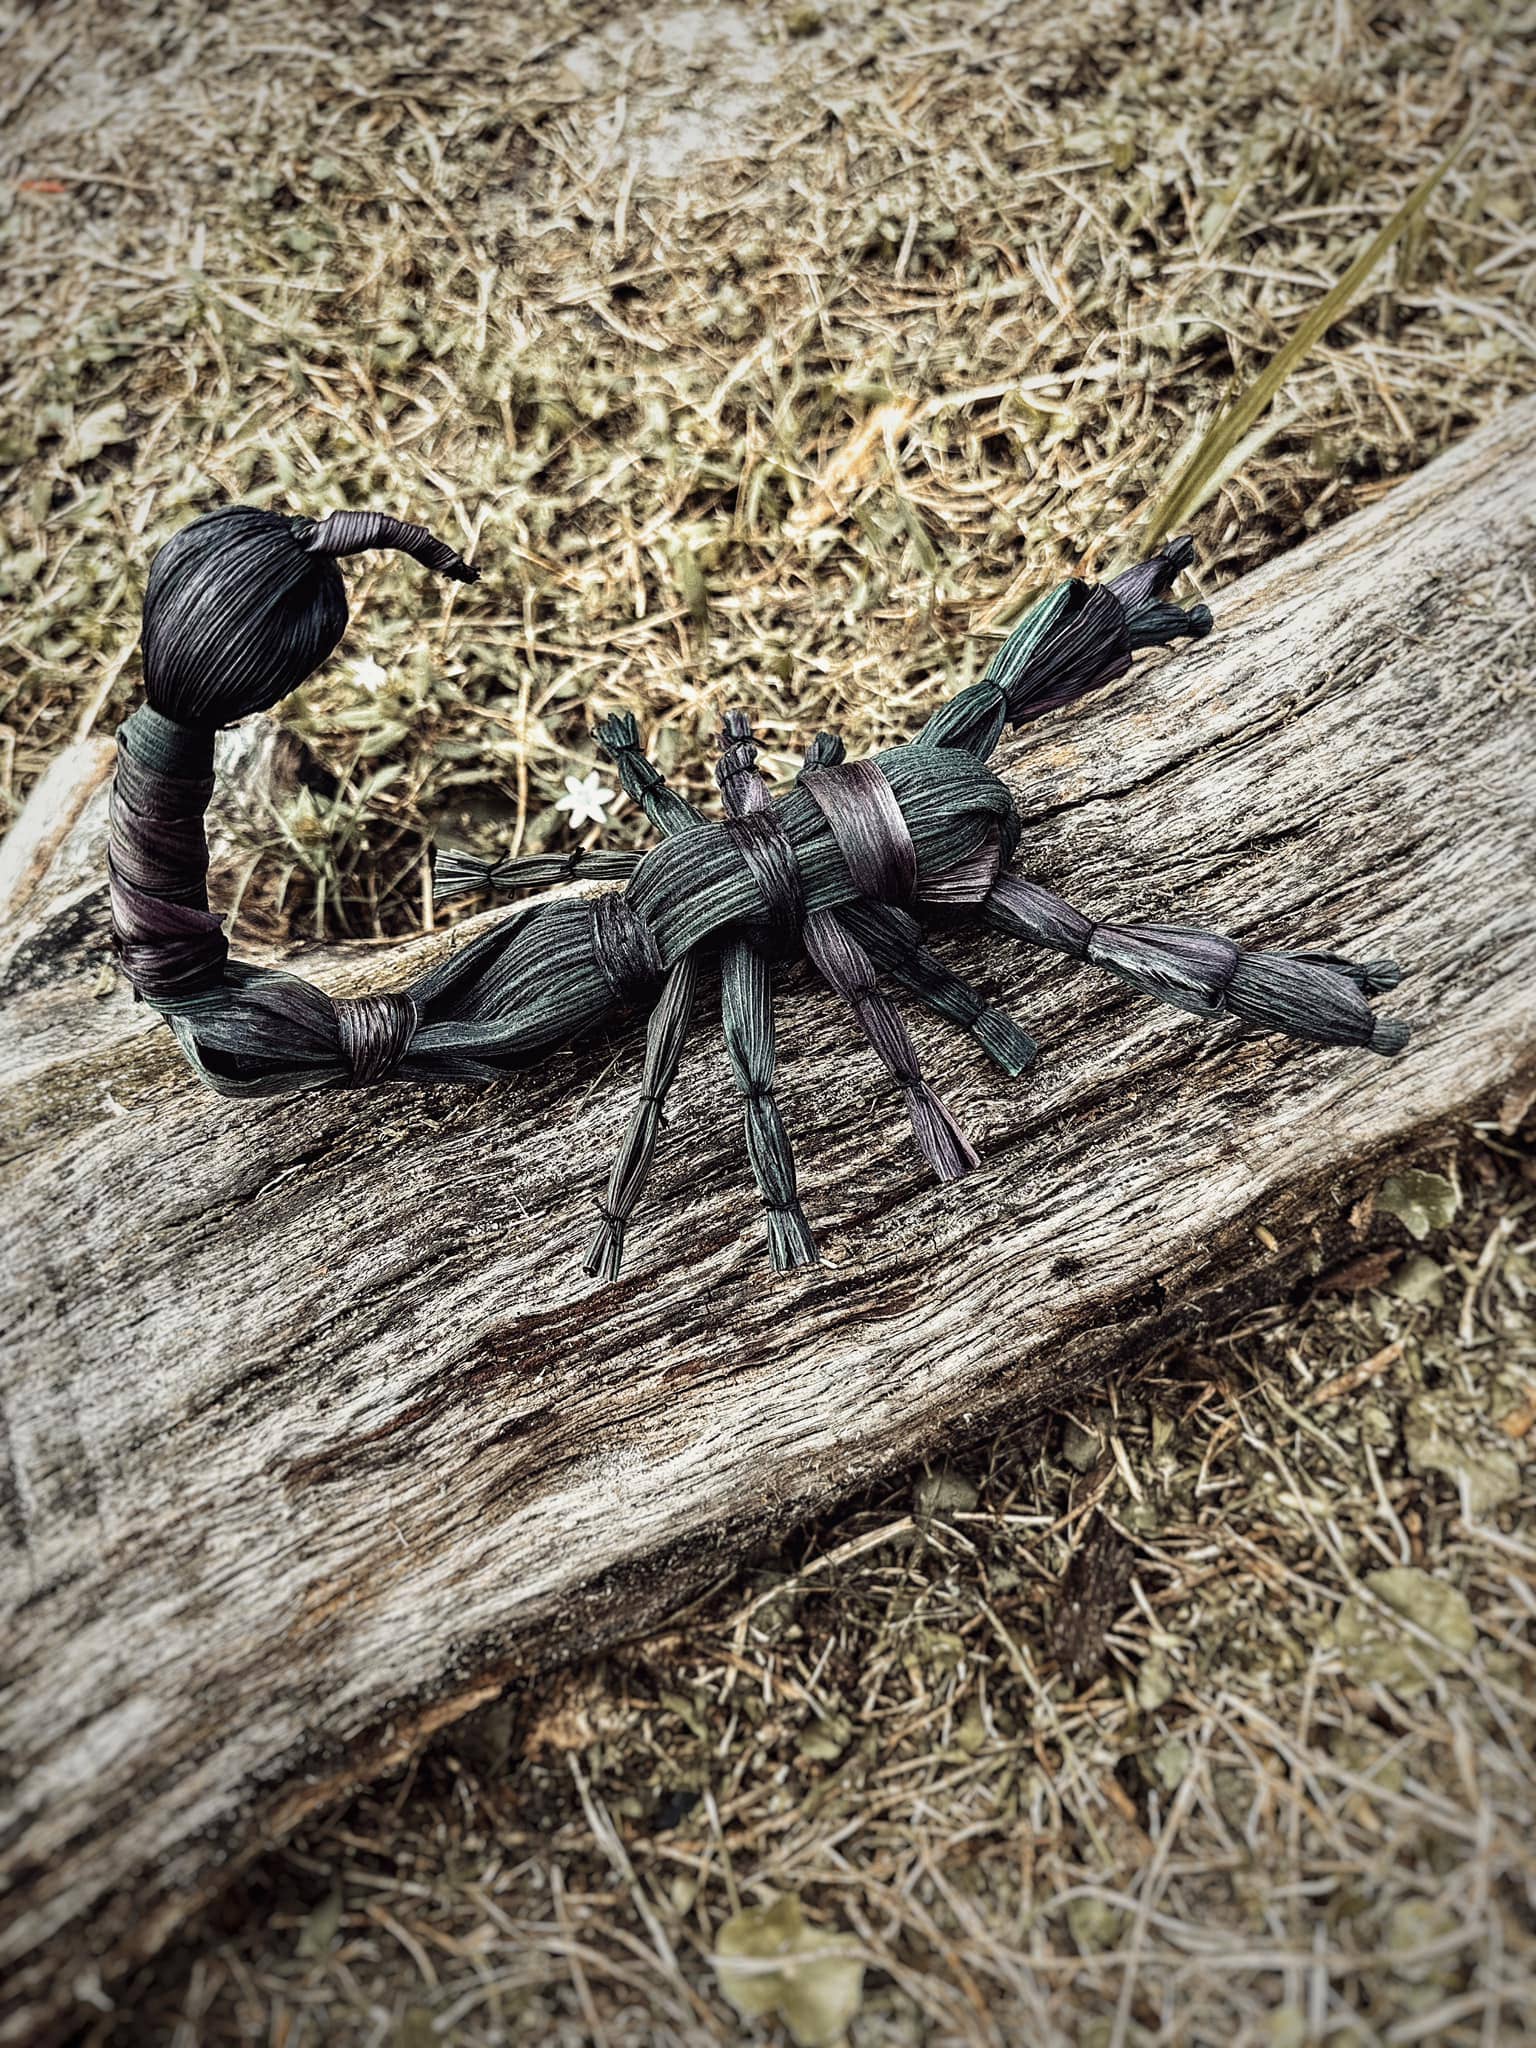
Not all corn husk crafts have to be soft and floral, this striking scorpion proves just how bold and intricate natural materials can be.
Hand-twisted and knotted into a coiled tail, segmented body, and clawed legs, this sculpture captures the essence of the real creature in earthy tones and organic texture.
Bonus, crafting it is a bit like weaving and a bit like sculpting and every twist feels like you’re honoring both craft and creature.
Materials Needed
- 10–12 long corn husk strips (soaked and softened)
- Dark fabric dye (black or deep green)
- Thin twine or waxed thread
- Scissors
- Craft glue (optional)
- Toothpick or skewer
Step-by-step Guide
Step 1: Dye the corn husks using dark fabric dye and allow them to dry completely.
Step 2: Twist and tie small bundles to form each leg. You’ll need 8 total, each about 2″-3″ long.
Step 3: Braid or coil husk strips tightly to create the body, leaving small openings where you can insert and tie the legs securely.
Step 4: Form the tail by wrapping and bending a thick husk strip, gradually curling it upward to mimic a scorpion’s posture. You tie off the end into a pointed stinger.
Step 5: Add claw shapes to the front using folded husk tips, and secure all parts tightly with thread or glue where needed.
#13. Corn Husk Moon Bats with Star Charms
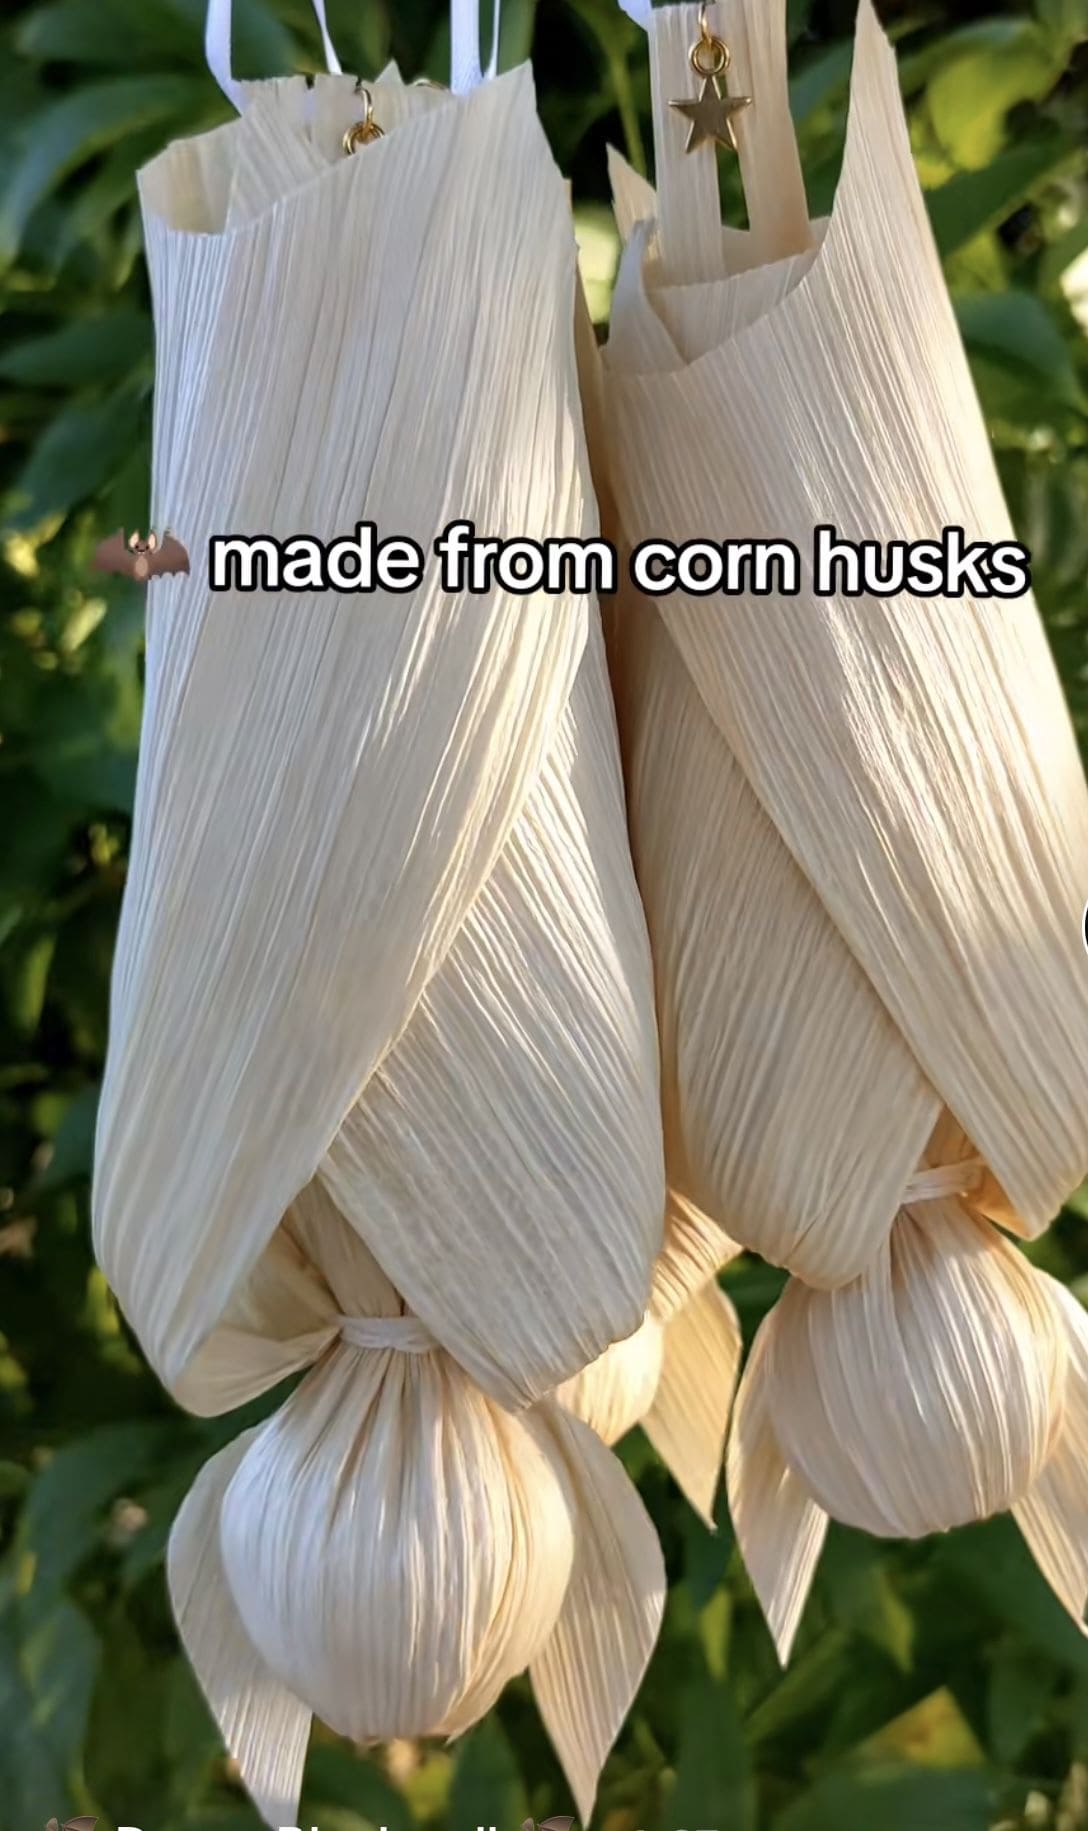
Wow, these delicate moon bats are a softer take on spooky decor, perfect for fall nights or celestial-themed rooms. Their light natural color and dangling star charm give them a dreamy, enchanted look.
Whether you’re decorating for Halloween, hanging ornaments on a tree, or making a fall garland, these bats will steal the show! Plus, they’re easy to make and look amazing as a mobile.
Materials Needed
- Natural (undyed) corn husks, 3-4 per bat
- Small foam ball or balled-up husk
- Twine, jute, or raffia string
- Small star charms
- Hot glue gun
- White ribbon or neutral string
- Scissors
Step-by-step Guide
Step 1: Soak and dry the corn husks until pliable. Then roll a husk into a ball to create the head and wrap another around it to form the body. Secure tightly with string.
Step 2: Fold and glue two husks over the sides like wings, curving them slightly inward for a gentle swoop shape.
Step 3: Add a loop of white ribbon for hanging and tie or glue a tiny star charm where the wings meet the top.
Step 4: Let dry completely before hanging.
#14. Colorful Corn Husk Angel Ornament
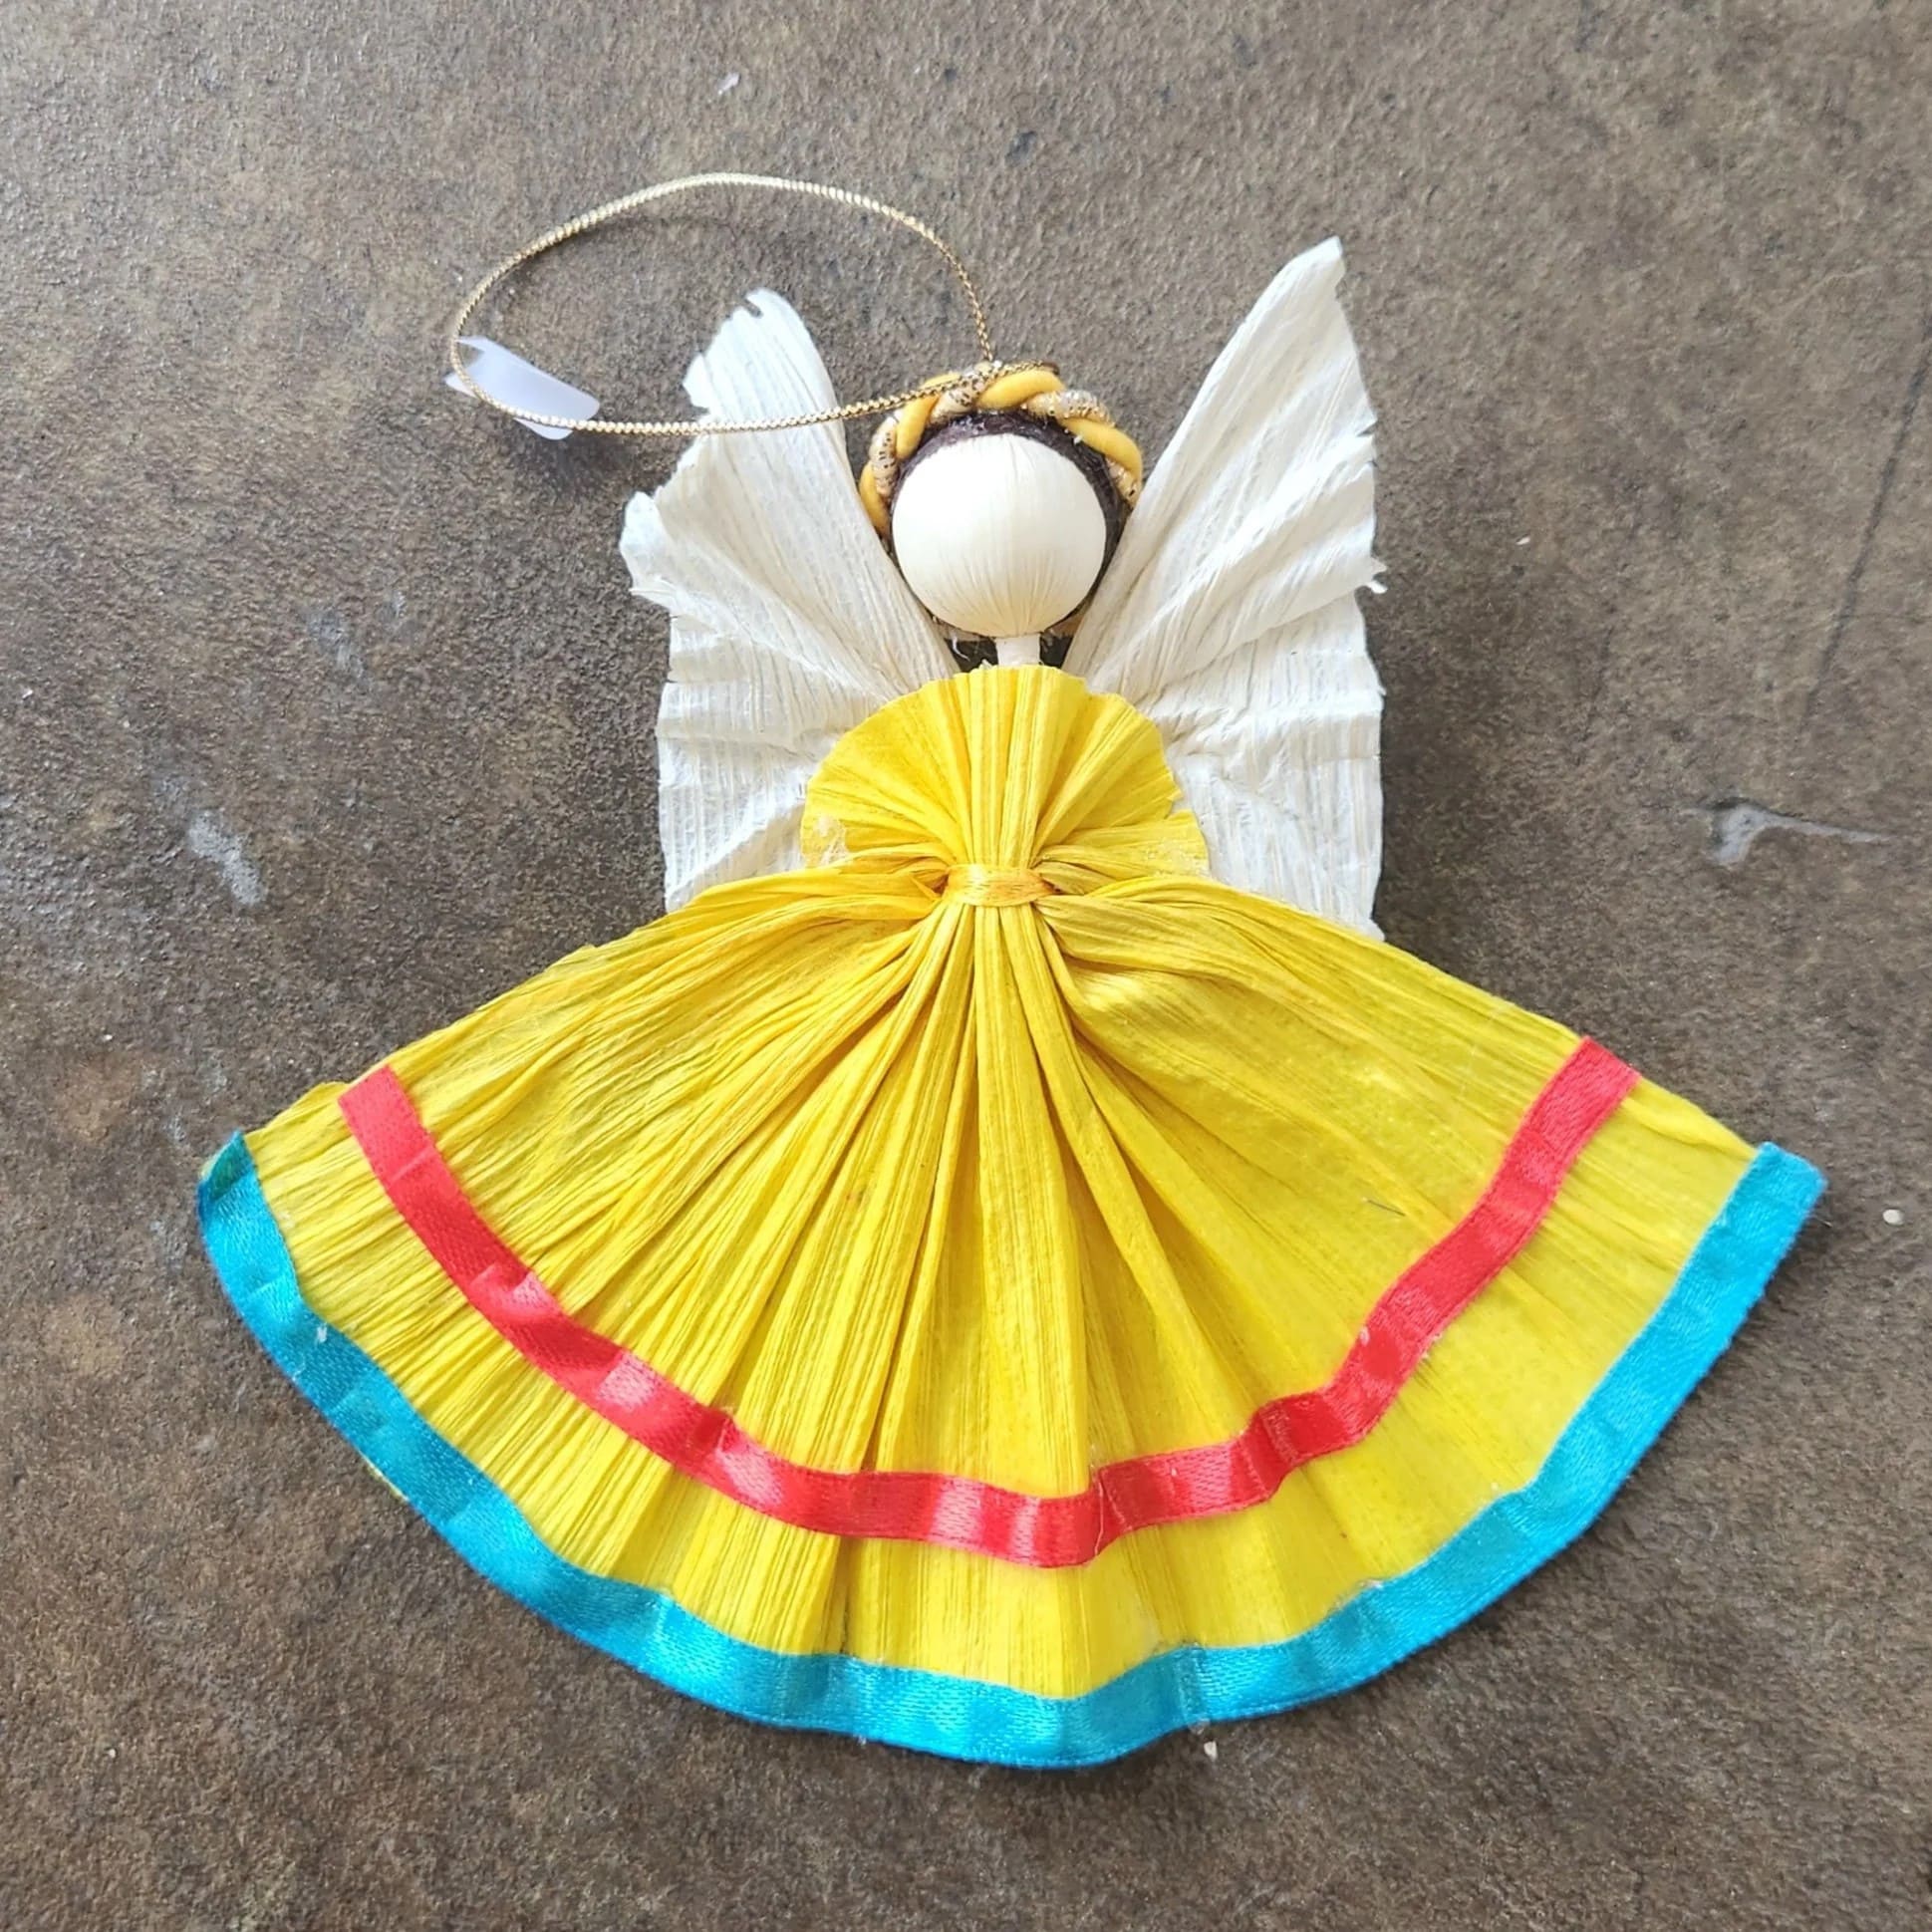
This cheerful corn husk angel is more than just a decoration, it’s a symbol of peace, joy, and handmade heritage.
With a bright yellow dress and soft wings, this little figure brings a heartwarming touch to your tree, mantel, or holiday gift wrap. The details, from the ribbon accents to the braided halo, make each one feel personal and unique.
Crafting one feels like stepping into a slower time. You’ll enjoy every fold, twist, and tie and once finished, your angel is ready to spread joy wherever it lands.
Materials Needed
- 6-8 pieces of corn husk (natural and dyed yellow)
- 1 small wooden bead (1″ diameter)
- Red and blue ribbon (⅜” wide)
- Gold thread or yarn
- Hot glue gun & glue sticks
- Scissors
- Twine or string
Step-by-step Guide
Step 1: Soak your husks until soft, then pat them dry. Dye some yellow ahead of time if you want vibrant skirts like this one.
Step 2: Create the angel’s body by folding and bunching a yellow husk for the skirt. You wrap tightly at the top and secure with twine.
Step 3: Glue the wooden bead on top for the head. Then attach two natural-colored husks to the back for wings, fanning them gently.
Step 4: Braid a short length of gold thread or yarn and glue it into a circle for the halo. Next, attach it to the top of the bead.
Step 5: Decorate the skirt with red and blue ribbon stripes, then add a hanging loop with gold thread.
#15. Mini Corn Husk Brooms for Fall Decorating
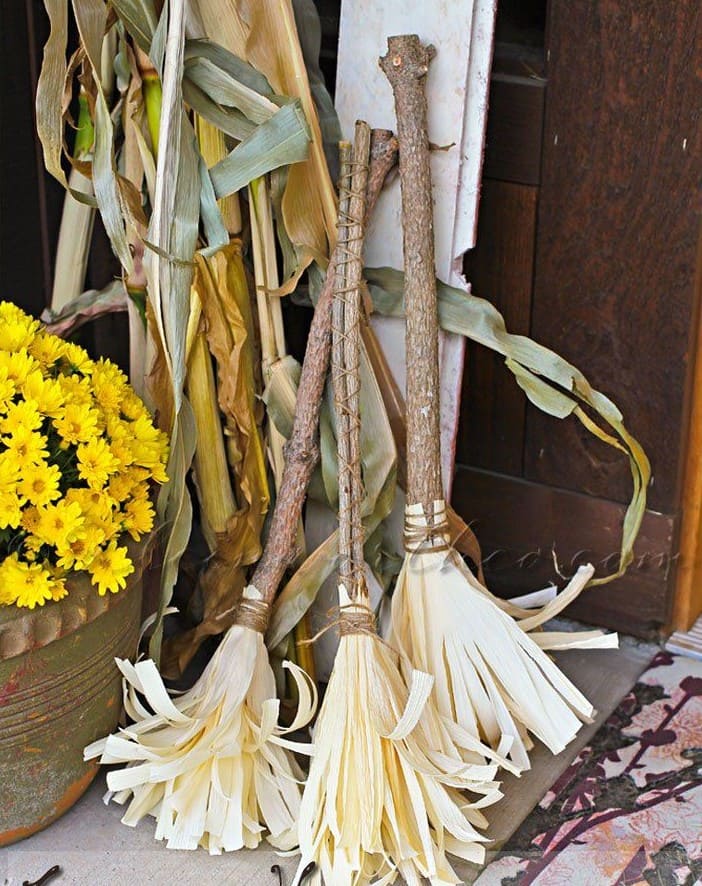
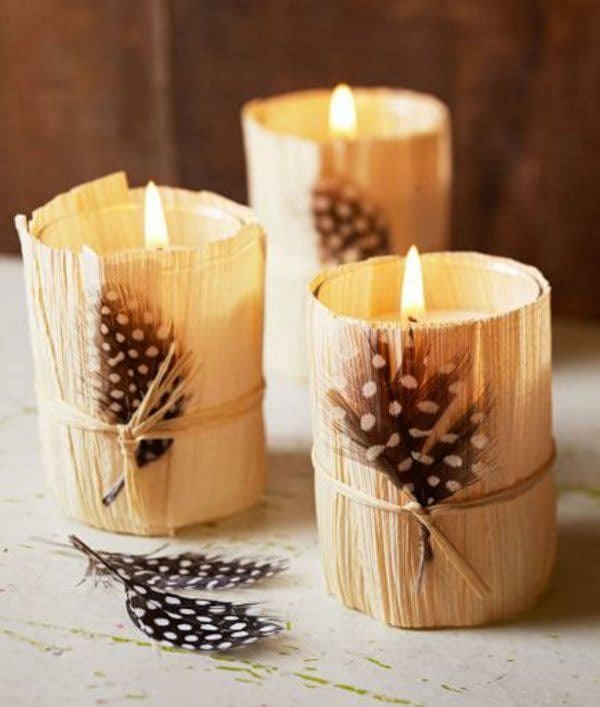
These corn husk candle wraps are proof that sometimes the quietest details make the coziest impact.
By wrapping natural husks around plain glass votives and finishing with twine and a feather, you create soft, glowing accents that feel handmade and heartfelt.
They look like something you’d find at a woodland gathering or tucked inside a cabin retreat. You can craft a set of these in under 30 minutes, making them perfect for dinner table centerpieces.
Materials Needed
- 3 glass candle holders or votives (2″-3″ diameter)
- 6-9 corn husk strips (about 4″ tall, pre-soaked and dried flat)
- Natural twine or raffia
- 3 decorative feathers (guinea feathers or similar)
- Scissors
- Battery-operated candles (recommended)
Step-by-step Guide
Step 1: Cut or tear corn husks into strips slightly taller than your candle holders. You soak and press them flat if needed for flexibility.
Step 2: Wrap 2–3 husk strips around each candle holder, overlapping slightly. Then secure with a tight wrap of twine or raffia tied in a knot or bow.
Step 3: Slide a feather under the twine on each candle, adjusting it so the tip peeks out naturally.
Step 4: Insert battery-operated candles and place your wrapped votives on a tray, windowsill, or dining table for a soft autumn glow.
#16. Rustic Corn Husk Candle Wraps with Feathers
#17. Enchanted Forest Cloaked Doll
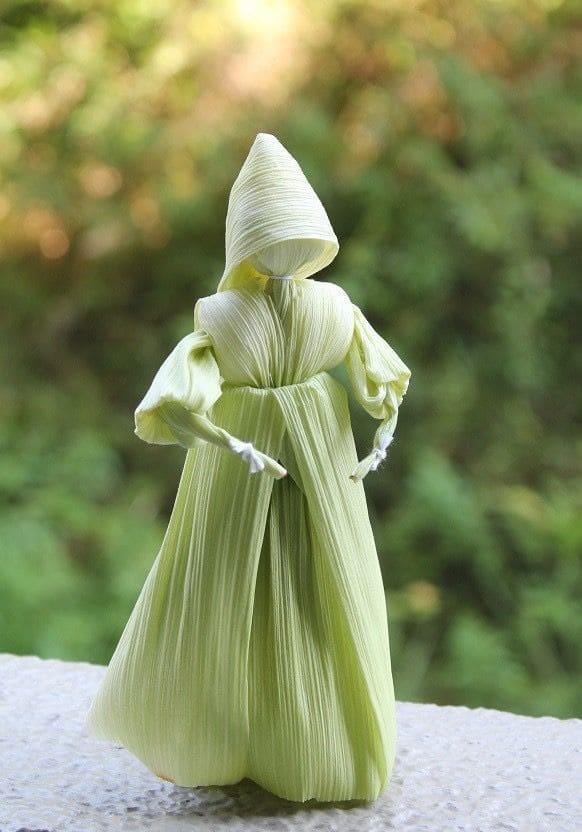
Looking for a craft that feels like it belongs in a folklore storybook? This cloaked corn husk figure brings that magical, old-world charm.
With its flowing robe and gently folded hood, it could be a woodland healer, a wise woman, or a mysterious forest guardian. Perfect as fall decor, a Halloween accent, or part of a seasonal nature table!
Specially, the natural green hue of fresh corn husks adds a soft, earthy tone that feels alive and elegant.
Materials Needed
- 6-8 pieces of fresh green corn husk (or dyed if using dried husks)
- Twine or raffia
- Pipe cleaners or floral wire
- Small wooden bead (optional head)
- Scissors
- Hot glue gun
Step-by-step Guide
Step 1: Begin by shaping the torso. Fold and tie one husk into a cone to create the hood and upper cloak. You can form the head using a small ball of husk or a wooden bead.
Step 2: Add pipe cleaners or thin wire for arms, then wrap husks around them to form sleeves. Let them drape naturally for a flowing look.
Step 3: Layer and glue long pieces of husk around the waist to create a full, robe-like skirt. Then overlap the layers slightly to give it volume and movement.
Step 4: Bring the cloak together by gently tucking and gluing the hood in place over the head. Finally, tie a thin strand of raffia or string around the waist to finish the silhouette.
#18. Corn Husk Pumpkins with Twine Stems
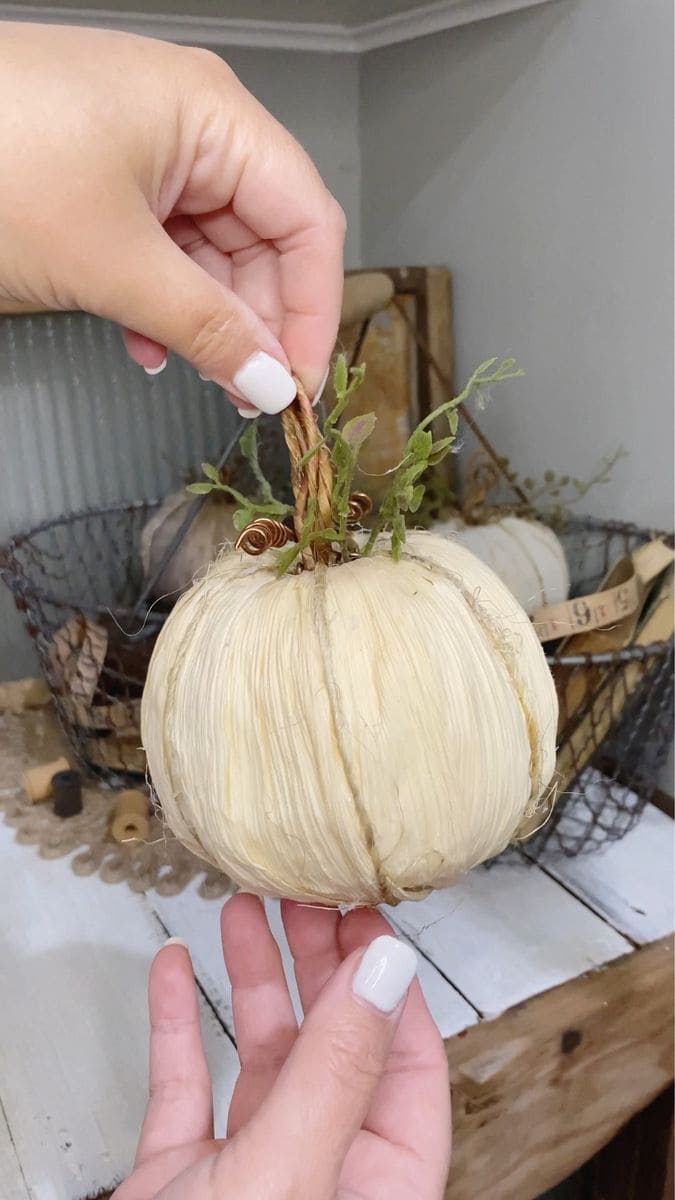
Wrapped in soft corn husks and crowned with a twine stem and leafy sprigs, this little pumpkin brings a gentle rustic touch to your fall decor.
You can hold it in your palm and feel the season in your hands. It’s one of those crafts that looks much more complicated than it is, but it only takes a few supplies and a bit of warm patience.
Also, you tuck these into baskets, line them across your mantel, or gift them as sweet tokens of the season.
Materials Needed
- 1 foam or paper ball (approx. 3″-4″ diameter)
- 10-15 dried corn husks (pre-soaked and softened)
- Hot glue gun & glue sticks
- Jute twine (6″-8″)
- Small faux greenery or vine sprigs
- Scissors
Step-by-step Guide
Step 1: Soak your husks in warm water for 10 minutes to make them flexible, then pat dry.
Step 2: Starting at the top center of the foam ball, glue one end of a husk down, pulling it tightly to the bottom and gluing it underneath. Repeat this process around the ball, slightly overlapping each husk.
Step 3: Once fully covered, trim any uneven edges at the base. Then wrap a piece of twine into a stem shape, twisting it as you go, then hot glue it to the top.
Step 4: Tuck in a few sprigs of faux greenery beside the stem for an extra natural look.
Tip: To make a scented version, you can tuck a cinnamon stick or clove bundle under the husks before sealing the base.
#19. Oversized Corn Husk Sunflower with Pinecone Center
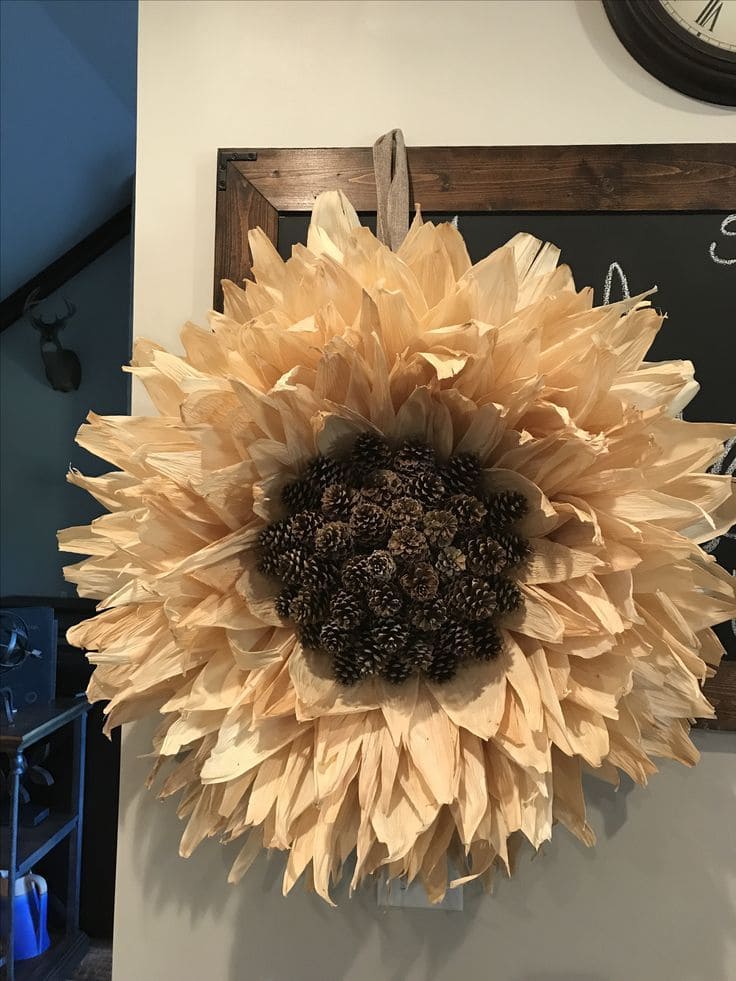
Layered with hand-trimmed corn husk petals and filled with pinecones at its heart, this breathtaking sunflower brings an organic wow factor to your entryway, kitchen wall, or seasonal mantel.
It’s bold, natural, and joyfully rustic, the kind of decor that makes guests pause and smile.
Though large in scale, the process is surprisingly meditative. You’ll layer, glue, and build until the petals burst into life, radiating out from the textured pinecone center like sunbeams.
Materials Needed
- 50-60 dried corn husks (softened and trimmed)
- 20-30 small pinecones (whole or halved)
- Cardboard or wood circle base (12″-16″ diameter)
- Hot glue gun & glue sticks
- Scissors
- Twine or wide ribbon
Step-by-step Guide
Step 1: Soak the husks in warm water until pliable, then pat dry. Then cut them into pointed petal shapes, some short and some long.
Step 2: Starting from the outer edge of the base, glue down the longest husks in a circular layer, overlapping slightly. You continue layering inward with shorter husks for a full, dimensional look.
Step 3: Once the petals are complete, glue pinecones tightly together in the center. You should alternate directions and sizes to create rich texture and depth.
Step 4: Flip the piece over and attach a loop of twine or ribbon to the back for easy hanging.
Step 5: Display your sunflower indoors or on a covered porch where it can shine through the season.
Tip: For an extra pop, you lightly brush the tips of a few husks with gold paint or dust the pinecones with cinnamon for a fragrant finish.
#20. Corn Husk Graduation Dolls on Floral Stems
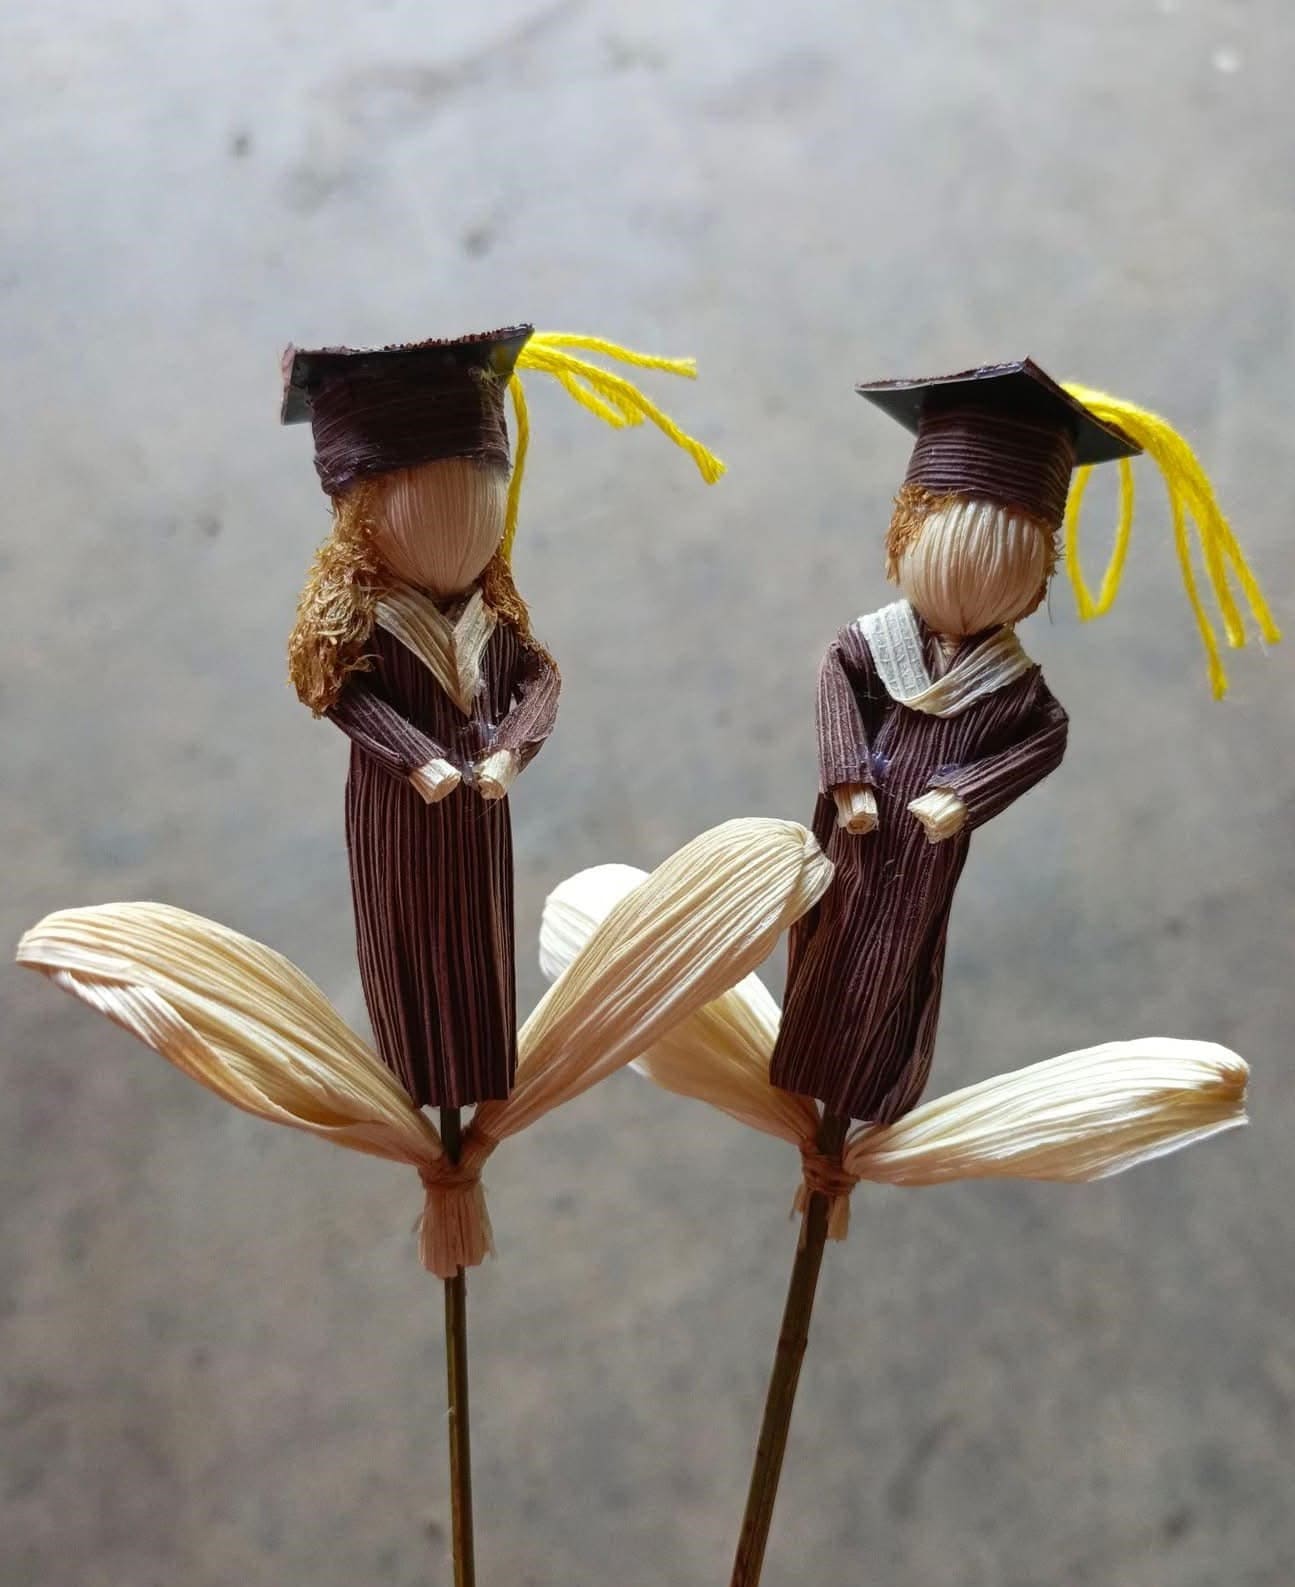
These tiny corn husk graduates are full of heart. Dressed in handmade gowns and tiny tassel-topped caps, they stand atop husk petals like blossoms of accomplishment.
Whether you’re honoring a big milestone or simply want a meaningful handmade gift, this craft celebrates growth, transformation, and a new chapter.
They’re perfect tucked into a bouquet, added to a centerpiece, or displayed on their own. Each doll carries a story, and no two will ever look quite the same.
Materials Needed
- 10-12 dried corn husks (soaked and softened)
- Dark brown or black dye
- Yarn or raffia
- Cardboard squares (approx. 1″×1″)
- Wooden skewers
- Hot glue gun & glue sticks
- Scissors
Step-by-step Guide
Step 1: Dye a few corn husks dark brown and let them dry fully. These will become the robes and hats.
Step 2: Create the body by folding and wrapping natural husks into a small doll shape like head, arms, and torso. Then use glue to secure.
Step 3: Wrap the torso in a dyed husk to form a graduation robe.
Step 4: For the hat, glue a small dyed husk or cardboard square to the doll’s head, and add a yarn tassel to one side.
Step 5: Attach your doll to the top of a skewer or floral stem, then glue additional husk petals beneath as a floral base.
See more: 28 Creative and Cozy DIY Fall Crafts to Elevate Your Seasonal Decor
