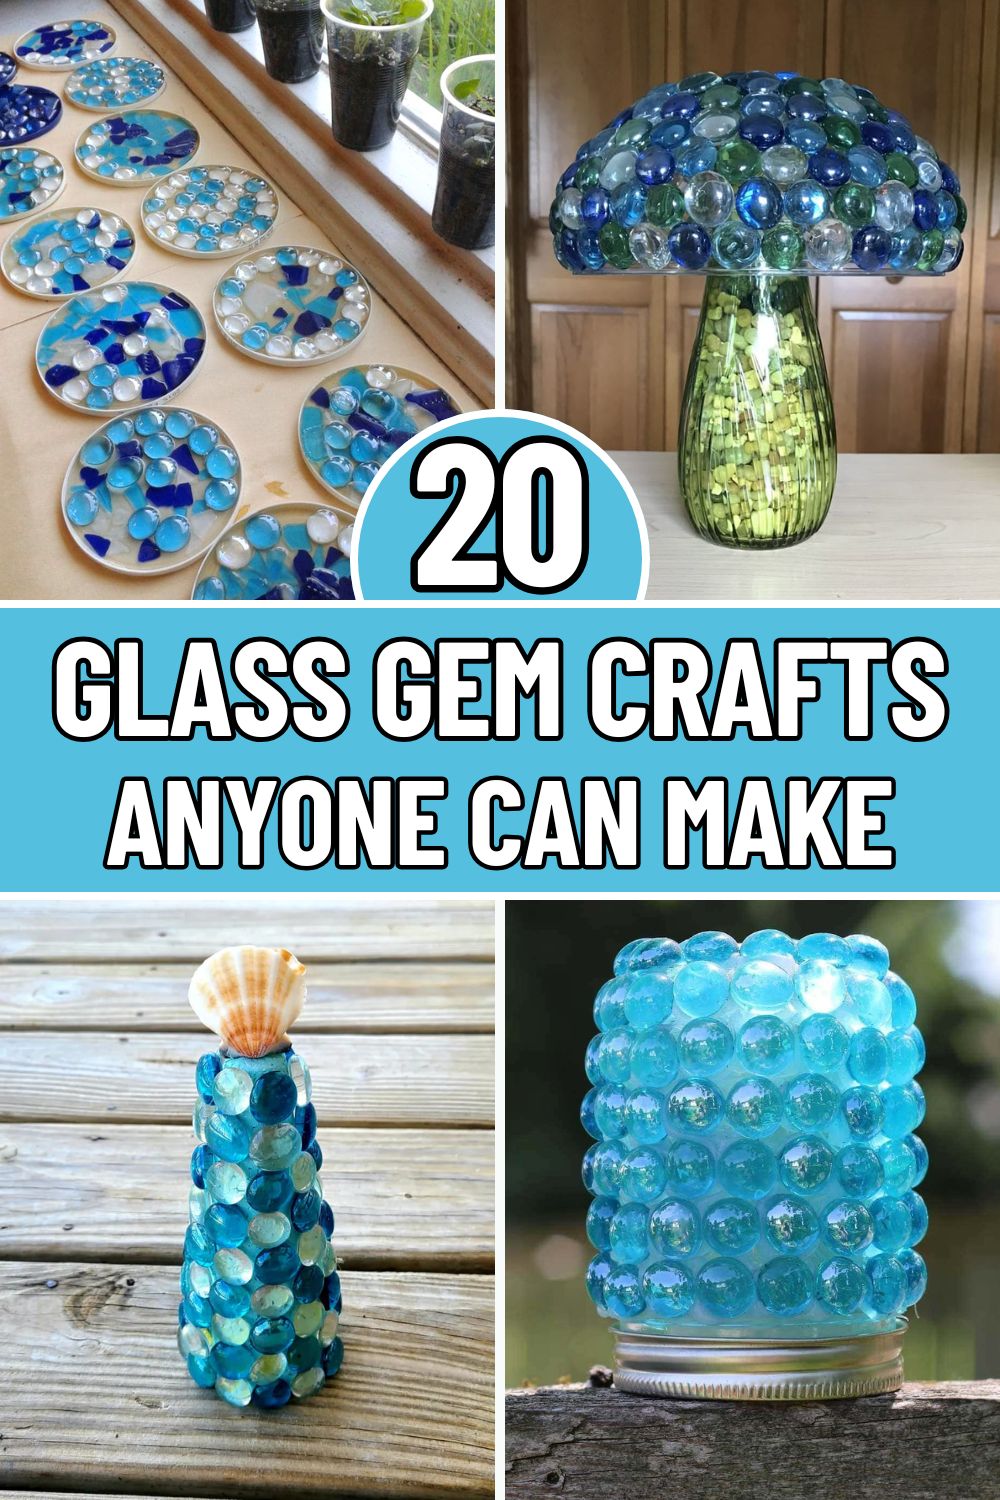
Glass gems aren’t just for vases or fish tanks, they’re little circles of magic waiting to be transformed.
Whether you’re new to crafting or just looking for something budget-friendly and beautiful, these glass gem projects are perfect for adding color to your space.
Now, dive into these 15+ easy and affordable crafts that shine with creativity and heart.
#1. DIY Glass Gem Mushroom Decor
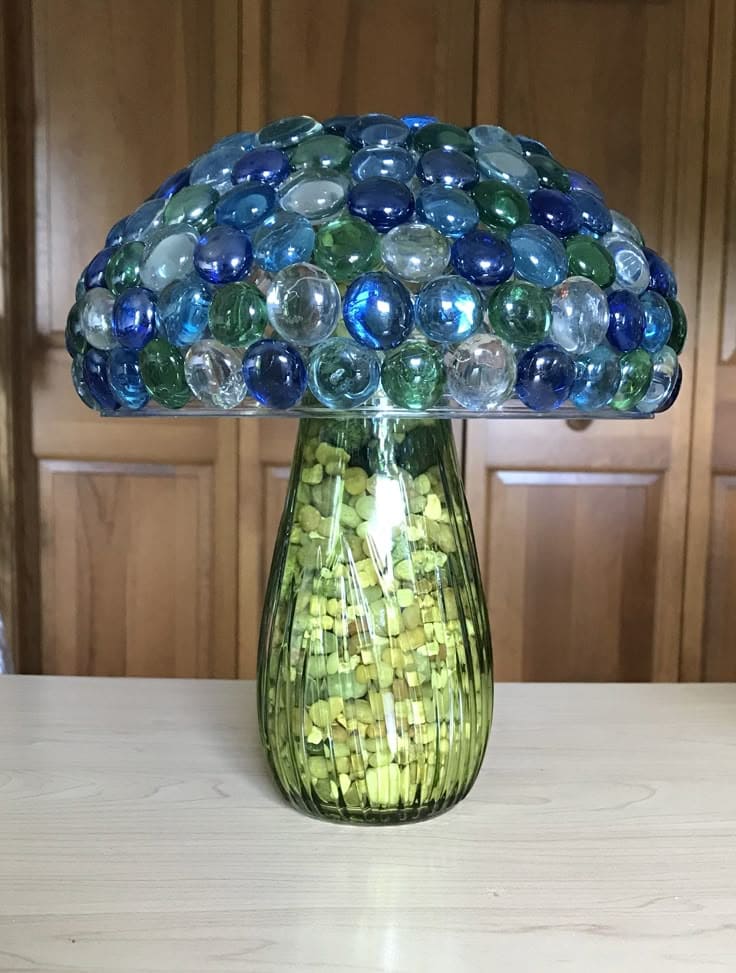
This charming mushroom-shaped decor piece brings a touch of forest magic indoors.
The base is a textured green glass vase filled with yellow pebbles for a grounded, earthy feel.
Also you can see the top cap is a glass bowl completely covered with vibrant flat-back glass gems in shades of blue, green, and clear.
Materials Needed
- 1 green glass vase (or any sturdy glass base)
- 1 clear glass bowl (to invert as the mushroom cap)
- Flat-back glass gems in assorted colors (blue, green, clear)
- Decorative filler stones
- Strong adhesive or hot glue gun
- Optional: Clear sealant spray
Step-by-step Guide
Step 1: Fill your glass vase with decorative stones or pebbles. This adds both color and weight to help the mushroom stay upright.
Step 2: Flip the glass bowl upside down.
Begin gluing the flat-back gems to the outer surface, starting from the bottom edge and working upward until the entire bowl is covered.
Step 3: Allow the glue to dry completely so the gems are secure and the surface is solid.
Step 4: Place the finished gem-covered bowl on top of the vase. It should sit comfortably without glue, but you can secure it if preferred.
Step 5: If using outdoors, spray the gem-covered cap with a clear sealant to protect it from weathering.
#2. DIY Mosaic Gem Candle Holder
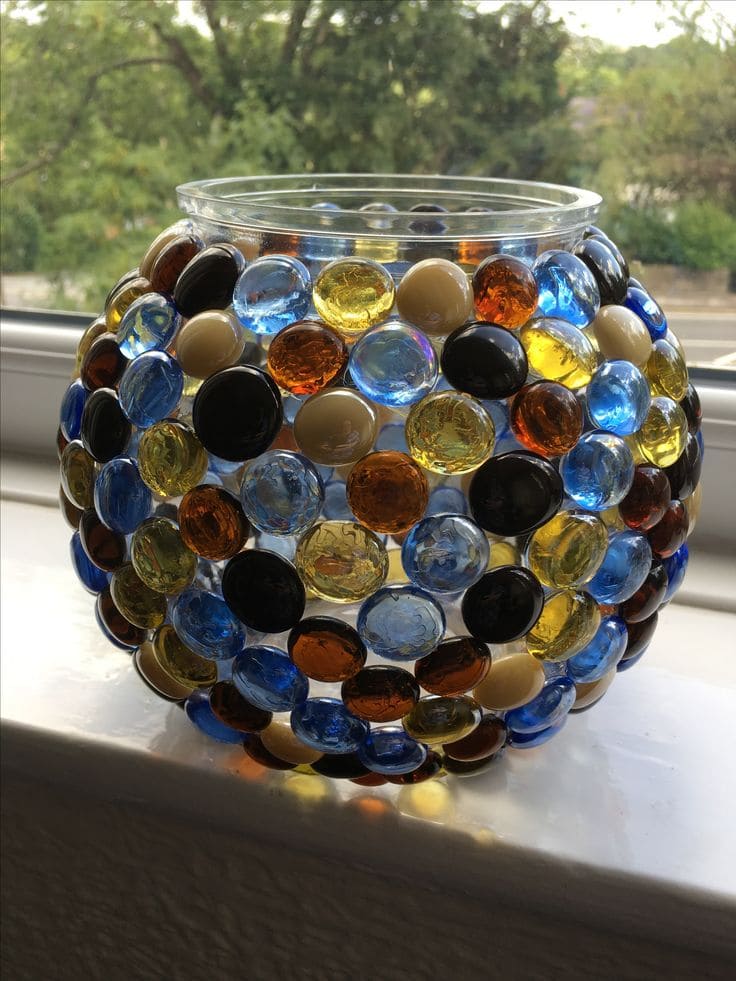
This vibrant candle holder adds a beautiful burst of color to any windowsill or table.
Made by covering a round glass bowl with a mix of flat-back glass gems in warm amber, cool blue, deep black, and creamy beige tones, it creates a stunning mosaic effect that catches and scatters light.
When a candle is placed inside, the gems glow like stained glass.
Materials Needed
- 1 round glass bowl or vase
- Flat-back glass gems in assorted colors
- Strong clear adhesive or hot glue gun
- Tea light or LED candle
- Rubbing alcohol and cloth (for cleaning the surface)
Step-by-step Guide
Step 1: Clean the outside of your glass bowl with rubbing alcohol to remove any dust or oil.
Step 2: Plan your color pattern, or go freestyle with a mix of colors.
Starting at the bottom, begin gluing each gem in place, working your way around in rows.
Step 3: Continue until the entire outer surface is covered with gems. Then press each one firmly to ensure it sticks well.
Step 4: Let the glue cure fully based on the adhesive instructions. Once dry, place a candle or LED light inside to enjoy the glowing gem effect.
Step 5: Set it on a windowsill or dark corner where it can catch the light and shine!
#3. DIY Ocean-Inspired Glass Gem Bottle
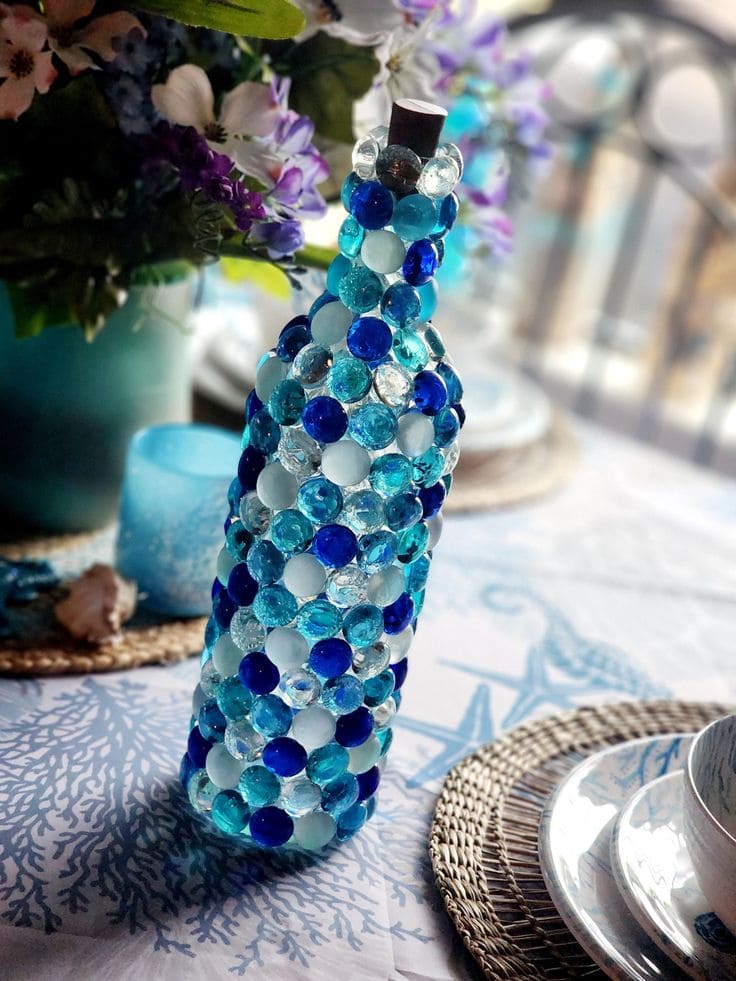
This project feels like bottling the ocean, each gem capturing the sparkle of the waves.
It’s the kind of thing you’d proudly place on a dinner table or windowsill, letting the light play through every translucent hue.
Whether you’re setting the mood for a beach-themed gathering or just want a pop of color in your home, this DIY brings an eco-friendly shimmer to any space.
Materials Needed
- 1 clean glass wine bottle (standard 750 ml size)
- 60–80 flat-back glass gems in various blue, aqua, and clear tones (1-1.5 cm diameter)
- Strong craft adhesive or hot glue gun with glue sticks
- Rubbing alcohol and cotton pad
- Optional: Cork topper, LED string lights for inside glow
Step-by-step Guide
Step 1: Wash and dry your glass bottle thoroughly. Wipe the outer surface with rubbing alcohol to ensure the glue bonds well.
Step 2: Start from the bottom and glue each gem in place, one row at a time.
Feel free to mix up colors to mimic the sea’s shifting shades like sky blue, deep sapphire, clear as a tide pool.
Step 3: Work upward, leaving no gaps. Rotate the bottle as you go so the gems stay evenly spaced and balanced.
Step 4: Let the glue cure for several hours. If using a cork or lights, finish by gently inserting them. Place near sunlight or candles for an enchanting glow.
#4. DIY Mosaic Butterfly Garden Stones
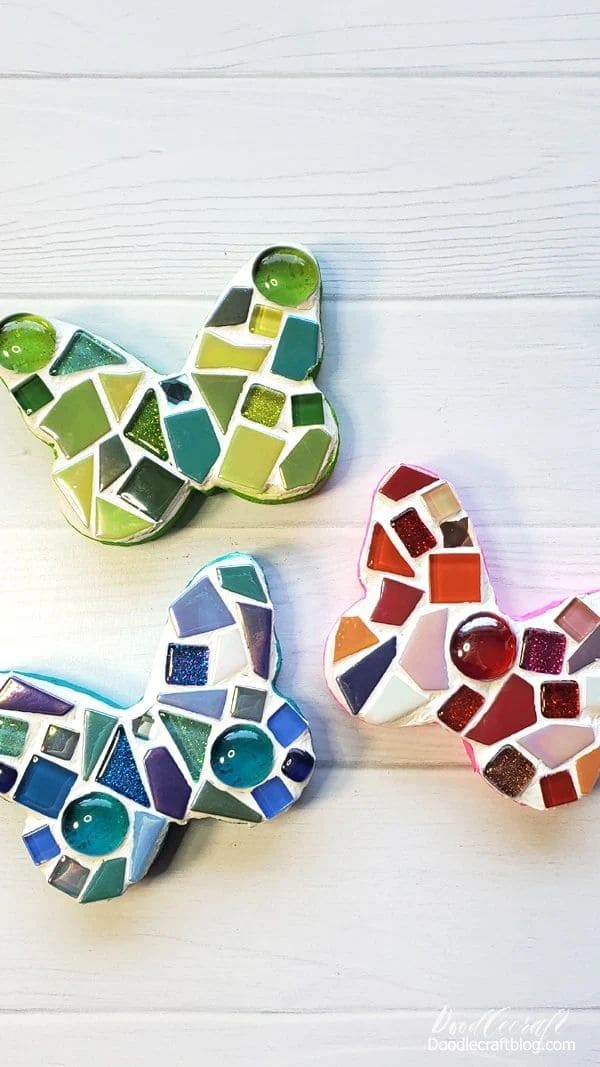
These mosaic butterflies are like bits of stained glass kissed by the sun.
Each one feels like a tiny celebration of color and creativity, perfect for brightening up your garden, a potted plant, or even your windowsill.
With just a handful of tile scraps and a little patience, you can create something joyful, unique, and surprisingly meditative.
Materials Needed
- 3 butterfly-shaped wooden or ceramic plaques (approx. 5-7 inches wide)
- 1-2 cups of broken ceramic tiles or glass tiles in mixed colors
- 3 large glass gems or marbles
- Pre-mixed grout (white or light gray)
- Tile adhesive or strong craft glue
- Grout sealer (optional for outdoor use)
- Safety goggles and gloves (for tile cutting)
- Small sponge and rag
Step-by-step Guide
Step 1: Arrange your butterfly bases on a work surface.
If you’re working with whole tiles, gently break them into small mosaic pieces using tile nippers (wear protective gear!).
Step 2: Begin laying out your tile pieces in a colorful pattern across each butterfly.
You can use a glass gem for the head. Once you’re happy with the look, glue down the pieces firmly and let dry for a few hours.
Step 3: Spread grout over the surface with your fingers or a rubber squeegee. Press it into all the gaps.
Next, wait 10-15 minutes, then wipe off the excess with a damp sponge.
Step 4: Once dry, polish the tiles with a soft cloth.
If your butterflies will live outside, seal them with a grout sealer to keep them weather-resistant and vibrant for seasons to come.
#5. DIY Glass Gem Mosaic Patio Table
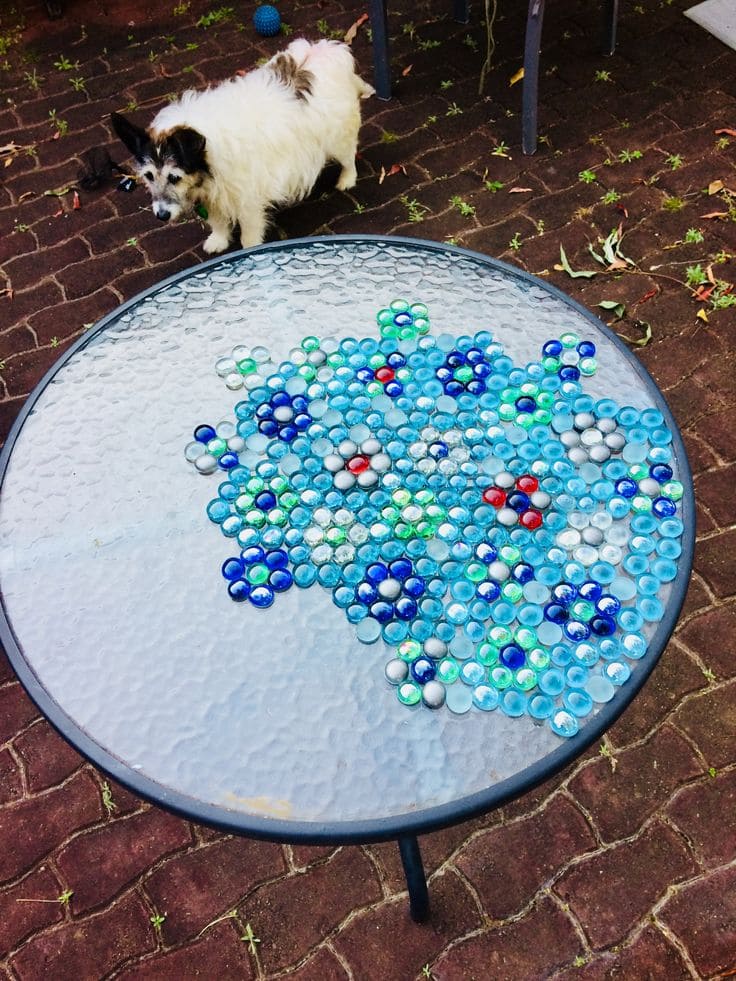
Why not give new life to an old patio table with this dazzling gem mosaic upgrade?
Using a mix of flat-back glass gems in oceanic blues, soft greens, icy whites, and pops of red, this design transforms a plain tabletop into a vibrant focal point.
The playful, almost floral clusters feel like floating bubbles or garden blooms, perfect for brightening up outdoor spaces.
Materials Needed
- Glass-top patio table (round or flat surface)
- Flat-back glass gems in various colors and sizes
- Strong outdoor adhesive or clear silicone sealant
- Rubbing alcohol and cloth
- Optional: Clear epoxy resin or grout for sealing
Step-by-step Guide
Step 1: Wipe down the table surface thoroughly with rubbing alcohol to remove dust, dirt, and oils.
Step 2: Arrange the gems into clusters or patterns directly on the table. Try florals, swirls, or scatter-style patterns.
Step 3: Once you’re happy with your layout, lift each gem one by one and glue it in place using outdoor adhesive or silicone sealant.
Step 4: Allow the adhesive to dry completely according to product instructions, usually 24 hours for a secure bond.
Step 5: For extra protection, especially if the table will be exposed to the elements, consider sealing the entire surface with a thin layer of clear epoxy resin.
#6. DIY Glass Gem Bottle Pendant Light
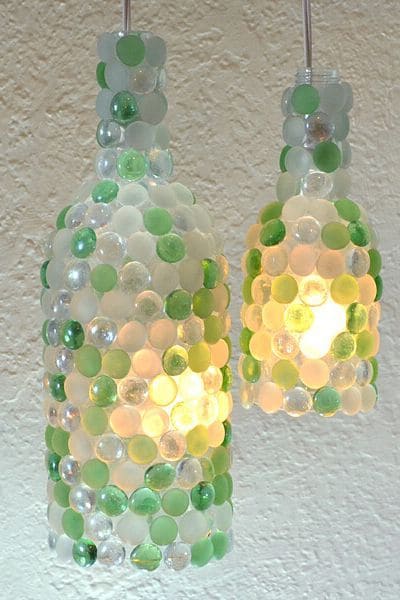
This glowing pendant light feels like bringing nature’s calm into your home.
The soft greens, frosty whites, and translucent gems shimmer like morning dew on spring leaves.
What once was just an empty bottle now radiates warmth, casting a gentle, spa-like glow.
If you’ve ever dreamed of a sustainable home accent that’s both functional and poetic, this is your project.
Materials Needed
- 1-2 empty glass bottles (wine or olive oil bottles work well)
- 70-100 flat-back glass gems in clear, green, and frosted white (1-1.5 cm diameter)
- Strong clear-drying craft glue or hot glue gun
- Pendant light cord set (E26/E27 base, cord length as needed)
- Glass cutter
- Fine sandpaper
- Rubbing alcohol and cloth (to clean surface before gluing)
- LED light bulb (low heat only)
Step-by-step Guide
Step 1: Carefully cut the bottom off your bottle using a glass cutter, then sand the edges until smooth. If you’re using a pre-cut bottle, skip this step.
Step 2: Clean the bottle thoroughly. Wipe down the outer surface with rubbing alcohol to remove any oils that may interfere with adhesion.
Step 3: Begin gluing the gems from the bottom up. You should alternate the shades to mimic sunlight filtering through a canopy.
Step 4: Let it dry fully, then thread your pendant cord through the neck of the bottle and screw in a low-heat LED bulb.
Finally, hang it in a cozy spot and bask in the handmade glow.
#7. DIY Glass Gem Garden Flower
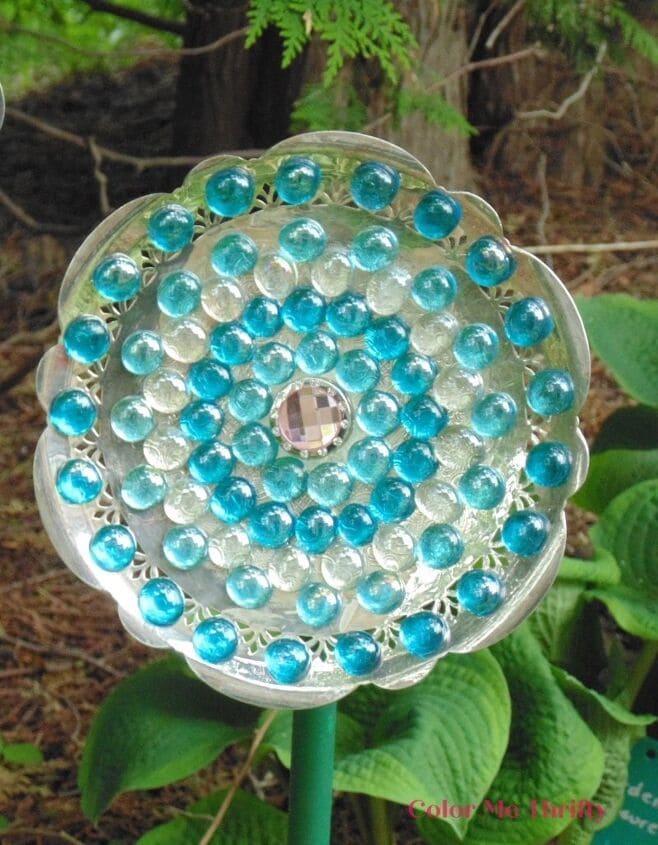
What about bringing a splash of permanent color to your garden with this dazzling glass gem flower?
Made from layered glass plates and radiant flat-back gems, this piece mimics a blooming flower while sparkling beautifully in the sunlight.
Mounted on a garden stake, it’s an eye-catching addition to flower beds, pathways, or potted planters.
Materials Needed
- 2-3 clear glass plates or dishes in graduated sizes
- Flat-back glass gems (blue, teal, and clear)
- Glass-safe adhesive (like E6000)
- Decorative gem or button
- Metal garden stake or copper pipe (for mounting)
- Silicone caulk or epoxy
Step-by-step Guide
Step 1: Clean all glass surfaces and lay out your design. Start with the largest plate as the base and build from there, layering smaller plates on top if desired.
Step 2: Begin gluing your glass gems in concentric circles starting from the center, alternating colors for a floral effect. Let each layer dry for stability.
Step 3: Add a decorative gem or button in the center to mimic a flower’s core. Let everything cure according to adhesive instructions.
Step 4: Flip the piece and use strong silicone or epoxy to securely attach the metal stake to the back of the plate.
Step 5: Let dry completely, then place your new gem flower in the garden where it will shimmer all day!
#8. DIY Glass Gem Planter Makeover
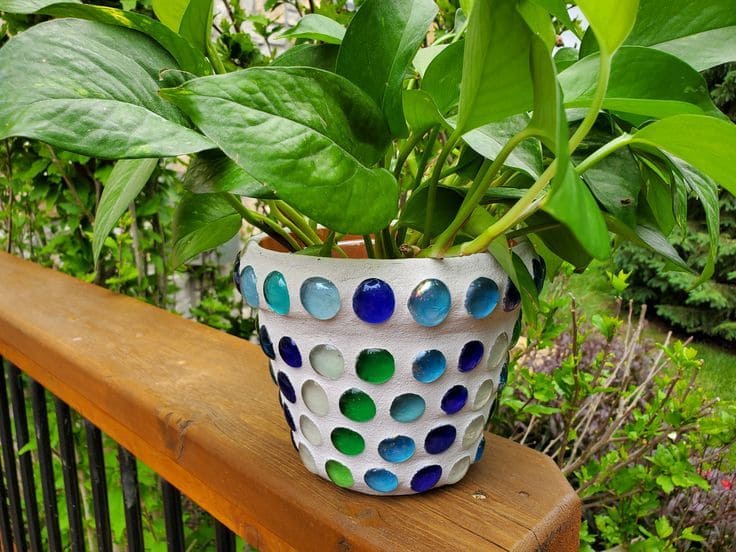
Give your plant pots a sparkling upgrade with this simple gem-studded makeover.
A plain terracotta planter is transformed into a vibrant piece of garden art using just a little paint and a handful of flat-back glass gems.
The mix of blues, greens, and iridescent whites adds texture and color, catching the sunlight and making any plant stand out beautifully.
Materials Needed
- Terracotta or ceramic flower pot
- Flat-back glass gems (assorted colors)
- Outdoor acrylic paint (optional, for base coat)
- Strong craft glue or silicone adhesive
- Paintbrush (if painting)
- Optional: Clear sealant spray for protection
Step-by-step Guide
Step 1: Clean the pot surface to remove any dirt or dust. If you want a colored base, apply acrylic paint and let it dry completely.
Step 2: Arrange your gems in rows or patterns on the pot to plan your design before gluing.
Step 3: One by one, glue the gems in place. Work in small sections so the adhesive doesn’t dry before you set the gems.
Step 4: Let the glue dry thoroughly according to the instructions. For extra durability, especially outdoors, seal the entire pot with clear spray sealant.
Step 5: Add your favorite plant and set your sparkling new pot on a porch, patio, or sunny windowsill.
#9. DIY Glass Gem Sun Catcher Frame
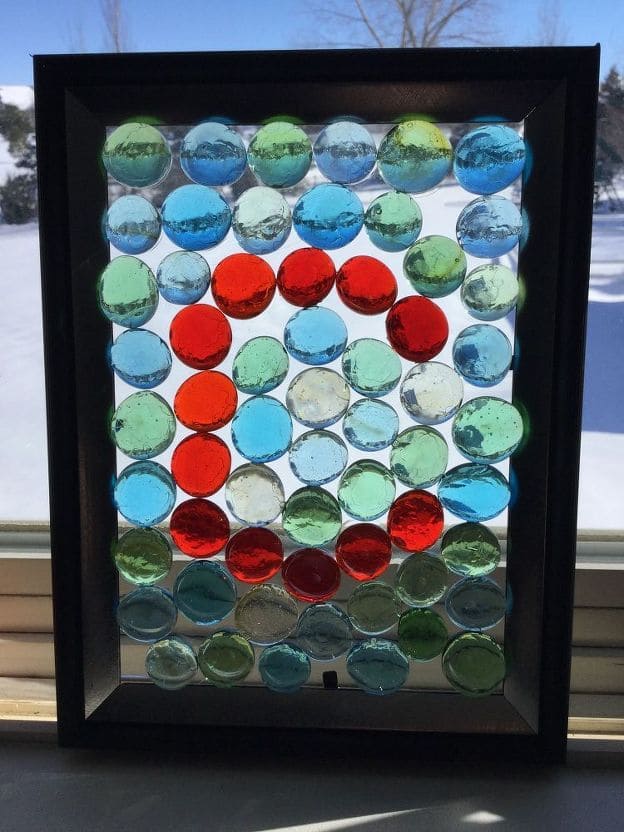
This radiant window art turns simple glass gems into a vibrant sun catcher!
Using a shadow box or photo frame, the flat-back gems are arranged in a grid or creative pattern to let light pour through their colorful textures.
Whether you design a shape (like the red heart shown here) or go abstract, this is an easy project that adds a pop of color to any sunny spot in your home.
Materials Needed
- 1 deep photo frame or shadow box (without backing)
- Flat-back glass gems in assorted colors
- Clear glue (E6000 or hot glue gun)
- Optional: cardstock or stencil
- Command strips or suction cup hook
Step-by-step Guide
Step 1: Remove the backing from your frame and clean the glass surface thoroughly.
Step 2: Lay out your gems on a flat surface first to plan your design like heart, initials, stripes, or random colors all work beautifully.
Step 3: Glue the flat side of each gem directly to the glass inside the frame. Then press firmly and let dry completely.
Step 4: Once the glue is cured, hold the frame up to the light to admire your colorful glass masterpiece!
Step 5: Hang the frame in a window using suction cups or mount it on the wall near natural light to enjoy the glowing effect daily.
#10. DIY Glass Gem Frog Prince
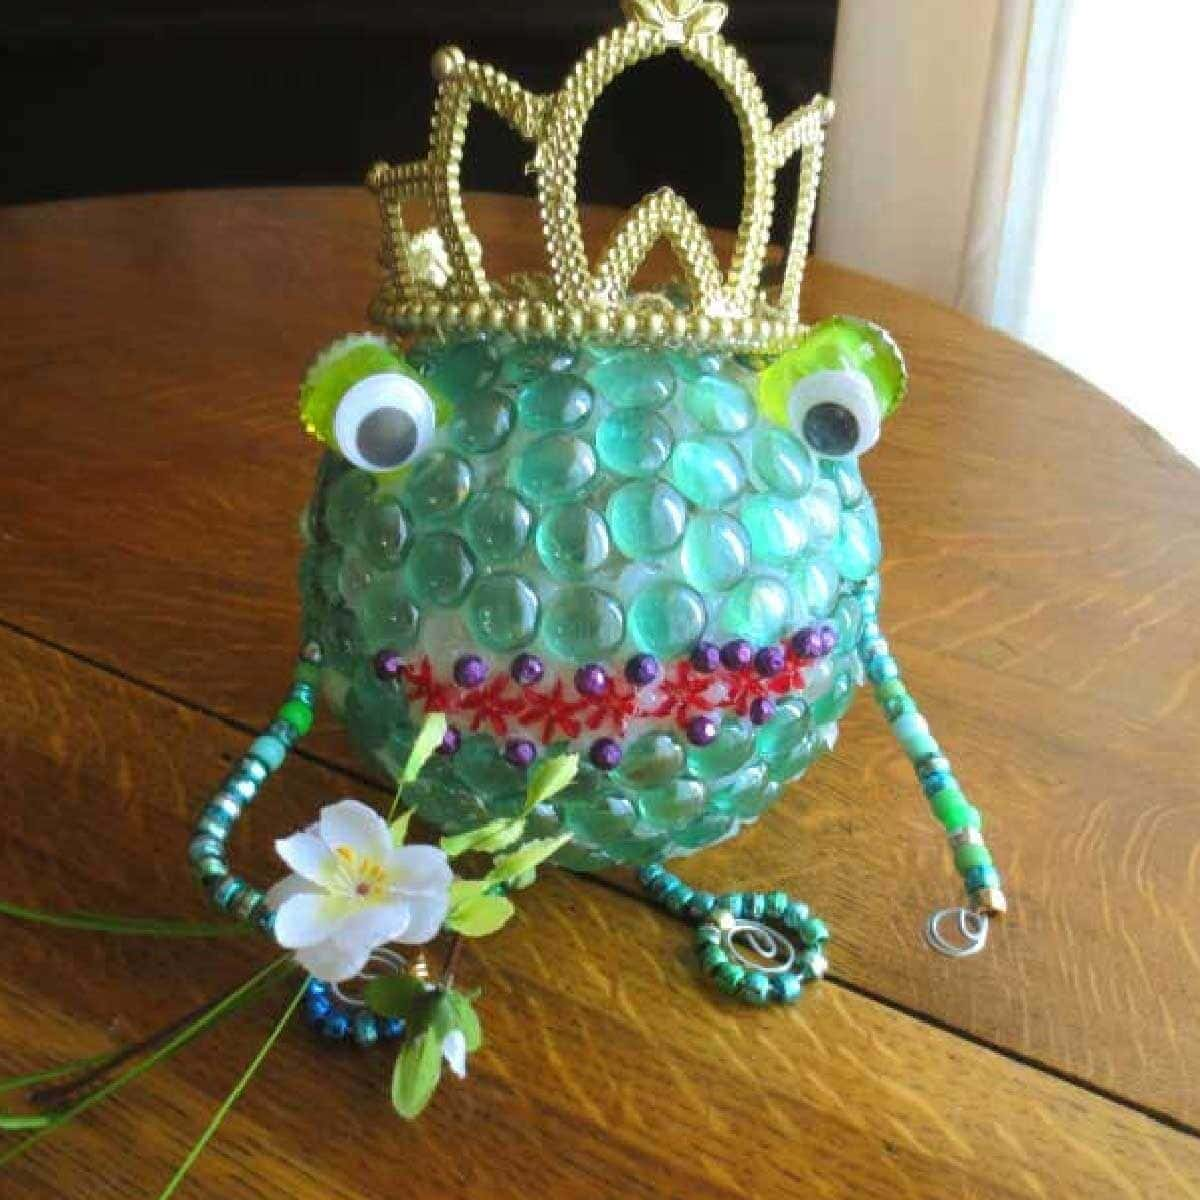
This charming little frog prince is a magical blend of sparkle and silliness, perfect for fairy gardens, playful home decor, or a kid-friendly craft session.
Made from a round base covered in green glass gems and decorated with beaded arms, googly eyes, and a golden crown, this frog is sure to steal the spotlight.
Materials Needed
- Round foam or plastic base (smooth surface works best)
- Green flat-back glass gems
- Strong craft glue or hot glue gun
- 2 large googly eyes
- Beads and wire
- Plastic crown or gold pipe cleaners to make one
- Decorative flowers (optional)
- Red and purple mini beads or paint for the mouth
Step-by-step Guide
Step 1: Cover your round base with green glass gems using strong glue. Work in sections and let each part dry before continuing.
Step 2: Glue on two large googly eyes near the top. Use bottle caps or foam circles behind them for a raised “frog eye” look.
Step 3: Create the mouth using red and purple beads, small gems, or paint. Form a big, goofy frog smile.
Step 4: Form arms and legs by stringing beads onto bendable wire. Then curl the ends for feet and glue them to the sides and bottom of the frog.
Step 5: Add a crown to the top (store-bought or homemade with pipe cleaners), and glue on a small flower if you’d like your frog to offer a romantic gesture!
#11. Upcycled Gem Succulent Planter
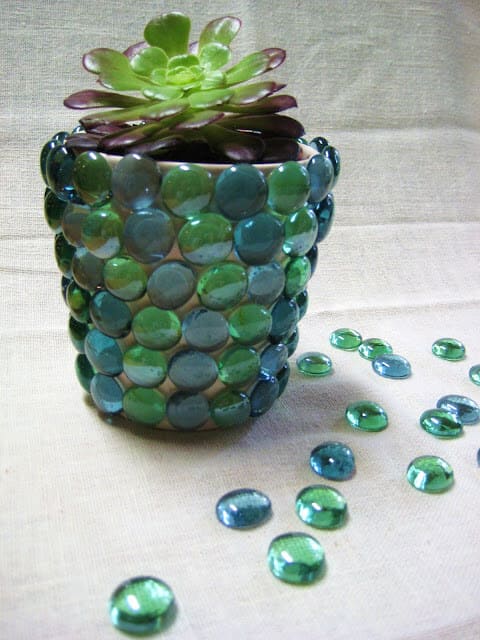
There’s something deeply satisfying about turning something simple into something spectacular.
This glass gem planter transforms a plain pot into a glimmering treasure chest, perfect for cradling succulents, herbs, or trailing vines.
The way light bounces off each gem gives the illusion of dewdrops resting on leaves.
Materials Needed
- 1 small flower pot (ceramic, plastic, or terra cotta, about 4-6 inches tall)
- 50–70 flat-back glass gems in green, aqua, and blue tones (1-1.5 cm diameter)
- Strong craft glue or hot glue gun
- Rubbing alcohol and paper towel
- Optional: Clear sealant spray
- Succulent or plant of choice + potting soil
Step-by-step Guide
Step 1: Clean the outside of your pot using rubbing alcohol to remove any residue. Let it dry completely before starting.
Step 2: Begin gluing glass gems from the bottom edge of the pot, working your way up in horizontal rows.
You now keep them snug and aligned, but don’t stress about perfection.
Step 3: Once the entire surface is covered, let the glue cure fully.
If placing outdoors, you can lightly spray the finished surface with a clear sealant to help weatherproof it.
Step 4: Fill the pot with fresh soil and nestle in your favorite plant. Now you’ve got a tiny jewel garden that sparkles with every sunbeam.
#12. DIY Glass Gem Suncatcher
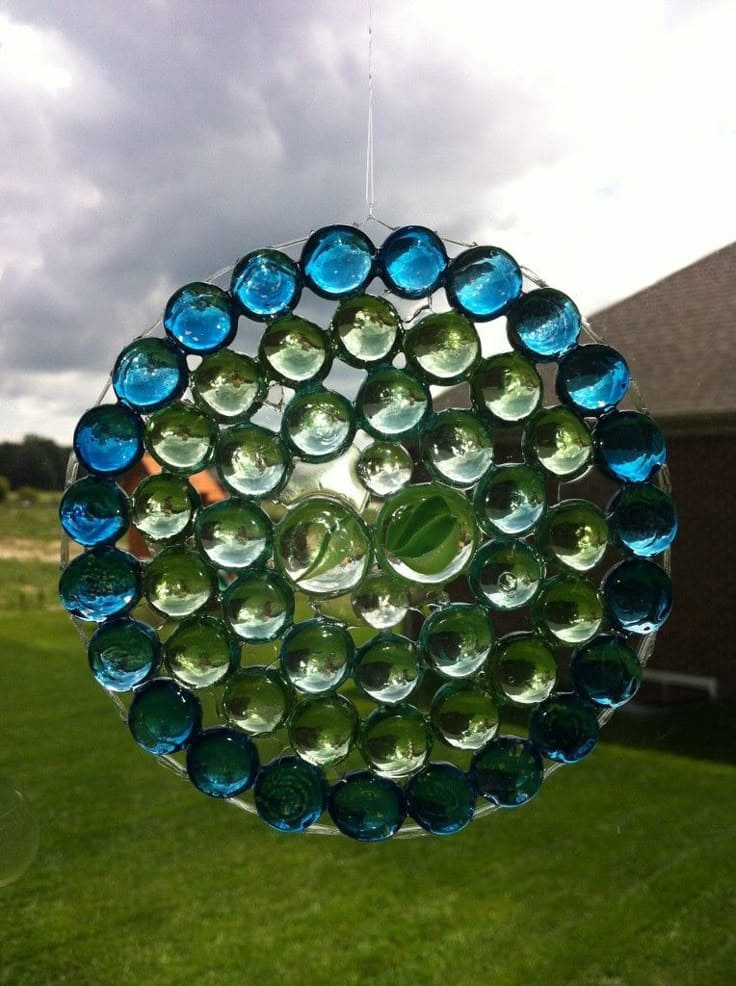
You can also turn a handful of glass gems into a radiant suncatcher that brings sparkle to your garden or window.
This round, jewel-toned piece uses blue, green, and clear flat-back gems arranged tightly into a circular pattern and bonded together to catch the sunlight just right.
Whether it spins in the breeze or stays still, it casts colorful reflections and adds a handcrafted charm to any outdoor or indoor space.
Materials Needed
- Flat-back glass gems in blue, green, and clear
- Strong clear-drying glue (E6000 or silicone adhesive)
- Clear plastic lid or CD
- Fishing line or clear thread for hanging
- Drill (optional)
Step-by-step Guide
Step 1: Arrange your glass gems in a circular pattern inside a clear plastic lid or CD-sized mold.
You now fill the shape completely so the gems sit snugly together.
Step 2: Apply strong glue between the gems to hold them together. Be generous but keep it neat, any excess will dry clear if using the right adhesive.
Step 3: Let the suncatcher dry flat for 24-48 hours until fully cured and hardened.
Step 4: Carefully remove it from the mold. If needed, drill a small hole near the top, or glue a loop of clear thread on the back.
Step 5: Hang it in a sunny window or on a tree branch where it can catch the light and shimmer all day.
#13. DIY Ocean-Inspired Resin Gem Coasters
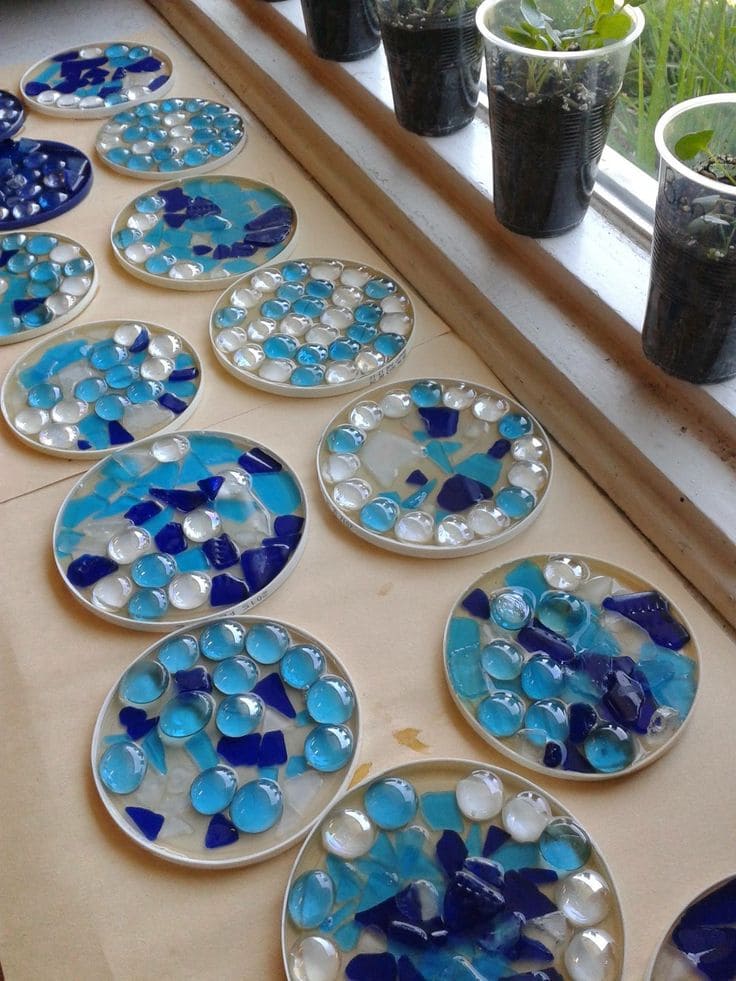
Bring the calming beauty of the sea to your coffee table with these handmade resin coasters.
Each one is a small work of art, created using a mix of glass gems, tumbled glass pieces, and crystal-clear resin.
The blues and whites mimic waves, water, and sea foam, making these coasters perfect for summer décor or beachy vibes all year round.
Materials Needed
- Silicone coaster molds (round, 4-inch size)
- Clear epoxy resin and hardener
- Flat-back glass gems in blue, white, or clear
- Small pieces of sea glass or tumbled glass (blue tones work best)
- Mixing cups and stir sticks
- Gloves and protective covering (resin can get messy!)
Step-by-step Guide
Step 1: Arrange your gems and glass pieces in the bottom of each mold. You can create patterns or scatter them randomly for a natural look.
Step 2: Mix your resin and hardener according to the package directions. Be sure to stir thoroughly and work in a well-ventilated area.
Step 3: Slowly pour the resin into each mold, covering the gems completely. Tap the mold lightly to release air bubbles.
Step 4: Let the coasters cure undisturbed for 24-48 hours, or until fully hardened and clear.
Step 5: Once cured, pop the coasters out of the molds and enjoy your new ocean-inspired drink rests!
#14. Seaside Gem Tree with Shell Topper
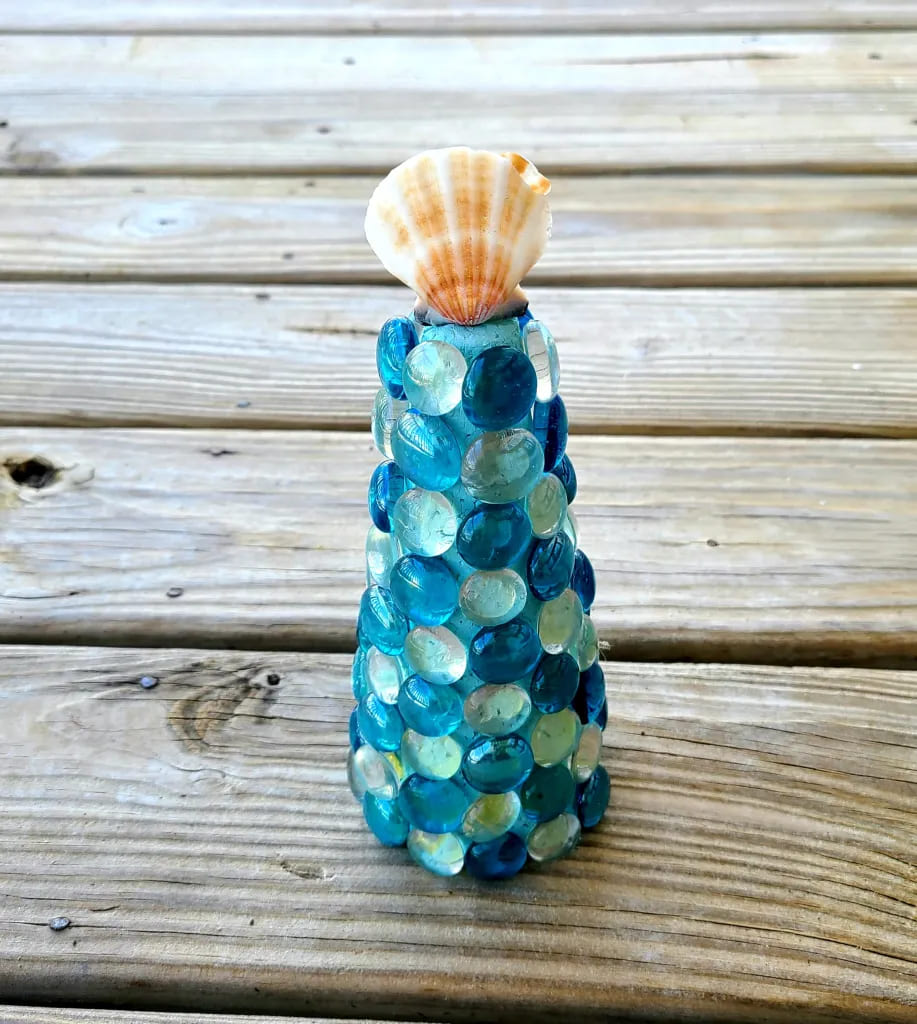
This little gem tree feels like something you’d find tucked into a mermaid’s cove. T
he smooth glass pebbles reflect light like sea foam catching the morning sun, while the scallop shell perched on top gives it a beachy finish.
Specially, it’s affordable, relaxing to make, and adds coastal calm wherever it goes.
Materials Needed
- 1 foam cone (6-8 inches tall)
- 60-80 flat-back glass gems in sea glass hues (aqua, blue, light green)
- 1 medium seashell (about 2-3 inches wide)
- Strong craft glue or hot glue gun with glue sticks
- Optional: Ribbon or twine for the base
Step-by-step Guide
Step 1: Begin at the base of your foam cone, gluing on a row of glass gems.
You should work your way up row by row, slightly overlapping for texture and full coverage.
Step 2: Use a mix of colors for a gentle ocean gradient, lighter at the top, deeper blues near the base.
Step 3: Once fully covered and dry, attach your seashell to the peak of the cone using glue. Let it cure completely before handling.
Step 4: If you’d like to give the bottom edge a finished touch, wrap it with ribbon or twine.
Then display your gem tree where light can bounce off the surface for that dreamy seaside sparkle.
#15. DIY Blue Glass Gem Mason Jar Lantern
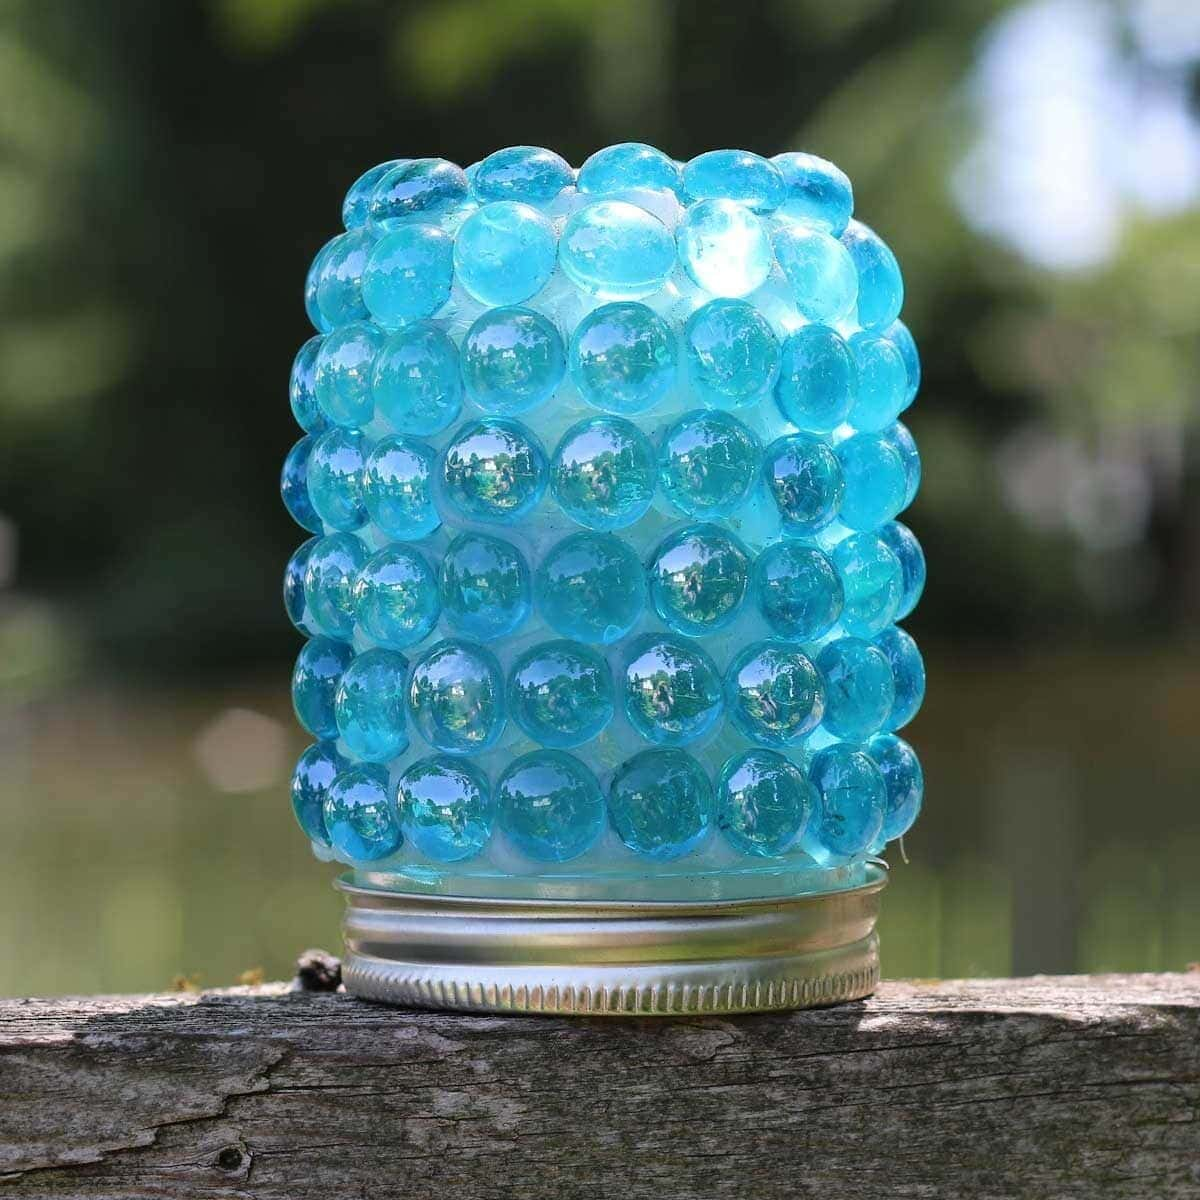
This beautiful mason jar lantern shimmers with ocean-blue glass gems that glow magically when lit from within.
It’s a relaxing addition to your porch, patio, or windowsill, perfect for summer nights, outdoor dinners, or as a dreamy indoor accent.
The round gems catch natural light during the day, and with a tealight or LED inside, they radiate a soft, watery glow at night.
Materials Needed
- 1 wide-mouth mason jar
- Flat-back glass gems (blue or aqua shades)
- Strong clear-drying glue (E6000 or similar)
- Battery-operated LED tea light or candle
- Optional: Twine or ribbon
Step-by-step Guide
Step 1: Clean the outside of the mason jar with rubbing alcohol to ensure the glue adheres well.
Step 2: Starting at the bottom, begin gluing the glass gems onto the jar in even rows, working upward. Press each gem firmly and hold for a few seconds.
Step 3: Continue adding gems until the jar is fully covered, then let the glue dry completely as directed (typically 24 hours).
Step 4: Place a battery-operated LED tea light inside the jar. Avoid real candles unless the jar remains open and well-ventilated.
Step 5: Display your glowing gem lantern on a porch, windowsill, or patio table for an instant touch of enchantment.
#16. Colorful Mosaic Window Art
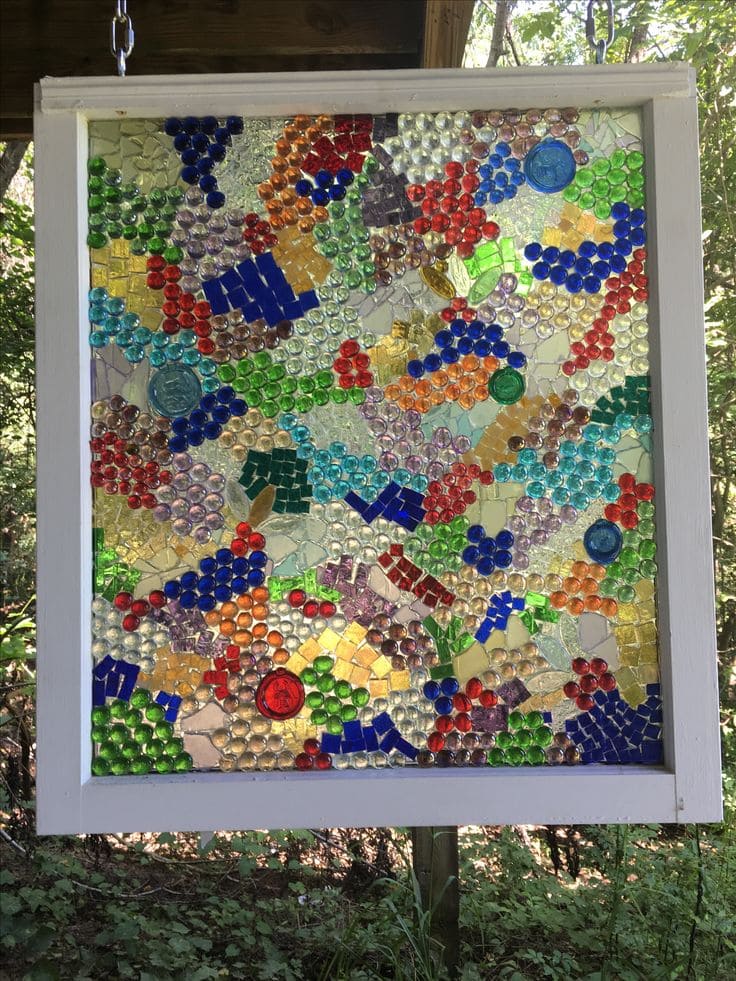
This piece is pure light therapy. A reclaimed window becomes a riot of color, pattern, and shine.
When you hang it where the sun pours through, it feels like your own private kaleidoscope.
The beauty lies in its randomness: broken tile, glass gems, marbles, and bits of treasure all finding a second life in one frame.
Materials Needed
- 1 large wood-framed window (approx. 24×30 inches or any size available)
- Assorted glass gems, marbles, sea glass, and mosaic tiles (enough to cover the glass)
- Clear silicone adhesive (2-3 tubes depending on size)
- Optional: glass cutting tools for fitting edges
- Old rag or gloves (adhesive cleanup)
- Chain and hooks
Step-by-step Guide
Step 1: Clean the glass surface thoroughly. Set your frame on a flat worktable in a well-lit space.
Step 2: Start laying out your design. You can freestyle like abstract art or loosely sketch shapes. Mix clear gems with colored tiles to create texture and dimension.
Step 3: Use clear silicone to glue each piece directly onto the glass. Press gently but firmly.
You should work in sections, letting them dry slightly before moving on.
Step 4: Once every piece is placed and cured (usually 24 hours), attach hooks and a sturdy hanging chain.
Hang it on a porch, in a garden nook, or by a sun-filled window and watch your space bloom in living color.
