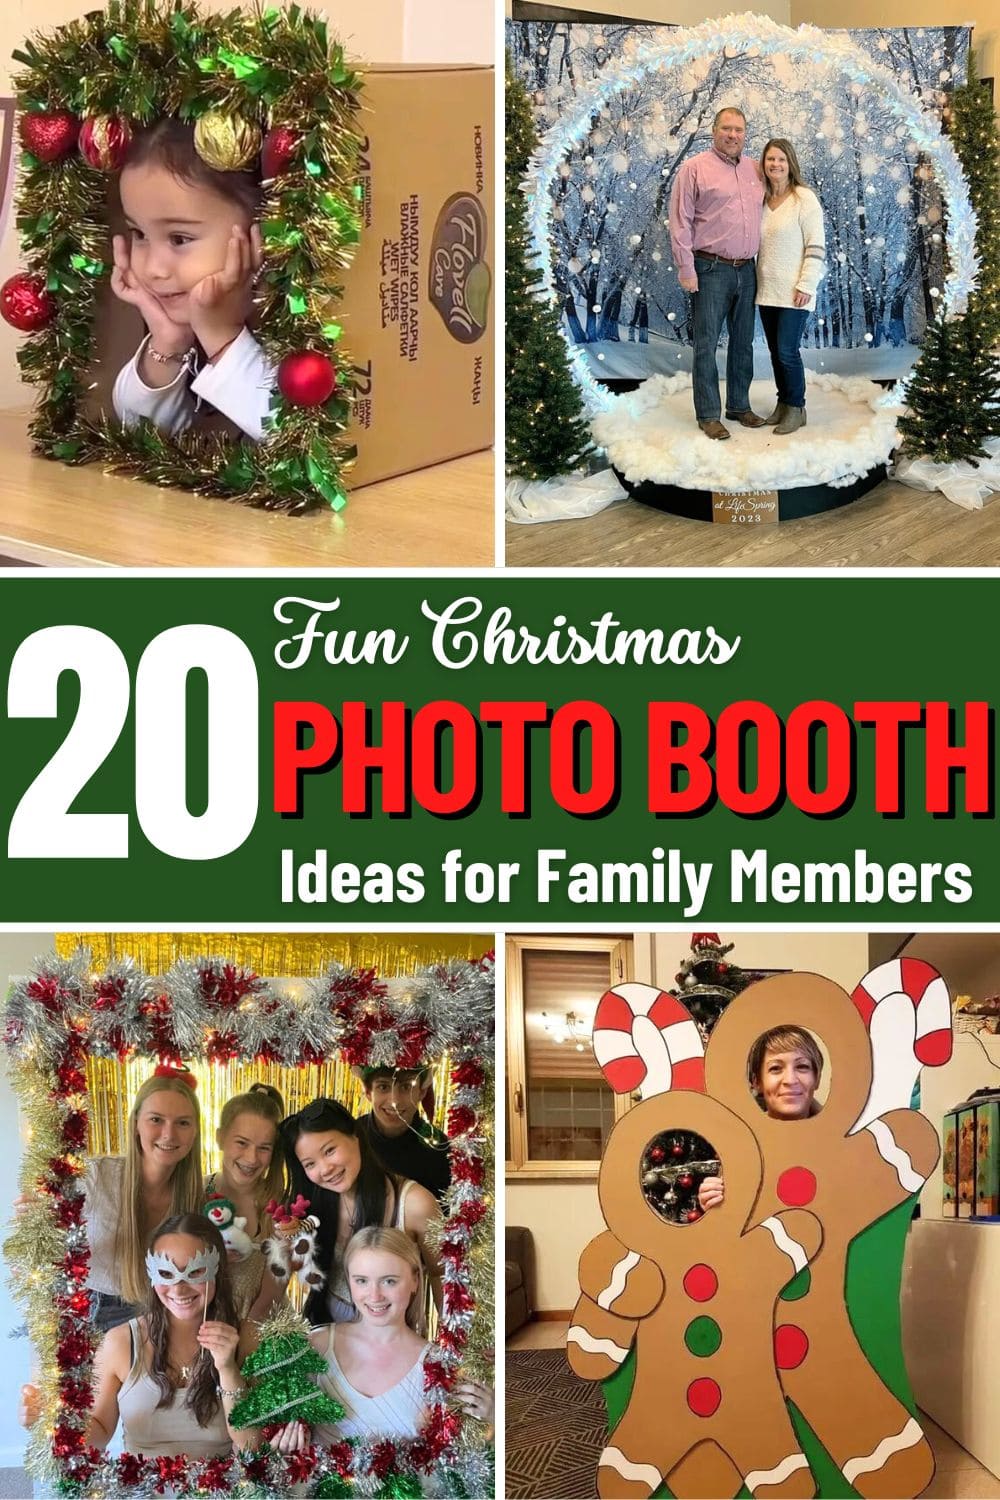
When Christmas comes, it’s not just about the tree or the presents, it’s about the memories we make together.
With just a few decorations and a sprinkle of creativity, you can turn any corner into a joyful holiday snapshot station.
In this list, you’ll discover 20 cute and creative Christmas photo booth setups designed to make everyone in the family smile.
These ideas are cozy, fun, and perfect for turning everyday gatherings into something worth framing.
#1. Gingerbread Family Cutout Booth
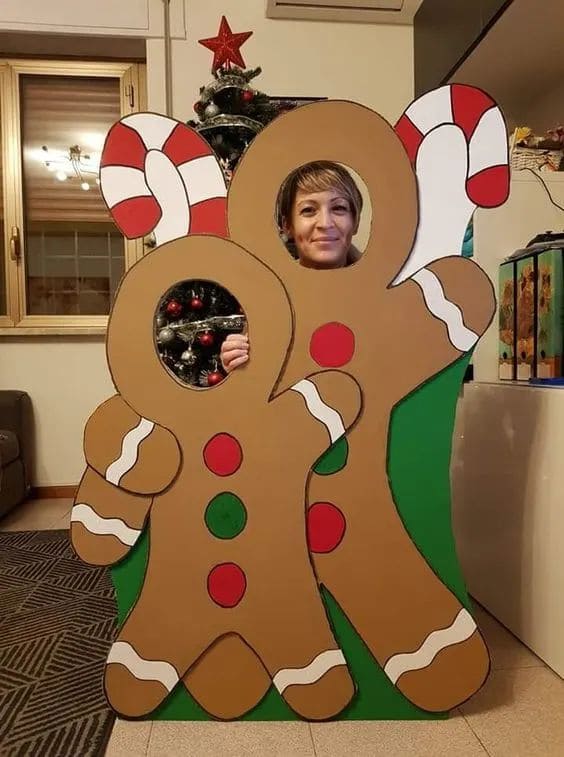
On Christmas day , this adorable life-sized gingerbread cutout brings sweet holiday fun to any living room.
With two character windows, it’s the perfect opportunity to snap silly family photos.
Between the candy cane accents and gumdrop buttons, this design feels like it was pulled right out of a cookie tin.
Materials Needed:
- Large cardboard sheet (approx. 4 ft x 5 ft)
- Brown kraft paper
- Red, green, and white craft paper
- White paint
- Scissors and craft knife
- Hot glue gun and glue sticks
- Optional: candy cane cutouts
Step-by-step Guide:
Step 1: Draw and cut out two large gingerbread figures on the cardboard including one adult-sized and one kid-sized, overlapping slightly for a cuddly look.
Step 2: Use a utility knife to cut circular face holes near the top of each gingerbread head.
Step 3: Now, you paint the entire board in a warm gingerbread tone and add decorative icing details using white paper along the arms, legs, and edges.
Step 4: Glue on red and green paper buttons, and add candy cane decorations for a playful pop.
#2. Winter Wonderland Arch Photo Booth

This winter forest scene is ideal for more formal holiday photos or church events, where you want the festive touch without the tinsel chaos.
Additionally, this setup may look elaborate, but it’s surprisingly doable with lightweight materials and good lighting.
Materials Needed:
- 1 winter forest backdrop (approx. 8 ft x 8 ft)
- 1 PVC pipe (7-8 ft tall)
- White garlands (approx. 30 ft)
- String lights
- 1 bag of faux snow batting
- 2 artificial Christmas trees with lights
- Hanging white pom-poms
- Black stage platform
- Signboard with event name and year
Step-by-step Guide:
Step 1: Set up your arch frame in front of the backdrop, then secure it tightly with weights or floor anchors to prevent wobbling.
Step 2: Wrap the arch with white garlands or snowy faux foliage. You should layer string lights throughout to give a gentle glow.
Step 3: Drape the floor with faux snow batting. Then you add extra layers along the base of the arch and in front for a soft, pillowy look.
Step 4: Place a small sign in front to mark the year or event name as this adds a sweet, personal touch to every photo.
#3. Snowman Cutout Frame for Kids
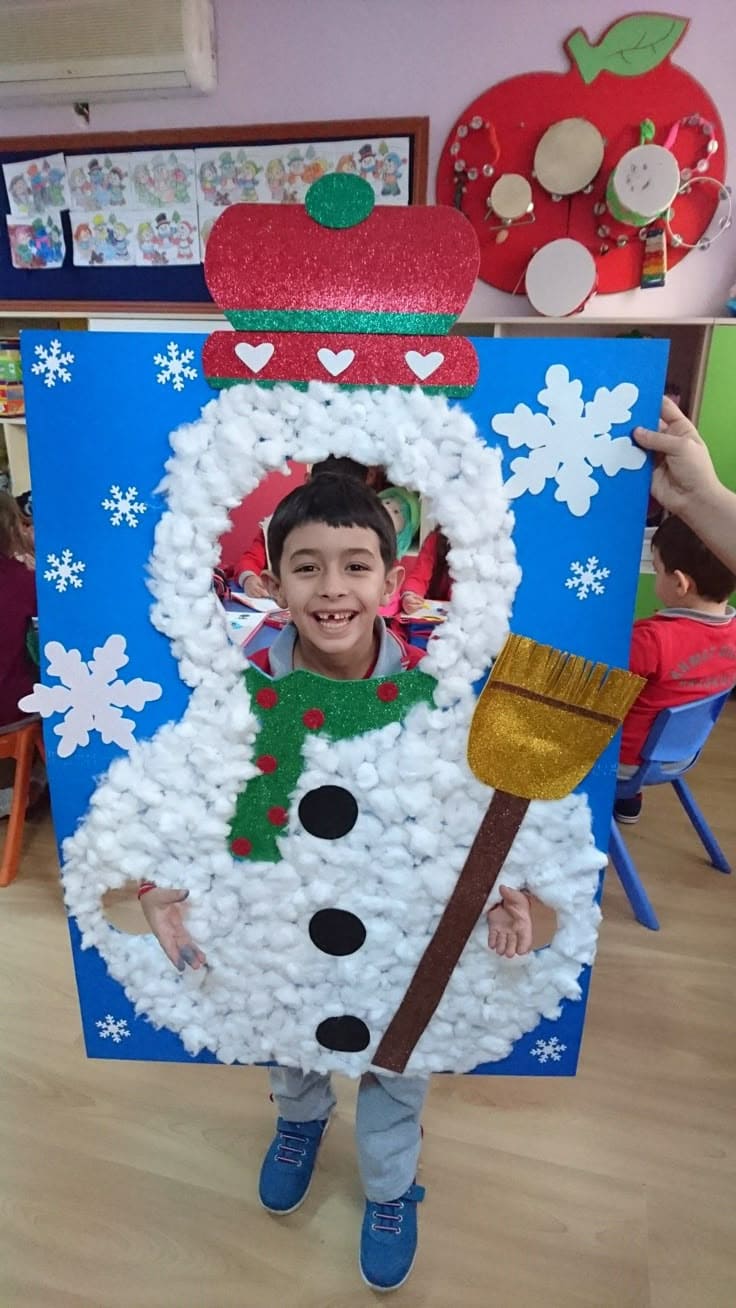
This snowman cutout is pure joy in cardboard form, just look at that grin! It’s the kind of craft that turns a classroom into a winter carnival.
The cotton ball snow gives it soft texture, and those cutouts for the face and arms make it feel alive.
Whether you’re making it for a school party or holiday playdate, kids will line up for their turn to become a jolly snow friend.
Materials Needed:
- 1 large poster board (approx. 24″ x 36″)
- Cotton balls
- Colored glitter foam sheets (red, green, gold, black)
- Scissors
- Hot glue gun
- Black marker
- Utility knife
- Optional: pre-cut snowflake stickers
Step-by-step Guide:
Step 1: Cut the face hole near the top center and two smaller hand holes on either side using a utility knife (adults only for safety).
Step 2: Glue cotton balls all over the snowman body area, layering them to create a puffy 3D look.
Step 3: Next, cut out and attach glittery accessories like hat, scarf, buttons, broom using foam sheets or cardstock. Then you glue in place securely.
Step 4: Finally, add snowflakes to the blue background to bring the whole winter scene to life.
#4. Tinsel Wonderland Christmas Photo Frame
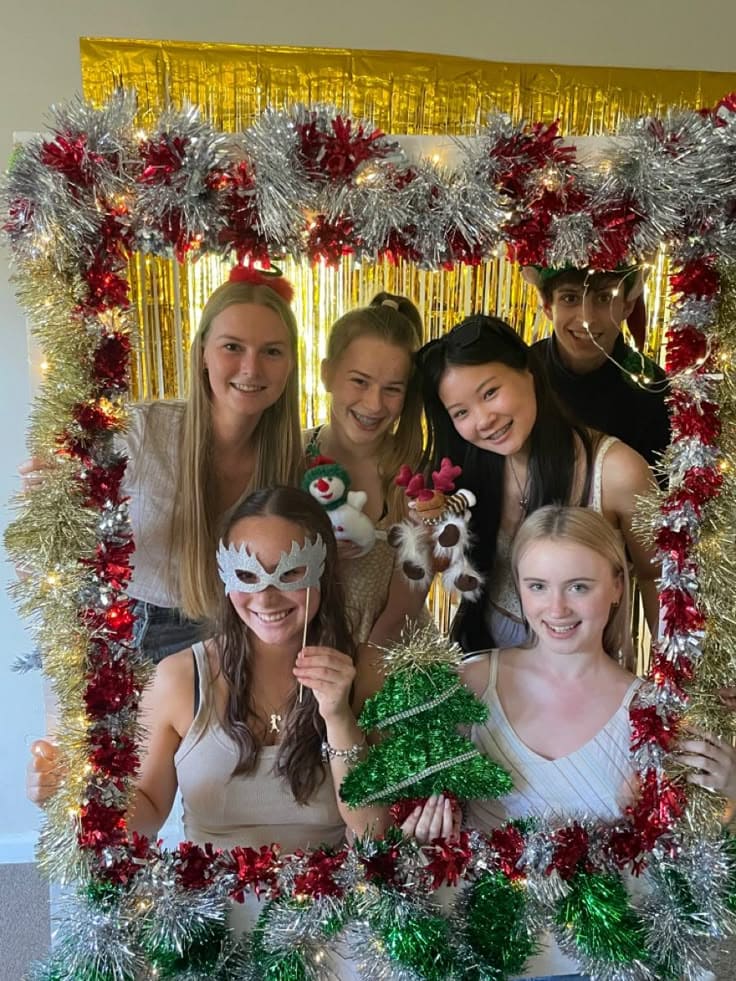
If you’re aiming for loud, sparkly, and full of energy, this one absolutely delivers. It feels like a New Year’s Eve party met a holiday market and decided to be best friends.
Plus, you can go wild with color combos, and it’s budget-friendly too as most of this can be sourced from your local dollar store or craft bin leftovers.
Materials Needed:
- 1 large rectangular cardboard frame (approx. 24” x 36” or larger)
- 3 strands of silver tinsel garland (6 ft each)
- 2 strands of red tinsel (6 ft each)
- 1 strand of green tinsel or metallic garland (6 ft)
- Gold foil curtain backdrop (1.5m x 2m)
- Clear tape
- Scissors
- Optional: mini props like masks, plush toys, or glitter ornaments
Step-by-step Guide:
Step 1: Cut out the center of a large cardboard piece to create an open frame, about 4 inches wide around.
Step 2: Wrap tinsel garlands around the edges of the frame, alternating colors for contrast. Then tape them as you go to keep them in place.
Step 3: Layer a few sections with extra sparkle, then ttwist multiple colors together or create bursts at the corners for a festive effect.
Step 4: Hang a gold foil curtain behind the frame as a shimmering backdrop.
#5. DIY Elf Cutout Photo Stand
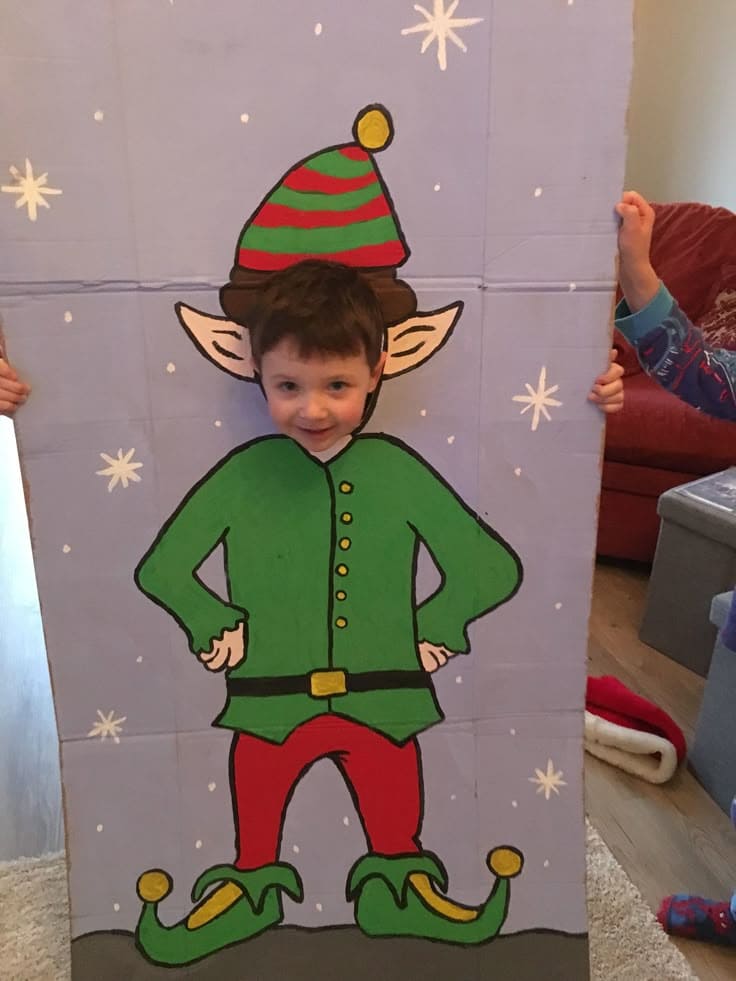
This elf cutout is pure holiday magic for kids and honestly, it’s hilarious for adults too.
It’s one of those projects that looks complicated but is actually just a big cardboard sheet, a bit of paint, and a good dose of creativity.
Also, you can customize the outfit colors or even create a Santa or reindeer version to mix things up.
Materials Needed:
- 1 large cardboard sheet (approx. 2 ft x 4 ft)
- Acrylic paints (green, red, black, white, yellow, brown)
- Paintbrushes (various sizes)
- Pencil
- Craft knife
- Cutting mat
- Optional: clear spray sealant
Step-by-step Guide:
Step 1: Lightly sketch the elf body on the cardboard. Don’t worry about perfect lines, then mark where the face cutout will go .
Step 2: Paint the design in layers, you should start with larger areas (like green for the shirt, red for pants), then add details like buttons, belt, hat stripes, and boots.
Step 3: Let everything dry completely. Once dry, carefully cut out the face hole using a utility knife on a cutting-safe surface.
Step 4: Optionally, spray the finished board with a clear sealant to make it last through sticky fingers and giggly face pushes.
#6. Ornament Garland Photo Frame
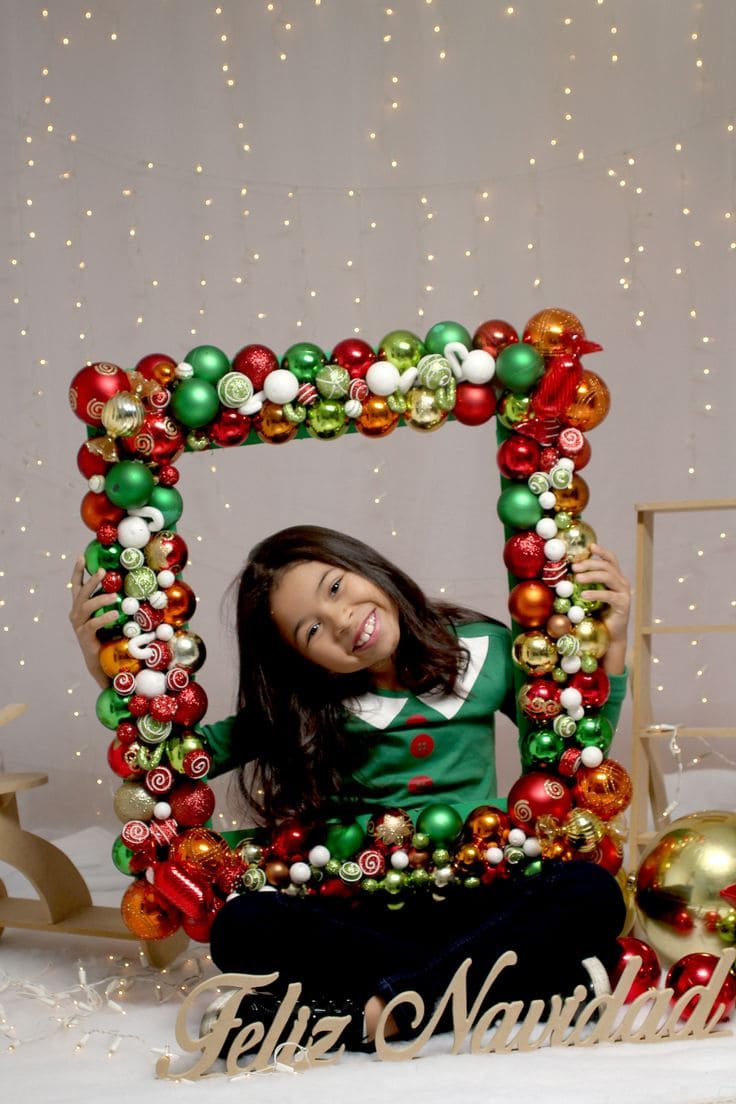
This Christmas ornament frame is bursting with cheer.
It turns every photo into a pop of color and sparkle, and the best part is that it’s light enough for little hands to hold and festive enough for any photo shoot.
Whether you’re hosting a classroom party or setting up for family portraits, this frame adds instant magic to every smile.
Materials Needed:
- 1 large wooden or cardboard open frame (approx. 18″ x 24″)
- 80 small to medium plastic ornaments (mixed red, green, gold, white)
- Hot glue gun and glue sticks
- Optional: glitter peppermint picks, mini foam swirl candies
- Twine
Step-by-step Guide:
Step 1: Start by removing the tops from the ornaments.
Step 2: Begin gluing the ornaments around the frame in layers, mixing colors and sizes for a rich, clustered look. You can use hot glue generously and hold each one in place for a few seconds until firm.
Step 3: Tuck in mini candy pieces or swirl accents to add extra personality and break up the round shapes.
Step 4 (Optional): If you’d like to hang it, tie fishing line through the top corners. Or simply let kids hold it up during photo time.
#7. Gold Frame Christmas Photo Booth Idea
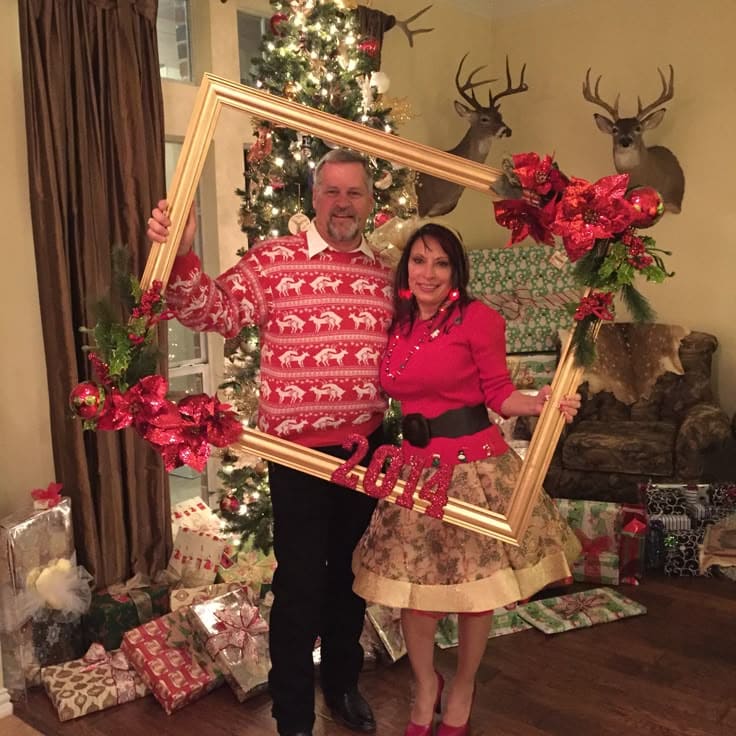
I believe this photo booth prop turns any corner of your home into a festive spotlight.
It’s light enough to hold, big enough to fit two or three faces, and fancy enough to feel like a DIY masterpiece.
Also, adding a year on the corner is such a sweet touch as it captures a memory in motion.
Materials Needed:
- 1 large empty picture frame (approximately 24″ x 36″)
- 3 bunches of faux Christmas greenery (about 10″-14″ each)
- 4 red glitter bows (approx. 6″ wide)
- 1 glitter year cut-out
- Hot glue gun and glue sticks
- Floral wire
- Scissors
Step-by-step Guide:
Step 1: Start by cleaning the frame and removing any glass or backing.
Step 2: Arrange faux greenery on two opposite corners (top right and bottom left work best) and attach them with floral wire or hot glue.
Step 3: Add red bows over the greenery clusters to hide any visible wiring and add volume.
Step 4: Finally, cut the year using glittery cardstock and glue it securely to the bottom part of the frame.
#8. Wall-Mounted Frame Christmas Photo Booth
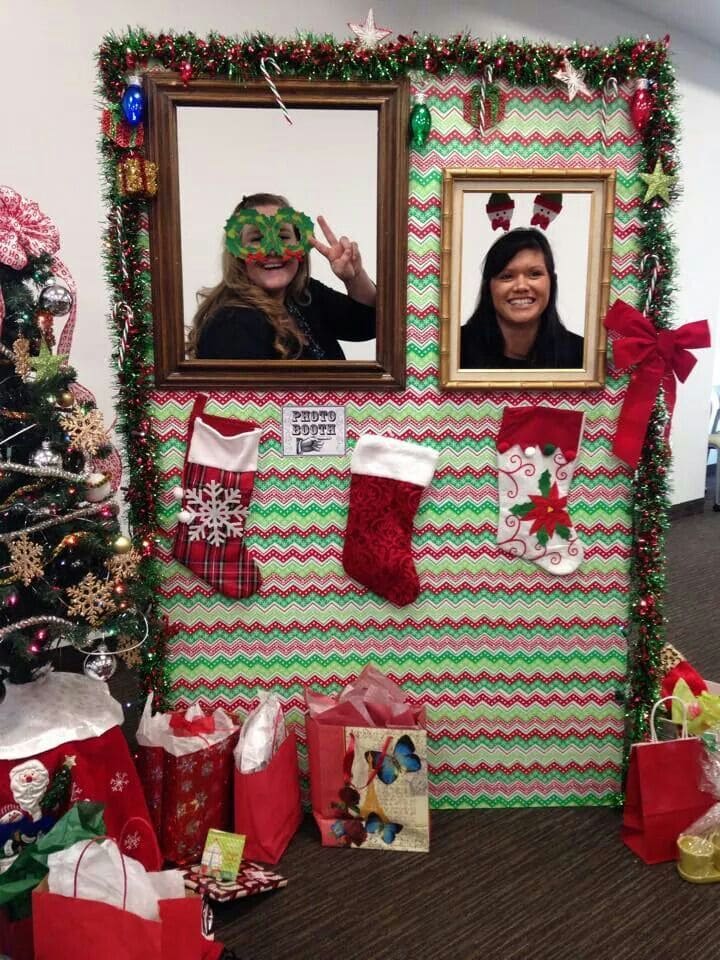
The idea of mounting actual photo frames into a decorated wall turns a regular corner into something straight from a Christmas movie.
Moreover, stockings, tinsel, gift bags, and even little candy canes add depth and cheer.
After finishing, step behind, peek through, and you become part of the decoration.
Materials Needed:
- 1 large cardboard sheet (approx. 6 ft x 4 ft)
- Wrapping paper (3-4 rolls, holiday-themed)
- 2 assorted-size picture frames
- 1 red bow
- Garland tinsel (10-12 ft)
- 3 Christmas stockings
- Ornaments, candy canes, small props
- Tape, glue gun, scissors, push pins
Step-by-step Guide:
Step 1: Wrap your board in festive wrapping paper completely and secure it tightly on the back.
Step 2: Cut out window holes that match your frame openings, then glue or tape the frames in place over those cutouts.
Step 3: Decorate the top edge with tinsel garland, small lights, ornaments, or candy canes. You can also add a big red bow for visual balance.
Step 4: Hang stockings under the frames and scatter wrapped boxes or gift bags at the base to finish the look.
#9. Striped Ornament Christmas Photo Frame
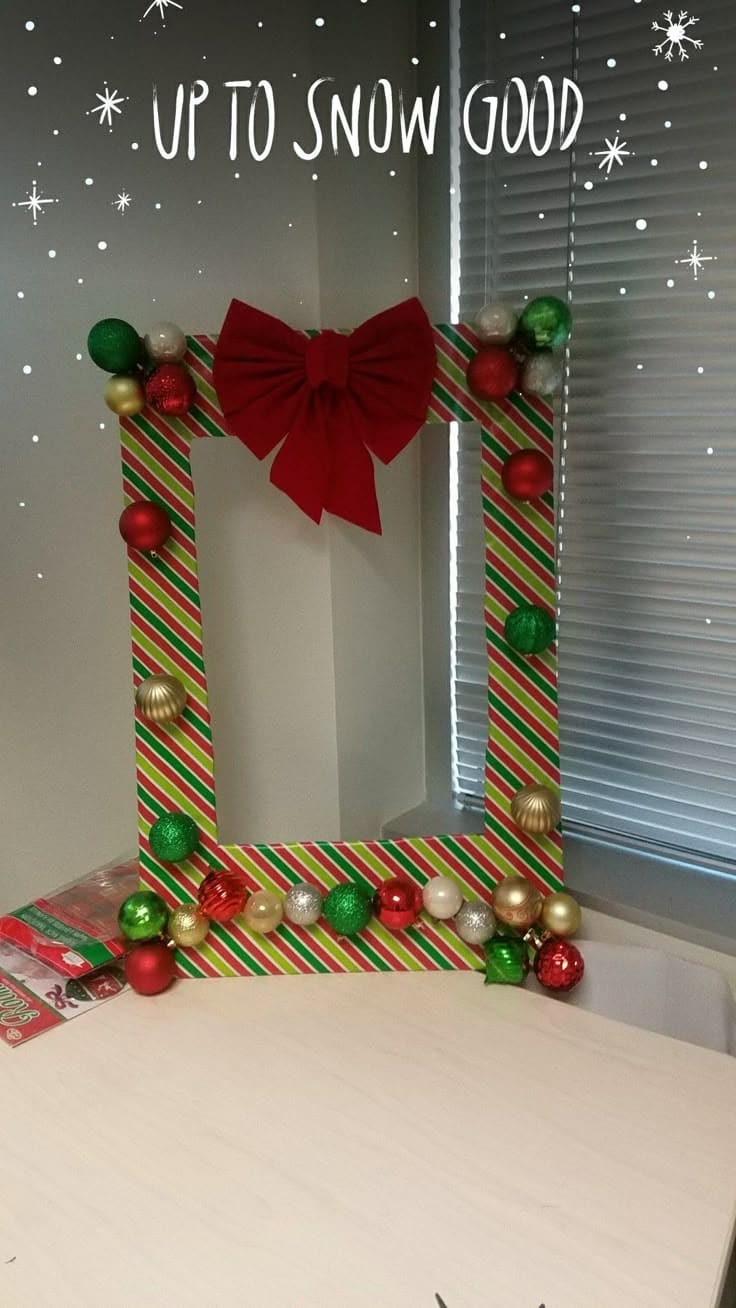
This striped holiday photo frame is super simple, cheerful, and full of charm that looks polished but takes just a cozy afternoon to make.
In addition, the diagonal candy-cane stripes paired with colorful ornaments and a big red bow give it a classic-but-playful feel.
And honestly, who could resist a photo op with something this festive?
Materials Needed:
- 1 lightweight rectangular cardboard frame (about 24” x 36”)
- Wrapping paper with diagonal Christmas stripes (red, green, white)
- 1 large red fabric (approx. 10″ wide)
- 15 small plastic ornaments
- Hot glue gun and glue sticks
- Clear tape
- Scissors
Step-by-step Guide:
Step 1: Wrap your entire cardboard frame with striped wrapping paper, securing the edges with clear tape on the back side.
Step 2: Glue the large red bow at the top center of the frame for a bold focal point.
Step 3: Evenly space ornaments along the edges, clustering a few at the corners for extra volume.
You can use hot glue and press firmly for 5-10 seconds per ornament.
#10. Life-Size Christmas Present Photo Booth
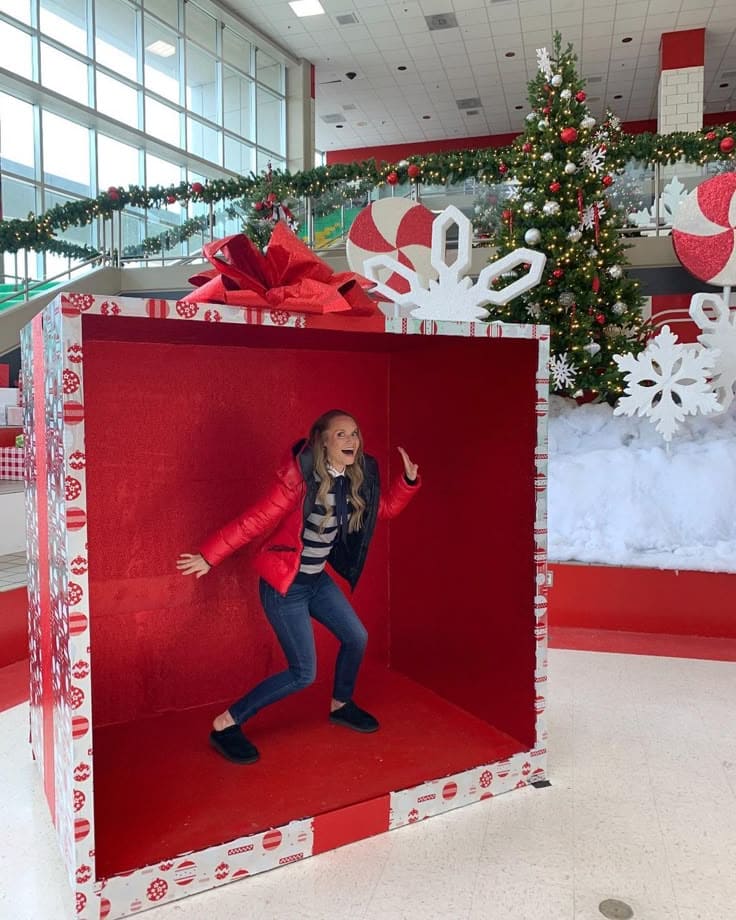
At the first glance, this oversized gift box feels like being the surprise under someone’s tree.
Specially, no matter how you want to look like a present ready to be unwrapped or just want a vibrant red backdrop, this booth works perfectly for malls, schools, or even bold home setups.
Materials Needed:
- 1 large cardboard appliance box (minimum 5 ft x 5 ft x 3 ft)
- Red wrapping paper
- Holiday-themed wrapping paper
- Large pre-made bow
- Hot glue gun
- Box cutter
- Optional: red carpet runner
Step-by-step Guide:
Step 1: Begin by reinforcing the box’s interior so it stands upright. You can tape the seams or add extra cardboard bracing if needed.
Step 2: Cover the inside and outside of the box with solid red wrapping paper or bulletin board roll, then smooth out any wrinkles and tape securely.
Step 3: Add a border around the top and bottom edges using patterned holiday paper or ribbon for a wrapped look.
Step 4: Finally, attach a large bow to the top center of the box.
#11. Whoville-Inspired Grinch Tree Photo Booth
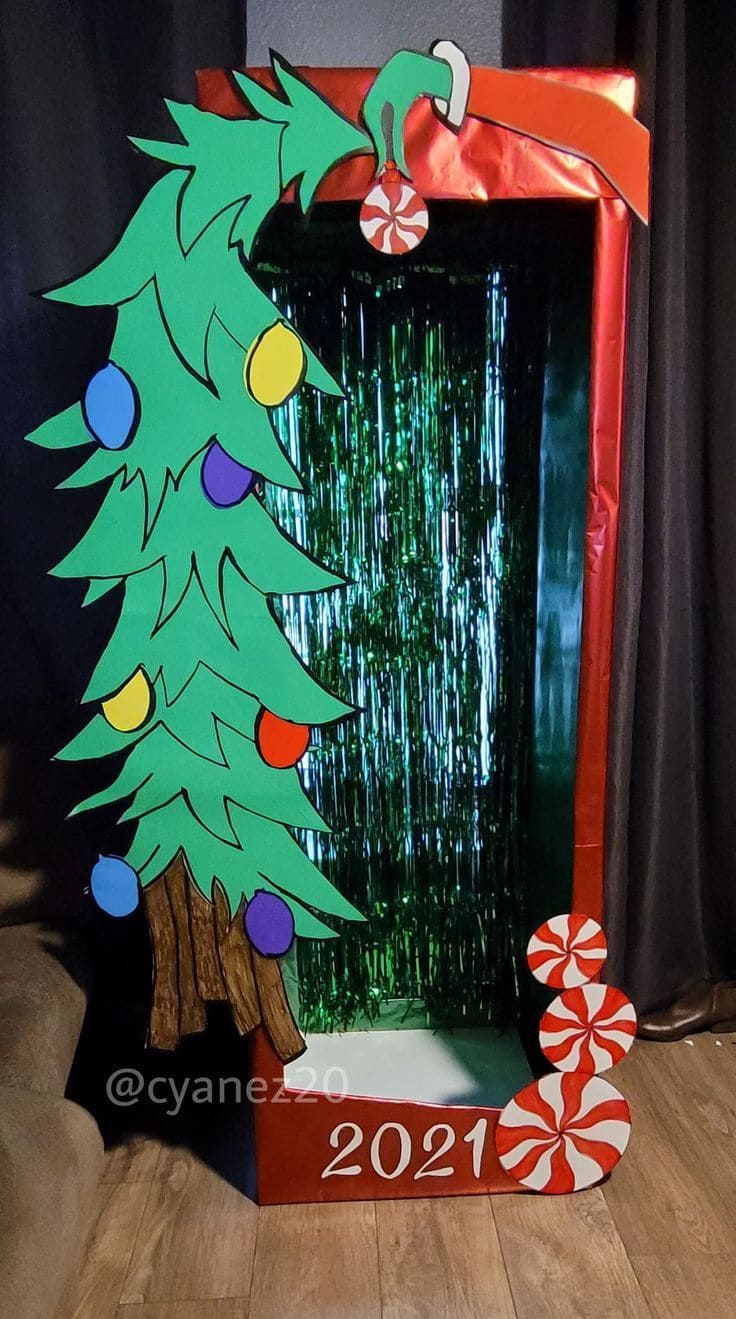
There’s something mischievously magical about that leaning tree, those peppermint swirls, and the Grinch hand dangling from above.
And the best part is that you can repurpose a cardboard appliance box or wardrobe box to bring it to life.
It’s perfect for kids, but adults won’t be able to resist stepping inside either.
Materials Needed:
- 1 tall cardboard box (approx. 6 ft tall)
- Red wrapping paper
- Green foil curtain backdrop (1.5m x 2m)
- Colored construction paper (green, brown, red, yellow, blue, purple)
- Scissors and glue stick
- Hot glue gun and glue sticks
- Black marker
- White number stickers
- Optional: peppermint swirl printouts
Step-by-step Guide:
Step 1: Cover the exterior of the cardboard box in red wrapping paper, then you leave the front open for photos.
Step 2: Attach the green foil curtain inside the back wall of the box using tape or glue.
Step 3: Cut out the tree, ornaments, trunk, and the Grinch-style hand from construction paper.
You can layer and glue the pieces onto the front left edge of the box, allowing the tree to bend and drape across.
Step 4: Add large peppermint circles and your current year to the bottom right corner using stickers or hand-painted letters.
#12. Candy Cane Gift Box Photo Booth
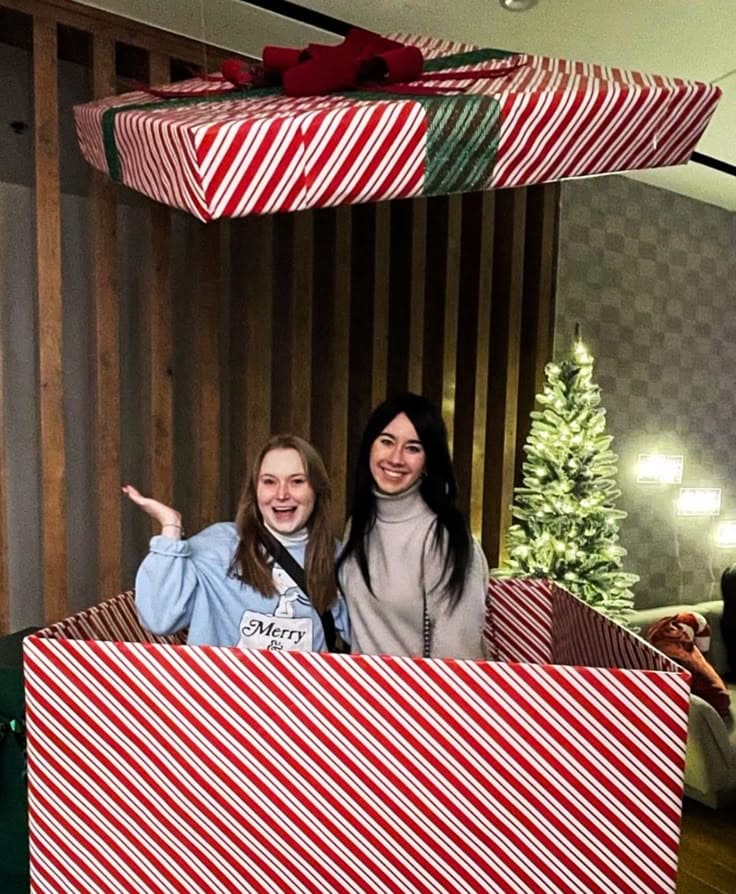
This striped gift box setup is all about bold, cheerful holiday vibes. With candy cane wrapping and a floating lid above, it turns you into the best present under the tree.
Furthermore, it’s playful and eye-catching without being overly complicated, and it fits perfectly in malls, offices, or cozy event corners.
Materials Needed:
- 1 oversized cardboard box (approx. 4 ft x 4 ft x 3 ft)
- Candy cane striped wrapping paper
- 1 matching cardboard lid
- Green ribbon (2” wide)
- Hot glue gun and glue sticks
- String
- Scissors
Step-by-step Guide:
Step 1: Wrap the entire box inside and out with candy cane striped wrapping paper. If using tape, you can run stripes diagonally for a peppermint look.
Step 2: Cover the separate cardboard lid in the same wrap, then crisscross green ribbon over the top and glue down a large bow.
Step 3: Suspend the lid slightly above the box using strong fishing line tied to the ceiling.
#13. Oversized Christmas Wreath Photo Booth Frame
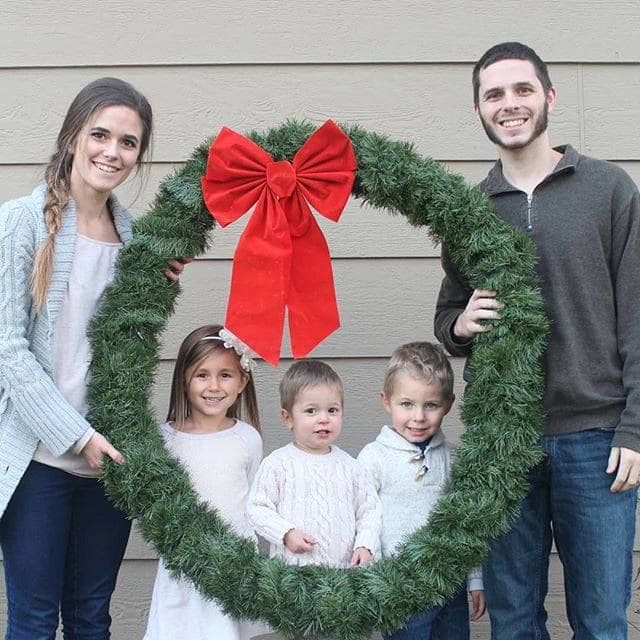
This giant wreath idea is as heartwarming as a mug of hot cocoa on a cold morning.
It’s simple, playful, and somehow feels like a holiday hug, especially when it frames a smiling family.
Moreover, you don’t need a fancy setup to recreate this look; just a lightweight wreath and a bold bow do the trick.
Materials Needed:
- 1 oversized faux wreath (30″-36″ diameter)
- 1 large red velvet bow (about 10″ wide)
- Floral wire
- Hot glue gun (optional)
Step-by-step Guide:
Step 1: Fluff out the wreath branches to give it fullness. If needed, gently bend or shape the frame so it sits evenly.
Step 2: Attach the large bow at the top center using floral wire or a strong twist tie. Then secure it tightly so it stays in place when holding.
Step 3: Check for balance, if the bow makes it top-heavy, you can reinforce the bottom with a hidden support stick or discreet wire loop.
#14. Butterfly-Themed DIY Photo Frame
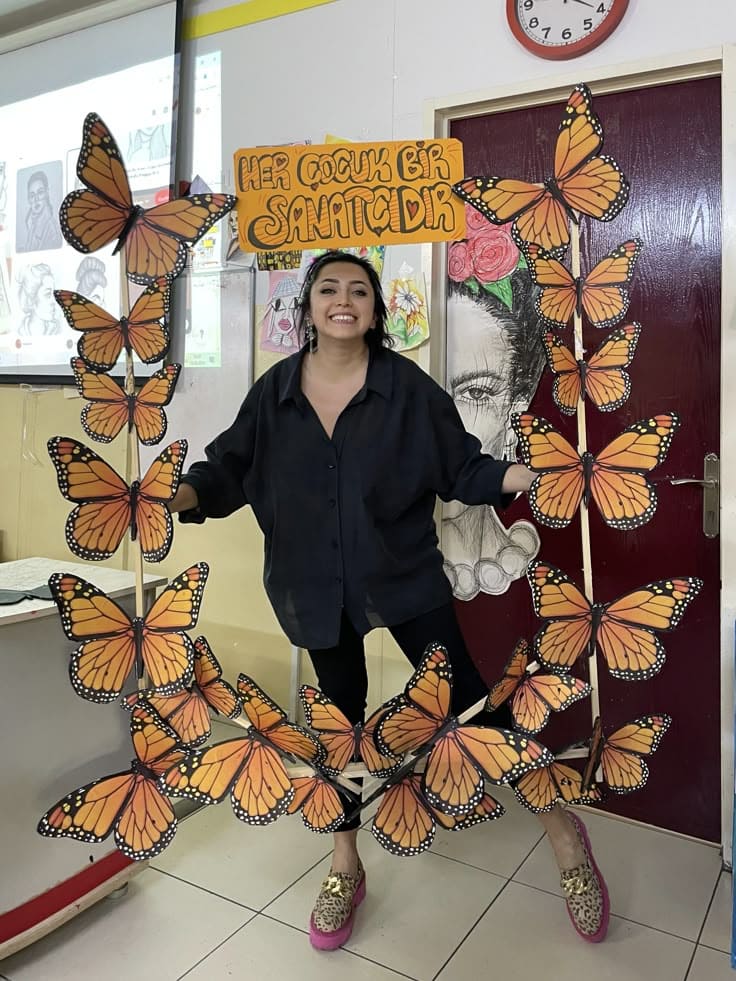
If you are looking for something for school art displays, spring festivals, or themed classroom activities, this butterfly photo frame makes sure your need.
With those monarch wings surrounding the frame, it’s vibrant, bold, and visually magnetic and the quote up top adds a meaningful layer.
Materials Needed:
- 1 large open wooden frame (approx. 36” x 36”)
- 20 printed monarch butterfly cutouts (8″-10″ wingspan)
- Wooden dowels
- Orange construction paper
- Black marker
- Hot glue gun and glue sticks
- Scissors and ruler
- Optional: craft wire or pipe cleaners
Step-by-step Guide:
Step 1: Cut and assemble your frame using lightweight wood strips. Now you should add vertical dowels on each side to hold butterflies in a layered layout.
Step 2: Print or draw large monarch butterflies, cut them out, and bend slightly at the center for a 3D effect.
Step 3: Glue the butterflies along the sides and bottom of the frame, overlapping for fullness.
You need to space a few facing different directions for movement.
Step 4: Create a rectangular sign with orange foam and hand-letter or apply vinyl letters with the quote.
#15. Christmas Gift Box Head Frame
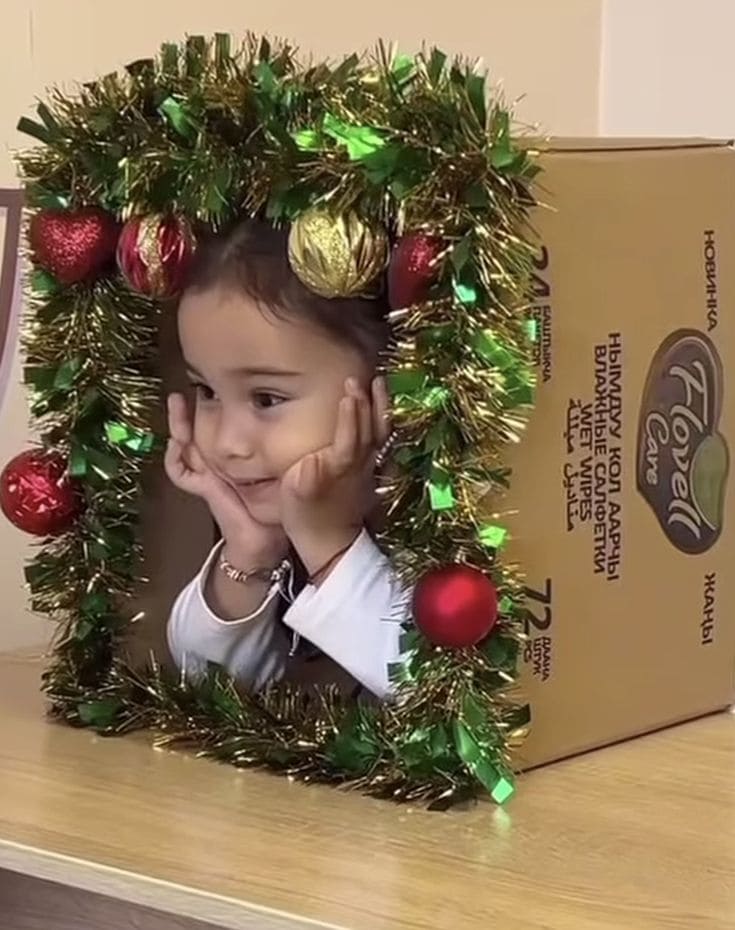
Wow, this little DIY is so cute like turning your child into the most adorable holiday decoration on the shelf.
Using just a cardboard box and a bit of shiny tinsel, you can create a photo booth prop that feels like a peek inside Santa’s workshop.
Materials Needed:
- 1 medium cardboard box (approx. 14” x 14” x 18”)
- 1 garland strand (6 ft)
- 6 small plastic ornaments
- Box cutter
- Hot glue gun
- Ruler and pencil
Step-by-step Guide:
Step 1: Turn the cardboard box on its side and mark a rectangle for the face opening (about 8” x 10”), then carefully cut it out using a craft knife.
Step 2: Wrap the edge of the cutout with the tinsel garland, securing it with hot glue or strong double-sided tape.
Step 3: Glue ornaments randomly around the garland, spacing them so they don’t weigh the box down.
Step 4: Place the box on a table, and let the child pop their head through from behind.
#16. Elfie Selfie Station
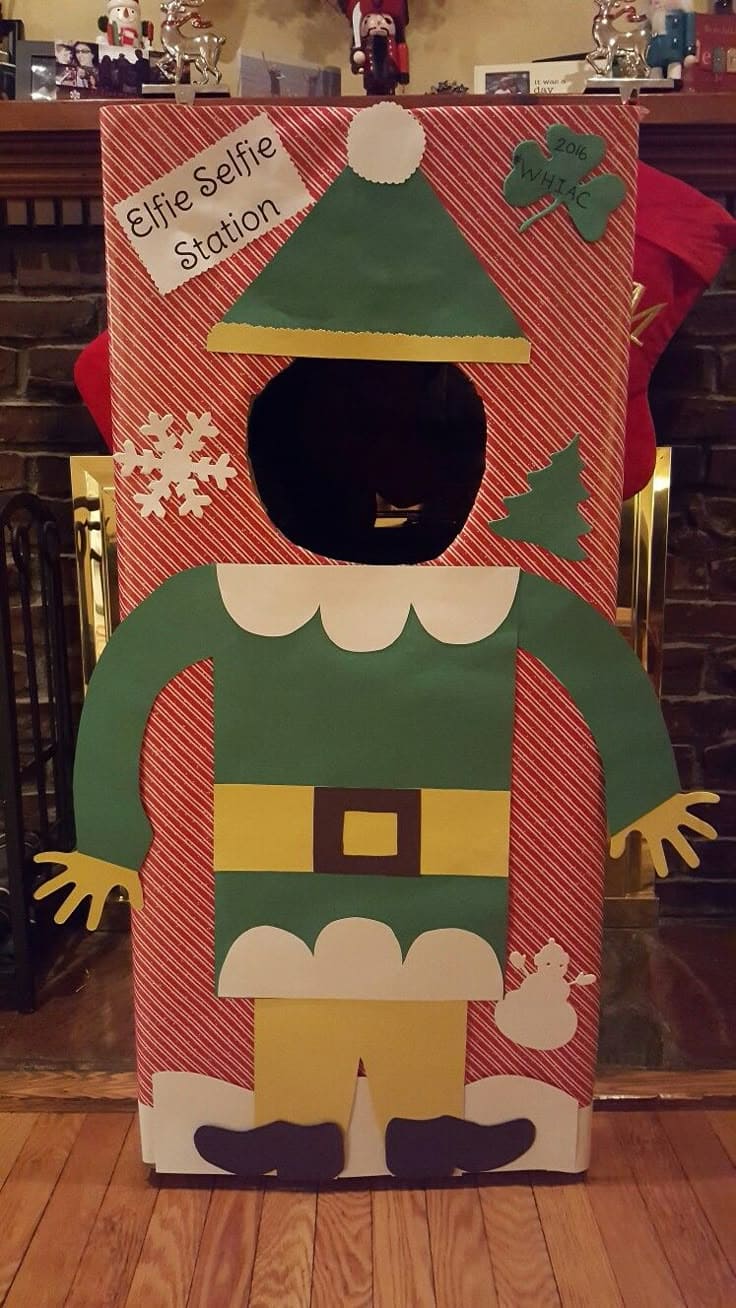
Your living room or office party will be outstanding like North Pole thanks to this Elfie selfie station.
Haha, it’s made from basic craft supplies but turns into a standout feature that makes everyone feel like Santa’s favorite helper for a moment.
Materials Needed:
- 1 large cardboard box (approx. 3 ft x 5 ft)
- Wrapping paper (candy-cane theme)
- Construction paper (green, yellow, white, black, brown)
- Scissors and glue stick
- Utility knife
- Hot glue gun and glue sticks
- Letter stickers
- Optional: snowflake cutouts, foam stickers, mini snowman stickers
Step-by-step Guide:
Step 1: Wrap the front of the cardboard with festive wrapping paper and tape the edges securely on the back side.
Step 2: Sketch and cut out an oval or circle for the face cutout.
Step 3: Cut and layer construction paper pieces to form the elf’s outfit like hat, shirt, belt, boots, and collar. Then you glue each piece on in layers starting from the bottom up.
Step 4: Add playful extras like snowflakes or trees for decoration, and a “Elfie Selfie Station” label at the top left corner.
#17. Cozy Garland-Wrapped Christmas Photo Nook
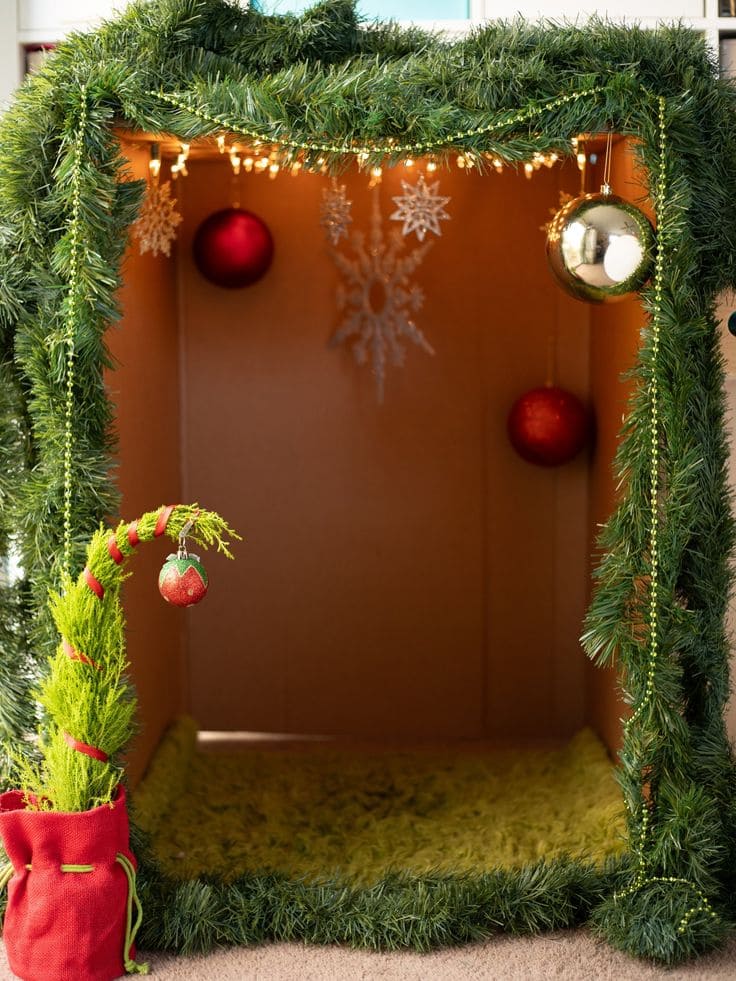
This enchanting photo nook feels like a miniature forest hideaway as it completes with twinkling lights, dangling ornaments, and a fuzzy green carpet.
Also, the addition of the droopy Dr. Seuss-style tree adds a whimsical twist that makes it perfect for kids, pets, or anyone feeling a little Grinchy.
Materials Needed:
- 1 large cardboard appliance box (approx. 4 ft x 4 ft x 3 ft)
- 12-15 ft faux green garland
- Mini string lights
- 3 large hanging ornaments
- Plastic snowflakes
- Green fuzzy rug
- Optional: small potted tree
- Clear tape, scissors, push pins, or hot glue
Step-by-step Guide:
Step 1: Open the front flap of the box and trim it to create a wide doorway. Optionally, you can cut out one side for better lighting or extra access.
Step 2: Wrap the front edges and top border with faux garland, then use push pins to secure it tightly.
Step 3: Drape a string of lights along the top interior and let them hang slightly for a curtain-like glow.
Step 4: Now you can hang ornaments and snowflakes from the ceiling of the box using string or ornament hooks.
Step 5: Finally, place a green rug, mat, or fuzzy blanket on the floor to create a soft base.
#18. Vintage Music Wall Holiday Photo Backdrop
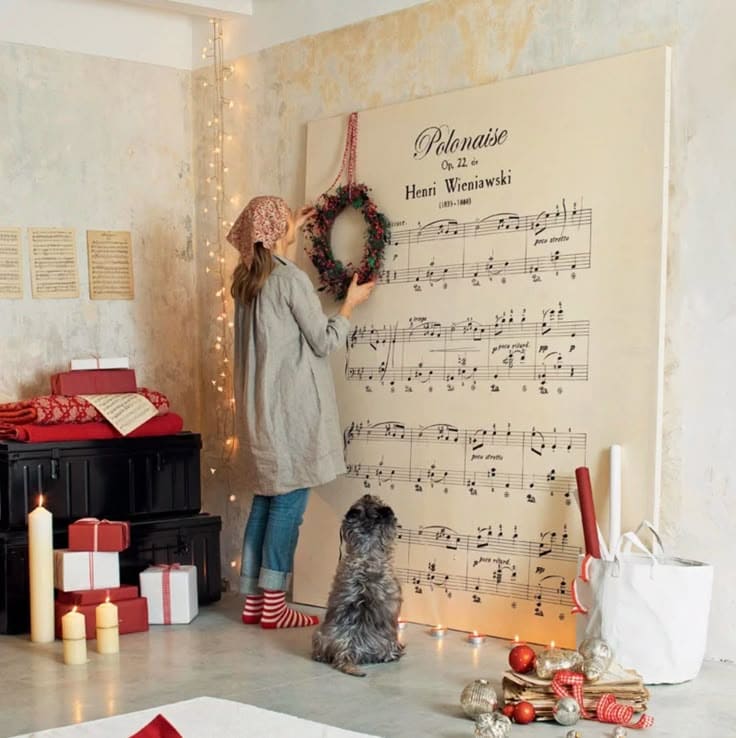
What about this stunning holiday setup? This setup is so soft with a giant sheet of classical music turned into an elegant Christmas backdrop.
Specially, it’s a beautiful tribute to the quiet moments of the season, where candlelight flickers, carols play, and little dogs sit patiently nearby.
Materials Needed:
- 1 large canvas or foam board (approx. 6 ft x 8 ft)
- Oversized printed music sheet (DIY printout or custom-ordered vinyl decal)
- Cream or parchment-colored paint or wrapping paper (for background)
- Faux wreath with ribbon
- Battery-powered string lights (warm white)
- Assorted candles and wrapped boxes
- Optional: extra printed sheet music to tape around for a collage effect
Step-by-step Guide:
Step 1: Cover your canvas or foam board in cream paint or paper to create a vintage background.
Step 2: Print out or apply a large-scale piece of classical sheet music. Then use adhesive spray or mod podge for a smooth finish, or opt for a custom wall decal.
Step 3: Hang a small wreath with festive ribbon on a hook or nail near the top left of the sheet.
Step 4: Drape string lights around the board or along the floor line to add warmth.
Step 5: Add candles, sheet music scrolls, wrapped presents, or other personal touches to the floor area to complete the scene.
#19. Christmas Present Box Seat Photo Booth
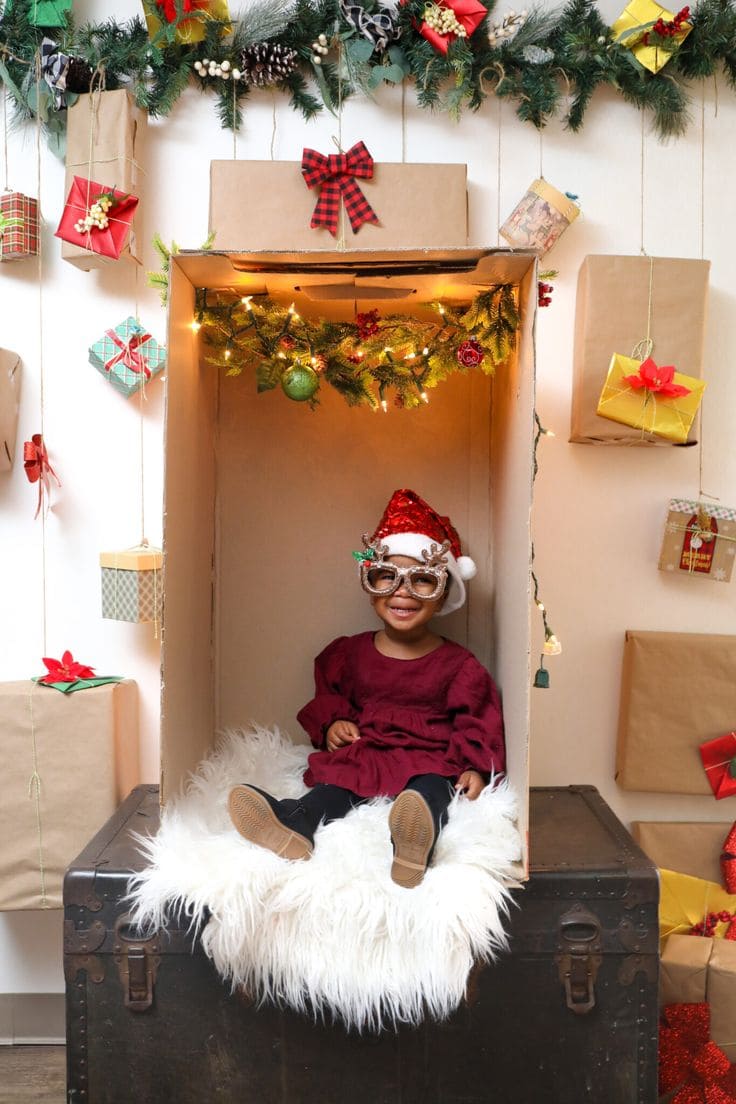
I believe your little ones will fall in love with this setup.
With twinkle lights, ornaments, and a fluffy faux fur seat, the setup feels like the inside of a gift come to life.
Whether you’re staging a mini photo session or just want something magical for your living room, this box makes memories in the most heartwarming way.
Materials Needed:
- 1 medium-large cardboard box (approx. 18″ x 30″ x 18″)
- Faux fur fabric
- Pine garland strand (3-4 ft)
- Mini ornaments
- String lights
- Ribbon
- Tape, glue gun, and scissors
- Optional: backdrop wall with hanging gift boxes
Step-by-step Guide:
Step 1: Stand the cardboard box upright with the open side facing out, then ut the flaps off or fold them inward and secure with tape.
Step 2: Drape faux fur or a soft white rug inside the base of the box to create a cozy seat.
Step 3: Wrap or tape pine garland across the top interior, letting it drape slightly forward. You now add a few mini ornaments and secure with hot glue.
Step 4: String lights along the top edge, weaving them through the garland.
Step 5: Finish with a big bow or holiday ribbon at the top front of the box to complete the gift-like look.
#20. Christmas Car and Reindeer Photo Booth Cutout
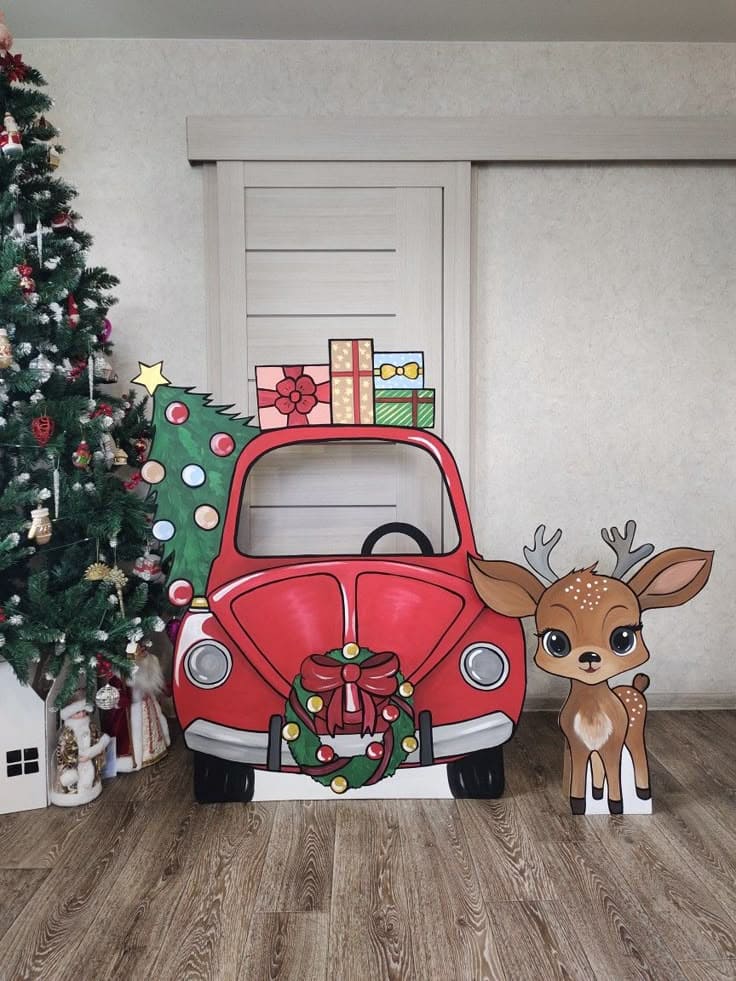
You can see the red car loaded with gifts, a Christmas tree poking out the side, and a sweet little cartoon reindeer make this an instant smile magnet.
Perfect for kids or fun-loving adults, the cutout windshield lets you drive the sleigh-car right into Christmas magic.
Materials Needed:
- Large cardboard sheet (approx. 5 ft wide x 4 ft tall)
- Acrylic paints (red, green, black, white, gold)
- Pencil and eraser
- Box cutter
- Optional: separate reindeer cutout
Step-by-step Guide:
Step 1: Sketch the outline of a cartoon car front onto the board.
You need to include a large window, wreath on the grill, Christmas tree off the side, and presents on the roof.
Step 2: Paint in bold, festive colors, then add shadows and lines to mimic a hand-drawn, animated look.
Step 3: Cut out the inner windshield area where kids or guests will peek through for photos.
Step 4: You can also create a standalone reindeer character on a separate board, cut it out, and place it beside the car for extra flair.
Step 5: Finally, set the board upright by attaching it to a wall or propping it with wooden braces or heavy cardboard supports in the back.
