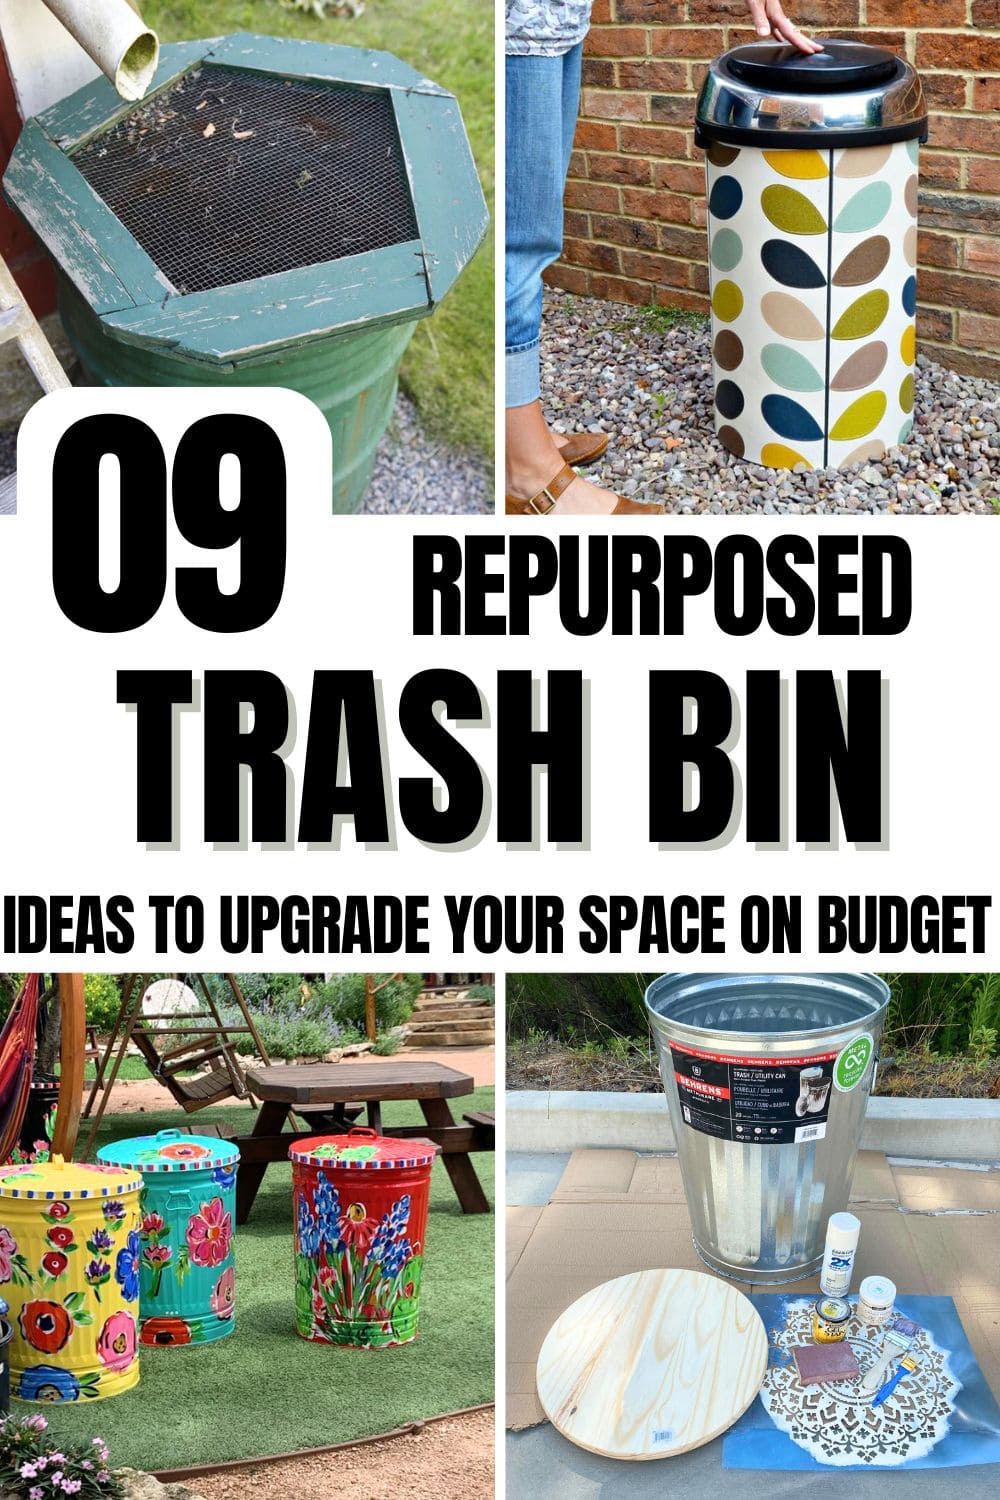
You know that old trash bin sitting by the shed, the one with a wobbly lid and a few battle scars from who knows what?
Most folks would roll it straight to the curb on trash day without a second thought. But I couldn’t do it.
There’s something oddly satisfying about giving forgotten things a second life, especially when they’ve still got some fight left in them. That’s how I stumbled into the world of repurposed trash bins.
What started as a way to save a few bucks turned into a fun little project that gave my space a quirky, personal touch. If you’ve got an old bin lying around, don’t throw it out just yet, here are 9 clever ideas that might just inspire you.
#1. Hand-Painted Floral Trash Can Storage
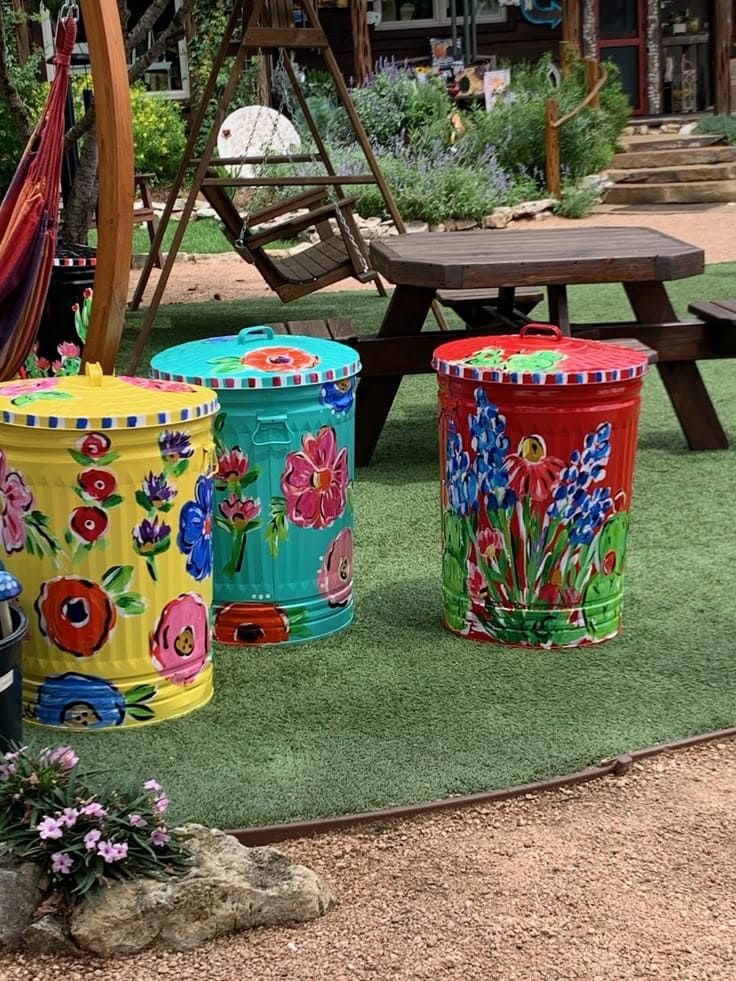
Who says storage has to be boring? These flower-covered metal bins are like sunshine for your backyard or craft space.
I turned an old utility can into a cheerful statement piece using leftover paint and a little patience and now it holds gardening tools right next to the shed.
Besides, you can use yours for patio cushion storage, kids’ outdoor toys, or even as a quirky planter. Every time you glance at it, you’ll smile.
Materials Needed
- 1 galvanized trash can with lid (20-32 gallon size)
- Acrylic paint in various colors
- 3-5 different-sized paintbrushes
- Pencil or chalk
- Outdoor clear acrylic sealer spray
- Old sheet
- Clean cloth and mild soap
Step-by-step Guide
Step 1: Wash the bin thoroughly with mild soap and let it dry. Then lightly sand glossy areas if needed.
Step 2: Sketch out your flower designs directly onto the bin with chalk or pencil.
Step 3: Paint each section layer by layer, allowing it to dry between coats. You can mix and match flower shapes to create a garden-like feel.
Step 4: Once dry, spray the entire piece with a clear acrylic sealer to protect it from weather and scratches.
#2. Rustic Chic Storage Bin Makeover
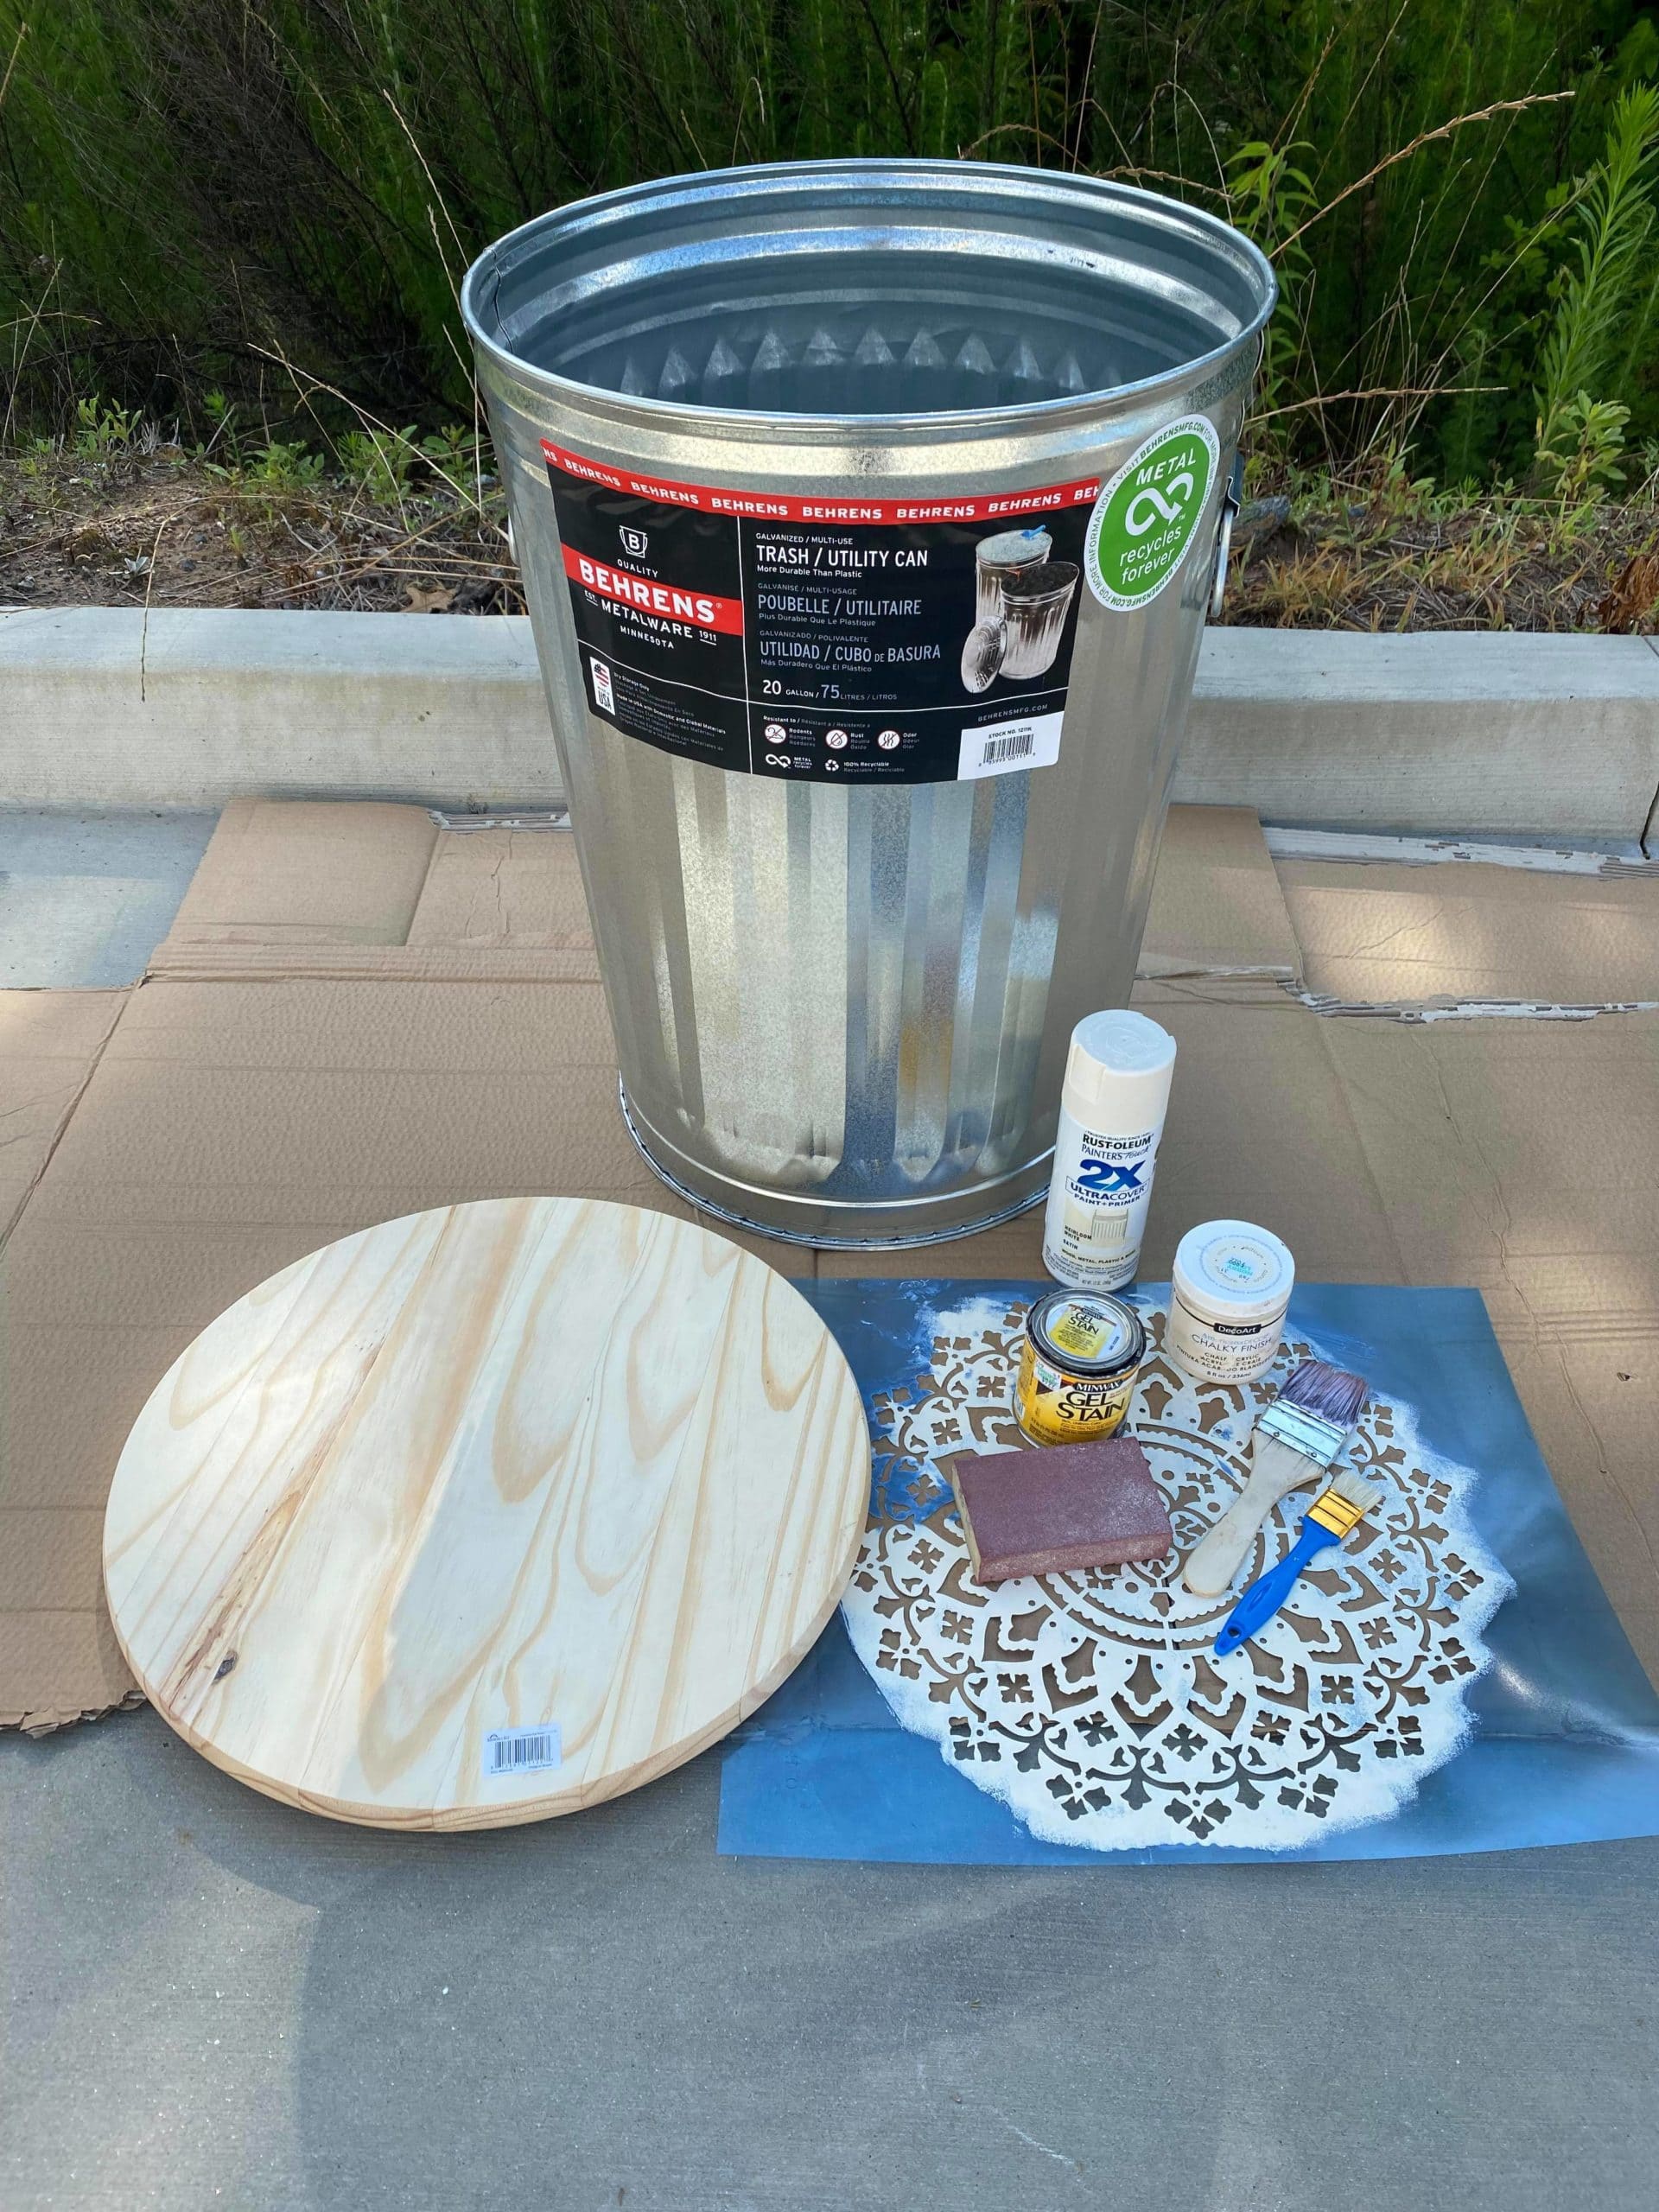
You wouldn’t think a plain metal trash can could become the highlight of your storage corner but here we are. With just a few decorative touches, you can turn it into a stunning, functional container that hides clutter while looking downright gorgeous.
Also, you can use yours to store extra throw blankets and board games in the living room, but honestly, it fits just as well in an entryway, craft nook, or even a porch.
Materials Needed
- 1 galvanized trash/utility can (20-gallon capacity)
- 1 round wooden board (18″-20″ diameter, 1″ thick)
- 1 can of white chalk paint
- 1 can of spray primer
- 1 can of protective clear sealer spray
- 1 stencil (floral, mandala, or any design you love)
- 1 foam or stencil brush
- 1 sanding block (medium grit)
- 1 can of wood stain
- 2-3 craft paintbrushes
- Drop cloth
Step-by-step Guide
Step 1: Lightly sand the entire trash can to help the primer stick, then wipe clean with a dry cloth. On a protected surface, spray the can with metal primer.
Step 2: Apply two coats of chalk paint using a brush or roller, allowing each coat to dry completely. If using a stencil, position it where you want the design and dab paint gently with a stencil brush.
Step 3: Sand the wooden lid lightly, then brush on a coat of stain. You should let it sit for a few minutes before wiping off excess.
Step 4: Once all pieces are dry, seal both the can and the lid with a clear protective spray.
#3. Organic Rainbow Bin

You don’t need a big budget for this project. Just painted with bright blue skies, butterflies, flowers, it turns your composting routine into something joyful.
Whether you use it for garden clippings, food scraps, or school compost projects, this bin is a reminder that taking care of the earth can be creative and fun too.
Materials Needed
- 1 metal trash can with lid (20-32 gallons)
- Acrylic outdoor paint
- Medium and fine paintbrushes
- Outdoor clear sealant spray (matte or glossy)
- Chalk or pencil
- Rag and rubbing alcohol
Step-by-step Guide
Step 1: Clean the entire bin thoroughly with alcohol to remove any dust or oils.
Step 2: Use chalk or a pencil to lightly sketch your design including grass at the bottom, butterflies, sunflowers, rainbows, clouds, and the word “Organics.”
Step 3: Begin painting the base sky color with light blue, followed by layering in your details.
Step 4: Once everything is dry, outline letters and details using black paint or a fine brush. Then finish with 2 coats of outdoor sealant to protect your work from weather and daily use.
#4. Gentleman Trash Bin
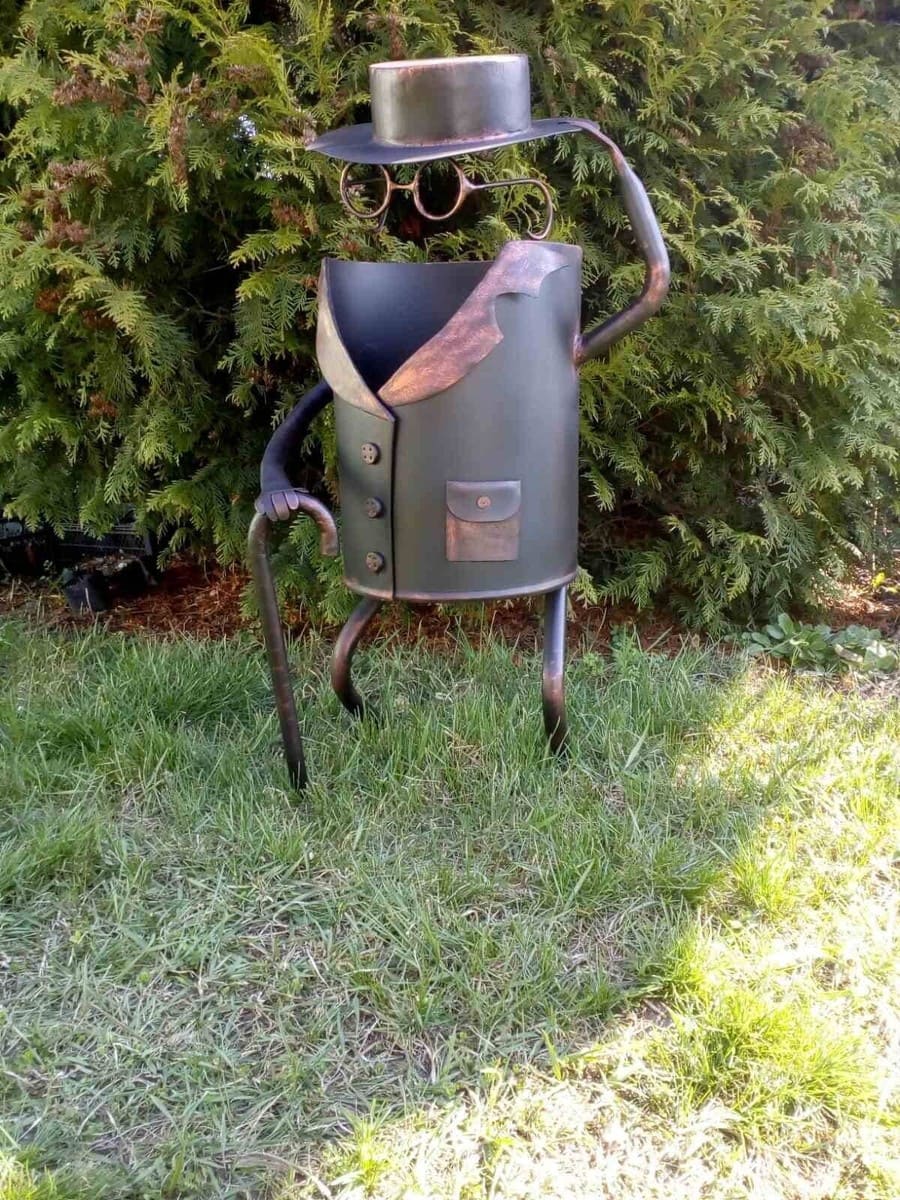
This clever metal sculpture feels like it walked straight out of a storybook, donning spectacles, a dapper coat, and a gentleman’s cane.
Perfect for parks, quirky gardens, or anyone with a love for character-filled design, this project might take some metalworking skill but the result is totally worth it.
Materials Needed
- 1 metal trash bin (approx. 15-20 gallons)
- 2 curved metal rods (each ~18” long)
- 2 straight metal rods (~24” long each)
- 1 metal bowl
- 1 small bucket or dome-shaped item
- Scrap metal sheet and pocket details
- Wire loops
- Welding equipment
- Black matte spray paint + bronze/gold paint
Step-by-step Guide
Step 1: Weld or attach the legs securely to the bottom of the bin, angling them outward slightly for balance. You can add a cane using a bent rod or old pipe.
Step 2: Shape the arms from curved rods and attach them to the sides including one resting casually, the other lifting the brim of the hat.
Step 3: For the head, use curled wire to form glasses and attach them to the rim. Then, stack the hat pieces on top: the bowl for the brim, the bucket for the crown. Weld or glue in place.
Step 4: Cut jacket panels from thin scrap metal. Now, you add a small lapel shape, pocket flap, and buttons, then attach these to the bin’s exterior.
#5. Rolling Trash Can Planters
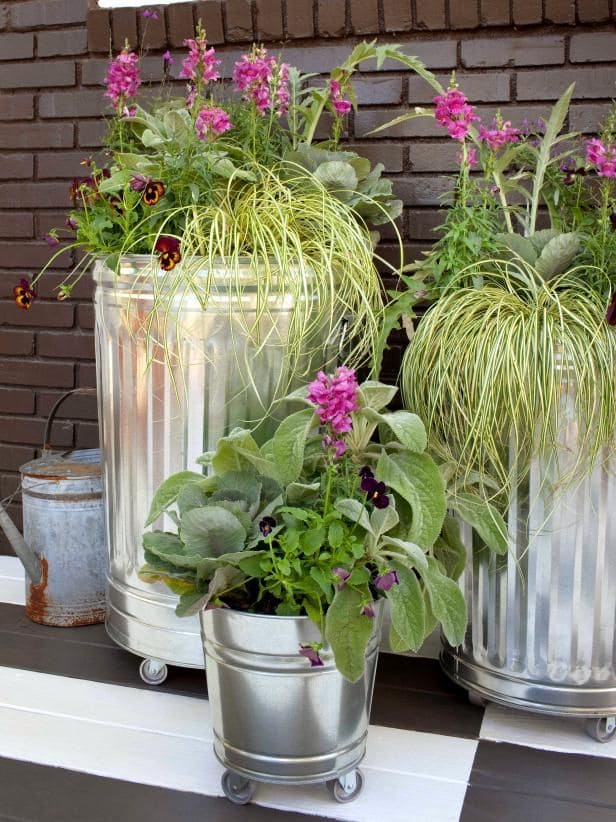
Some mornings, I like to chase the sun and now, so do my plants. Turning basic galvanized trash bins into rolling planters was a game-changer for my small patio.
You can see they’re deep enough for bold root systems, durable through all seasons, and the casters make them effortless to reposition.
Materials Needed
- 2-3 galvanized trash bins (20-32 gallon and 10-15 gallon sizes)
- 4 caster wheels per bin (2”-3” swivel type)
- Drill with metal bit
- 4 bolts, nuts, and washers (1/4″ size)
- Potting mix
- Plants of choice (grasses, annuals, herbs, or flowers)
- Optional: landscape fabric
Step-by-step Guide
Step 1: Flip the bin over and mark spots evenly spaced for each caster wheel near the rim. Then drill holes through the bottom, and attach the wheels using bolts, nuts, and washers.
Step 2: Drill a few small drainage holes in the bottom of the bin to prevent waterlogging. If you’d like, line the inside bottom with a layer of landscape fabric to keep soil from escaping.
Step 3: Fill about two-thirds of the bin with good-quality potting mix, leaving room for the root ball of your plants.
Step 4: Plant a mix of trailing, upright, and filler plants to create a lush, overflowing effect. Now, you water well and roll them into their sunny new spot.
#6. Animal Character Trash Bins
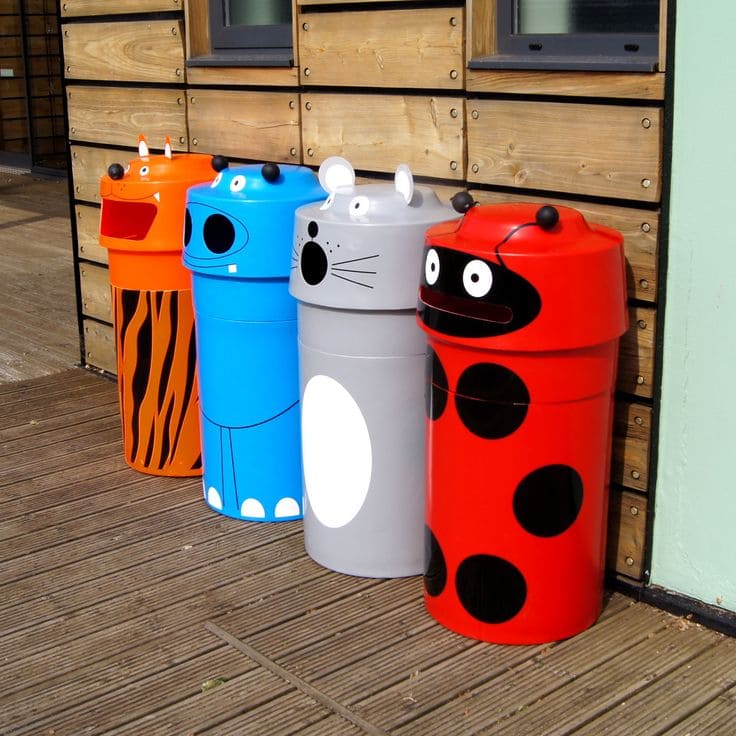
If you’ve got little ones or run a daycare, these charming animal bins are an absolute win. What once were plain outdoor garbage cans are now tiger, hippo, mouse, and ladybug friends.
Additionally, these colorful characters turn something mundane into a playful moment.
Materials Needed
- 4 tall cylindrical bins with flip lids (approx. 20-25” tall)
- Spray primer
- Spray paint in orange, blue, grey, red, black, and white
- Black and white acrylic paint pens
- EVA foam
- Strong adhesive
- Optional: googly eyes
Step-by-step Guide
Step 1: Clean the bins thoroughly and apply primer to ensure smooth paint adhesion.
Step 2: Spray paint each bin with a base color to match the chosen animal (e.g., red for ladybug, grey for mouse).
Step 3: Use painter’s tape to block off areas for patterns (e.g., tiger stripes, mouse belly) and fill them in with acrylic paint. Next, you use paint pens for facial features like eyes, whiskers, or noses.
Step 4: Cut shapes like ears, paws, or antennae out of EVA foam and glue them securely to the lids. You can even attach plastic spheres or ping pong balls as 3D eyes.
#7. Scandi-Style Trash Can Makeover

If your old plastic bin is still functional but looks a little sad, this cheerful project is a total game-changer. With just a bit of paint and patience, you can transform a plain trash can into a bold, retro-inspired piece that feels like it belongs in a design magazine.
You could even use this beauty as a quirky umbrella holder or recycling bin as no one will guess its humble beginnings.
Materials Needed
- 1 old plastic or metal trash bin (round, approx. 20-25″ tall)
- White spray primer
- Matte white spray paint
- Acrylic paints
- Black painter’s tape
- 6-8 small sponge brushes
- Pencil and stencil
- Clear acrylic sealer
Step-by-step Guide
Step 1: Clean your bin thoroughly and let it dry. Then you spray a coat of primer if needed based on your surface.
Step 2: Lightly sketch your stem and leaf pattern onto the bin with a pencil. Keep your leaf shapes slightly rounded and varied in direction for a natural feel.
Step 3: Paint in each leaf using acrylic paints. You can alternate colors or follow a color palette like the one pictured.
Step 4: Once the leaves are dry, outline the stem using painter’s tape or a black paint pen to create a clean line. You can also outline the leaves if you prefer a sharper graphic style.
#8. Rustic Rain Barrel from an Old Trash Can

Rainy days don’t have to mean muddy puddles and wasted runoff. This sturdy, weathered trash can found a second life as a rustic rain barrel and I’ve never appreciated a good downpour more.
Materials Needed
- 1 metal trash can (30-35 gallons)
- 4 wood planks (approx. 1″ x 3″)
- 14 wood screws (1” size)
- Drill with screwdriver bit
- Metal mesh screen
- Saw
- Exterior green paint (optional)
- Sandpaper and weatherproof wood sealer
Step-by-step Guide
Step 1: Start by measuring and cutting your wood planks into angled sections that fit snugly around the top of the can to create a hexagonal or octagonal frame.
Step 2: Place the metal mesh screen flat over the top opening of the can. You need to position the wooden frame pieces over it, sandwiching the screen in place.
Step 3: Screw the wooden pieces together securely, making sure the mesh stays taut underneath. If you want extra durability, apply wood sealer to weatherproof the frame.
Step 4: Position your rain barrel under a downspout or gutter. The mesh will catch debris, while the water flows cleanly into the can below.
#9. Mosaic Magic on a Trash Can
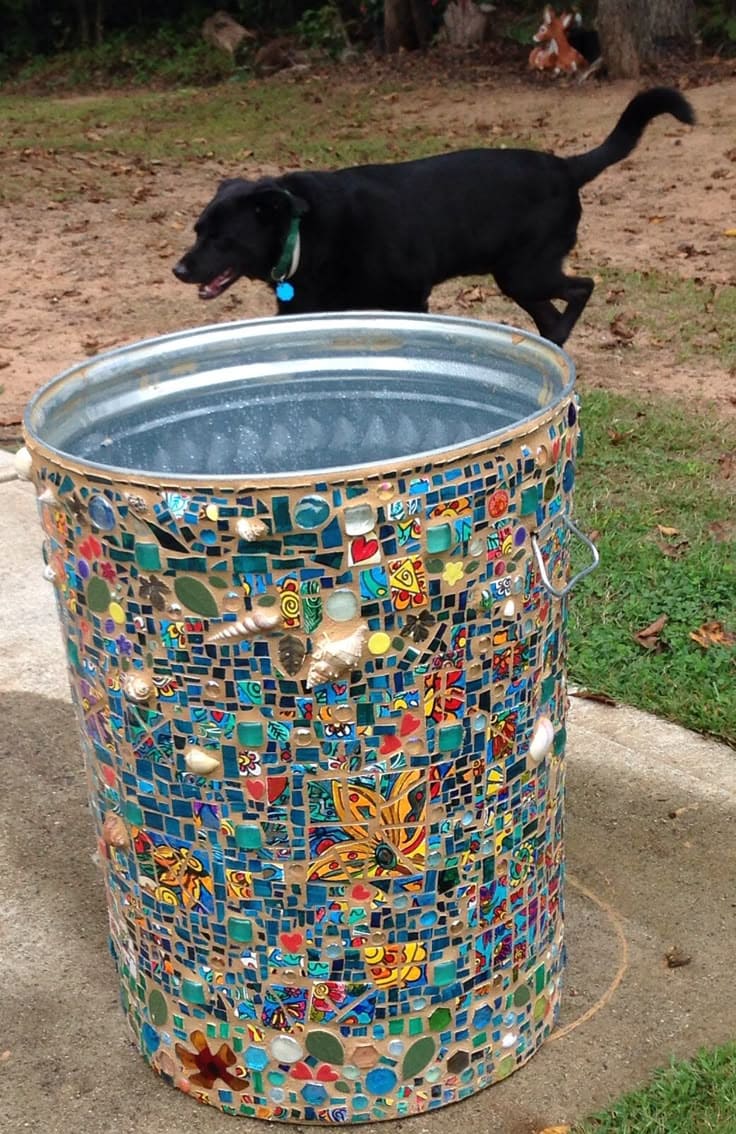
If you’ve ever smashed a plate and thought, “What a waste,” this project is your redemption arc. Turning a boring galvanized trash can into a colorful mosaic masterpiece is the kind of weekend project that leaves you beaming every time you take out the trash.
Specially, this one’s vibrant, detailed, and just a little bit chaotic. You don’t need to be a tile artist, just someone willing to get a little messy and have a lot of fun.
Materials Needed:
- 1 metal trash can (20-32 gallon)
- Broken ceramic plates, old tiles, glass beads, and seashells (~2 lbs total)
- Tile adhesive
- Grout (1 lb bag)
- Rubber gloves
- Grout float
- Sponge and bucket of water
- Safety glasses and tile nippers (optional)
Step-by-step Guide:
Step 1: Clean the trash can thoroughly and dry it. Plan your layout by loosely placing tiles or pieces to get a sense of spacing and pattern.
Step 2: Start adhering your mosaic pieces one section at a time using the tile adhesive. Then press each piece firmly and let it dry for at least 24 hours.
Step 3: Apply grout over the entire surface using a float or spatula, pushing it into all the gaps. You should wipe away excess with a damp sponge before it dries completely.
Step 4: After 48 hours, go over the mosaic with a clean, dry cloth to remove any haze from the grout.
