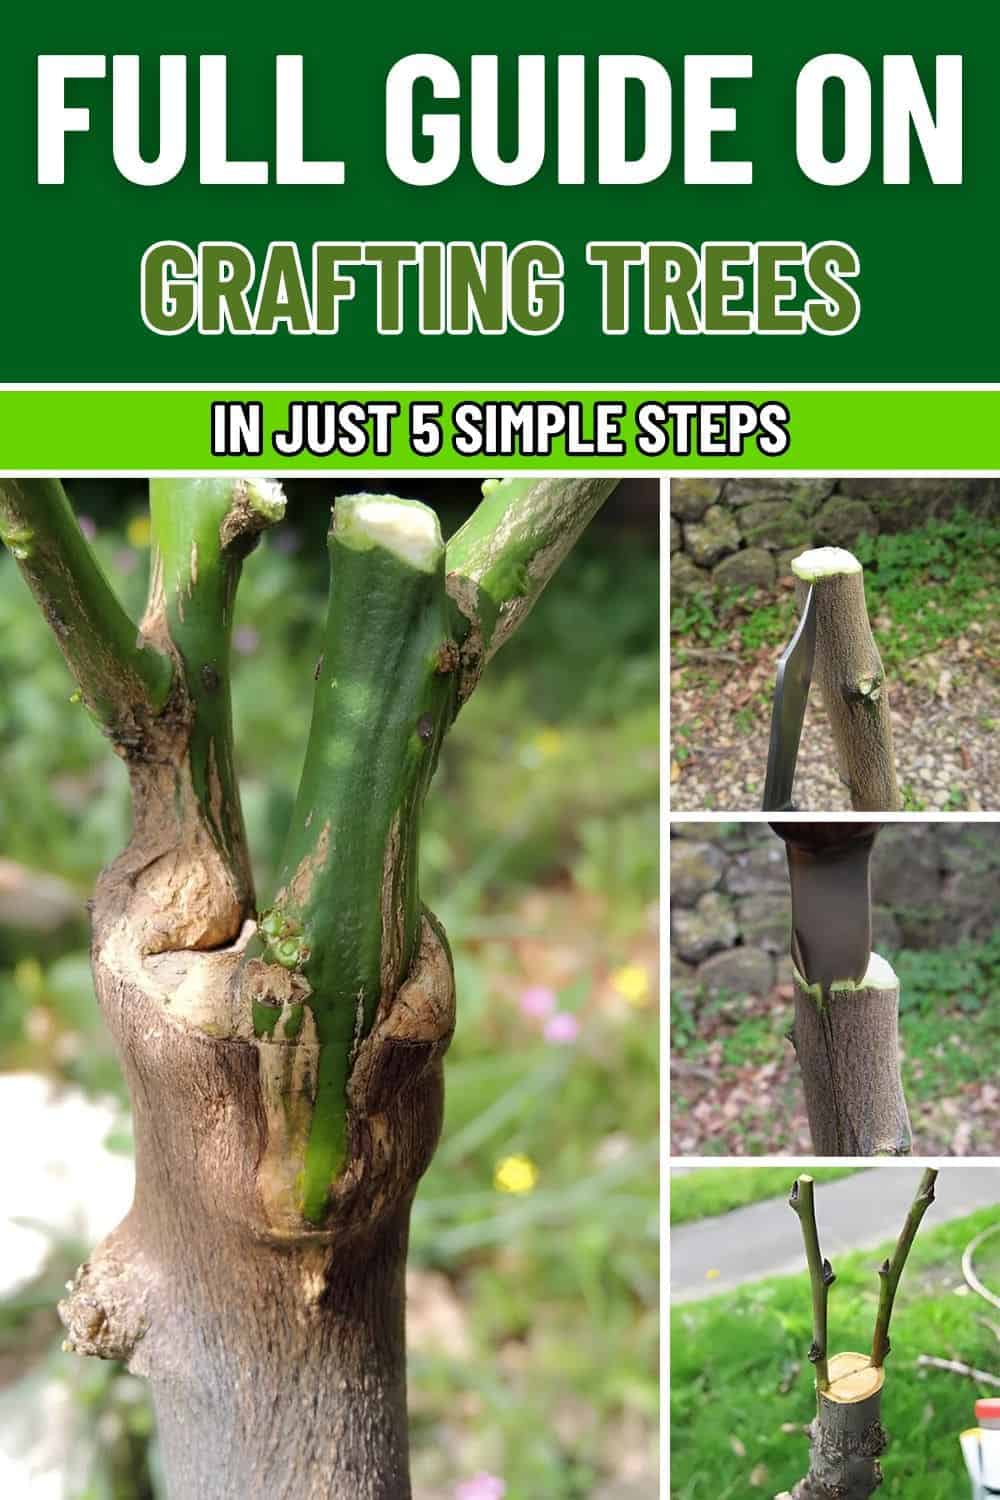
Grafting trees is one of those timeless techniques that every serious gardener should master.
Whether you’re aiming to improve the fruit production of a tree, repair a damaged specimen, or propagate a rare variety, grafting allows you to combine the best qualities of different trees.
As someone who has worked with grafting for years, I can tell you that while it requires patience and precision, the rewards are well worth the effort.
What is Grafting?
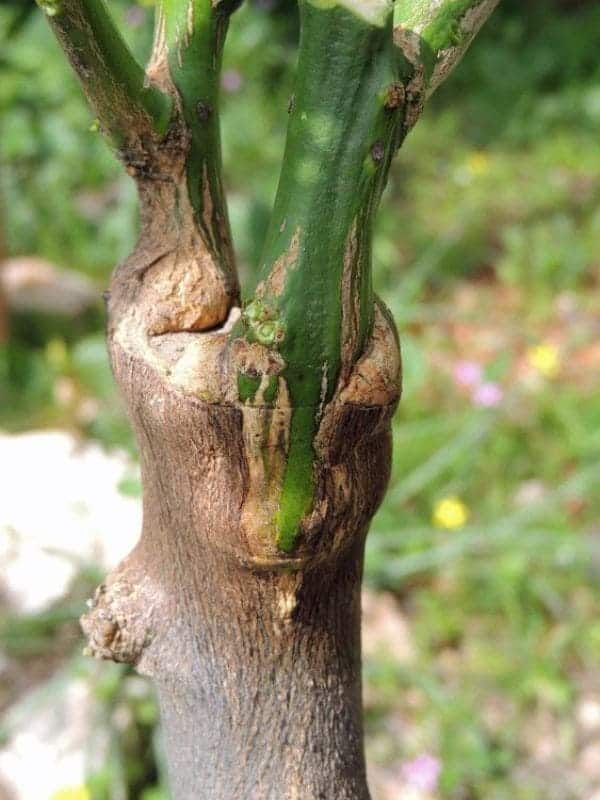
Grafting is the process of joining two different plants together in a way that allows them to grow as one.
The bottom part, known as the rootstock, provides the roots and overall structure, while the scion is the upper part, typically a branch or shoot, that will bear fruit or grow foliage.
The success of grafting hinges on the proper alignment of the cambium layers – the vital growth layer beneath the bark – of both parts.
The Right Time for Grafting
I always recommend grafting during the dormant season, late winter to early spring, before the sap starts flowing.
During this time, the tree is not actively growing, which reduces the stress on both the scion and rootstock. The grafts are more likely to heal and take without the additional challenge.
Choosing the Right Tools and Materials
You need to prepare:
- Sharp knife or grafting tool
- Grafting tape
- Grafting wax or sealer
- Rootstock
- Scionwood
Four Popular Grafting Techniques
1. Whip-and-Tongue Grafting
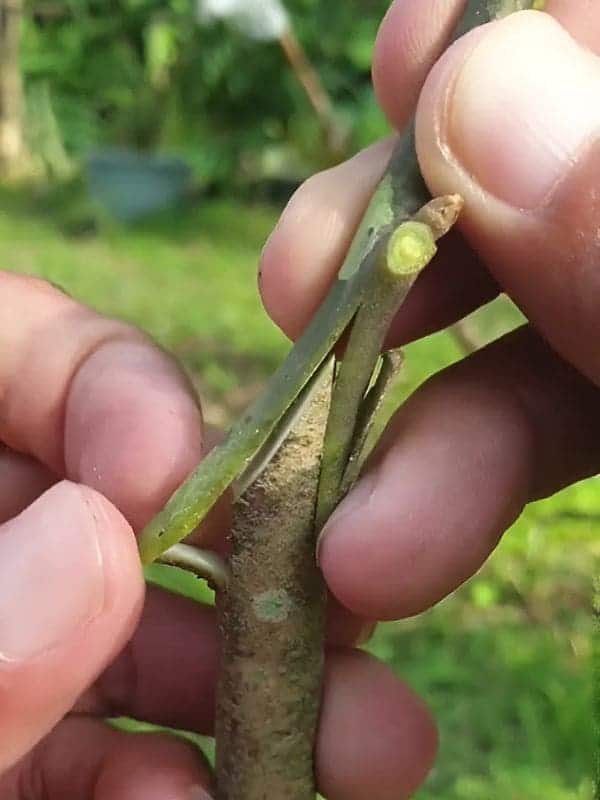
This is one of my favorite methods, especially for smaller trees and young rootstocks.
The technique involves making an angled cut on both the scion and rootstock, then interlocking them like a puzzle, creating a “tongue” on each piece that fits together perfectly.
2. Cleft Grafting
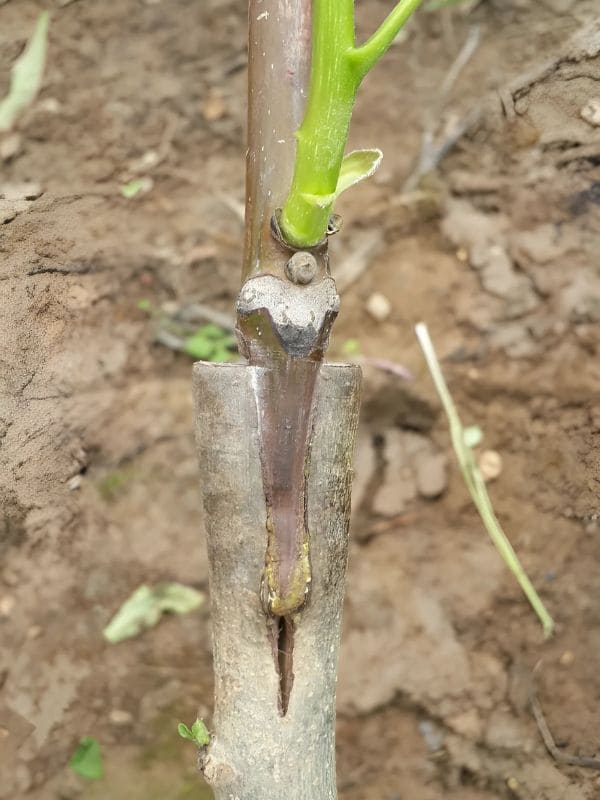
This method is a go-to when dealing with larger rootstocks, and I’ve used it successfully for fruit trees like apples and pears.
The rootstock is cut down the center, creating a cleft where the scion is inserted. The scion is usually cut to a wedge shape to fit tightly into the split.
3. Bark Grafting
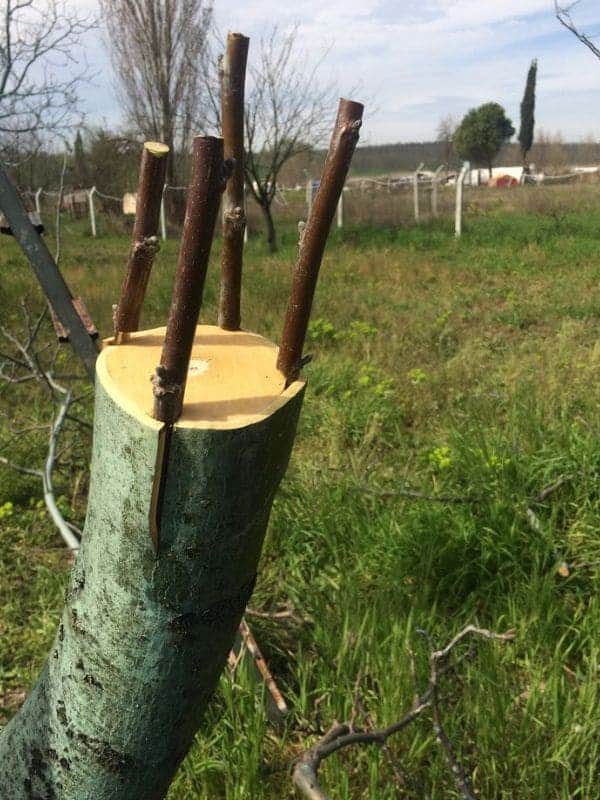
When the rootstock is older or has thicker bark, bark grafting is a solid choice. In this technique, I make a cut in the bark of the rootstock and slip the scion just beneath it.
This method is great for larger trees and can be done when the tree is starting to break dormancy, just before new growth begins.
4. Side-Veneer Grafting
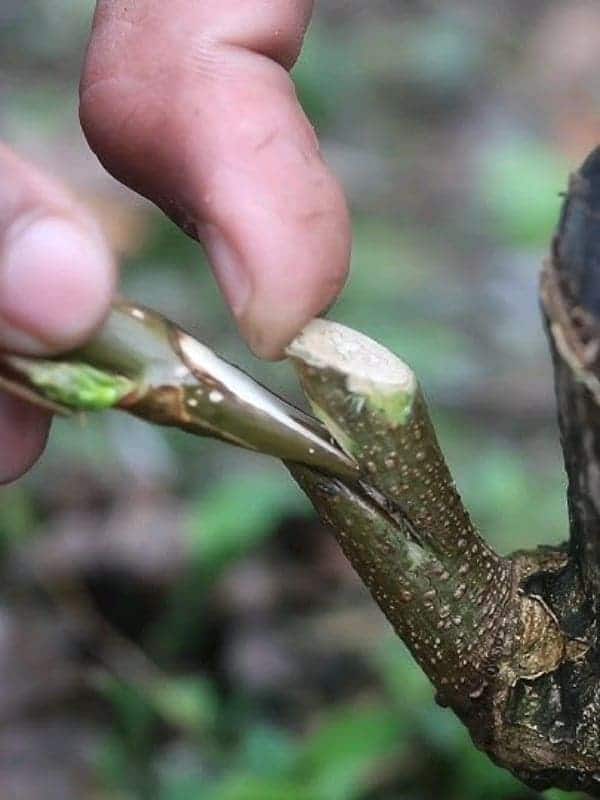
This is my go-to method for ornamental trees and some dwarf varieties. With side-veneer grafting, I make a shallow cut on the side of the rootstock and insert the scion at a matching angle.
The cut is made just below the bark, and the cambium layer of both rootstock and scion are aligned.
Step-by-Step Guide to Grafting Trees
Step 1: Prepare the Rootstock
Start by selecting a healthy rootstock and making a clean, straight cut at a 45-degree angle to expose fresh cambium tissue.
For methods like whip-and-tongue or cleft grafting, make sure to create a clean surface for the graft to join.
Step 2: Prepare the Scion
Choose a healthy scion, this should be a piece of wood from the current or previous year’s growth, then cut the scion at an angle that matches the cut on the rootstock.
For whip-and-tongue, I cut both the scion and rootstock in a similar angled shape, while for cleft grafting, I make a wedge at the base of the scion.
Step 3: Joining the Scion and Rootstock
Align the cambium layers of the scion and rootstock as closely as possible. For whip-and-tongue, interlock the pieces, ensuring the cambium layers are in contact.
For cleft grafting, insert the wedge-shaped scion into the cleft of the rootstock, again ensuring good cambium alignment.
Step 4: Securing the Graft
You wrap the graft union tightly with grafting tape to hold the scion and rootstock together. Apply grafting wax or sealer around the union to keep moisture in and prevent infection.
Step 5: Aftercare and Monitoring
You should place the grafted tree in a shaded area to prevent direct sunlight from drying out the union. Also, keep the soil moist but not soggy as overwatering can lead to fungal infections, which are deadly to grafts.
If you live in an area with heavy pest pressure, use insect netting or place the grafted tree in a protective spot until it takes.
After 6 to 8 weeks, it’s time to remove the grafting tape. Once you see strong growth from the scion, apply a balanced fertilizer to encourage healthy development.
Common Challenges and Troubleshooting
- Graft rejection: If the scion doesn’t take, it could be due to poor cambium alignment or incompatible rootstock and scion. You need to ensure that both parts are compatible before attempting grafting.
- Improper alignment: If the cambium layers don’t line up correctly, the graft won’t heal. It’s critical to make precise, clean cuts.
- Graft drying out: To prevent dehydration, always seal the graft union with grafting wax and ensure the graft is kept humid until healing occurs.
