Garden & Crafty - Garden, DIY, Home
No Result
View All Result
  • GARDEN
    • Garden Tips
    • Garden Guide
    • Garden Care
    • Garden Ideas
  • DIY
    • Diy Project
    • Crafty Ideas
  • HOME
    • Decoration
    • Cleaning
    • Tips & Hacks
  • About Us
  • GARDEN
    • Garden Tips
    • Garden Guide
    • Garden Care
    • Garden Ideas
  • DIY
    • Diy Project
    • Crafty Ideas
  • HOME
    • Decoration
    • Cleaning
    • Tips & Hacks
  • About Us
No Result
View All Result
Garden & Crafty - Garden, DIY, Home
Home DIY Diy Project

Step-by-Step Guide: DIY Cardboard Gingerbread House That Kids Will Adore

Lois Capone by Lois Capone
November 25, 2024
in Diy Project
Reading Time: 3 mins read

IN THIS ARTICLE:

Toggle
  • Materials You’ll Need:
  • Guide on DIY Cardboard Gingerbread House

This year, I wanted to create something special for the holidays, something that would light up the kids’ eyes and bring a sense of whimsical joy to our home.

That’s when I decided to make a life-sized gingerbread house entirely out of cardboard! It’s easy, affordable, and the perfect festive activity to spark creativity.

Using just a few materials, I transformed plain boxes into a magical decoration that looks straight out of a storybook. 


Materials You’ll Need:

  • 1 Large cardboard box (minimum dimensions: 40” x 30” x 30”)
  • Smaller cardboard pieces for chimney (approx. 12” x 10” for each wall of the chimney)
  • Brown paint (1 quart for full coverage)
  • White paint or markers for detailing
  • Paintbrushes or rollers
  • Hot glue gun and glue sticks
  • Scissors or utility knife
  • PVC pipe or wrapping paper rolls (around 30” tall)
  • Decorative items (foam, stickers, ribbons, candy-shaped cutouts)
  • Red and white tape for candy canes


Guide on DIY Cardboard Gingerbread House

Step 1: Build the House Structure

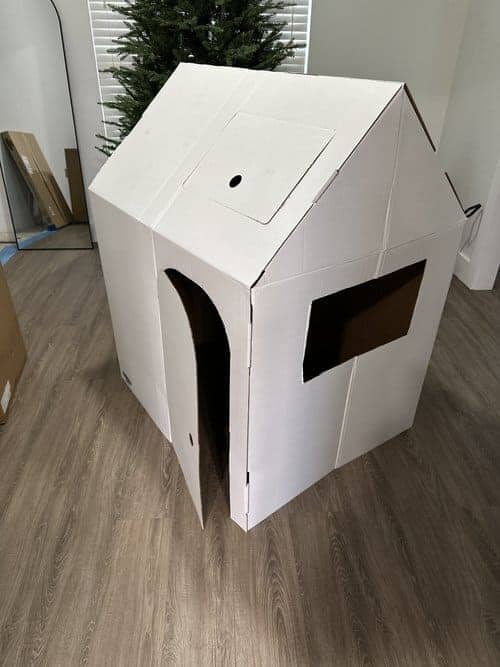
First, start with a large cardboard box, at least 40” tall, 30” wide, and 30” deep, so it’s big enough for kids to crawl inside.

I made mine 20” tall by 12” wide, rounding the top for that classic gingerbread look, then cut out two square windows on either side of the box, each about 10” x 10”.
Step-by-Step Guide: DIY Cardboard Gingerbread House That Kids Will Adore

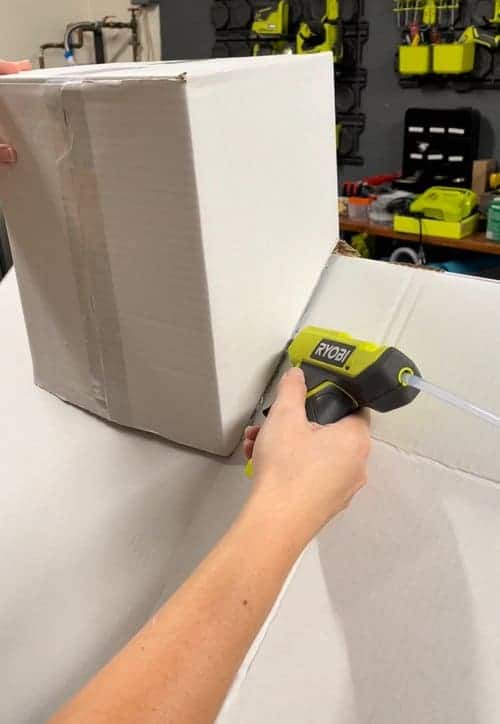
For the roof, fold the box flaps upward to form a peak and secure them with hot glue. You may need an extra piece of cardboard (cut to 30” x 20”) to fill in any gaps at the top of the roof.


Step 2: Create and Attach the Chimney

You need to cut four smaller cardboard pieces, each measuring 12” tall and 10” wide, and glue them together to form a rectangle.

Once assembled, attach the chimney to the roof with hot glue, ensuring it sits securely at an angle for a playful touch.
Step-by-Step Guide: DIY Cardboard Gingerbread House That Kids Will Adore


Step 3: Paint the Entire House

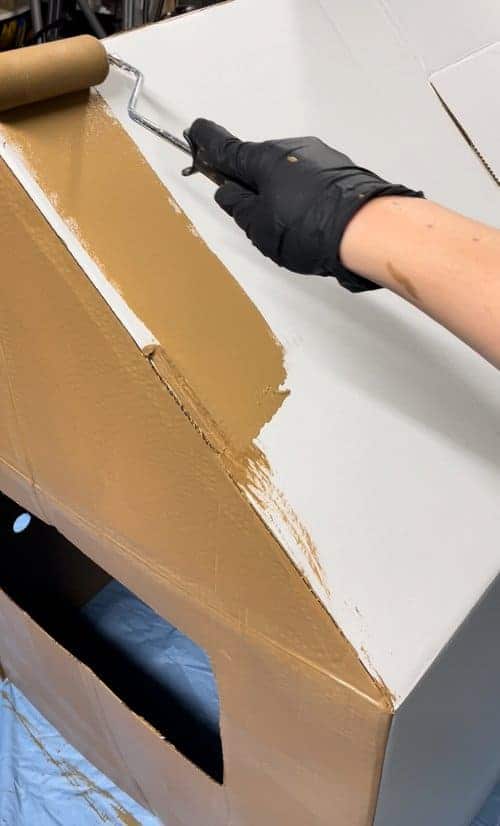
Now, you use a quart of brown acrylic paint and a roller to coat the entire house, chimney included. It took two coats to get an even finish.

Also, don’t forget to let it dry completely between coats! This step transforms your cardboard into a gingerbread-like surface, instantly making it look festive.
Step-by-Step Guide: DIY Cardboard Gingerbread House That Kids Will Adore


Step 4: Add Icing and Candy Details

Using white paint or a thick marker, you draw scalloped lines along the roof to mimic icing. Each “scallop” was about 3” wide.

Besides, you add colorful candy-like dots by painting circles (2” in diameter) or attaching stickers in bright colors. For the chimney, I painted small 2” x 1” rectangles to resemble bricks.
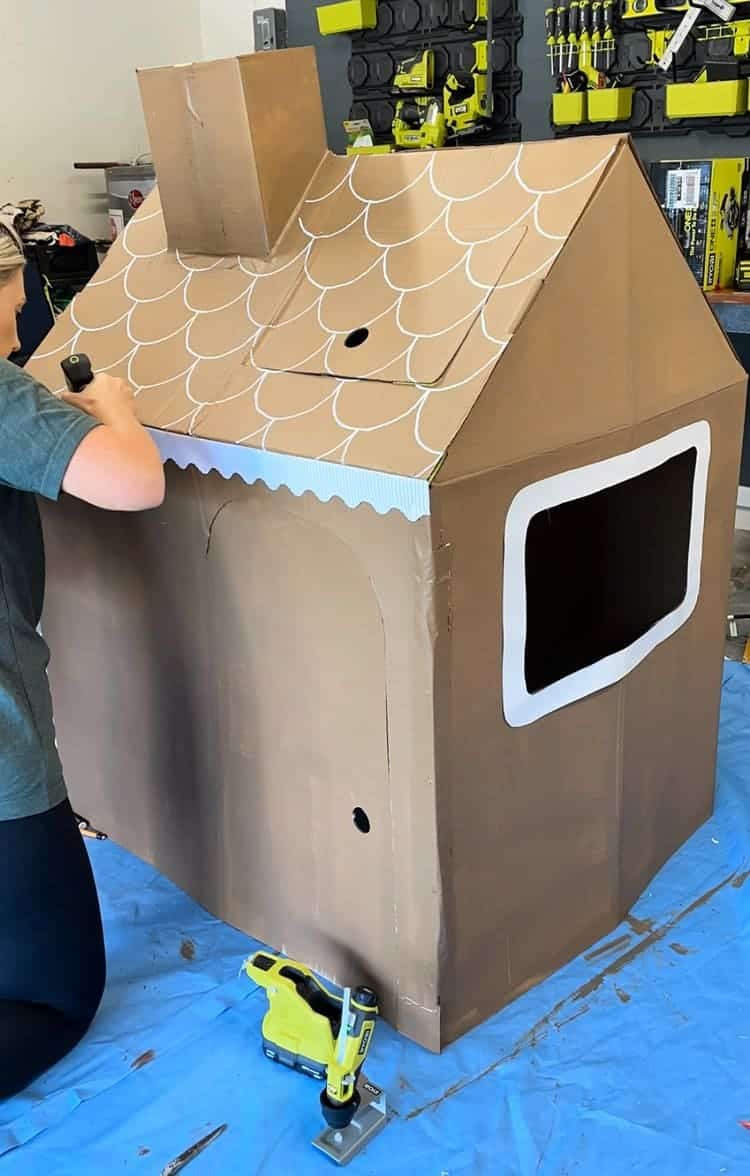
Step-by-Step Guide: DIY Cardboard Gingerbread House That Kids Will Adore


Step 5: Create Candy Canes

For the candy canes, I wrapped 30” PVC pipes with red and white tape, alternating the stripes every 2 inches.

If you don’t have PVC pipes, wrapping paper rolls work just as well, then glue these candy canes to either side of the door for support and decoration.
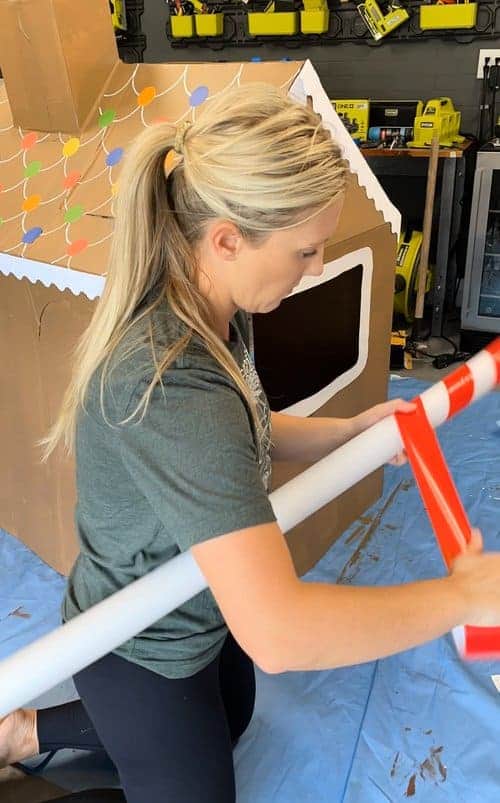
Step-by-Step Guide: DIY Cardboard Gingerbread House That Kids Will Adore


Step 6: Decorate with Final Touches

Step-by-Step Guide: DIY Cardboard Gingerbread House That Kids Will Adore

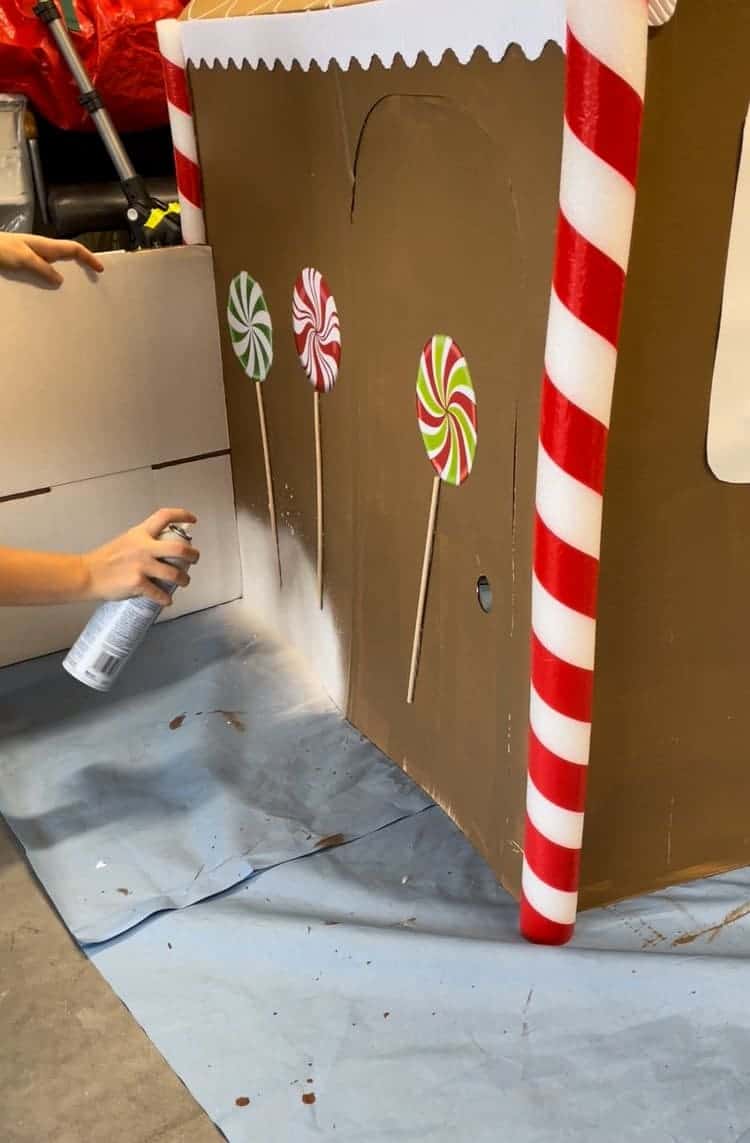
Finally, cut out peppermint swirls or lollipop shapes from foam or sturdy cardboard (about 8” in diameter) and glue them to the sides of the house.

To make it feel snowy, you can spray a bit of white paint around the base or glue cotton along the edges of the roof. Add ribbon or trim for extra details if you’d like!

Step-by-Step Guide: DIY Cardboard Gingerbread House That Kids Will Adore

This project was an absolute joy to make, and the result was worth every minute. Not only did it bring holiday cheer to my home, but it also became a cozy playhouse for the kids to enjoy.
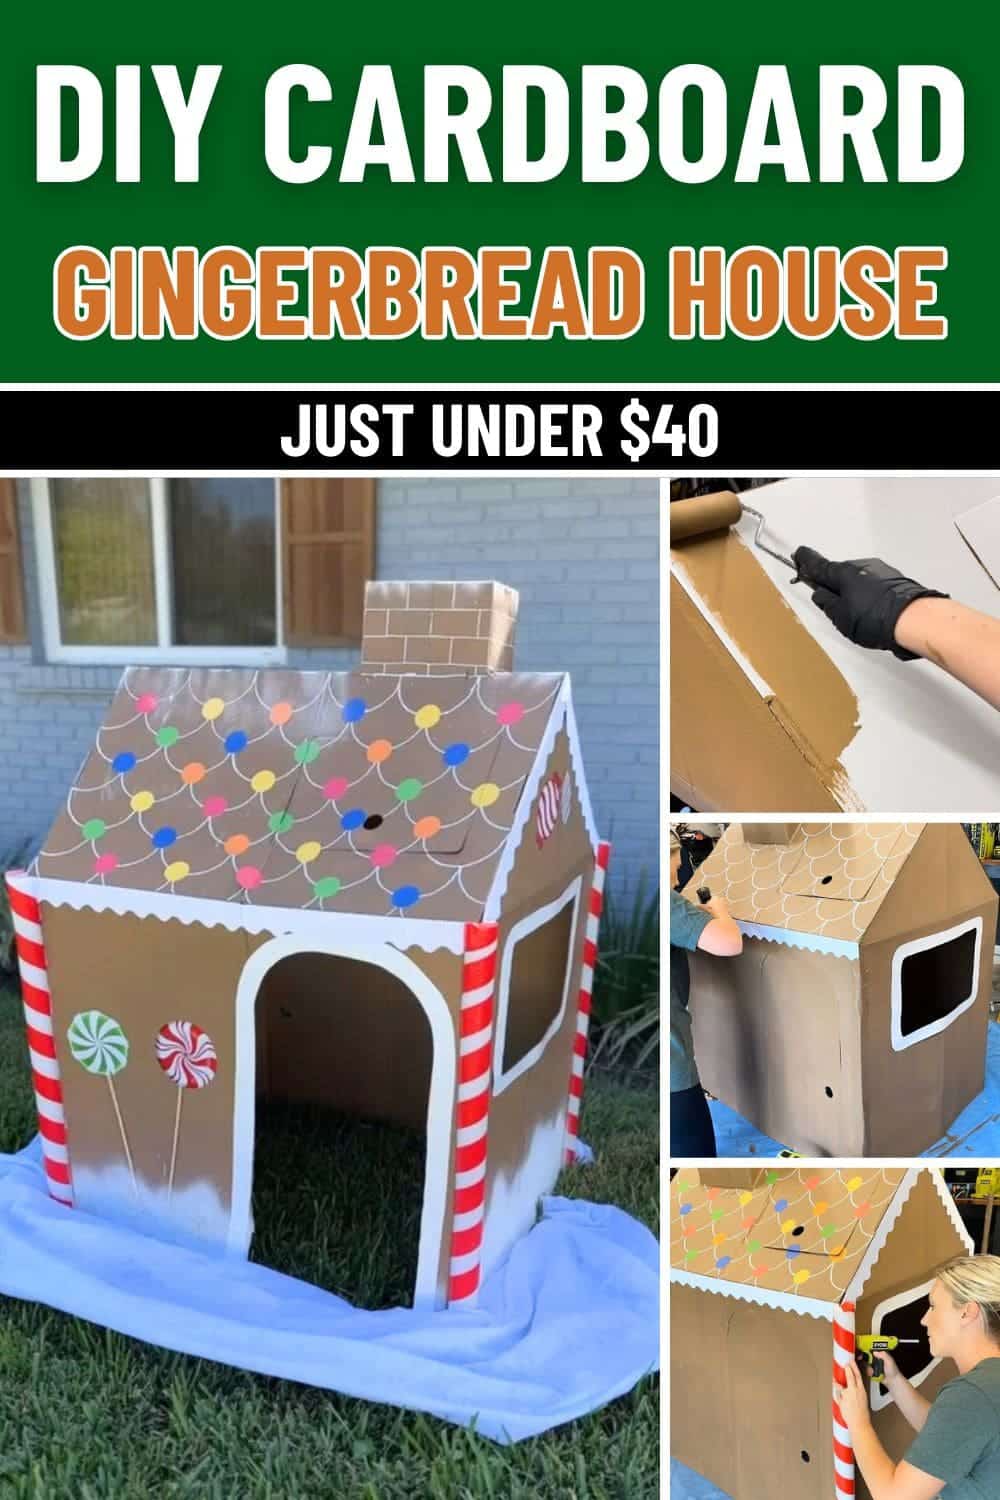
 

Step-by-Step Guide DIY Cardboard Gingerbread House That Kids Will Adore
Tags: cardboardgingerbreadgingerbread house
SharePin21
Lois Capone

Lois Capone

Lois Capone is a wife and mom in her 50s who enjoys sharing gardening, DIY tips, and home decor ideas. She believes that with some inspiration, anyone can create a special feel in their home and garden.

Related Posts

Full Guide to Making Your Own Christmas Simmer Pot
Diy Project

Full Guide to Making Your Own Christmas Simmer Pot

When the world outside turns crisp and quiet, nothing welcomes the season like a Christmas simmer pot. The aroma of...

by Lois Capone
October 13, 2025
16 Easy and Fun Q-Tip Crafts to Try at Home
Crafty Ideas

16 Easy and Fun Q-Tip Crafts to Try at Home

Who knew something as ordinary as Q-tips could spark so much creativity? These tiny cotton swabs can transform into incredible...

by Lois Capone
October 13, 2025
22 Creative Christmas Kitchen Item Decor Ideas to Add Holiday Spirit
Diy Project

22 Creative Christmas Kitchen Item Decor Ideas to Add Holiday Spirit

The heart of every home deserves a touch of Christmas magic, and your kitchen is no exception. Imagine baking cookies...

by Lois Capone
October 11, 2025
20 Creative Burlap Craft Ideas for Country-Style Decor
Diy Project

20 Creative Burlap Craft Ideas for Country-Style Decor

Burlap has a special way of turning simple materials into something warm and timeless. You can use it to create...

by Lois Capone
October 9, 2025
20+ Gorgeous String Art Projects for Every Skill Level
Diy Project

20+ Gorgeous String Art Projects for Every Skill Level

String art transforms simple threads and nails into mesmerizing works of creativity. Whether you’re a complete beginner or an experienced...

by Lois Capone
October 9, 2025
12 Ways to Upcycle Old Salt Shakers into Unique Decor
Diy Project

12 Ways to Upcycle Old Salt Shakers into Unique Decor

Don’t toss out those old salt shakers just yet as they’re bursting with creative potential. With a little imagination, you...

by Lois Capone
October 9, 2025
Load More

Leave a Reply Cancel reply

Your email address will not be published. Required fields are marked *

Recipe Rating


Categories

  • Cleaning (6)
  • Crafty Ideas (166)
  • Decoration (164)
  • DIY (8)
  • Diy Project (232)
  • GARDEN (39)
  • Garden Care (61)
  • Garden Guide (134)
  • Garden Ideas (348)
  • Garden Tips (128)
  • Guide (687)
  • HOME (90)
  • Tips & Hacks (20)


Garden & Crafty - Garden, DIY, Home

© 2024 gardenandcrafty.com

Navigate Site

  • About Us
  • Privacy Policy
  • Terms Of Service
  • Disclaimer
  • Cookie Policy
  • Webstories
  • Sitemap

Follow Us

No Result
View All Result
  • GARDEN
    • Garden Tips
    • Garden Guide
    • Garden Care
    • Garden Ideas
  • DIY
    • Diy Project
    • Crafty Ideas
  • HOME
    • Decoration
    • Cleaning
    • Tips & Hacks
  • About Us